Can You Boot Windows from External Ssd? Yes!
Yes, you absolutely can boot Windows from an external SSD. This can be a convenient way to have a portable version of Windows that you can take with you and use on different computers.
Booting Windows from an external SSD involves installing the operating system onto the SSD and then using the BIOS of your computer to boot from it instead of the internal hard drive.
This method allows for faster boot times and increased performance, especially if your internal hard drive is on the slower side.
Booting Windows from an external SSD can be an effective method to have a portable, high-performance system.
It’s particularly beneficial for IT professionals or individuals who need to troubleshoot various computers.
However, ensure your computer’s BIOS settings are correctly configured to boot from the external drive, to avoid any startup issues.
3 Factors Of Booting Windows from External Ssd
| Factors | Details |
|---|---|
| Feasibility | Yes, you can run and boot Windows from an external SSD. |
| Benefits | Faster speed, increased storage capacity, improved data security, and portability. |
| Installation Method | 1. Ensure the SSD is properly connected. |
Key Takeaway
Five Facts About: Booting Windows from an External SSD
Benefits Of Booting Windows From External Ssd
Windows can indeed be booted from an external SSD, offering numerous benefits such as faster boot times, improved performance, and increased portability.
With the option to carry your operating system with you, you can access your personalized Windows setup on any compatible device without compromising speed or functionality.
Experience the convenience and efficiency of booting Windows from an external SSD.
Boot times and overall system performance play a crucial role in providing a smooth computing experience.
By booting Windows from an external SSD, you can enjoy the following benefits:
Faster boot times:
With an external SSD, your Windows operating system will load much more quickly compared to a traditional internal hard drive.
This means you can get up and running in no time, saving you valuable minutes every day.
Improved system performance:
In addition to faster boot times, an external SSD can significantly enhance the overall performance of your system.
Whether you’re multitasking, running resource-intensive applications, or handling large files, the speed and efficiency of an SSD can make a noticeable difference.
Portability and convenience are essential factors for users who want to access Windows on multiple computers.
By booting Windows from an external SSD, you can enjoy the following advantages:
Greater portability:
An external SSD allows you to carry your Windows operating system with all your personalized settings wherever you go.
Whether you’re using multiple computers at work, home, or on the go, you can simply connect your external SSD and access your Windows environment seamlessly.
Convenience and flexibility:
Installing Windows on an external SSD provides you with the flexibility to use your preferred operating system across a range of devices.
You can effortlessly switch between computers without the need for a lengthy setup or compromising your personal preferences.
Increased storage capacity and flexibility are significant benefits of booting Windows from an external SSD.
Consider the following advantages:
Expanded storage:
An external SSD provides you with additional storage capacity, allowing you to store more files, applications, and data.
This extra space is especially useful if your internal hard drive is running out of storage or if you need to keep your personal and work files separate.
Flexibility and versatility:
With an external SSD, you have the freedom to customize your Windows environment based on your needs.
Whether you want to install multiple operating systems or partition your external drive for specific purposes, the flexibility afforded by an external SSD ensures you can tailor your computing experience to suit your preferences.
By booting Windows from an external SSD, you can experience faster boot times and improved system performance, enjoy portability and convenience on multiple computers, and benefit from increased storage capacity and flexibility.
Make the most of your Windows operating system by harnessing the power of an external SSD.
Requirements For Booting Windows From External Ssd
Windows can be booted from an external SSD, but there are specific requirements to consider.
The SSD needs to be compatible with your device’s interface, have sufficient storage capacity, and be properly formatted for Windows to recognize it as a bootable device.
Bootable external SSDs have become increasingly popular as a convenient way to carry your Windows operating system (OS) wherever you go.
However, there are certain requirements that need to be met in order to successfully boot Windows from an external SSD.
Let’s delve into the essential prerequisites:
Compatibility With Usb 3.0 Or Thunderbolt Interface:
- The external SSD must be compatible with either a USB 3.0 or Thunderbolt interface.
- Ensure that your computer has the necessary USB 3.0 or Thunderbolt ports to connect the external SSD.
- This compatibility ensures efficient data transfer rates and smooth performance.
Sufficient Storage Capacity For Windows Installation And Applications:
- The external SSD should have ample storage capacity to accommodate the Windows OS installation files and your desired applications.
- Take into consideration the space required by Windows updates, system files, and any additional software you wish to install.
- It is recommended to opt for an external SSD with at least 256GB or more to ensure a hassle-free experience.
Adequate Power Supply For Reliable Performance:
- To ensure reliable performance, it is crucial to have an external SSD that receives an adequate power supply.
- Some external SSDs draw power directly from the computer through the USB or Thunderbolt connection, while others require a separate power source.
- Make sure your computer or the power source can deliver sufficient power to the external SSD for seamless operations.
By meeting the requirements mentioned above, you can ensure a smooth experience booting Windows from an external SSD.
Enjoy the advantages of portability and convenience without compromising on performance.
Steps To Boot Windows From External Ssd
Windows can be booted from an external SSD by following simple steps.
This allows for faster performance and increased storage space on your computer.
If you’re considering booting Windows from an external SSD, you’re in luck! This guide will walk you through the steps you need to follow to make it happen.
With the right preparation and configuration, you’ll have your Windows operating system up and running smoothly on your external SSD in no time.
Check Ssd Compatibility With Your Computer’S Firmware Or Bios:
- Ensure that your computer’s firmware or BIOS supports booting from an external device.
- Consult your computer or motherboard manufacturer’s specifications or support documentation to verify compatibility.
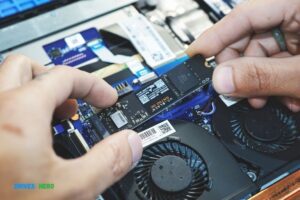
Prepare The External Ssd For Windows Installation:
- Connect the external SSD to your computer using a compatible cable or adapter.
- Ensure that the SSD is properly recognized and accessible on your computer.
Format The Ssd With Ntfs File System:
- Right-click on the external SSD drive in your computer’s file explorer.
- Select “Format” and choose “NTFS” as the file system option.
- Follow the on-screen prompts to complete the formatting process.
Create A Bootable Usb Installation Media:
- Obtain a Windows installation ISO file.
- Use a tool such as Rufus or the official Windows Media Creation Tool to create a bootable USB drive.
Configure Computer Bios Settings:
- Restart your computer and access the BIOS settings.
- Refer to your computer’s manual or manufacturer’s website for instructions on accessing the BIOS.
- Locate the “Boot” or “Boot Options” section in the BIOS settings.
Enable External Boot Option:
- Enable the option to boot from an external device, such as a USB or external SSD.
- Save changes and exit the BIOS settings.
Adjust Boot Priority Order:
- In the BIOS settings, set the external SSD as the first boot device in the boot priority order.
- Configure any other boot devices according to your preference.
Install Windows On The External Ssd:
- Connect the SSD to your computer if it’s not already connected.
- Start the Windows installation process by booting from the created USB installation media.
Select The External Ssd As The Installation Destination:
- During the Windows installation process, choose the external SSD as the destination for the operating system installation.
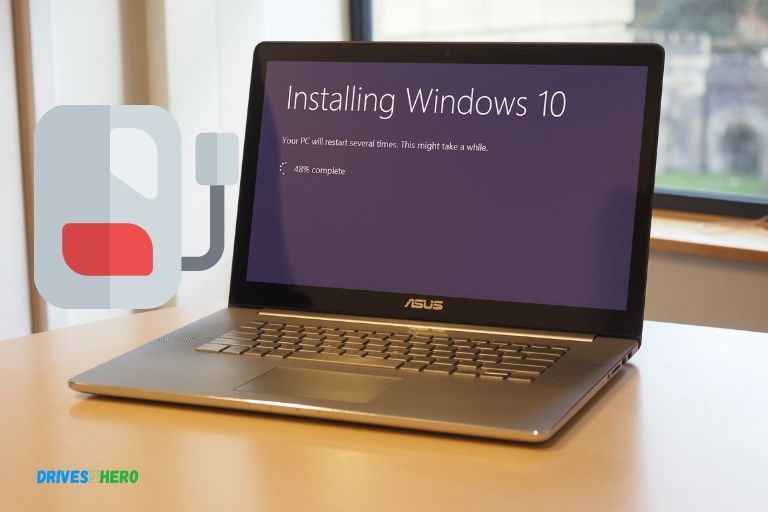
Complete The Windows Installation:
- Follow the on-screen prompts to complete the Windows installation process.
- Customize settings according to your preferences.
Install Necessary Drivers And Software:
- After the Windows installation, install any necessary drivers for your computer hardware.
- Install any additional software or applications as needed.
Create User Accounts And Set Up Security Preferences:
- Set up user accounts and configure security preferences for your Windows operating system.
Test And Optimize Windows Performance On The External Ssd:
- Once Windows is installed, test the performance of your system on the external SSD.
- Optimize settings and make any necessary adjustments to ensure smooth operation.
By following these steps, you can successfully boot Windows from an external SSD. Enjoy the flexibility and portability that an external SSD can offer for your Windows operating system.
Potential Challenges And Solutions
External SSDs offer a potential solution for booting Windows, but you may face challenges in the process.
However, with proper configuration and troubleshooting, it is possible to successfully boot Windows from an external SSD.
Booting issues or errors:
- If you encounter issues or errors when attempting to boot Windows from an external SSD, there are several troubleshooting steps you can take to resolve the problem.
Troubleshoot and update BIOS firmware:
- Ensure that your computer’s BIOS firmware is up to date. This can often resolve compatibility issues and improve overall performance.
Disconnect other external devices and try again:
- Disconnect any other external devices connected to your computer, such as USB drives or external hard drives. Sometimes conflicts can arise, preventing the external SSD from booting properly.
Compatibility issues with certain hardware or software:
- Check if there are any known compatibility issues between your specific hardware or software and booting Windows from an external SSD. This could be due to outdated drivers or incompatible firmware.
Check for driver updates and compatibility patches:
- Visit the manufacturer’s website for your external SSD and check for any driver updates or compatibility patches. Installing the latest drivers can help ensure smooth booting.
Consult the manufacturer’s support resources for guidance:
- If you are still experiencing difficulties, it is recommended to consult the manufacturer’s support resources. They may have specific guidance or troubleshooting steps to help you resolve the booting issue.
Remember to always follow the manufacturer’s instructions and guidelines when troubleshooting booting issues with an external SSD.
By taking these steps, you can increase your chances of successfully booting Windows from your external SSD.
Tips For Optimizing External Ssd Performance
Looking to optimize the performance of your external SSD? Discover tips for boosting speed and efficiency, including whether you can boot Windows from an external SSD.
Windows users have long enjoyed the convenience of using external storage devices to expand their storage options.
With the rise in popularity of solid-state drives (SSDs), many people are wondering if it’s possible to boot Windows from an external SSD.
The good news is that it is indeed possible, and we will explore some tips for optimizing the performance of your external SSD.
So, let’s dive in and find out how you can make the most of your external SSD.
Regularly Update Ssd Firmware For Improved Stability And Compatibility:
- Keeping your SSD firmware up to date is crucial for ensuring optimal performance and stability.
- Firmware updates often address known issues and bugs, enhancing the overall functionality of your SSD.
- To update your SSD firmware, visit the manufacturer’s website and download the latest firmware version for your specific SSD model.
- Follow the instructions provided by the manufacturer to install the firmware update correctly.
Utilize Ssd-Specific Optimization Features And Software:
SSDs come with built-in features and software that can help maximize their performance.
- Trim Command: Enable the Trim command to maintain your SSD’s speed and prolong its lifespan. Trim helps the SSD identify and remove unnecessary data, ensuring efficient operation.
- Over-Provisioning: Allocate a certain amount of your SSD’s capacity as over-provisioning to enhance performance and extend lifespan. Over-provisioning improves wear leveling and reduces write amplification.
- SSD Toolbox: Many SSD manufacturers provide dedicated software that allows you to monitor the health of your SSD and perform tasks such as firmware updates, secure erasing, and optimizing settings.
Manage Storage Space Effectively To Maintain Optimal Performance:
- Running out of space on your SSD can lead to a decline in performance.
- Regularly clean up your drive by removing unnecessary files and applications.
- Move large files or less frequently accessed data to another storage device, such as an HDD or cloud storage, to free up space.
- Avoid filling your SSD to its maximum capacity. Maintain at least 10-20% free space for optimal performance.
- Consider using storage management software to automate the process of organizing and optimizing your files.
By following these tips, you can ensure that your external SSD performs at its best, providing you with fast and reliable storage for your Windows operating system.
Remember to stay up to date with firmware updates, make use of SSD-specific optimization features, and manage your storage space effectively.
With these strategies in place, you can make the most of your external SSD and enjoy a seamless Windows experience.
FAQ About Can You Boot Windows from External Ssd
Is It Possible to Boot Windows from an External Ssd?
Yes, it is possible to boot Windows from an external SSD.
Do I Need to Make Any Changes to My System Settings in Order for the External Ssd to Be Recognized?
Yes, you may need to make changes to your system settings in order for the external SSD to be recognized.
Depending on your operating system, there may be different steps you need to take.
For example, Windows users might need to update their drivers or enable USB booting in their BIOS settings.
What Type of Connection Do I Need for My Computer And External Ssd in Order for It to Work Properly?
You need to connect your computer and external SSD using a USB cable.
Are There Any Disadvantages Or Risks Associated With Booting Windows from an External Ssd?
Yes, there are some disadvantages and risks associated with booting Windows from an external SSD.
These include increased power consumption, slower performance due to the lack of direct access to internal components like RAM and processor, reduced battery life in laptop computers, limited storage space compared to a traditional hard drive, higher risk of data loss or corruption since external drives can be disconnected easily without proper shutdown.
Additionally, it is also more susceptible to being damaged by physical shock.
Conclusion
Booting Windows from an external SSD is a game-changer for many users.
With its faster speed, high storage capacity, and portability, an external SSD provides a practical solution for those who need to run Windows on different devices or have limited internal storage.
This option not only enhances the system’s performance but also allows users to carry their personalized Windows environment wherever they go.
By following the necessary steps, such as converting the SSD to a bootable drive and adjusting the BIOS settings, users can seamlessly transfer their Windows operating system.
Moreover, the compatibility with both Windows and Mac systems expands the versatility of external SSDs.
Whether you are a professional requiring a powerful setup on the go, a student looking for flexibility, or simply someone with space constraints, booting Windows from an external SSD is the solution to make your computing experience smoother and more convenient.
Can I Use External Ssd As Boot Drive?
Yes, you can use an external SSD as a boot drive. An external SSD is essentially a hard drive that connects to your computer via a USB port or other connection type.
As long as the operating system and motherboard are compatible with the external SSD, it will work for booting up your device.
However, keep in mind that using an external SSD may be slower than using one internally – so if speed is important to you, consider getting an internal solid-state drive instead.
Additionally, make sure to check the specs of any external drives before purchasing them; some won’t support higher speeds or larger files.
Is It Possible to Boot Windows from an External Hard Drive?
Yes, it is possible to boot Windows from an external hard drive. To do so, you will need a USB-to-SATA adapter that connects your computer to the external drive, as well as a valid installation disc of Windows 7 or later.
After connecting these components and setting up the BIOS settings on your computer, you can use the installation disc in order to install Windows onto the external drive and then configure it for booting.
This process may be more difficult than installing Windows on an internal hard drive but with patience and attention to detail, anyone can learn how to do this successfully.
Why Won T Windows 10 Boot from External Ssd?
There can be several reasons why Windows 10 won’t boot from an external SSD.
How Do I Boot Windows from an External Ssd on My Laptop?
Make External Hard Drive Bootable Windows 10
Creating a bootable Windows 10 external hard drive is an easy process that can be done with the help of free tools such as Rufus.
To get started, simply download and install the tool, plug in your USB drive or external HDD into your computer, select it as the device to use for creating a bootable drive, choose ‘Windows 10’ from the list of available ISO images and click start.
Once finished you’ll have a fully operational Windows 10 installation ready to go on any compatible machine.
How to Boot from External Ssd Windows 10
If you want to boot from an external SSD on Windows 10, the first step is to ensure your system BIOS supports this feature.
You’ll then need to connect your external drive and make sure it’s detected in the BIOS.
Once that’s done, you can select the external drive as a boot option when starting up your PC and it should load Windows 10 from the SSD.
How to Make External Hard Drive Bootable With Rufus
Making an external hard drive bootable with Rufus is a great way to make sure your data is safe and secure.
All you need to do is download the latest version of Rufus, connect your external hard drive to your computer, select the USB device as the destination for installation, and then click “Start” in Rufus.
Once complete, you will be able to use your external hard drive just like any other system disk or storage device.
This makes it easy for you to back up important documents or software programs that are too big for regular storage devices.
Make External Hard Drive Bootable Windows 10 Without Formatting
Making an external hard drive bootable Windows 10 without formatting is possible and can be done by creating a bootable Windows installation media on the external drive.
This allows you to use the external hard drive as your primary storage device for running the operating system, rather than using a separate internal hard disk or USB flash drive.
Additionally, it’s important to note that making an external hard drive bootable will erase any existing data stored on it so make sure to back up all of your files before beginning this process.