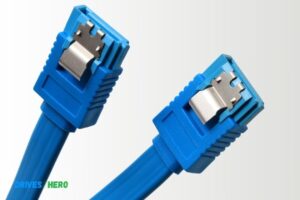
Diy Sata Power Cable: 8 Steps!
Whether you’re a DIY enthusiast looking to customize your computer setup or need a quick replacement cable, this guide will walk you through the process in clear, concise steps.
By following these instructions and using readily available materials, you’ll be able to craft a reliable power cable to supply your SATA drives with the necessary power from your computer’s PSU.
Key Takeaway
DIY SATA Power Cable: Step-by-Step Guide
Step 1: Prepare the Materials
Gather all the materials listed above on a clean, well-lit workspace. Make sure your wire stripper and cutter are within reach.
Step 2: Strip the Wires
Using the wire stripper, carefully strip about 1/4 inch of insulation from both ends of the electrical wire. Be cautious not to damage the wire strands while stripping.
Step 3: Determine Wire Length
Measure and cut two lengths of wire according to your required cable length. It’s better to have a little extra length than too little.
Step 4: Connect the Wires to the SATA Connector
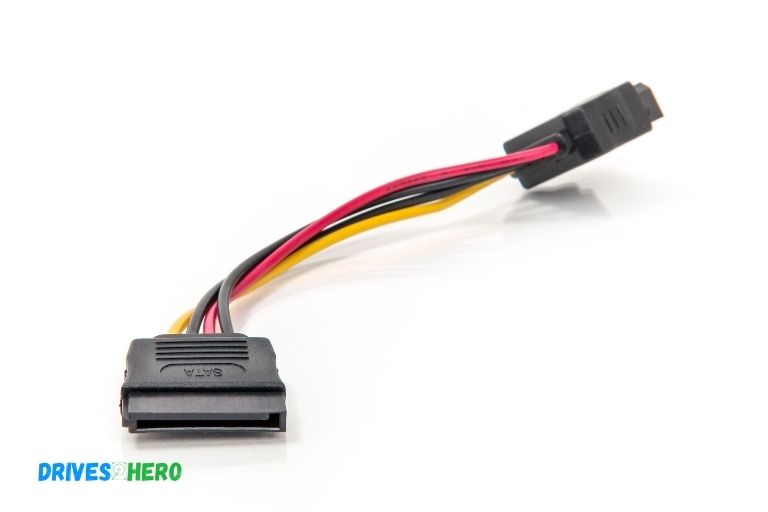
Insert one stripped end of each wire into the corresponding slots on the SATA power connector. There are usually three slots: +5V, +12V, and Ground. Ensure the wires are securely inserted.
Step 5: Secure the Connections
Solder the wires to the SATA connector terminals. This step ensures a stable electrical connection. If you’re not comfortable with soldering, you can use crimp connectors instead.
Step 6: Insulate the Connections
Slide a piece of heat shrink tubing over each soldered connection. Heat the tubing using a heat gun or a lighter until it shrinks snugly around the connection. This provides insulation and protects against short circuits.
Step 7: Test the Cable
Before using the cable, it’s essential to test it for continuity and proper functioning. Connect one end of the cable to your PSU and the other end to a SATA device. Power on your computer and ensure the device is recognized.
Step 8: Final Touches
If desired, wrap electrical tape around the exposed parts of the cable for added protection and aesthetics. Trim any excess tubing or wire for a neat finish.
You’ve successfully created your own SATA power cable. With proper care and attention to detail, this DIY project can provide a cost-effective solution for powering your SATA devices.
Five Facts About: Diy Sata Power Cable
Tools And Materials Needed For Diy Sata Power Cable
To create your own DIY SATA power cable, you will need essential tools and materials. These include wire cutters, crimping tools, SATA connectors, heat shrink tubing, and a soldering iron for a secure and reliable connection.
Essential Tools Required For The Project:
- Wire strippers: A reliable pair of wire strippers will be necessary to remove the protective casing from the cables.
- Crimping tool: You’ll need a crimping tool to securely attach the connectors to the wires.
- Heat gun or lighter: This tool is required to shrink the heat shrink tubing around the connections for added protection.
- Multimeter: A multimeter will help you ensure that your cables are properly functioning and transmitting power as expected.
- Precision screwdriver set: Depending on your power supply unit or devices, you may need a precision screwdriver set to access the necessary components.
Materials Needed To Create Sata Power Cables:
- SATA connectors: These are the key components that will connect your power cables to your SATA devices. Ensure they are compatible with your devices.
- Wiring: You’ll require high-quality wiring to carry the electrical current. It’s recommended to use stranded wires for ease of handling and flexibility.
- Heat shrink tubing: This tubing provides insulation and security for the cable connections. Make sure it is the appropriate size for your cables and connectors.
- Cable sleeving: While not mandatory, cable sleeving can add a neat and professional look to your homemade SATA power cables. It is available in various colors and styles.
Where To Source The Necessary Components:
- Electronic supply stores: Local stores that specialize in electronics and electrical supplies are likely to have the required components. Visit or contact them to inquire about availability.
- Online marketplaces: Websites such as Amazon, Newegg, or eBay offer a wide range of SATA connectors, wiring, heat shrink tubing, and cable sleeving. Ensure you read product reviews and compare prices before making a purchase.
Now that you know the essential tools needed, the materials required, and where to source them, it’s time to roll up your sleeves and start creating your DIY SATA power cable.
Testing And Troubleshooting Your Diy Sata Power Cable
Troubleshoot and test your self-made SATA power cable to ensure it functions properly, avoiding common DIY mistakes. Identify and fix problems for seamless performance.
Ensuring Proper Electrical Continuity:
Proper electrical continuity is essential to ensure that your DIY SATA power cable functions correctly.
Here are some steps you can take to ensure proper continuity:
- Inspect the cable for any visible damage or loose connections.
- Use a multimeter to check for continuity between the connectors.
- Ensure that there is continuity between the 5V and 12V pins on the power connector and the corresponding pins on the SATA connector.
Using A Multimeter For Testing:
A multimeter is a valuable tool for testing and troubleshooting your DIY SATA power cable.
Here’s how you can use a multimeter for testing:
- Set the multimeter to the continuity or resistance mode.
- Place one probe on the 5V or 12V pin of the power connector and the other probe on the corresponding pin of the SATA connector.
- If there is continuity (the multimeter beeps or shows a low resistance reading), it means the connection is good. If there is no continuity, it indicates a problem.
Troubleshooting Common Issues And Solutions:
Sometimes, issues may arise when building your DIY SATA power cable.
Here are some common issues and their solutions:
- Loose connections: Check all connections to ensure they are securely fastened.
- Incorrect wiring: Verify that the wires are connected to the right pins on the connectors.
- Voltage issues: Use a multimeter to measure the voltage output of the power supply to ensure it meets the SATA power specification (5V or 12V).
- Pin alignment: Ensure that the pins on the connectors align properly. Misaligned pins can cause connectivity issues.
- Damaged connectors or cables: Inspect the connectors and cables for any signs of damage. Replace any damaged components as necessary.
Remember, it’s crucial to follow safety precautions when working with electrical components. Double-check your work and seek help if needed.
With proper testing and troubleshooting, you can ensure a reliable DIY SATA power cable for your computer peripherals.
Safety Considerations And Best Practices For Diy Sata Power Cable
This DIY guide explores safety considerations and best practices for creating your own SATA power cable.
Ensure you follow these guidelines for a secure and efficient setup:
Safety Considerations When Working With Electrical Components:
- Always ensure the power is turned off before working with electrical components.
- Use insulated tools to avoid electric shocks.
- Avoid wearing loose clothing or jewelry that could potentially get caught in the equipment.
- Keep liquids away from electrical components to prevent the risk of short-circuits.
- Work in a well-ventilated area to prevent overheating of components.
- If you’re uncertain about anything, consult an expert or professional for guidance.
Tips For Preventing Accidents And Damage To Your Computer:
- Double-check the power cable connections to avoid loose connections that can cause power fluctuations.
- Regularly inspect the cables for wear and tear, and replace them if necessary.
- Avoid bending or twisting the cables excessively to prevent damage to the wires inside.
- When plugging or unplugging the cables, hold onto the connector and not the cable itself.
- Keep the cables organized and away from areas where they can be tripped over or tangled.
Additional Best Practices For Maintaining A Reliable Power Supply:
- Use high-quality SATA power cables from reputable manufacturers to ensure stability and performance.
- Avoid using extension cords or power strips with multiple devices connected, as they can overload the circuit.
- Connect the power cable securely to the SATA power connector, ensuring a snug fit.
- Regularly clean the connectors and remove any dust or debris that may affect the connection.
- Perform regular checks on your power supply unit (PSU) to ensure it’s functioning properly and providing adequate power.
Remember, safety should always be a priority when working with electrical components. By following these precautions and best practices, you can minimize the risk of accidents and damage to your computer while maintaining a reliable power supply.
Possible Upgrades And Customizations For Diy Sata Power Cable
Upgrade and customize your DIY SATA power cable with various options for enhanced performance and personalization. Explore different modifications to optimize power delivery and adapt to specific requirements.
Exploring Different Connector Options And Their Benefits:
- Right-angled connectors: These connectors have a 90-degree angle, making them ideal for tight spaces where a straight connector wouldn’t fit properly.
- Latching connectors: These connectors feature a locking mechanism that ensures a secure connection, preventing accidental disconnections.
- Low-profile connectors: Designed to be compact and slim, low-profile connectors are perfect for situations where space is limited, such as in small form factor PCs.
Adding Additional Connectors For Multiple Devices:
- Y-splitter cables: By using Y-splitter cables, you can connect multiple SATA devices to a single power source, saving you from having to install multiple power cables.
- Power distribution boards: These boards allow you to distribute power to multiple SATA devices from a single source, simplifying cable management and reducing clutter.
Upgrading Cable Length For Better Cable Management:
- Cable extensions: If your existing cable isn’t long enough to reach your desired destination, you can use cable extensions to bridge the gap. These extensions maintain proper power delivery while giving you the flexibility to route the cables as needed.
- Custom cable sleeving: While not directly related to cable length, custom cable sleeving adds a touch of personalization and can improve cable management by keeping them organized and tidier.
Remember to research and choose connectors and cable options that are compatible with your devices and adhere to safety standards.
Real-World Examples Of Diy Sata Power Cable Implementations
Discover real-world examples of DIY SATA power cable implementations and learn how to create your custom cables for your computer system. Take control of your power supply needs with these practical and cost-effective solutions.
Success Stories From Computer Enthusiasts:
- Some computer enthusiasts have successfully built their own DIY Sata power cables, saving money and customizing their setups to their specific needs.
- DIY Sata power cables have allowed these enthusiasts to connect their storage devices efficiently and neatly, reducing cable clutter inside their computer cases.
- By creating their own Sata power cables, computer enthusiasts have gained valuable knowledge about the internal workings of their systems, giving them a sense of accomplishment and confidence in their technical skills.
- Many DIY Sata power cable implementations have been shared on online forums and communities, inspiring others to embark on their DIY projects.
Photos And Descriptions Of Diy Sata Power Cable Setups:
- A computer enthusiast shared pictures of their DIY Sata power cable, showcasing the neatly organized cables and the sleek, professional-looking finish.
- Another user provided step-by-step instructions along with detailed photos, making it easy for beginners to follow along and create their own custom Sata power cables.
- The photos demonstrate how DIY Sata power cables can be customized with different color-coded wires, allowing users to create visually appealing and organized cable setups.
- Descriptions accompanying the photos highlight the materials used, the precise connections made, and the benefits of opting for custom Sata power cables over pre-made ones.
Real-World Applications Of Custom Sata Power Cables:
- Custom Sata power cables are not limited to computer enthusiasts but can also be used in various industries such as data centers, server rooms, and tech laboratories.
- Companies can benefit from custom Sata power cables by reducing power consumption, improving airflow, and enhancing overall system performance.
- In server rooms, custom Sata power cables can be designed to efficiently distribute power to multiple storage devices, resulting in faster data transfer rates and increased productivity.
- DIY Sata power cables offer flexibility in terms of cable lengths, allowing users to maximize space utilization and achieve optimal cable management in both small and large-scale setups.
Creating your own Sata power cable is a rewarding experience that empowers computer enthusiasts to tailor their systems according to their unique requirements.
FAQ About Diy Sata Power Cable
What is a DIY SATA power cable?
A DIY SATA power cable is a type of power cable that is used to connect the SATA drive to the power supply. It is made by the user from components such as a power supply, cabling, connectors, and power pins.
What are the components of a DIY SATA power cable?
The components required to make a DIY SATA power cable include a power supply, cabling, connectors, and power pins.
How do I make a DIY SATA power cable?
To make a DIY SATA power cable, first gather the necessary components and sources necessary to assemble the cable.
Next, strip off excess insulation from the cabling and connect each wire to the appropriate pin on the connector or the power supply.
Once all wires are connected, secure the ends with electric tape. Lastly, connect the cable to the SATA drive and the power supply.
Are there any potential risks associated with making a DIY SATA power cable?
Yes, there are some risks associated with making a DIY SATA power cable. These include the possibility of electric shock, improper connection of wires, and damage to the device.
It is important to take all precautions when constructing a DIY SATA power cable, such as wearing protective gloves and eyewear and following manufacturer instructions.
How frequently should I check my DIY SATA power cable?
Periodically check your DIY SATA power cable to ensure that all connections are secure and that no wires have come loose.
Conclusion
Creating your own DIY SATA power cable can be a cost-effective and gratifying solution for those needing additional power connections for their computer peripherals.
By following the step-by-step guide provided in this blog post, you can confidently undertake this project without the need for professional assistance.
Not only will this provide you with the necessary power supply but it will also give you a sense of accomplishment for completing a technical task.
Remember to gather all the required materials before starting, take safety precautions, and double-check your connections.

Harold Williams is a senior writer and technical editor at Drives Hero with 20+ years of experience in IT administration. He specializes in storage systems, SSD reviews, and performance testing, bringing real-world insight to every guide.