External Ssd to Internal
If you’re looking to upgrade your computer’s storage, you may be wondering if it’s worth it to install an external SSD. While external SSDs are great for storing large files and backing up data, they can be expensive. Internal SSDs are a more affordable option and can offer similar performance benefits.
Here’s a look at the pros and cons of each type of storage to help you decide which is right for your needs.
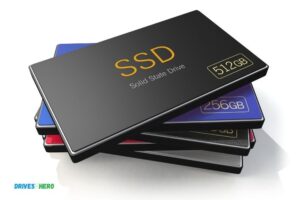
If you’ve been using a computer for any length of time, you’ve probably heard of solid state drives, or SSDs. SSDs are becoming increasingly popular as the primary storage device in many laptops and desktop computers. One reason for this popularity is that SSDs are much faster than traditional hard disk drives.
Another advantage of SSDs is that they’re more durable than HDDs. Because there are no moving parts in an SSD, it’s less likely to be damaged if it’s dropped or jostled around. This makes them ideal for use in laptops, which are more prone to being dropped than desktop computers.
If you’re thinking about upgrading to an SSD, one option is to buy an external SSD and then use it as your internal storage device. This can be a bit tricky, but we’ll walk you through the process step-by-step so that you can get up and running with your new drive as quickly and easily as possible.The first thing you’ll need to do is purchase an external SSD that’s compatible with your computer.
Make sure to check the requirements before purchasing so that you don’t end up with a drive that won’t work with your system. Once you have your new drive, connect it to your computer using a USB cable.Next, open Disk Utility (on a Mac) or Computer Management (on Windows).
You should see your new drive listed under External Devices. If not, try unplugging and replugging the drive into a different USB port on your computer. Once you see the drive listed, select it and then click on the “Initialize” button.
After the initialization process is complete, you’ll be able to format your new drive however you like. We recommend formatting it as exFAT so that it can be used on both Windows and Mac computers without any hassle. Now all that’s left to do is copy over any files from your old HDD onto your new SDD!
Can You Use an External Ssd Internally?
No, you cannot use an external SSD internally. External SSDs are designed to be used with a computer’s USB port and will not fit into a standard internal hard drive bay.
Can You Turn an External Hard Drive into an Internal?
If you have an extra hard drive laying around and you’re wondering if you can turn it into an internal hard drive, the answer is maybe. It depends on a few things, such as what type of hard drive it is and what computer you have. In this blog post, we’ll go over everything you need to know about turning an external hard drive into an internal one.
First, let’s start with the basics. An external hard drive is a hard drive that plugs into your computer via USB or another interface. An internal hard drive, on the other hand, is a hard drive that’s installed inside your computer.
Both types of drives serve the same purpose: they store data.
First, let’s talk about interface compatibility.
How Do I Convert Internal Ssd to External Ssd?
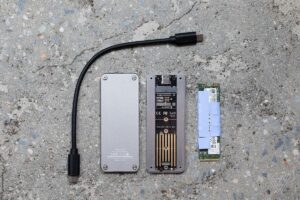
There are a few different ways that you can convert an internal SSD to external SSD. The most common way is to use an adapter, which will allow you to connect the SSD to a computer via USB. There are also enclosures available that will allow you to install the SSD inside and then connect it externally.
If you’re looking to convert an internal SSD to external SSD for the purpose of increased storage, then an adapter is probably your best bet. This is because adapters are generally cheaper than enclosures and they’re also much easier to use. All you need to do is connect the adapter to your computer and then plug in the SSD.
Enclosures, on the other hand, tend to be more expensive but they offer some benefits over adapters. For one, they provide better protection for your SSD since it’s completely enclosed. This can help keep your data safe from physical damage.
Additionally, some enclosures come with features like cooling fans which can help prolong the life of your SSD.Ultimately, the decision of whether or not to convert your internal SSD to external SSD comes down to personal preference and needs. If you’re looking for increased storage or better protection for your data, then an enclosure is probably a better option.
However, if cost is a concern or you simply need an easy way to connect your SSD to a computer, then an adapter may be all you need.
How Do I Connect My External Ssd to My Motherboard?
If you’re looking to connect an external SSD to your motherboard, there are a few things you’ll need to take into account. First, you’ll need to make sure that your motherboard supports SATA III, as this is the interface that most external SSDs use. If your motherboard only supports SATA II, you may be able to use an adapter, but performance will likely be slower.
Once you’ve verified that your motherboard can support an external SSD, the next thing you’ll need to do is figure out which connection type you need. Most external SSDs will come with either a USB 3.0 or Thunderbolt 3 connection. If your motherboard has a USB 3.0 port, then you can simply connect the SSD using a standard USB cable.
However, if your motherboard only has Thunderbolt 2 or lower ports, then you’ll need an adapter in order to connect the SSD.Once everything is plugged in and ready to go, all you need to do is format the drive and install your operating system of choice. Windows 10 should be able to automatically detect the drive and walk you through the formatting process; for other operating systems, consult your documentation on how to format drives for installation.
And that’s it! Once everything is set up, you should have no problem using an external SSD connected directly to your motherboard.
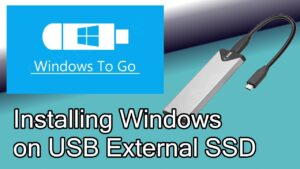
Can I Use an External Ssd As a Boot Drive
If you’re considering using an external SSD as your boot drive, you might be wondering if it’s possible. The answer is yes! You can absolutely use an external SSD as your boot drive, and there are a few different ways to do it.
One option is to simply connect your external SSD to your computer and choose it as the boot device in your BIOS settings. This is typically the easiest way to do it, but if your computer doesn’t have a built-in port for an SSD, you’ll need to use an adapter. Alternatively, you could also use a USB 3.0 enclosure for your SSD.
Another option is to image your existing internal hard drive onto the external SSD. This can be done with free software like Macrium Reflect or AOMEI Backupper Standard. Once you’ve imaged your hard drive, you can then boot from the external SSD and have all of your files and programs just like they were on your old hard drive.
Finally, if you’re using a laptop with only one internal storage slot, you can replace the existing hard drive with an SSD and then use an external case/enclosure for the old hard drive (which can now be used as extra storage).Whichever method you choose, using an external SSD as your boot device is definitely possible!
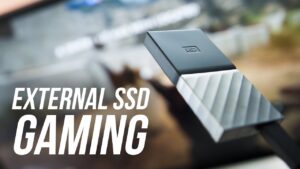
How to Use an External Ssd for Gaming
An external SSD is a great way to get faster loading times and improved performance for your gaming PC. Here’s how to get the most out of an external SSD for gaming:1. Choose the right size and interface.
Make sure you pick an external SSD that’s large enough to hold all your games (at least 250GB is a good starting point) and has a fast interface like USB 3.0 or Thunderbolt 3.0.2. Format the drive properly. In order to get the best performance from your external SSD, you’ll need to format it with the NTFS file system.
This can be done easily in Windows by opening up My Computer, right-clicking on your external SSD, and choosing “Format…” from the context menu. Be sure to select “NTFS” from the File System drop-down menu before you click on the “Start” button to begin formatting the drive.3 Install your games onto the external SSD .
Once your drive is formatted and ready to go, it’s time to install your games onto it. Just copy over all the game files from your internal hard drive onto the external SSD—you can do this easily by dragging and dropping them in Windows Explorer (or any other file manager). Some games may need to be reinstalled in order to work properly from an external drive, so keep that in mind if you run into any issues getting a game launched from your new setup .
If necessary , refer back our guide on how move installed programs Windows 10 another hard disk .4 Connect External Drive Before Launching Games . When everything is copied over , make sure connect plug in USB cable or whatever interface using into one of computer’s open ports before launching any games .
Once plugged in , launch Steam ( or Origin , GOG Galaxy , Epic Games Store , etc .) pick game want play . For example Witcher III : Wild Hunt should now show option “Play” when selecting it within Steam since installed now resides on much faster – loadingexternal storage device . Selecting this option will start process unpacking some files first time played after installation which normal given Witcher III’s massive file size nearly 100 GB uncompressed without mods enabled .
Internal Vs External Ssd for Gaming
As a PC gamer, you have a few different choices when it comes to storage for your games. You can either go with an internal hard drive or SSD, or an external hard drive or SSD. So which is the best option for gaming?
Internal hard drives and SSDs are typically faster than external ones, due to the fact that they don’t have to communicate with the computer over a USB connection. They also tend to be more reliable, since there are no moving parts inside of them. However, they do require you to open up your computer case in order to install them, which can be a bit of a hassle.
External hard drives and SSDs are much easier to install, since you just need to connect them to your computer via USB. They’re also usually cheaper than internal storage options. However, they tend to be slower and less reliable than internal options.
How to Use External Ssd on Laptop
If you’ve recently purchased an external SSD, you may be wondering how to use it with your laptop. Here’s a quick guide on how to get started!First, connect the SSD to your laptop using a USB cable.
Then, open the File Explorer and find the drive letter assigned to your SSD. Right-click on the drive and select “Format.” Choose the NTFS file system and give your drive a name.
Finally, click “OK” to format the drive.Now that your SSD is formatted, you can copy over any files or folders that you want to store on it. Keep in mind that external SSDs are typically faster than traditional hard drives, so they’re ideal for storing large files or frequently accessed data.
Conclusion
You can upgrade your computer’s storage by adding an external SSD to its internal drive. This will give you the extra space you need for large files and programs. It’s easy to do, and it doesn’t require any special tools or knowledge.
Just follow these simple steps:1. Buy an external SSD that’s compatible with your computer. Make sure it has a USB 3.0 port, as this is the fastest type of connection.
2. Connect the SSD to your computer using a USB cable.3. Open the Disk Management tool in Windows (search for “disk management” in the Start menu). Find your external SSD in the list of drives, right-click on it, and select “Initialize Disk”.
Choose MBR (Master Boot Record) as the partition style, and click OK.4 format disk” option 4a From here you can either create a new partition or use the “Quick” option to automatically format the entire drive 5 Right-click on your newly created partition (orthe unallocated space if you opted for Quick Formatting), select “New Simple Volume…”, and follow the wizard to complete formatting 6 After formatting is complete, open up File Explorer 7 You should now see your external SSD listed under This PC 8 Double-click on it to open it up, and start copying files over!Adding an external solid state drive (SSD) to your computer is an easy way to upgrade its storage capacity without having to open up the case and fiddle with internal components.

Harold Williams is a senior writer and technical editor at Drives Hero with 20+ years of experience in IT administration. He specializes in storage systems, SSD reviews, and performance testing, bringing real-world insight to every guide.