How to Fix ‘Drive Not Formatted’ Error (Don’t Format Yet!)
You plug in your external hard drive, USB flash drive, or SD card, and Windows hits you with the dreaded message: “You need to format the disk in drive X: before you can use it.” Your stomach drops because that drive has years of photos, work documents, or your entire music collection on it.
Your first instinct might be to click “Format” just to make the error go away. Don’t do it. Formatting that drive will make data recovery significantly harder, and in many cases, the error can be fixed without formatting at all. The data is usually still there, sitting on the drive, waiting for you to recover it properly.
This guide walks you through exactly what causes the “drive not formatted” error, how to recover your files safely, how to repair the drive if possible, and when formatting truly is the only remaining option. Follow these steps in order, and you’ll give yourself the best chance of getting everything back.
What Causes the “Drive Not Formatted” Error?
Before you start troubleshooting, it helps to understand why this happens. The error appears when Windows can’t recognize the file system on your drive. Several things can cause this:
- Corrupted file system: A power outage, improper ejection, or sudden disconnection can corrupt the NTFS, FAT32, or exFAT file system structures.
- Damaged partition table: The master boot record (MBR) or GUID partition table (GPT) that tells your computer where partitions begin and end has been corrupted.
- Bad sectors: Physical damage to the area of the disk that stores file system metadata.
- Virus or malware damage: Some malware deliberately corrupts file system structures.
- Incompatible file system: A drive formatted with a Linux file system (ext4) or macOS file system (APFS/HFS+) will trigger this error on Windows.
- Failing drive hardware: The drive’s controller board, read/write heads, or NAND flash cells may be degrading.
The most common cause, by far, is file system corruption from improper ejection. You pulled the USB drive out while Windows was still writing to it, or the power went out during a file transfer. The good news is that this type of corruption is also the easiest to fix.
Step 1: Don’t Format, Don’t Panic, and Stop Using the Drive
This is the most important step. When you see the format prompt, click “Cancel” every single time. Do not write any new data to the drive. Every byte you write potentially overwrites recoverable data.
If the drive is an internal one, avoid booting from it. If it’s an external drive, leave it connected but don’t try to open files or run random utilities on it. Just let it sit while you plan your approach.
Step 2: Check Disk Management for Clues
Open Disk Management in Windows by right-clicking the Start button and selecting “Disk Management.” Find your drive in the list and look at what it says about the partition.
Here’s what to look for:
- RAW file system: This means Windows can’t read the file system. Your data is likely still there, but the file system metadata is corrupted.
- Unallocated space: The partition table may be damaged or missing. Recovery is still possible.
- Healthy partition with a recognized file system: The problem might be a bad USB cable, port, or driver issue rather than actual corruption.
- No media shown: This could indicate a hardware failure, especially with USB flash drives.
Take a screenshot or write down exactly what Disk Management shows. This information will guide your next steps.
Step 3: Try Simple Hardware Fixes First
Before running any software, rule out basic hardware issues. These take just a few minutes and solve the problem more often than you’d expect:
- Try a different USB port. Use a port directly on your motherboard rather than a front-panel or hub port.
- Try a different USB cable. Cables go bad constantly, especially the cheap ones that come bundled with drives.
- Try a different computer. If the drive works fine on another machine, the issue is with your computer’s USB drivers or configuration.
- Try a different card reader. If you’re dealing with an SD card or microSD card, a faulty reader is a common culprit.
- Check the write-protect switch. Some SD cards and USB drives have a tiny physical switch that can get bumped into the locked position.
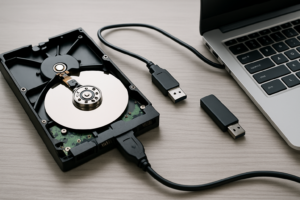
A quality USB 3.0 docking station like the Sabrent USB 3.0 Hard Drive Docking Station can also help you rule out enclosure problems with external hard drives. You pop the bare drive into the dock and connect directly, bypassing any potentially faulty enclosure electronics.
Step 4: Recover Your Data First
If hardware fixes didn’t work and Disk Management shows a RAW file system, your priority is getting the data off the drive before attempting any repairs. This is critical because repair tools can sometimes make things worse if the corruption is severe.
Using Data Recovery Software
Data recovery software scans the drive at a low level, looking for file signatures and directory structures regardless of whether the file system is intact. Several excellent options exist.
R-Studio is what many data recovery professionals use. It handles NTFS, FAT, exFAT, ext2/3/4, and HFS+ file systems, and it can reconstruct folder structures even from badly damaged drives. It’s more technical than consumer tools, but it produces the best results in difficult situations.
Stellar Data Recovery Professional
A user-friendly recovery tool that handles RAW drives, formatted partitions, and corrupted file systems with an intuitive interface that’s great for non-technical users.
Recuva by Piriform offers a free version that works well for simple recoveries. It won’t handle severe corruption as well as the paid tools, but for a USB drive that was improperly ejected, it’s often sufficient.
TestDisk is a free, open-source tool that can actually repair partition tables and recover lost partitions without formatting. It’s command-line based and intimidating at first, but it’s incredibly powerful. We’ll cover this more in the repair section.
How to Run a Data Recovery Scan
- Install the recovery software on a different drive than the one you’re recovering from. Never install anything on the damaged drive.
- Create a disk image first if possible. Most professional recovery tools let you create a sector-by-sector image of the drive. Work from the image instead of the original drive to avoid further damage.
- Run a deep scan. Quick scans check the existing file system structures. Deep scans look for file signatures across the entire drive surface. Use the deep scan.
- Save recovered files to a different drive. Never recover files to the same drive you’re recovering from.
The scan can take hours on large drives. Let it finish completely. A 1TB external hard drive might take 3 to 8 hours depending on the connection speed and drive health.
EaseUS Data Recovery Wizard
Excellent balance of power and ease of use, with a preview feature that lets you verify files are recoverable before purchasing the full version.
Step 5: Attempt File System Repair
Once your important data is safely recovered to another drive, you can try repairing the original drive’s file system. If the repair works, you may find that all your files are still intact and accessible.
Using CHKDSK (Windows Built-in Tool)
Open Command Prompt as Administrator and type:
chkdsk X: /f /r
Replace “X” with your actual drive letter. The /f flag fixes file system errors, and /r locates bad sectors and recovers readable information.
Important caveat: CHKDSK sometimes refuses to run on RAW drives, giving you the message “The type of the file system is RAW. CHKDSK is not available for RAW drives.” If you see this, skip to the next method.
Using TestDisk for Partition Recovery
TestDisk is the best free tool for repairing damaged partition tables. Download it from the official CGSecurity website. Here’s the basic process:
- Run TestDisk and select your drive.
- Choose the partition table type (usually Intel/PC for most drives).
- Select “Analyse” to search for lost partitions.
- TestDisk will show you any partitions it finds. Verify they look correct (right size, right file system).
- If the partitions look correct, select “Write” to restore the partition table.
TestDisk has recovered drives that every other tool gave up on. It’s particularly effective when the partition table is corrupted but the actual file data is intact, which is the most common scenario with the “drive not formatted” error.
Using DiskPart to Clean and Rebuild (Last Resort Before Formatting)
If TestDisk can’t find valid partitions, you can try using DiskPart to remove the corrupted partition information and create new partitions. Be aware that this will erase the drive, so only do this after you’ve recovered your data.
- Open Command Prompt as Administrator.
- Type
diskpartand press Enter. - Type
list diskto find your drive number. - Type
select disk X(replacing X with the correct number). Triple-check you’ve selected the right disk. - Type
cleanto remove all partition information. - Type
create partition primary. - Type
format fs=ntfs quick(or exfat for drives used across multiple operating systems). - Type
assignto give it a drive letter.
Step 6: When You Actually Need to Format
Sometimes formatting is the right answer. Here are the situations where formatting makes sense:
- You’ve already recovered all important data. Once your files are safe, formatting is the fastest way to get the drive usable again.
- The drive has an incompatible file system. If you formatted the drive on a Mac or Linux machine, Windows genuinely can’t read it. You’ll need to either format it for Windows or use a third-party driver like Paragon NTFS or MacDrive.
- CHKDSK and TestDisk both fail. If no repair tool can fix the file system, a fresh format is your only option for reusing the drive.
- The drive has extensive bad sectors. If a surface scan reveals hundreds or thousands of bad sectors, the drive is failing. Format it, test it thoroughly, and replace it if bad sectors continue appearing.
When you do format, always choose the appropriate file system. Use NTFS for external drives used only with Windows, exFAT for drives shared between Windows and Mac, and FAT32 only if you need compatibility with older devices like car stereos or basic media players.
When to Call a Professional Data Recovery Service
Software tools can handle logical corruption, which covers probably 80% of “drive not formatted” errors. But some situations require professional help:
- The drive makes clicking, grinding, or beeping noises.
- The drive isn’t detected at all in BIOS or Disk Management.
- The data is irreplaceable and extremely valuable (wedding photos, business records, legal documents).
- Software recovery tools find the files but can’t read them (indicating physical damage to the platters).
Professional recovery from companies like DriveSavers or Ontrack typically costs several hundred to over a thousand dollars, but they work in cleanroom environments and can handle physical drive damage that no software can fix. Most reputable services offer a free evaluation and won’t charge you if they can’t recover the data.
How to Prevent “Drive Not Formatted” Errors
An ounce of prevention really is worth a pound of cure here. Follow these practices to avoid this error in the future:
- Always safely eject drives. Click the “Safely Remove Hardware” icon in the system tray every single time. This ensures all write operations complete before disconnection.
- Use a UPS for desktop computers. A sudden power loss during a write operation is one of the most common causes of file system corruption. Even an inexpensive UPS protects against this.
- Replace aging drives. Hard drives typically last 3 to 5 years. USB flash drives have a limited number of write cycles. If a drive is old and showing occasional errors, replace it before it fails completely.
- Keep backups. Follow the 3-2-1 rule: three copies of important data, on two different types of media, with one copy stored offsite or in the cloud.
- Run periodic CHKDSK scans. A monthly
chkdsk /fon your external drives can catch and repair minor file system issues before they become major problems. - Use quality drives from reputable manufacturers. Cheap, no-name USB drives have higher failure rates and are more susceptible to corruption.
WD My Passport Portable External Hard Drive
Reliable, portable, and includes built-in hardware encryption, making it a solid choice for everyday external storage and backups.
A reliable external drive paired with a good backup routine will save you from ever having to go through this recovery process again. The Samsung T7 Portable SSD is another excellent option if you want the speed and durability advantages of solid-state storage for your backup drive.
Frequently Asked Questions
Will formatting a drive erase all my data permanently?
A quick format doesn’t immediately overwrite your data. It removes the file system index and marks all space as available, but the actual file contents remain on the drive until they’re overwritten by new data. This means data recovery software can often retrieve files after a quick format. A full format on modern versions of Windows (Vista and later) writes zeros to every sector, making recovery extremely difficult. If you accidentally clicked “Format,” immediately stop using the drive and run recovery software before writing anything new to it.
Why does my external hard drive keep asking to be formatted every time I plug it in?
Recurring format prompts usually indicate a hardware issue rather than simple file system corruption. Common causes include a failing USB cable, a damaged USB port, a faulty drive enclosure, or early signs of drive failure. Try different cables and ports first. If the problem persists, remove the