How to Install a Kingston Ssd? 10 Steps!
To install a Kingston SSD, first shut down your computer and disconnect the power. Then open the case to access the drive bays or slots.
Whether you’re upgrading your storage or adding a new drive, this step-by-step walkthrough will ensure a smooth installation process.
With just a few tools and straightforward instructions, you’ll have your Kingston SSD up and running in no time, optimizing your computer’s performance.
Key Takeaway
Installing a Kingston SSD: Step-by-Step Guide
Step 1: Gather Tools
- Collect the necessary tools, including a Kingston SSD, a screwdriver, and any additional hardware provided with the SSD.
Step 2: Power Off Your Computer
- Turn off your computer and disconnect it from the power source.
Step 3: Open the Computer Case
- Use a screwdriver to open the computer case. Locate the available drive bays.
Step 4: Identify SATA Ports
- Identify the SATA ports on your motherboard. Choose an available port for the Kingston SSD.
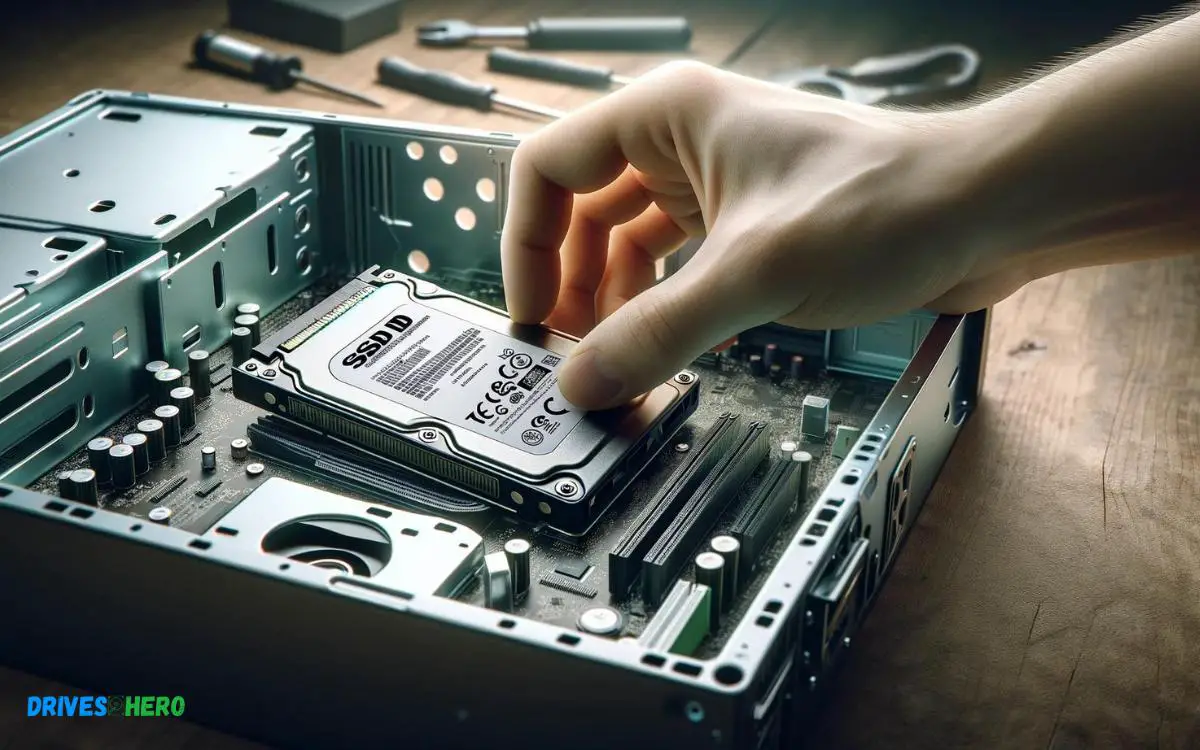
Step 5: Mount the SSD
- Secure the Kingston SSD in an available drive bay using screws. Ensure a snug fit.
Step 6: Connect SATA and Power Cables
- Connect one end of the SATA cable to the Kingston SSD and the other end to an available SATA port on the motherboard. Connect the power cable to the SSD.
Step 7: Close Computer Case
- Once connected, carefully close the computer case and secure it with screws.
Step 8: Power On Your Computer
- Reconnect your computer to the power source and power it on.
Step 9: Check BIOS/UEFI
- Enter the BIOS/UEFI settings during startup and confirm that the Kingston SSD is detected.
Step 10: Install Operating System (if necessary)
- If the SSD is a new primary drive, install the operating system. Ensure your BIOS/UEFI is set to boot from the Kingston SSD.
By following these simple steps, you can successfully install a Kingston SSD in your computer, enhancing storage and improving overall performance.
Opening The Computer Case
To install a Kingston SSD, first, ensure the computer is powered off and unplugged. Gently remove the side panel of your PC case to access the motherboard and drive bays.
Powering Off The Computer
Before opening up your computer, ensuring it is fully powered down is imperative.
Follow these simple steps for a safe shutdown:
- Start Shutdown: If using Windows, click on the Start menu, select the Power icon, and then choose “Shutdown”. For Mac users, click on the Apple icon, and click “Shut Down”.
- Unplug: Once the computer is off, disconnect all cables, including the power cord, to prevent any electrical shock or damage to the components.
- Static Safety: To protect your computer’s delicate internal electronics from static electricity, ground yourself by touching an unpainted metal surface on the case.
Locating The Case Screws
Now that the computer is off and unplugged, locate the screws on the back of the case that secure the side panel. They are usually found along the edges of the back panel.
Removing The Side Panel
Gently remove the screws while supporting the side panel with your other hand. Once all screws have been taken out, slide the panel off or open it as per the manufacturer’s instructions to reveal the internals of your PC.
Identifying The Mounting Area
With the side panel off, find the drive bay or mounting bracket where your new Kingston SSD will reside. If you have a 2.5-inch SSD and a 3.5-inch bay, you may need an adapter bracket for proper fitment.
Safety Precautions
Installing a new Kingston SSD in your system is an exciting venture, but safety should always be your top priority. Not only to protect yourself but also to safeguard your new investment and the rest of your computer components from potential damage.
Keeping in mind some fundamental safety tips can go a long way toward ensuring a smooth installation process.
Handling Components Carefully
- Touch the SSD by its edges without touching the connectors or circuitry.
- Ensure your work area is clean, organized, and free of any potential hazards.
- Before removing the SSD from its packaging, prepare the installation space to prevent any unnecessary handling.
- Handle the drive and all other computer components with care, as they can be sensitive to force and pressure.
Configuring The Kingston Ssd
After installing your new Kingston SSD into your computer, the first step to unleashing its full potential is configuring it correctly.
This essential process ensures that your system recognizes the drive and that it operates at peak performance. Follow the guide below to configure your Kingston SSD successfully.
Entering Bios Setup
To set up your Kingston SSD, you’ll need to start by entering the BIOS setup of your computer.
Here’s how:
- Restart your computer.
- Press the key to enter BIOS – this is often Del, F2, F10, or ESC, depending on your motherboard.
- Once in the BIOS, use the arrow keys to navigate the menus.
Adjusting Boot And Sata Configuration
In the BIOS, you may need to adjust the boot and SATA configuration:
| Setting | Option | Description |
|---|---|---|
| Boot Order | SSD First | Set your Kingston SSD as the first boot device. |
| SATA Mode | AHCI | Ensures that all SATA devices run in AHCI mode for better performance. |
Updating Ssd Firmware
Keeping your SSD firmware updated is crucial for receiving performance enhancements and security updates:
- Visit the Kingston’s official website to find the latest firmware updates.
- Download the SSD Manager utility.
- Run the utility and follow the on-screen instructions to update the firmware.
With an updated firmware, you can rest assured that your SSD runs efficiently and securely.
Finalizing Ssd Configuration
After adjusting the BIOS settings and updating the firmware:
- Exit the BIOS, saving your changes.
- Reboot your computer to apply the new settings.
Your computer should now boot with the Kingston SSD as the primary drive, and you can proceed with installing your operating system or transferring data.
Setting Kingston Ssd As The Boot Drive
Elevate your system’s performance by installing a Kingston SSD as your primary boot drive. This straightforward upgrade significantly speeds up boot times, ensuring your computer is ready to go when you are.
Selecting The Boot Order
To set your Kingston SSD as the boot drive, you need to adjust the boot priority in the BIOS or UEFI settings.
These steps will guide you through this crucial process:
- Restart your computer and as it begins to power back up, promptly access the BIOS or UEFI interface. Typically, you press a key such as F2, Del, or Esc during startup, but this varies by manufacturer.
- Use the arrow keys to navigate to the Boot tab or menu within the BIOS/UEFI interface.
- Locate the Boot Order section, which might also be referred to as Boot Priority or Boot Sequence. Here, you’ll find a list of connected storage devices.
- Using the designated keys (often +/- or F5/F6), move the Kingston SSD to the top of the list, asserting it as the primary boot device.
- After prioritizing the SSD, ensure to save your changes. This is often done by pressing F10 or navigating to the Exit menu and selecting the option to ‘Save and Exit’.
Your computer will reboot. If you’ve followed these steps correctly, it should now start up from the Kingston SSD.
Ensuring Compatibility And Boot Success
Lastly, once the Kingston SSD is set as the boot drive and the operating system is up and running, take a moment to appreciate the improved boot times and overall enhanced system responsiveness that comes with your Kingston SSD investment.
Testing And Verifying Installation
Once you’ve successfully installed your brand new Kingston SSD, the next crucial step is to test and verify that the installation has been done correctly.
Ensuring that your system recognizes the SSD and is taking full advantage of its speed and efficiency is essential.
Powering On The Computer
After securely placing the SSD in its designated spot and reconnecting all cables, it’s time to power on your computer.
These are the points you need to check:
- Listen for the usual startup sounds. Avoid abnormal noises which may indicate a hardware issue.
- Observe the system’s boot-up sequence. It should proceed smoothly without errors.
- Check if the BIOS or UEFI recognizes the Kingston SSD. You may need to enter the BIOS setup by pressing a specific key during startup.
If the computer boots up normally and you can see the SSD listed in the BIOS, it’s a good indication that your initial installation is successful.
Take note, though, that seeing the SSD in BIOS doesn’t mean the job is done you still need to verify that your system is using the SSD to its fullest potential.
Testing And Verifying Installation
- Enter the Operating System and log in as you usually would.
- Open ‘This PC’ on Windows (or ‘Finder’ on Mac), and locate the new Kingston SSD among the listed drives.
- Check the Drive’s Properties to make sure it reflects the correct storage capacity of your SSD.
- Conduct a speed test using a disk benchmark tool to verify the read and write speeds align with Kingston’s provided specifications.
If any issues arise during these steps, ensure all connections are secure and consult Kingston’s troubleshooting resources for help.
Spotting issues early allows for quick remediation, guaranteeing the longevity and efficiency of your SSD upgrade.
Checking The Drive Recognition
Ensuring your computer recognizes the new Kingston SSD is a pivotal step during installation. Verify the drive’s detection through your system’s BIOS settings or Disk Management to ensure a smooth setup process.
Verifying Ssd In The Bios
- Restart your computer and enter the BIOS setup.
- Navigate through the BIOS menus using the instructions provided.
- Look for a section labeled “Boot Order,” “Boot Menu,” “Storage Configuration,” or similar.
- Locate your Kingston SSD in the list of storage devices.
- If the drive appears, it indicates proper installation and connection.
| Common Issue | Potential Fix |
|---|---|
| SSD not detected | Check and re-secure cables |
| Improper seating | Reinstall SSD ensuring snug fit |
| BIOS outdated | Update BIOS version |
Conclusion
Upgrading to a Kingston SSD can significantly boost your system’s performance. By following the steps outlined, you’ve now equipped your computer with a fast, reliable drive.
Should questions arise during your installation journey, there’s a wealth of online resources and Kingston’s support to help. Embrace the speed and enjoy your revitalized computing experience!

Harold Williams is a senior writer and technical editor at Drives Hero with 20+ years of experience in IT administration. He specializes in storage systems, SSD reviews, and performance testing, bringing real-world insight to every guide.