How to Install Crucial Ssd in Laptop? 8 Steps!
Unlock the potential of your laptop with a Crucial SSD. This concise guide walks you through the straightforward steps of installing a Crucial SSD, offering an accessible upgrade to boost your laptop’s performance.
Whether you’re a tech novice or enthusiast, follow this clear and focused step-by-step process to seamlessly integrate a Crucial SSD into your laptop. Elevate your device’s speed and storage capability with this user-friendly installation guide.

Key Takeaway
Installing a Crucial SSD in Your Laptop: A Step-by-Step Guide
Requirements:
- Crucial SSD: Choose a compatible Crucial SSD for your laptop.
- Screwdrivers: Prepare Phillips screwdrivers (#00 and #000) for the installation process.
Step 1: Back Up Your Data
Before starting, safeguard your important data by creating a backup to prevent any potential loss.
Step 2: Power Off Your Laptop
Ensure your laptop is completely powered off and disconnect all external cables.
Step 3: Accessing the SSD Slot
Identify the location of the current SSD within your laptop.
Step 4: Removing Existing SSD
Carefully unscrew and remove the current SSD, gently disconnecting any attached cables.
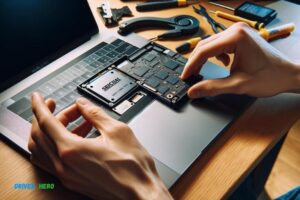
Step 5: Installing Crucial SSD
Connect the new Crucial SSD to the same slot, securing it in place with screws.
Step 6: Reconnecting Cables
Attach any cables you disconnected during the process to ensure proper connectivity.
Step 7: Assembling Your Laptop
Put back any covers or panels you removed and secure them with the appropriate screws.
Step 8: Power On Your Laptop
Switch on your laptop to verify that the Crucial SSD is correctly detected.
Conclusion
You’ve successfully installed a Crucial SSD in your laptop, enhancing its performance and storage capacity.
Preparing Your Laptop For Ssd Installation
Learn how to prepare your laptop for a smooth SSD installation with our easy step-by-step guide. Get your Crucial SSD up and running in no time for improved performance and storage capacity.
Backing Up Your Data
Before you make any changes to your laptop’s storage, it’s essential to backup your data to prevent any potential loss.
Here’s how you can do it:
- Connect an external hard drive or use cloud storage to back up all your important files, documents, and media.
- Use backup software or manually copy your files to the external storage device.
- Double-check that you have successfully backed up all necessary data before proceeding with the SSD installation.
Checking Hardware Compatibility
It’s important to ensure that your laptop is compatible with the Crucial SSD you intend to install.
Follow these steps to check hardware compatibility:
- Identify the specifications of your laptop, including the model name and number.
- Visit Crucial’s website or use their System Scanner tool to check if your laptop is compatible with the specific SSD model you want to install.
- Verify that your laptop has an available slot for the SSD or determine if any adapter or connector is required.
- Read the documentation or consult manufacturer support if you have any doubts or need further assistance.
By backing up your data and verifying hardware compatibility, you have taken the necessary precautions before proceeding with the Crucial SSD installation.
Configuring The Crucial SSD for Optimal Performance
Learn the step-by-step process of installing a Crucial SSD in your laptop for optimal performance. Maximize your device’s speed and storage capacity with this easy-to-follow guide.
Formatting The Ssd
To begin, formatting the SSD sets the groundwork for a smooth installation process.
Here’s how you can format your Crucial SSD:
- Connect the SSD to your laptop using a compatible cable.
- Boot up your computer and enter the BIOS settings.
- Locate the SSD in the BIOS and select it as the primary boot device.
- Save the changes and exit the BIOS.
- Restart your laptop and open the Disk Management utility.
- Identify the Crucial SSD in the list of available disks.
- Right-click on the SSD and choose the format option.
- Select your desired file system (NTFS is recommended) and click on Format.
- Wait for the formatting process to complete, and you’re ready to proceed.
Transferring Data From The Backup
After installing the operating system, it’s important to transfer your data from the backup to the Crucial SSD.
Here’s how you can accomplish this:
- Connect your backup storage device (such as an external hard drive) to your laptop.
- Copy the files and folders from the backup storage to the Crucial SSD.
- Make sure to organize your data appropriately, creating folders for different file types if needed.
- Verify that all your important files have been successfully transferred.
- Once the transfer is complete, safely disconnect the backup storage device.
By configuring your Crucial SSD for optimal performance, you can enhance your overall computing experience. Remember to format the SSD, meticulously install the operating system, and securely transfer your data from the backup.
Troubleshooting Ssd Installation Issues
If you’re experiencing issues when installing a Crucial SSD in your laptop, this troubleshooting guide will help you resolve them quickly and easily.
Common Problems And Their Solutions:
- Compatibility issues: Check the manufacturer’s website or user manual for compatibility information. If your laptop is not compatible, you may need to consider purchasing a different SSD or consult a professional technician.
- Improper connection: Double-check that the Crucial SSD is correctly connected to your laptop’s motherboard. Ensure that all cables and connectors are securely attached. If the connection is loose, reseat the SSD and try again.
- BIOS/UEFI settings: Sometimes, your laptop’s BIOS/UEFI settings may need to be adjusted to recognize the new SSD. Access your laptop’s BIOS/UEFI menu by restarting your laptop and pressing the designated key (check your laptop’s user manual for the specific key).
- Insufficient power supply: In some cases, an SSD may not function properly due to inadequate power supply. Make sure your laptop’s battery is sufficiently charged or connect your laptop to the AC power adapter during installation.
- Drive formatting: If your Crucial SSD is not recognized by your laptop or operating system, it might require formatting. Access the Disk Management utility (for Windows) or Disk Utility (for macOS) to format the SSD and assign it a drive letter or mount point.
- Outdated firmware: Outdated firmware can often lead to compatibility issues or performance problems. Visit the manufacturer’s website and download the latest firmware for your Crucial SSD model.
Remember, these troubleshooting tips should help you overcome common issues during the SSD installation process.
However, if you’re still facing challenges or are unsure about any step, it’s always a good idea to seek professional assistance from a qualified technician.
Tips For Maximizing The Performance Of Your Crucial Ssd
Follow these simple steps to install a Crucial SSD and maximize its capabilities. Crucial SSDs are known for their high performance and reliability, and with a few simple tweaks, you can ensure that your SSD is running optimally.
Updating Firmware And Drivers:
- Regularly check for firmware updates for your Crucial SSD. Firmware updates often bring performance improvements and bug fixes that can enhance the overall functionality of your SSD.
- Visit the Crucial website and download the latest firmware specifically designed for your Crucial SSD model.
- Ensure that your laptop’s operating system and drivers are up to date. Outdated drivers can affect the performance of your SSD.
- Update the storage controller driver for your SSD to ensure compatibility and optimal performance.
Enabling Trim Support:
- TRIM is a feature in SSDs that helps maintain optimal performance by erasing unwanted data blocks and freeing up space. However, it needs to be enabled on your system.
- To enable TRIM on Windows, open the Command Prompt as an administrator and type “fsutil behavior set DisableDeleteNotify 0” and press Enter. This will enable TRIM support for your Crucial SSD.
- For macOS users, TRIM is usually enabled by default. However, you can verify this by opening the Terminal and entering the command “sudo trimforce enable.”
Implementing Regular Maintenance Practices:
- Keep your Crucial SSD and laptop clean from dust and debris. Overheating can impact the performance of your SSD.
- Avoid unnecessary disk writes and reduce the number of file transfers to maximize the lifespan of your SSD.
- Regularly check for and repair any file system errors that may occur. This can be done using the built-in disk utility tools on your operating system.
- Monitor the health of your Crucial SSD using suitable software tools. This will help you identify any potential issues and take appropriate action promptly.
By following these tips, you can ensure that your Crucial SSD performs at its best and delivers the speed and reliability you expect from this high-quality storage solution. Happy computing!
Conclusion
Upgrading your laptop with a Crucial SSD can greatly enhance its performance and overall user experience.
With the step-by-step guide provided in this blog post, you should now have a clear understanding of how to install the SSD in your laptop. Remember to back up your data and follow safety precautions during the installation process.
By selecting the appropriate capacity and model for your needs, you can ensure faster boot times, improved multitasking capability, and seamless storage management.
Not only will your laptop benefit from increased speed and efficiency, but you will also have a more reliable and durable storage solution.

Harold Williams is a senior writer and technical editor at Drives Hero with 20+ years of experience in IT administration. He specializes in storage systems, SSD reviews, and performance testing, bringing real-world insight to every guide.