How to Install M 2 Ssd in Desktop? 10 Easy Steps!
To install an M.2 SSD in a desktop computer, you will need to follow a series of steps including preparing the necessary items, opening the computer case, locating the M.2 slot on the motherboard, installing the SSD, and connecting it to the power supply.
M.2 SSDs (Solid State Drives) are a small form factor storage device that connect directly to the motherboard using an M.2 slot.
They offer faster read and write speeds compared to traditional SATA drives, resulting in improved performance and boot time for your desktop computer.
Here’s how to install an M.2 SSD in a desktop:
Before installing an M.2 SSD, always ensure that your desktop’s motherboard has an M.2 slot available for use. If not, you may need to purchase an M.2 to PCIe adapter to complete the installation.
Moreover, it is crucial to ground yourself by using an ESD wrist strap or frequently touching a metal part of the computer case to prevent any potential electrostatic discharge damage to the components.
Once the installation is complete, you may need to access the BIOS or UEFI settings to configure the new SSD as your primary boot drive.
10 Easy Steps to Install M 2 SSD in Desktop
| Steps | Instructions |
|---|---|
| 1 | Turn off the computer and unplug it |
| 2 | Open the computer case |
| 3 | Locate the M.2 slot on the motherboard |
| 4 | Remove the screw from the M.2 slot if necessary |
| 5 | Take the M.2 SSD carefully without touching the gold connector pins |
| 6 | Insert the M.2 SSD into the slot. Make sure it is inserted correctly |
| 7 | Secure the M.2 SSD with the screw that was previously removed |
| 8 | Close the computer case |
| 9 | Plug the computer back in and turn it on |
| 10 | The computer should automatically detect the new M.2 SSD. If not, you may need to format it through the operating system |
Key Takeaway

Five Facts About Installing M 2 SSD in Desktop
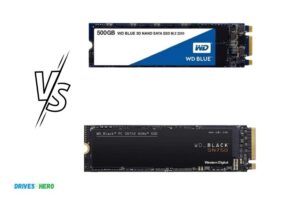
Types Of M.2 Ssds
M. 2 ssds are a great way to upgrade your desktop’s storage capacity and speed. Compared to traditional sata drives, m. 2 ssds are faster and more compact, and they come in different types and sizes.
We’ll discuss the different types of m. 2 ssds and how to install them on your desktop.
Single-Sided
Single-sided m. 2 ssds are the most common type of m. 2 ssds. As the name suggests, they only have components on one side of the pcb (printed circuit board). Single-sided m. 2 ssds are usually shorter and thinner than double-sided m.2 ssds.
Here are some key points to remember about single-sided m. 2 ssds:
- They are easier to install.
- They usually have lower storage capacities.
- They generate less heat than double-sided m.2 ssds.
- They are more compatible with thin laptops and desktops.
Double-Sided
Double-sided m. 2 ssds have components on both sides of the pcb. They are usually longer and thicker than single-sided m. 2 ssds.
Double-sided m. 2 ssds can have higher storage capacities than single-sided m. 2 ssds, but they can also generate more heat.
Here are some key points to remember about double-sided m. 2 ssds:
- They can have higher storage capacities.
- They generate more heat than single-sided m.2 ssds.
- They can cause compatibility issues with thinner laptops and desktops.
- They are more challenging to install than single-sided m.2 ssds.
M. 2 ssds come in different types and sizes, and choosing the right type of m. 2 ssd depends on your needs and your desktop’s compatibility.
Make sure you check your motherboard’s specifications and choose an m. 2 ssd that matches the interface and length of your motherboard’s m.
2 slot. Follow the manufacturer’s instructions closely when installing your m. 2 ssd to avoid damaging your components. With these tips in mind, you can enjoy faster boot times, quicker application launches, and a better overall computing experience.
Gather The Necessary Tools And Materials
M.2 Ssd
If you’re a gamer, graphic designer, or video editor, you’ll definitely want to install an m. 2 ssd in your desktop. But before we delve into the installation process, let’s define what an m. 2 ssd is.
An m. 2 ssd, also known as a next generation form factor (ngff) ssd, is a solid-state drive in a compact pci express (pcie) form factor. It can operate at a faster speed than a standard ssd drive, making it an excellent choice for those who require lightning-fast data transfer.
To get started with installing an m. 2 ssd in your desktop, the first step is to gather all necessary tools and materials.
Screwdriver Set
You will need a screwdriver set to open your computer case and install the m. 2 ssd. It’s essential to use the appropriate size and type of screwdriver to avoid damaging your computer.
Anti-Static Wrist Strap
When handling computer components, it’s crucial to discharge any static electricity that may harm your computer. An anti-static wrist strap is a must-have item to prevent any electrical damage to your desktop.
Now that we’ve gathered all necessary tools and materials let’s move on to the installation process. Remember, handling computer components requires patience, skill, and care. Follow the instructions carefully to ensure you don’t damage any components.
Step-By-Step Guide To Installing The M.2 Ssd
How To Install M.2 Ssd In Desktop: Step-By-Step Guide
Are you planning to upgrade your desktop’s storage system? Installing an m. 2 ssd is an excellent way to boost your machine’s speed and performance. With this guide, we’ll show you how to install an m. 2 ssd into your desktop.
Insert The M.2 Ssd Into The M.2 Slot
Before getting started, make sure your desktop motherboard is compatible with an m. 2 slot. Most modern motherboards come with at least one m. 2 slot.
Once you have confirmed compatibility, follow these simple steps to install the m. 2 ssd into the slot:
- First, locate the m.2 slot on the motherboard. It looks like a small horizontal slot.
- Next, take the m.2 ssd and align it with the slot. Make sure it matches the key on the slot, and the pins are lined up correctly.
- Gently push the m.2 ssd into the slot until it clicks into place.
Secure The M.2 Ssd With The Screw
Now that the m. 2 ssd is securely in place, the next step is to secure it with the screw. The screw usually comes with the motherboard or the ssd.
To secure the m. 2 ssd, follow these simple steps:
- First, locate the screw hole on the m.2 ssd.
- Next, locate the screw standoff on the motherboard. If there is no standoff, locate the designated screw hole on the motherboard instead.
- Screw the m.2 screw into the standoff or the designated screw hole. Do not overtighten the screw, or you risk damaging the ssd.
Reassemble Your Desktop
With the m. 2 ssd secured, it’s time to reassemble your desktop.
Follow these simple steps:
- Replace the desktop’s cover and secure it with the screws.
- Reconnect all the cables you disconnected while accessing the motherboard.
- Finally, turn on your desktop to make sure everything is functioning correctly.
Install The Os On The M.2 Ssd
Congratulations, you have successfully installed the m. 2 ssd into your desktop. Now, you need to install the operating system (os) on it.
Follow these steps:
- Insert the bootable os installation media, such as a usb flash drive or dvd, into your desktop.
- Configure the bios settings to boot from the installation media.
- Follow the os installation wizard instructions, select the m.2 ssd as the installation destination, and complete the installation process.
By following these simple steps, you can enjoy the increased speed and performance that comes with installing an m. 2 ssd into your desktop. Happy computing!
FAQ About Installing M 2 Ssd In Desktop
What Is An M.2 Ssd?
An m. 2 ssd is a solid-state drive that uses the m. 2 form factor for storage.
Why Should I Install An M.2 Ssd In My Desktop?
Installing an m. 2 ssd in your desktop can greatly improve your computer’s overall performance and speed.
What Tools Do I Need To Install An M.2 Ssd In My Desktop?
To install an m. 2 ssd in your desktop, you will need a phillips head screwdriver and possibly a mounting screw if one is not already included with your ssd.
Is It Difficult To Install An M.2 Ssd In My Desktop?
Installing an m. 2 ssd in your desktop is a fairly simple process that can be completed in just a few minutes by following the proper steps.
Conclusion
Now that you have learned how to install m. 2 ssd in the desktop, you can experience the speed and storage of nvme technology. This hardware upgrade is guaranteed to improve the performance of your computer. Just follow the above steps carefully and enjoy a faster data transfer rate, shorter boot times and improved overall system performance.
We hope this guide has been helpful to you and if you have any queries or suggestions, feel free to leave them in the comments section. Always remember to handle your ssd with care and follow the manufacturer’s guidelines for safe installation.
A well-installed m. 2 ssd can last for many years and elevate your computing experience to new heights. With this upgrade, you can take on more complex tasks and enjoy greater productivity. Upgrade your desktop today!

Harold Williams is a senior writer and technical editor at Drives Hero with 20+ years of experience in IT administration. He specializes in storage systems, SSD reviews, and performance testing, bringing real-world insight to every guide.