How To Move Games To SSD Without Redownloading
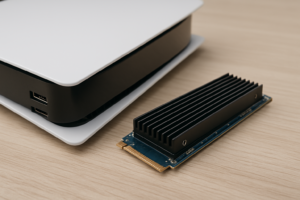
You just bought a shiny new SSD, and the first thing you want to do is move your most-played games onto it. Faster load times, smoother texture streaming, and quicker fast-travel in open world games. But when you look at your game library, the idea of redownloading 500 GB worth of titles sounds painful, especially if your internet connection isn’t exactly blazing fast.
The good news is that you don’t have to redownload anything. Every major game launcher has a way to relocate your installed games to a different drive, and most of them have built-in tools that make it pretty simple. For the launchers that don’t, there’s a reliable workaround using symbolic links that tricks the software into thinking nothing changed.
This guide walks you through moving games on Steam, Epic Games Store, EA App, Ubisoft Connect, GOG Galaxy, and the Xbox app. I’ll also cover what to do when a launcher doesn’t offer a built-in move feature, and how to verify everything works correctly after migration.
Before You Start: Prep Your SSD
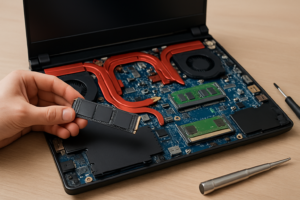
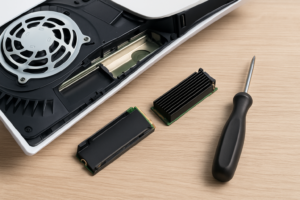
Before moving any games, you’ll want to make sure your SSD is formatted, assigned a drive letter, and has enough free space. If you just installed a new NVMe or SATA SSD, open Disk Management in Windows (right-click the Start button and select it) to initialize and format the drive.
Create a dedicated folder on your SSD for game storage. Something like D:\Games or E:\GameLibrary works well. Keeping things organized from the start saves headaches later when you have games spread across multiple launchers.
One more thing: close the game you want to move before starting the process. This sounds obvious, but some launchers won’t let you move a game that’s currently running or updating.
Moving Steam Games to Your SSD
Steam has one of the best built-in move features of any launcher. Valve added this years ago, and it works reliably.
Step 1: Add a New Steam Library Folder
Open Steam and go to Steam > Settings > Storage. You’ll see your current drive listed at the top. Click the + button next to it and select your SSD from the dropdown. Steam will create a new steamapps folder on that drive automatically.
Step 2: Move the Game
Go to your Library, right-click the game you want to move, and select Properties. Click the Installed Files tab, then hit Move Install Folder. Choose your new SSD library location and click Move.
Steam will copy all the files to the new location and clean up the old ones. For a 50 GB game on an internal SATA SSD, this typically takes a few minutes. Moving between two NVMe drives on PCIe 4.0 is significantly faster.
Moving Multiple Steam Games at Once
Steam also supports batch moves. Go to Steam > Settings > Storage, select the drive your games are currently on, check the boxes next to multiple games, and click Move. This is a huge time-saver if you’re migrating a big chunk of your library at once.
Moving Epic Games Store Titles
Epic added a built-in move feature relatively recently. Before that, you had to resort to workarounds, but the process is clean these days.
Open the Epic Games Launcher, go to your Library, click the three dots on the game you want to move, and select Manage. You’ll see a Move button. Click it, choose the destination folder on your SSD, and let it do its thing.
If you don’t see the Move option, make sure your launcher is updated to the latest version. Epic has been iterating on this feature, and older versions may not have it.
Moving Games on the Xbox App (PC Game Pass)
The Xbox app on Windows handles things a little differently because of how Microsoft packages its games. These titles are installed as encrypted Windows apps, which means you can’t just drag and drop folders.
Using the Built-in Move Feature
Open the Xbox app, go to your installed games list by clicking My Collection and then Installed. Click the three dots next to the game and choose Manage. You should see an option to Move the game to another drive.
Alternatively, you can use Windows Settings. Go to Settings > Apps > Installed apps, find the game, click the three dots, and select Move. This works because Xbox games are technically Microsoft Store apps under the hood.
Setting Your Default Install Drive
To avoid having to move future Game Pass titles, open the Xbox app, click your profile icon, go to Settings > General, and change the default install location to your SSD. Every new game you install will go there automatically.
Moving EA App Games
EA replaced Origin with the EA App, and the move process changed slightly. Unfortunately, the EA App doesn’t have the most intuitive move feature.
Open the EA App, click on My Collection, find the game, click the three dots, and select Move Game. Choose your SSD as the destination. The app will handle the file transfer and update its internal paths.
If the Move option isn’t showing up (this happens occasionally with the EA App), you can use the manual method. Copy the game folder to your SSD, uninstall the game through the EA App (don’t delete the files you just copied), then reinstall and point the install path to where you placed the files. The app will detect the existing files and verify them instead of redownloading.
Moving Ubisoft Connect Games
Ubisoft Connect doesn’t have a built-in move button, which is frustrating in 2024. But there’s a reliable manual method that works every time.
- Close Ubisoft Connect completely (check your system tray to make sure it’s not running in the background).
- Move your game folder from its current location to your SSD. For example, move C:\Program Files\Ubisoft\Ubisoft Game Launcher\games\Assassins Creed Valhalla to D:\Games\Assassins Creed Valhalla.
- Open Ubisoft Connect. It will notice the game is “missing” and show it as uninstalled.
- Click Install on the game and set the install location to the folder on your SSD where you just moved the files.
- Ubisoft Connect will detect the existing files and verify them. No redownloading required.
This process works for every Ubisoft title I’ve tested, including large installs like Far Cry 6 and Rainbow Six Siege.
Moving GOG Galaxy Games
GOG Galaxy added a move feature that works similarly to Steam’s approach. Right-click a game in your library, go to Manage Installation > Move, and pick your SSD. The client handles everything.
If you’re using standalone GOG installers (without Galaxy), your games are just regular folders with no DRM. You can literally copy them to any location and run the executable directly. It doesn’t get simpler than that.
The Symbolic Link Method: Your Universal Fallback
Some launchers don’t offer built-in move tools, and some games hardcode their install paths. When you hit a wall, symbolic links (symlinks) are your best friend. A symbolic link is essentially a shortcut on steroids. It tells Windows, “When anything tries to access this folder, actually go to this other folder instead.” The application has no idea the files have been moved.
How to Create a Symbolic Link
- Move the game folder from its original location to your SSD. For example, move C:\Games\SomeGame to D:\Games\SomeGame.
- Open Command Prompt as Administrator (search for “cmd” in the Start menu, right-click, Run as administrator).
- Type the following command:
mklink /D "C:\Games\SomeGame" "D:\Games\SomeGame" - Press Enter. Windows will create a symbolic link at the original location that points to the new one.
The first path in the command is where the symlink will be created (the old location). The second path is where the files actually live (your SSD). Make sure the original folder has been moved or deleted before creating the symlink, because the command won’t work if a folder already exists at that path.
When to Use Symbolic Links
I recommend symlinks for games installed through launchers that lack a move feature, older games that expect to be in a specific directory, and modded games where changing the install path might break mod configurations. For most major launchers in 2024, the built-in move features work well enough that you won’t need symlinks. But it’s a great technique to keep in your back pocket.
Verifying Game Files After Migration
After moving any game, you should always verify the file integrity. This catches any files that got corrupted during the copy process. It’s rare, but it happens, and discovering a corrupted file mid-boss-fight is not how you want to spend your evening.
Here’s how to verify files on each launcher:
- Steam: Right-click the game > Properties > Installed Files > Verify integrity of game files
- Epic Games: Click the three dots on the game > Manage > Verify
- EA App: Click the three dots on the game > Repair
- Ubisoft Connect: Click the game > Properties > Verify files
- GOG Galaxy: Right-click the game > Manage Installation > Verify / Repair
- Xbox App: Not available directly, but you can use the Windows “Reset” option under Settings > Apps if something goes wrong
Verification usually takes just a few minutes per game and gives you confidence that everything transferred correctly.
Recommended SSDs for Game Storage
If you’re still shopping for an SSD, here are my top picks for game storage specifically:
- Samsung 990 Pro (NVMe, PCIe 4.0): Best overall for a primary gaming drive. Fast sequential reads (up to 7,450 MB/s) and excellent sustained performance. Available in 1 TB and 2 TB. Check current pricing on Amazon.
- WD Black SN770 (NVMe, PCIe 4.0): A strong value option with great real-world gaming performance. Slightly slower than the 990 Pro on paper, but you won’t notice a difference in load times. Check current pricing on Amazon.
- Samsung 870 EVO (SATA): If your PC only has SATA connections or you’re using an external enclosure, this is the SATA SSD to get. It won’t match NVMe speeds, but it’s still dramatically faster than a hard drive for game loading. Check current pricing on Amazon.
For most people, a 2 TB NVMe drive hits the sweet spot. It’s large enough to hold 15 to 20 modern AAA games without constantly juggling installs.
Tips for Managing Games Across Multiple Drives
Once you start splitting your library between an SSD and a hard drive (or multiple SSDs), a little organization goes a long way.
- Keep your most-played games on the SSD. Multiplayer titles and games with long load screens benefit the most from fast storage.
- Archive finished single-player games on a hard drive. You can always move them back if you want to replay them.
- Use Steam’s Storage Manager (Settings > Storage) to see at a glance how much space each game uses and where it’s installed. It’s one of the best library management tools across any launcher.
- Don’t fill your SSD past 90% capacity. SSDs slow down noticeably when they’re nearly full because the controller runs out of free blocks for write operations.
Frequently Asked Questions
Will moving a game to an SSD delete my save files?
In most cases, no. The majority of modern games store save files in your Documents folder, AppData, or in the cloud (Steam Cloud, Epic Cloud Saves, etc.), which are completely separate from the game installation directory. There are a few older or indie games that store saves inside the game folder itself. To be safe, check whether your saves are in the game directory before moving, and back them up if they are.
Can I move games to an external SSD connected via USB?
Yes, and it works well with a USB 3.1 Gen 2 or USB 3.2 Gen 2 enclosure. You’ll get read speeds up to around 1,000 MB/s, which is slower than an internal NVMe drive but still much faster than a mechanical hard drive. The Samsung T7 Shield is a solid portable option if you don’t want to deal with enclosures. Keep in mind that the Xbox app can be finicky with external drives for Game Pass titles, so test it before committing your whole library.
Do I need to update any shortcuts or mod managers after moving a game?
Desktop shortcuts created by launchers like Steam usually still work because they reference the game’s Steam App ID, not the file path directly. Custom shortcuts or mod managers (like Vortex or Mod Organizer 2) typically need to be updated with the new file path. If you use symbolic links, mod managers should continue to work without changes since the original path still technically resolves to the correct location.
How much faster will my games load on an SSD compared to a hard drive?
It depends on the game, but the improvement is significant. In real-world testing, games like Cyberpunk 2077 see load times drop from 30+ seconds on a 7200 RPM HDD to about 8 to 10 seconds on a SATA SSD, and under 5 seconds on a fast NVMe drive. Open world games with lots of asset streaming, like Elden Ring or Starfield, benefit the most. You’ll also see fewer texture pop-in issues and smoother performance when moving quickly through large environments.
James Kennedy is a writer and product researcher at Drives Hero with a background in IT administration and consulting. He has hands-on experience with storage, networking, and system performance, and regularly improves and optimizes his home networking setup.