How to Partition External Ssd: 10 Steps!
Partitioning an external SSD involves creating separate, distinct storage areas in the drive.
The process can be accomplished using built-in utilities in your operating system such as Disk Management on Windows or Disk Utility on MacOS.
Partitioning your external SSD allows you to divide your external SSD into two or more independent sections known as partitions.
Each partition can be used as a separate disk and can even have different file systems.
This is particularly useful if you want to use your SSD for multiple functions, for instance, running a different operating system, segregating personal files, or for improving your computer’s performance.
Partitioning an external SSD allows maximum utilization of storage space.
You can keep your work files in one partition and personal files in another.
Furthermore, if you’re a software developer or a dual OS user, you can use one partition to run a different OS, helping you keep your projects separate and organized.
However, improper partition could result in data loss, so always backup important data before partitioning your SSD.
10 Steps: Partitioning an External SSD
| Steps | Description |
|---|---|
| 1. Connect SSD | Connect the external SSD to your computer |
| 2. Open Disk Management | On Windows, open Disk Management; on Mac, open Disk Utility |
| 3. Select SSD | Select the SSD you wish to partition from the list of available drives |
| 4. Start Partitioning | Click on ‘Partition’ button |
| 5. Choose Partition Size | Specify the size of the partition for your SSD |
| 6. Assign Drive Letter/Name | Assign a drive letter on Windows, or a name on Mac |
| 7. Select File System | Choose a file system format (NTFS for Windows, Mac OS Extended for Mac) |
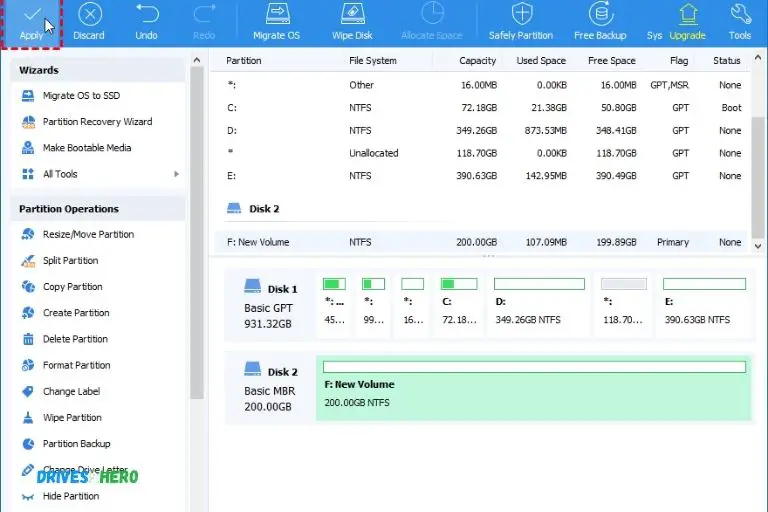
| 8. Apply Settings | Click on ‘Apply’ or ‘OK’ to apply the partition settings |
| 9. Confirm Partition | Confirm your action in the following pop-up window |
| 10. Completion | Once the process is completed, your SSD should now be partitioned. |
Key Takeaway
Five Facts About: Partitioning an External SSD
Understanding The Benefits Of Partitioning Ssds
Discover the advantages of partitioning external SSDs, ensuring efficient storage organization and seamless data management.
Explore step-by-step guides on how to partition your SSD for enhanced productivity and optimized performance.
Improve your storage experience with easy-to-follow techniques and maximize the potential of your external SSD.
Increased Storage Management Flexibility:
- Partitioning your external SSD provides you with increased storage management flexibility.
- By dividing the drive into multiple partitions, you can allocate specific amounts of space for different purposes or categories of files.
- Each partition can have its own file system, allowing you to customize it according to your needs.
- With this flexibility, you can easily organize and manage your data more efficiently without cluttering up your entire drive.
Here are some benefits of increased storage management flexibility by partitioning your SSD:
- Utilize different partitions for various purposes such as work, personal, or multimedia.
- Protect important files by separating them from other data.
- Easily back up and restore specific partitions without affecting the other data on the drive.
- Allocate space proportionately to different data types, based on their importance or frequency of use.
Enhanced Data Organization And Accessibility:
- Partitioning your external SSD enhances data organization and accessibility, making it easier to locate and access files.
- By categorizing your files into different partitions, you can keep related data in specific sections, saving you time and effort when searching for specific documents.
Here are some benefits of enhanced data organization and accessibility through SSD partitioning:
- Efficiently organize your personal and professional files, reducing clutter and increasing productivity.
- Streamline data access by grouping files based on their nature or usage.
- Facilitate easier file transfers between devices, as you can assign specific partitions for specific purposes.
- Simplify sharing files with others by having separate partitions for shared data.
Improved System Performance And Response Time:
- Partitioning your external SSD can significantly improve your system’s performance and response time.
- By dividing the drive into smaller partitions, the operating system can locate and retrieve data more quickly, resulting in faster loading times and better overall system performance.
Here are some benefits of improved system performance and response time through SSD partitioning:
- Faster boot times, as the operating system can locate required files more efficiently.
- Reduced risk of file fragmentation, leading to faster file access and reduced data fragmentation.
- Enhanced multitasking capabilities, as your system can access data simultaneously from multiple partitions.
- Improved gaming experience, with quicker loading times and smoother gameplay.
Give partitioning a try and experience the benefits of increased storage management flexibility, enhanced data organization and accessibility, and improved system performance and response time with your external SSD.
With these advantages, you’ll be able to make the most out of your storage device and optimize your workflow.
Happy partitioning!
Preliminary Preparations
Discover the essential steps to partitioning an external SSD for optimal performance and organization.
Learn how to efficiently allocate storage space and effectively manage your data with this comprehensive guide.
Before you begin partitioning your external SSD, there are a few preliminary preparations you should undertake to ensure a smooth and successful process.
These preparations include:
Backing Up Important Data:
- Prioritize the safety of your data by creating a backup before proceeding with the partitioning process.
- Use an external storage device or cloud-based service to store copies of your important files and documents.
- By backing up your data, you can safeguard against any potential data loss or corruption that could occur during the partitioning process.
Formatting The External Ssd:
- Format the external SSD to remove any existing partitions and data.
- Connect the SSD to your computer and open the Disk Management tool (on Windows) or use the Disk Utility (on macOS).
- Locate the external SSD in the list of connected drives and select the option to format it.
- Follow the on-screen prompts to choose the desired file system (such as NTFS for Windows or macOS Extended for macOS) and complete the formatting process.
Understanding Different Partitioning Methods:
There are different partitioning methods available, and it is essential to have a clear understanding of each one to choose the most suitable option for your needs.
Some common partitioning methods include:
- MBR (Master Boot Record): This method allows for compatibility with older systems but has limitations on the number of partitions and maximum partition size.
- GPT (GUID Partition Table): GPT is the newer and more advanced method, allowing for larger partition sizes and increased flexibility.
- Basic vs. Dynamic: Basic partitions are simpler and suitable for most users, while dynamic partitions offer advanced features like volume expansion and data redundancy.
Remember, understanding the different partitioning methods will help you make an informed decision and ensure that your external SSD serves your specific requirements.
In this preliminary phase, it is vital to back up your important data, format your external SSD, and have a good understanding of the different partitioning methods available.
Once you have completed these preparations, you can proceed confidently with partitioning your external SSD according to your needs.
Step-By-Step Guide: Partitioning Your External Ssd
Learn how to partition your external SSD with this step-by-step guide. Maximize your storage space effectively and efficiently.
Step 1: Accessing Disk Management (Windows) Or Disk Utility (Mac)
To begin partitioning your external SSD, you first need to access the disk management tool on Windows or the disk utility on Mac.
Follow these steps:
For Windows:
- Go to the Start menu and search for “Disk Management.”
- Click on “Create and format hard disk partitions” from the search results.
- The Disk Management window will open.
For Mac:
- Go to the Applications folder and open the Utilities folder.
- Look for the Disk Utility application and launch it.
- The Disk Utility window will open.
Step 2: Selecting The External Ssd And Initializing It (If Required)
Once you have opened the disk management tool, the next step is to select your external SSD and initialize it if necessary.
Here’s how:
- Locate your external SSD in the list of available disks or drives.
- If the SSD is shown as “Not Initialized” or “Unallocated” on Windows, right-click on it and select “Initialize Disk.” Choose the appropriate disk format.
- On Mac, click on the external SSD and go to the Erase tab. Select the desired format and click on the “Erase” button.
Step 3: Creating A New Partition
With your external SSD selected and initialized, it’s time to create a new partition.
Follow these instructions:
On Windows:
- Right-click on the unallocated space of your external SSD.
- Select “New Simple Volume” from the context menu.
- Follow the on-screen instructions to specify the partition size and assign a drive letter.
On Mac:
- Click on the external SSD in the Disk Utility window.
- Go to the Partition tab and click on the “+” button to add a new partition.
- Adjust the size of the partition as needed and give it a name.
Step 4: Assigning A Drive Letter Or Mount Point
After creating a new partition, you need to assign a drive letter (Windows) or a mount point (Mac) to it.
Here’s how:
On Windows:
- Right-click on the partition and select “Change Drive Letter and Paths.“
- Click on the “Add” button and choose a drive letter from the drop-down list.
- Click “OK” to assign the drive letter.
On Mac:
- Click on the partition in the Disk Utility window.
- Go to the Info tab and click on the “Mount Point” field.
- Choose a mount point for the partition.
Step 5: Formatting The Partition With The Desired File System
Now that you have assigned a drive letter or mount point, the next step is to format the partition with the desired file system.
Follow these instructions:
On Windows:
- Right-click on the partition and select “Format.”
- Choose the desired file system (e.g., NTFS, exFAT) and allocation unit size.
- Click “OK” to format the partition.
On Mac:
- Click on the partition in the Disk Utility window.
- Go to the Erase tab and choose the desired format.
- Click on the “Erase” button to format the partition.
Step 6: Adjusting Partition Sizes, If Needed
If you need to adjust the partition sizes on your external SSD, follow these steps:
On Windows:
- Right-click on the partition and select “Extend Volume” or “Shrink Volume” to adjust the size as needed.
- Follow the on-screen instructions to complete the process.
On Mac:
- Click on the partition in the Disk Utility window.
- Go to the Partition tab and adjust the size of the partition by dragging the resize handle.
- Click on the “Apply” button to save the changes.
By following these step-by-step instructions, you can easily partition your external SSD and optimize its storage capabilities according to your specific needs.
Tips For Effective Ssd Partitioning
Discover effective strategies for partitioning external SSDs with these expert tips.
Learn how to optimize storage space, improve performance, and organize your data efficiently for maximum productivity.
Gain insights on the best practices for SSD partitioning to enhance your overall computing experience.
When it comes to partitioning your external SSD, there are a few tips that can help you make the most of your storage space and optimize its performance.
By allocating appropriate partition sizes for specific uses, considering the number and size of partitions, using logical drives for better organization, and avoiding over-partitioning, you can ensure efficient utilization of your SSD.
So, let’s delve into these tips:
Allocating Appropriate Partition Sizes For Specific Uses:
System Partition:
Allocate a significant portion of your SSD for the system partition. This is where your operating system and essential software are installed.
Programs Partition:
Reserve a partition exclusively for software applications. Dedicate ample space to accommodate your frequently used programs.
Data Partition:
Create a separate partition to store your personal data, such as documents, photos, and videos. This will help prevent data loss in case of system issues.
Games Partition:
If you’re an avid gamer, considering creating a dedicated partition for storing game installations.
Games can consume a considerable amount of space, so allocating a specific partition can keep them organized and ensure smooth gaming performance.
Considering The Number And Size Of Partitions:
Number of Partitions:
Avoid creating an excessive number of partitions as this can lead to storage fragmentation and decrease overall performance. Strive to find a balance between organization and practicality.
Partition Size:
Determine the appropriate sizes for your partitions based on your needs.
Be mindful not to allocate too little or too much space for each partition. Aim for a balance that allows for future growth and avoids wastage.
Using Logical Drives For Better Organization:
Categorize by Purpose:
Create logical drives within each partition to organize your files further. For example, within the data partition, you can have separate logical drives for documents, photos, and videos.
Simplify Navigation:
Logical drives offer a convenient way to locate files quickly, making it easier to manage and access your data.
Avoiding Over-Partitioning:
Carefully Plan Partitions:
Before creating multiple partitions, assess your requirements and consider whether having additional partitions is truly necessary.
Over-partitioning can lead to complexities and reduced overall storage capacity.
Optimize Space Utilization:
Instead of spreading your data across numerous small partitions, consider consolidating them into larger ones. This approach can enhance performance and provide more flexibility.
Remember, effective SSD partitioning involves finding the right balance between organization, performance, and optimizing storage space.
By allocating appropriate partition sizes, considering the number and size of partitions, and using logical drives, you can ensure a well-structured and efficient external SSD setup.
Troubleshooting Common Partitioning Issues
Looking for solutions to common partitioning issues on your external SSD? Learn how to efficiently partition your SSD with these troubleshooting tips.
Partitioning an external SSD can be a useful way to organize and optimize your storage space.
However, it’s not uncommon to encounter some issues during the process.
In this section, we will discuss the common problems people face while partitioning their external SSDs and explore potential solutions.
Partition Not Recognized By The Operating System
When you connect your freshly partitioned external SSD to your computer, it can be frustrating to find that it is not recognized by the operating system.
Here are a few things you can try to resolve this issue:
- Ensure that the SSD is properly connected to your computer through a functioning USB cable or port.
- Check if the SSD is compatible with your operating system. Some older SSD models may require additional drivers to be installed.
- Verify that the partitioning process was completed successfully. You can do this by checking the partition table using disk management tools.
- If the partition is still not recognized, you may need to format the SSD and repeat the partitioning process.
Errors During Partition Creation
Errors can occur when creating partitions on your external SSD, leading to a frustrating roadblock.
Here are a few common reasons for errors and how to address them:
- Check if there is enough free space on your SSD to accommodate the new partition. Insufficient space can cause errors during partition creation.
- Scan your SSD for any potential errors or bad sectors using disk utility tools. Fixing these issues can resolve any errors encountered during partition creation.
- Ensure that you have the necessary permissions to create partitions on your SSD. Running partitioning software as an administrator might be required.
Inability To Modify Or Resize Partitions
Sometimes, you may find yourself unable to modify or resize partitions on your external SSD.
Here’s how you can troubleshoot this problem:
- Verify that the partition you are trying to modify is not being used or accessed by any process or application. Close any open files or programs associated with the partition.
- Check if your partitioning software is up to date. Outdated software may not support certain partition modifications.
- Ensure that you have the required privileges and permissions to make changes to the partition. Running the partitioning software as an administrator might solve the issue.
Data Loss During Partitioning Process
One of the worst fears when partitioning an external SSD is the risk of data loss.
Here are a few steps you can take to minimize this risk:
- Before starting the partitioning process, ensure that you have a backup of all important data on your SSD. This will provide a safety net in case of any mishaps.
- Follow the partitioning instructions carefully and double-check your actions before proceeding. One wrong click can potentially erase your data.
- Consider using reliable and trusted partitioning software to minimize the chances of data loss.
- If data loss does occur, avoid further partition modifications and seek professional data recovery services to increase the chances of retrieving your lost files.
By understanding and troubleshooting these common partitioning issues, you can navigate the process more smoothly and ensure the optimal performance of your external SSD.
Remember to proceed with caution and always back up your data before making any changes to your partitions.
Advanced Partitioning Techniques
Learn the advanced partitioning techniques for partitioning your external SSD effectively.
This guide will help you optimize your storage space and improve the performance of your SSD.
Partitioning an external SSD can offer various benefits, such as creating multiple partitions for dual-boot systems, utilizing different file systems for specific partitions, and utilizing partitioning software for advanced partition management.
In this section, we will explore these techniques in detail.
Creating Multiple Partitions For Dual-Boot Systems:
- Divide your external SSD into separate partitions to run multiple operating systems.
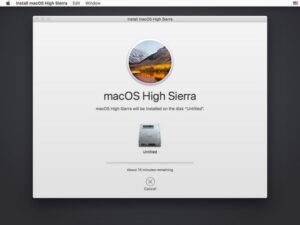
- Install macOS on one partition and Windows on another to have a dual-boot system.
- This allows you to switch between operating systems without interference.
- Keep in mind that you need to allocate sufficient storage space for each partition.
Utilizing Different File Systems For Specific Partitions:
- Choose the appropriate file system for each partition based on your requirements.
- NTFS is commonly used for Windows systems due to its compatibility and security features.
- For macOS systems, consider using APFS (Apple File System) for optimal performance.
- Use ex FAT if you need cross-platform compatibility between Windows and macOS.
- FAT32 is suitable for partitions that will be frequently accessed by multiple devices.
Utilizing Partitioning Software For Advanced Partition Management:
- Partitioning software offers advanced features for managing partitions effectively.
- Some popular partitioning software options include Ease US Partition Master, MiniTool Partition Wizard, and Paragon Partition Manager.
- With these tools, you can resize, merge, create, and delete partitions effortlessly.
- Ensure you choose a reliable software and follow the instructions carefully.
By employing these advanced partitioning techniques, you can make the most out of your external SSD.
Whether you need to set up a dual-boot system or allocate specific file systems for different purposes, these methods provide flexibility and efficient management options.
Explore the possibilities and optimize your external SSD for your unique needs.
FAQ About How to Partition External Ssd
What is the Best Way to Partition an External Ssd?
The best way to partition an external SSD is to create two partitions, one for the operating system and a second for programs and data. The OS partition should be formatted as NTFS or exFAT, while the other can use any file system. It is also important to back up all data before attempting this process in case of data loss.
How Do I Know If My External Ssd Can Be Safely Partitioned?
You can check if your external SSD can be safely partitioned by checking the manufacturer’s specifications. Some manufacturers may also provide a software utility that you can use to test compatibility and safety of partitioning.
What Type of File System Should I Use When Partitioning My External Ssd?
NTFS is recommended for external SSDs, as it provides a good balance between performance and compatibility with different operating systems.
Does Partitioning an External Ssd Improve Its Performance And Speed?
Yes, partitioning an external SSD can improve its performance and speed by allowing the user to divide their data into different sections, making it easier to manage. Partitioning also improves the read/write speed of the SSD as separate partitions can be assigned dedicated resources for faster access times.
Conclusion
Partitioning your external SSD is a crucial step in optimizing its performance and maximizing its storage capabilities.
By following the steps outlined You can easily partition your SSD to suit your specific needs and requirements.
Whether you want to separate your personal and work-related data, create multiple partitions for different operating systems, or organize your files into distinct categories, partitioning offers a flexible and efficient solution.
Remember to back up your important files before proceeding with any partitioning process, as it ensures the safety of your data in case of any unforeseen errors or issues.
Additionally, regularly monitoring your SSD’s health and performance, as well as updating your firmware, will help maintain its longevity and efficiency.
By understanding how to properly partition your external SSD, you can optimize its performance, enhance your workflow, and ensure a seamless and organized storage experience.
So don’t hesitate to take advantage of this valuable technique and make the most out of your external SSD’s capabilities.

Harold Williams is a senior writer and technical editor at Drives Hero with 20+ years of experience in IT administration. He specializes in storage systems, SSD reviews, and performance testing, bringing real-world insight to every guide.