How to Set Up Crucial Ssd? 10 Steps!
Setting up a Crucial SSD is a straightforward process that can significantly improve your computer’s performance and storage capacity.
This concise, step-by-step guide will walk you through the essential tasks, ensuring a seamless integration of your Crucial SSD into your computer system.
From gathering supplies to verifying operation, follow these straightforward instructions for a hassle-free setup that maximizes your storage capabilities.

Key Takeaway
Setting Up Your Crucial SSD: Step-by-Step Guide
Step 1: Gather Supplies
- Ensure you have your Crucial SSD, a compatible SATA or NVMe cable, and any necessary mounting brackets.
Step 2: Prepare Your Computer
- Shut down your computer and disconnect it from the power source.
- Open the case to access your system’s storage bays.
Step 3: Locate the Storage Bays
- Identify the available storage bays in your computer.
- Choose an appropriate bay for your Crucial SSD.
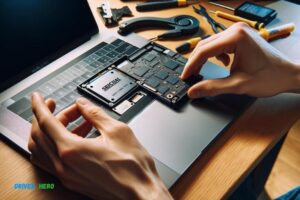
Step 4: Install the SSD
- If using a 2.5-inch SSD, attach it to a mounting bracket and secure it in the bay.
- For M.2 SSDs, insert it into the M.2 slot on the motherboard.
Step 5: Connect the Cable
- If using a 2.5-inch SSD, connect the SATA or power cable.
- For M.2 SSDs, no additional cables are needed.
Step 6: Secure the SSD
- If using a 2.5-inch SSD, secure the SSD in place using screws.
- M.2 SSDs typically have a retention mechanism; ensure it’s secure.
Step 7: Close the Case
- Once the SSD is installed, close the computer case and reconnect any disconnected cables.
Step 8: Power On Your Computer
- Power up your computer and enter the BIOS/UEFI settings.
- Ensure the SSD is recognized; adjust settings if necessary.
Step 9: Format and Partition
- In your operating system, format the Crucial SSD.
- Create partitions as needed for your storage requirements.
Step 10: Verify Operation
- Check the file explorer to confirm the Crucial SSD is listed.
- Transfer a small file to confirm functionality.
Setting up your Crucial SSD is a straightforward process, enhancing your system’s storage capacity and performance. Follow these steps for a quick and efficient installation.
Configuring Crucial Ssd: Optimizing Performance And Storage
Learn how to optimize the performance and storage of your Crucial SSD by following our step-by-step guide. Set up your SSD effectively for improved speed and storage capacity.
Formatting The Ssd:
When setting up your Crucial SSD, the first step is to format it properly. This will prepare the drive for data storage and optimize its performance.
Follow these steps to format your SSD:
- Open the Disk Management utility by pressing Windows Key + X and selecting “Disk Management.”
- Locate your Crucial SSD in the list of available drives.
- Right-click on the SSD and select “Format” from the context menu.
- Choose the desired file system, such as NTFS, and allocate a name for the SSD.
- Select the “Quick Format” option if you want to speed up the formatting process. Keep in mind that quick formatting doesn’t check for bad sectors.
Formatting your SSD will erase all existing data, so make sure to back up any important files before proceeding.
Allocating Drive Letters:
Next, you’ll need to allocate a drive letter to your Crucial SSD. This allows the operating system to recognize and access the drive easily.
To allocate a drive letter:
- Right-click on your formatted SSD in the Disk Management utility.
- Select “Change Drive Letter and Paths” from the context menu.
- Click on the “Add” button.
- Choose an available drive letter from the drop-down menu.
- Click “OK” to assign the selected drive letter to your Crucial SSD.
Once you have allocated a drive letter, you can access your Crucial SSD through File Explorer or any other file management software.
Partitioning The Ssd:
Partitioning your Crucial SSD allows you to divide it into multiple sections, known as partitions. This can be beneficial for better data organization and usage.
Follow these steps to partition your SSD:
- Right-click on your Crucial SSD in the Disk Management utility.
- Select “Shrink Volume” from the context menu.
- Enter the desired size for the new partition in megabytes (MB) and click “Shrink.”
- Right-click on the unallocated space created and select “New Simple Volume.”
- Follow the on-screen instructions to allocate a drive letter and format the partition.
You can create multiple partitions on your Crucial SSD based on your specific needs and preferences. Just repeat the partitioning process for each desired partition size.
Enabling Ssd Trim Support:
To maintain the optimal performance of your Crucial SSD over time, it’s important to enable the TRIM support feature.
TRIM allows the operating system to inform the SSD which blocks of data are no longer in use, optimizing write operations.
Here’s how to enable TRIM support:
- Press Windows Key + X and select “Command Prompt (Admin)” or “Windows PowerShell (Admin).”
- Type the following command: Fsutil behavior set disable delete notify 0
- Press Enter to execute the command.
- Restart your computer to apply the changes.
Enabling TRIM support ensures that your Crucial SSD remains efficient and performs at its best throughout its lifespan.
By following these steps to format, allocate drive letters, partition, and enable TRIM support, you will set up your Crucial SSD for optimal performance and storage.
Troubleshooting Common Errors
If you encounter common errors while setting up a crucial SSD, don’t panic. Our troubleshooting guide provides step-by-step solutions to ensure a smooth installation process.
Ssd Not Recognized By Your Computer:
If your SSD is not being recognized by your computer, it can be a frustrating experience.
Here are a few troubleshooting steps to try:
- Check the physical connections: Ensure that the SSD is properly connected to your computer. Sometimes, loose connections can prevent the SSD from being recognized. Try unplugging and re-plugging the SATA or NVMe cables to ensure a secure connection.
- Check the BIOS settings: Access your computer’s BIOS settings to make sure that the SSD is being detected by the system. If it is not listed, you may need to enable the SATA or NVMe port in the BIOS.
- Update the drivers: Outdated or missing drivers can also prevent your SSD from being recognized. Visit the manufacturer’s website and download the latest drivers for your SSD model. Install them and restart your computer to see if the SSD is now recognized.
- Test the SSD on another computer: If the SSD is still not recognized, try connecting it to another computer. This can help determine if the issue lies with the SSD or your computer’s configuration.
- Contact customer support: If none of the above steps work, it may be a hardware issue with the SSD itself. Reach out to the manufacturer’s customer support for further assistance or to check if the SSD is under warranty.
Slow Performance Issues:
Here are a few troubleshooting tips to address slow performance issues:
- Check the storage capacity: Make sure that your SSD is not nearing its maximum capacity. When an SSD is close to being filled up, it may become slower. Consider freeing up some space by deleting unnecessary files or transferring them to an external drive.
- Enable TRIM: Check TRIM status with “fsutil behavior query DisableDeleteNotify” in the Command Prompt. If the result is “1,” enable TRIM using “fsutil behavior set DisableDeleteNotify 0” and restart your computer.
- Update firmware: Manufacturers often release firmware updates to improve SSD performance and fix any bugs. Visit the manufacturer’s website and download the latest firmware for your SSD model. Follow the provided instructions to install the firmware update.
- Disable power-saving settings: Some power-saving settings of your computer may affect SSD performance. In the Power Options settings, make sure that the “Turn off hard disk after” setting is set to “Never” and disable any other power-saving features that may impact SSD performance.
- Check for background processes: Certain background processes, such as antivirus scans or disk defragmentation, can use significant resources and cause slow SSD performance. Temporarily disable these processes or schedule them to run during idle times.
Firmware Updates And Driver Installation:
Firmware updates and driver installation are essential for maintaining optimal SSD performance.
Here are a few things to consider:
- Firmware updates: Manufacturers periodically release firmware updates to address performance issues, improve compatibility, and fix bugs. Check your SSD manufacturer’s website for available firmware updates specific to your model.
- Driver installation: Like firmware updates, installing the latest drivers for your SSD can help enhance performance and compatibility. Visit the manufacturer’s website and locate the driver downloads section.
- Backup data before updating: Before performing any firmware update or driver installation, it is crucial to backup your data. In rare cases, these updates may interfere with data stored on the SSD. By creating a backup, you can ensure that your data remains safe during the process.
- Follow instructions carefully: When updating firmware or installing drivers, it is essential to follow the instructions provided by the manufacturer. Failure to do so may result in errors or even cause damage to the SSD.
- Regularly check for updates: Firmware and driver updates are often released to address newly discovered issues or improve SSD performance. Make it a habit to periodically check for updates on the manufacturer’s website to ensure your SSD is up to date.
Remember, proper troubleshooting and maintenance can help resolve common SSD errors and ensure your SSD functions optimally.
Follow the recommended steps and consult your SSD manufacturer’s support resources for further assistance if needed.
Maximizing Your Crucial Ssd: Tips For Long-Term Maintenance
Learn how to set up your crucial SSD for optimal long-term maintenance with these helpful tips.
By following these guidelines, you can maximize the performance and lifespan of your SSD, ensuring a smooth and efficient computing experience.
Regularly Updating Firmware And Drivers
To keep your Crucial SSD running smoothly, it’s essential to regularly update the firmware and drivers. These updates often include bug fixes, security patches, and performance enhancements that can improve the SSD’s overall functionality.
Here’s how you can ensure your firmware and drivers are up to date:
- Visit the Crucial website: Go to the official Crucial website and navigate to the support section. Look for the specific model of your SSD and check if there are any available firmware or driver updates.
- Download the updates: If there are updates available, download them onto your computer.
- Install the updates: Follow the provided instructions to install the firmware and driver updates on your Crucial SSD.
Regularly checking for and installing these updates will help maintain the optimal performance and stability of your SSD.
Monitoring Ssd Health And Performance
Monitoring the health and performance of your Crucial SSD is crucial to ensure that it continues to operate at its best.
Here are some ways to monitor your SSD’s health and performance:
- Use manufacturer’s software: Crucial provides software such as Crucial Storage Executive, which allows you to monitor the health and performance of your SSD. Install this software and regularly check the status of your SSD.
- Keep an eye on the SMART data: SSDs use SMART (Self-Monitoring, Analysis, and Reporting Technology) to track various parameters. Monitoring these parameters can help you identify any potential issues with your SSD.
- Run regular diagnostics: Use diagnostic tools provided by Crucial or third-party software to run tests on your SSD and identify any potential problems.
By actively monitoring your SSD’s health and performance, you can detect and address any issues promptly, ensuring optimal performance and longevity.
Managing Storage And Deleting Unnecessary Files
Proper management of your SSD’s storage is crucial for its long-term maintenance.
Here are some tips for managing your Crucial SSD’s storage effectively:
- Regularly clean up your SSD: Delete unnecessary files or move them to an external storage device.
- Utilize storage optimization tools: Crucial SSDs often come with built-in storage optimization tools in the form of software. Utilize these tools to enhance your SSD’s performance and manage storage effectively.
- Be mindful of large files and directories: Identify large files and directories that you no longer need and consider deleting or archiving them.
By managing your SSD’s storage efficiently, you can prevent it from becoming cluttered and maximize its performance.
Backing Up Your Ssd Data
Regardless of how well you maintain your Crucial SSD, unforeseen events can result in data loss. That’s why it’s important to regularly back up your SSD data.
Here are some backup strategies you can implement:
- External storage: Copy your crucial files and data to an external hard drive or cloud storage service regularly.
- Disk imaging: Create a disk image of your entire SSD, including the operating system and all installed programs. This allows you to restore your system to its previous state in case of data loss or system failure.
Regularly backing up your SSD data ensures that even in the event of a failure, you can quickly restore your files and get back up and running.
By following these tips for long-term maintenance, you can maximize the performance and lifespan of your Crucial SSD.
Conclusion
Setting up a crucial SSD can greatly enhance your computer’s performance and provide you with faster data access and storage. By following the steps outlined in this guide, you can ensure a smooth and successful installation process.
Remember to gather all the necessary tools and materials, connect the SSD correctly, and clone or install the operating system onto the SSD.
Make sure to optimize your SSD by enabling the TRIM command and turning off unnecessary features like Superfetch. Regularly updating your SSD firmware and backing up your data are crucial for maintaining its longevity.
With a properly set up SSD, you’ll experience improved boot times, faster application loading, and increased overall productivity.

Harold Williams is a senior writer and technical editor at Drives Hero with 20+ years of experience in IT administration. He specializes in storage systems, SSD reviews, and performance testing, bringing real-world insight to every guide.