How to Use M 2 Ssd? 10 Steps!
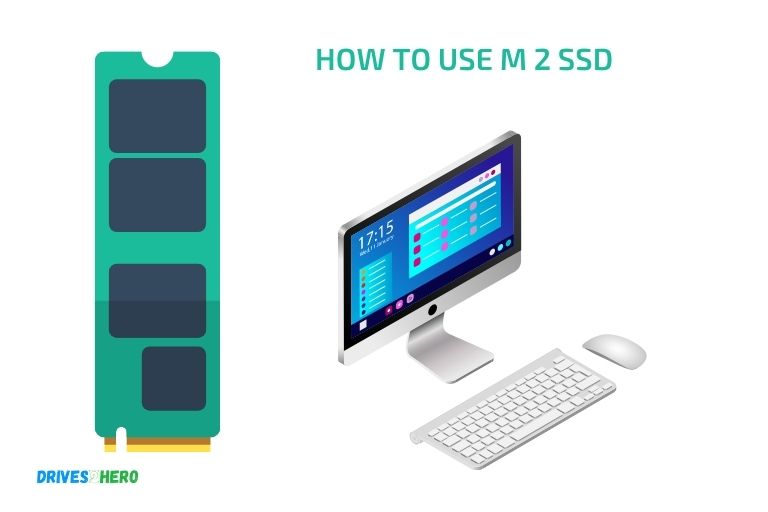
To use an M.2 SSD, you need to install it on a compatible motherboard, configure BIOS/UEFI settings, and install an operating system or migrate data from another drive.
M.2 SSDs are solid-state drives that come in a compact form factor. They offer high-speed data transfer and improved performance compared to traditional HDDs and SATA SSDs.
Using an M.2 SSD involves installing it on a suitable motherboard with an M.2 slot, setting up the BIOS/UEFI for proper recognition, and installing or transferring an operating system or data.
M.2 SSDs have become increasingly popular due to their high-speed performance and compact design. They are ideal for users looking to upgrade their storage or enhance their computer’s overall performance.
Before attempting to use an M.2 SSD, ensure your motherboard is compatible and has an available M.2 slot. Once installed, you will need to configure your BIOS/UEFI settings to detect the drive properly.
Finally, either install a fresh operating system on the M.2 SSD or migrate data from an existing drive, completing the process of using an M.2 SSD.
10 Steps to Use M.2 Ssd
| Step | Instruction | Description |
|---|---|---|
| 1 | Verify Compatibility | Check if your motherboard supports M.2 SSDs. Look for an M.2 slot on the motherboard or a mention of M.2 support in your motherboard manual. |
| 2 | Choose the Right SSD | Determine the required form factor (typically M.2 2280) and choose an SSD with the desired capacity and compatible interface (NVMe or SATA). |
| 3 | Gather Required Tools | You may need a compatible screwdriver (usually a small Phillips-head) and a standoff (if not included with the motherboard). |
| 4 | Power Down and Unplug | Turn off your computer, unplug the power cable, and discharge any static electricity by touching a metal part of your computer case. |
| 5 | Locate the M.2 Slot | Identify the M.2 slot on your motherboard. It resembles a thin, elongated slot with mounting points at various lengths. |
| 6 | Install the Standoff | If your motherboard doesn’t have a pre-installed standoff, find the matching hole for your SSD’s form factor (usually 2280) and install the standoff by threading it into the hole. |
| 7 | Insert the SSD | Align the notches on the SSD with the M.2 slot, then gently slide in the SSD at a 30-degree angle. |
| 8 | Secure the SSD | Press down on the opposite end of the SSD so it lays flat against the motherboard. Use the provided screw to secure the SSD to the standoff. |
| 9 | Reassemble and Boot | Reassemble your computer, plug in the power cable, and turn on your computer. The SSD should be detected by the BIOS and visible in your operating system. |
| 10 | Configure as Desired | If the SSD is intended as your new boot drive, install your preferred operating system and configure the BIOS boot settings accordingly. Otherwise, format the SSD in your operating system for storage or keep the original configuration. |
Key Takeaway
Five Facts About M.2 SSD
What Is An M.2 Ssd And Why Should You Use It?
Understanding Ssds: A Brief Overview
Solid state drives (ssds) have emerged as a viable alternative to traditional hard disk drives (hdds) for the storage of data on computers.
They use nand-based flash memory instead of spinning disks, and they offer a range of benefits, including faster boot times and better performance in comparison to hdds. However, ssds come in a range of form factors, including m. 2 ssds.
Why Should You Choose M.2 Ssds Over Other Alternatives?
M. 2 ssds are a form of ssd that uses the m. 2 interface, which is a small, rectangular, and versatile connector.
An m. 2 ssd can be connected directly to the motherboard of a computer, which helps to reduce the number of cables and connections required in your system.
Here are the top four benefits of using an m. 2 ssd:
Benefit 1: Faster Data Transfer Rates
One of the significant advantages of an m. 2 ssd is that it offers faster data transfer rates than traditional sata-based ssds. The m. 2 interface is faster than sata, and it allows for faster data transfer rates of up to 32 gbps.
This means that you can enjoy faster boot times, faster load times, and improved overall system performance.
Benefit 2: Space-Saving Form Factor
M. 2 ssds are smaller than traditional sata ssds, which saves space on the motherboard and allows for more compact form factors. This makes them ideal for use in laptops and ultrabooks, as well as smaller form factor desktops and home theatre pcs.
Benefit 3: Better Power Efficiency
M. 2 ssds use less power than traditional sata ssds. This means that they can help to conserve battery life in laptops and other portable devices, which is essential for people who are always on the go.
Benefit 4: Enhanced Durability
M. 2 ssds have no moving parts, which means that they are more durable than traditional hdds and even sata-based ssds.
This makes them ideal for use in environments where shock and vibration are a concern, such as in industrial or military applications.M. 2 ssds offer a range of benefits over traditional hdds and sata-based ssds. T
hey offer faster transfer rates, space-saving form factors, better power efficiency, and enhanced durability. If you’re looking for a new ssd for your computer, an m. 2 ssd is a compelling choice.
Understanding The Different Types Of M.2 Ssds
M. 2 ssds have become increasingly popular in recent years, providing high-speed data-transfer rates in a smaller footprint. However, while m. 2 ssds have different types, it can be a little confusing to understand the differences between them.
In this section, we will discuss the different types of m. 2 ssds, including m. 2 nvme vs. m. 2 sata, key differences between m. 2 pcie and nvme, comparison of speed and performance and the best m. 2 ssds for various use-cases.
M.2 Nvme Vs. M.2 Sata
M. 2 ssds come in two primary types: m. 2 nvme and m. 2 sata.
Here are the key differences between m. 2 nvme and m. 2 sata:
- M.2 nvme ssds use the nvme protocol, allowing them to deliver faster transfer rates.
- M.2 sata ssds use the same protocol as standard 2.5-inch sata ssds, and while still faster than traditional hard drives, they provide slower transfer speeds compared to m.2 nvme ssds.
- M.2 nvme ssds are more expensive than m.2 sata ssds.
- M.2 sata ssds are best for budget-conscious buyers and smaller form-factor devices, while m.2 nvme ssds are more suitable for high-performance devices that require faster data-transfer rates.
Key Differences Between M.2 Pcie And Nvme
While pcie and nvme are sometimes used interchangeably when discussing m. 2 ssds, they are not the same thing.
Here are some key differences between m. 2 pcie and nvme:
- Pcie is the interface used for m.2 ssds, while nvme is the protocol used for direct communication between the ssd and the cpu.
- Pcie is the physical connector that connects the m.2 ssd to the motherboard, whereas nvme is the standard for reading and writing data between storage devices and the system memory.
- M.2 pcie ssds can use nvme or sata protocols. M.2 nvme ssds use nvme protocol only because it is specifically built to optimize the performance of ssds.
Comparison Of Speed And Performance
The primary advantage of m. 2 ssds is speed and performance. M. 2 nvme ssds offer faster data-transfer rates and lower latency compared to m. 2 sata ssds or traditional hard drives.
Here are the key differences in speed and performance:
- M.2 nvme ssds offer read speeds of up to 3500mbps and write speeds of up to 3000mbps, making them significantly faster than m.2 sata ssds, which provide read and write speeds around 500mb/s.
- M.2 nvme ssds have lower latency, providing faster access to data compared to m.2 sata ssds.
- M.2 pcie ssds can improve system performance by up to 7x compared to traditional hard drives and up to 3x compared to m.2 sata ssds.
The Best M.2 Ssds For Various Use-Cases
M. 2 ssds are a popular choice for various use-cases, including gaming, video editing, or rapid boot times.
Here are some suggested m. 2 ssds for specific use-cases:
- Samsung 970 evo plus nvme ssd is the best choice for gaming, providing fast data transfer rates and low latency.
- Sabrent rocket nvme ssd is the best choice for video editing, providing faster rendering times.
- Wd blue sata ssd is the best choice for budget-conscious buyers who still prefer high-performance without breaking the bank.
- Intel optane ssd 905p is the best choice for workstations and enterprise-grade servers requiring fast read and write speeds and high endurance.
M. 2 ssds have become the go-to choice for high-performance computing in recent years. Understanding the different types of m. 2 ssds and their primary differences will help you choose the best ssd for your specific use-case.
Remember to look out for m. 2 nvme vs. m. 2 sata, key differences between m. 2 pcie and nvme, comparison of speed and performance, and the best m. 2 ssds for various use-cases.
Installing Your M.2 Ssd: A Step-By-Step Guide
Installing an m. 2 ssd is a great way to increase your system’s overall performance. This guide has been designed to help you with installing your m. 2 ssd the right way. Below is a step-by-step guide that will help you through the process.
Preparing Your Motherboard And Required Tools
Before you begin the installation process, you must ensure that your motherboard is compatible with nvme m. 2 ssds. Some older motherboards may not work with m. 2 ssds or may have compatibility issues.
To prepare for the installation process, you will need the following tools:
- Screwdriver
- M.2 ssd drive
- Motherboard manual
- Anti-static wristband
Step 1: Find And Open The M.2 Socket On Your Motherboard
First, locate the m. 2 socket on your motherboard. Once you have located the socket, take the screw out of the socket to open it up. You may need to look at your motherboard manual to confirm the location of the socket.
Step 2: Insert Your M.2 Ssd Carefully
Once the m. 2 socket is open carefully, you can insert the m. 2 ssd drive. Before doing so, make sure the notches on the m. 2 ssd and the socket align precisely.
Then, insert the m. 2 ssd straight into the socket. Apply gentle and even pressure until the drive is entirely inserted into the socket.
Step 3: Secure The M.2 Ssd With The Screw
After carefully inserting the m. 2 ssd drive in the socket, you need to screw it in place to secure it. Take the screw you removed in step 1 and use it to screw the m. 2 ssd drive in place. Tighten the screw just enough to hold the drive firmly in place, but do not tighten it too much.
Step 4: Update Your Bios And Install The Necessary Drivers
Before booting your system or installing your operating system, you need to update your bios and install the necessary drivers for your newly installed m. 2 ssd drive.
Updating your bios and installing the necessary drivers ensure that your system recognizes your newly installed m. 2 ssd drive, which will allow you to use it.
Step 5: Verify And Test Your Installation
Once your bios is updated, and the necessary drivers are installed, the final step is to verify and test your m. 2 ssd drive installation. You can verify and test your installation through the bios setup or a dedicated software utility.
Verify that your system recognizes the m. 2 ssd drive, and check that the drive’s capacity and performance are as expected.
The installation process of your m. 2 ssd drive may seem a bit daunting, but it isn’t that difficult. Follow the above step-by-step guide to ensure that you carry out the process correctly. Good luck!
Optimizing The Performance Of Your M.2 Ssd
Enabling The Bios Settings For Improved Performance:
Before optimizing the m. 2 ssd performance, make sure that you enable the right settings on your bios.
You can follow these steps:
- Restart your computer and access the bios settings by pressing the designated key (usually f2 or del) during the boot process.
- In the bios, locate the sata or storage configuration menu.
- Change the sata operation mode to ahci to unlock the full potential of your m.2 ssd.
- Save the settings and exit the bios.
Testing The Sequential And Random Read/Write Speeds:
Testing your m. 2 ssd’s sequential and random read/write speeds is an essential first step to optimizing its performance. You can use free online tools such as userbenchmark or crystaldiskmark to run these tests.
Here’s how you can do it:
- Download and install the testing software.
- Run a sequential read/write test to measure the m.2 ssd’s data transfer rate for larger files.
- Then run a random read/write test to measure the ssd’s performance in handling small files.
- Compare the results with the manufacturer’s specifications for the ssd to determine if your ssd’s performance is up to par.
Configuring Windows For Optimal Performance:
To achieve optimal performance, you need to customize some settings in windows.
Follow these steps:
- Go to the control panel and locate the power options setting.
- Click on “high performance” to optimize the power settings for the m.2 ssd.
- Disable background apps to free up system resources.
- Turn off indexing for the m.2 ssd to prevent unnecessary disk activity.
- Disable system mechanism to optimize system performance.
Using Third-Party Tools To Manage Your M.2 Ssd:
Several third-party tools can help you manage and optimize your m. 2 ssd.
Here are a few popular options:
- Nvme driver – this driver improves the performance of nvme drives by up to 10%.
- Samsung magician – this software offers various optimization tools such as performance benchmarks, firmware updates, and more.
- Ssd-z – this tool provides detailed information about your m.2 ssd’s performance, firmware, and other features.
- Crystaldiskinfo – this tool monitors the health of your m.2 ssd by displaying its temperature, power-on time, and other important metrics.
With these tools, you can maintain your m. 2 ssd’s performance and keep it running at its best. Remember to choose a tool that’s suitable for your m. 2 ssd model and read the user manual before making any optimizations.
FAQ On M 2 Ssd
What Is An M.2 Ssd?
An m. 2 ssd is a solid-state drive that uses the m. 2 interface to connect to a computer’s motherboard.
How Do I Install An M.2 Ssd?
To install an m. 2 ssd, insert the drive into the m. 2 slot on your motherboard and secure it using the provided screw.
Can I Use An M.2 Ssd As My Primary Drive?
Yes, you can use an m. 2 ssd as your primary drive for faster boot and load times compared to traditional hard drives.
What Are The Benefits Of Using An M.2 Ssd?
M. 2 ssds offer faster read and write speeds, lower power consumption, and a smaller form factor compared to traditional hard drives.
Conclusion
Using an m 2 ssd can greatly enhance your computer’s performance. It provides fast read and write speeds, a compact form factor, and easy installation. By following the steps outlined in this article, you can ensure that you are properly installing and utilizing your m 2 ssd to its maximum potential.
Remember to always check your computer’s compatibility before purchasing an m 2 ssd, and make sure to properly secure it in its slot. With the right setup, you can expect faster boot times, shorter loading screens, and improved overall performance.
Whether you are a gamer, a professional content creator, or simply a casual user, investing in an m 2 ssd is a worthwhile investment that will pay dividends in the long run.

