How to Use Samsung Portable Ssd T5? 7 Steps!
The Samsung Portable SSD T5 is a versatile and reliable storage solution that offers fast transfer speeds and ample capacity. This compact and portable solid-state drive is designed to elevate your data experience.
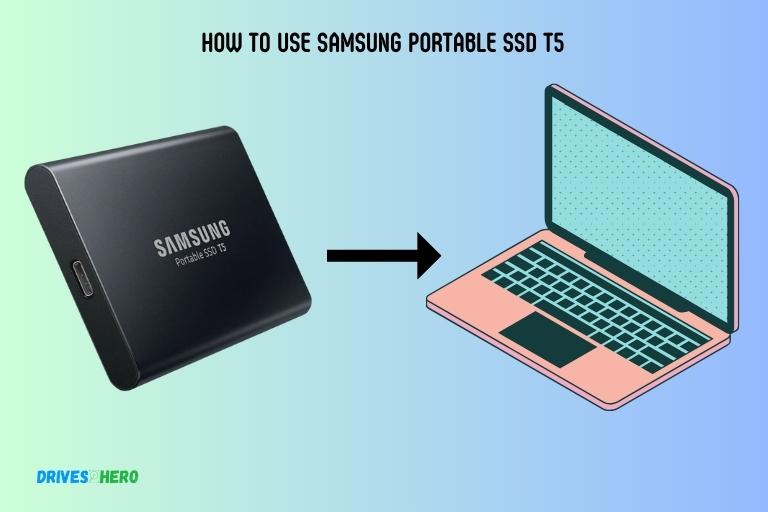
To use the Samsung Portable SSD T5, connect it to your computer and transfer files by dragging and dropping them onto the drive.
We’ll walk you through the simple steps to set up and use your Samsung Portable SSD T5. Whether you’re a tech enthusiast or a casual user, get ready to harness the speed and efficiency of this sleek storage solution.
Key Takeaway
Setting Up Your Samsung Portable SSD T5: A Quick Guide
Step 1: Unboxing
Upon receiving your Samsung Portable SSD T5, carefully unbox it. Inside, you’ll find the SSD, a USB cable, and user manuals.
Step 2: Connecting the SSD
- Locate the USB-C port on the SSD.
- Take the provided USB-C to USB-A cable and connect the USB-A end to your computer.
- Connect the USB-C end of the cable to the SSD.
Step 3: Power On
The SSD is powered through the USB connection, so there’s no need for an external power source. Once connected, your computer should recognize the SSD.
Step 4: Formatting (Optional)
- If the SSD is new, you may need to format it. Right-click on the SSD icon on your computer and select “Format.”
- Follow the on-screen instructions, choosing a file system (ex: exFAT for cross-platform use).
Step 5: Data Transfer
- Open File Explorer (Windows) or Finder (Mac).
- Locate the files you want to transfer.
- Drag and drop the files onto the SSD icon.
Step 6: Ejecting the SSD
- Right-click on the SSD icon.
- Select “Eject” to safely disconnect the SSD.
Step 7: Disconnecting the SSD
Once safely ejected, unplug the USB-C cable from both the SSD and your computer.
You’ve successfully set up and used your Samsung Portable SSD T5. Whether it’s for backup, storage, or speedy file transfers, your SSD is ready for action.
Managing Your Samsung Portable SSD T5
Discover how to effectively manage your Samsung Portable SSD T5 with our step-by-step guide, ensuring optimal usage and storage for your data on the go.
Organizing Files And Folders On The SSD for Easy Retrieval:
- Create folders: Organize your files by creating separate folders for different categories or projects.
- Use clear file names: Give your files descriptive names that will make it easy to locate them later.
- Group-related files: Store related files in the same folder for easy retrieval.
- Implement a logical folder structure: Create subfolders within main folders to further organize your files.
Performing Regular Backups To Ensure Data Protection:
- Schedule automatic backups: Use backup software or applications to schedule regular automatic backups of your important files and folders.
- Make use of backup utilities: Take advantage of backup utilities provided by your operating system or third-party applications for a hassle-free backup process.
- Utilize cloud storage: Consider syncing your SSD with cloud storage services to create an additional backup in case of any unforeseen circumstances.
Utilizing The Ssd’S Built-In Encryption Capabilities For Added Security:
- Activate password protection: Set up a password to secure your SSD data and prevent unauthorized access.
- Enable hardware encryption: Utilize the built-in hardware encryption feature of your Samsung Portable SSD T5 to encrypt data on the device.
- Create secure partitions: Partition your SSD to separate sensitive data from non-sensitive data, providing an additional layer of security.
- Keep your password safe: Make sure to keep your password in a secure location and avoid sharing it with others.
Remember, by following these tips and leveraging the features of your Samsung Portable SSD T5, you can efficiently manage your data, ensure its protection, and enhance the overall security of your portable storage solution.
Maintaining And Caring For Your Samsung Portable Ssd T5
Learn how to effectively maintain and care for your Samsung Portable SSD T5 with these simple steps. Proper usage and regular cleaning will ensure the longevity and performance of your device.
Cleaning And Protecting The Ssd From Physical Damage:
- Avoid exposing the SSD to extreme temperatures, humidity, and direct sunlight as it can damage the device.
- Use a soft, lint-free cloth to clean the exterior surfaces of the SSD. Gently wipe away any dust or smudges.
- Keep your SSD away from liquid spills, especially harsh chemicals, which can corrode the device.
- Utilize a protective case or sleeve while transporting your SSD to prevent scratches or accidental drops.
- Ensure that the USB connector is clean before plugging it into your device. Dust or debris can hinder proper connectivity and performance.
Updating Firmware To Ensure Optimal Performance:
- Regularly check for firmware updates on the official Samsung website or using the Samsung Portable SSD software. Firmware updates often include bug fixes, security patches, and performance improvements, allowing you to enjoy the best possible experience.
- Follow the firmware update instructions provided by Samsung to ensure a smooth and successful installation.
- It is advisable to back up your data before performing any firmware updates to avoid data loss.
Extending The Lifespan Of Your Ssd Through Proper Maintenance:
- Optimize your SSD’s performance by regularly defragmenting the drive. Although the Samsung Portable SSD T5 is designed to resist fragmentation, occasional optimization can help maintain performance.
- Be cautious when unplugging the SSD from your computer. Safely eject the device to prevent data corruption or loss.
- Keep your SSD sufficiently ventilated to prevent overheating. Adequate airflow helps maintain the SSD’s internal temperature within safe limits.
- Avoid filling the SSD to its maximum capacity. Leaving around 10-20% of the drive’s space free allows for better performance and prolongs the SSD’s lifespan.
- Periodically check for errors or bad sectors by using the built-in diagnostic tools or third-party software. Address any issues promptly to ensure the longevity of your SSD.
By implementing these simple maintenance practices and taking care of your Samsung Portable SSD T5, you can maximize its lifespan, preserve optimal performance, and safeguard your valuable data.
Troubleshooting Common Issues With Samsung Portable Ssd T5
Discover effective solutions for troubleshooting common issues with the Samsung Portable SSD T5, ensuring smooth and efficient usage.
Benefit from expert advice and practical tips to optimize your experience with this reliable and versatile storage device.
Ssd Not Recognized By The Computer:
- Check the cable connection: Ensure that the USB cable connecting the Samsung Portable SSD T5 to the computer is securely plugged in at both ends.
- Use a different USB port: Try plugging the SSD into a different USB port on your computer to rule out any issues with the current port.
- Try a different computer: Connect the SSD to another computer to see if it is recognized. If it works on another computer, the problem may be with the USB port or drivers on your original computer.
- Update USB drivers: Visit the manufacturer’s website for your computer and download the latest USB drivers compatible with your operating system.
- Update SSD firmware: Go to the Samsung website and search for the SSD T5 model. Look for any firmware updates and download the latest version. Follow the instructions provided to update the SSD firmware.
- Disk Management (for Windows users): Press the Windows key + R to open the Run dialog box. Type “diskmgmt.msc” and press Enter. Look for the Samsung Portable SSD T5 in the list.
Slow Transfer Speeds And Performance Issues:
- Check the USB port: Connect the Samsung Portable SSD T5 to a USB 3.0 or higher port on your computer for optimal speeds. USB 2.0 ports may result in slower transfer speeds.
- Close unnecessary programs: Close any programs running in the background that may be using system resources and affecting the performance of the SSD.
- Use the provided USB cable: Ensure you are using the original USB cable that came with the Samsung Portable SSD T5, as using a different cable may result in slower transfer speeds.
- Update firmware: Visit the Samsung website and check if there are any firmware updates available for the SSD T5. Download and install the latest version to improve performance.
- Check for storage capacity: If the SSD is almost full or has limited available space, it can affect transfer speeds. Free up space on the drive by deleting unnecessary files or transferring them to another storage device.
- Check for malware or viruses: Run a scan on your computer to check for any malware or viruses that may be affecting the performance of the SSD.
Error Messages And Firmware Updates:
- Firmware update notifications: When a firmware update is available for the Samsung Portable SSD T5, you may receive a notification on your computer. Follow the prompts to download and install the update.
- Firmware update utility: Samsung provides a firmware update utility for the SSD T5. Visit the Samsung website and search for the SSD T5 model. Download the firmware update utility and follow the instructions provided to update the firmware.
- Error messages: If you encounter any error messages while using the Samsung Portable SSD T5, note down the message in detail. Visit the Samsung website and check their support section for information on troubleshooting the specific error message.
- Contact Samsung support: If you have exhausted all troubleshooting options and are still experiencing issues with your Samsung Portable SSD T5, contact Samsung’s customer support for further assistance.
Remember, always make sure to back up your data before performing any firmware updates or making changes to your SSD.
Conclusion
Using the Samsung Portable SSD T5 can greatly enhance the performance and convenience of your digital life. Its lightning-fast data transfer speeds and durable design make it a reliable companion for both personal and professional use.
Whether you need to store and transfer large files, edit videos in real time, or simply want to free up space on your device, the T5 delivers exceptional performance and versatility.
Its compact and lightweight build makes it easy to take with you wherever you go. With strong encryption and password protection, your data remains secure at all times.
The Samsung Portable SSD T5 truly stands out as a top-notch storage solution that offers unparalleled speed, durability, and ease of use.

Harold Williams is a senior writer and technical editor at Drives Hero with 20+ years of experience in IT administration. He specializes in storage systems, SSD reviews, and performance testing, bringing real-world insight to every guide.