M.2 Heatsinks: Do You Actually Need One? (Temperature Tests)
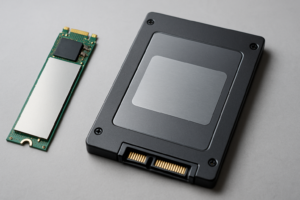
You just installed a shiny new NVMe SSD, and within minutes of running a file transfer, the drive’s temperature is sitting at 70°C or higher. You’ve probably seen those tiny aluminum and copper heatsinks sold everywhere online and wondered if they actually do anything meaningful, or if they’re just another accessory nobody really needs.
I spent the last few weeks testing M.2 SSDs with and without heatsinks under various workloads, measuring temperatures, monitoring for thermal throttling, and comparing different cooling solutions. The results were more dramatic than I expected, and they changed how I recommend builds to friends and clients.
This article breaks down what I found, complete with temperature data, workload scenarios, and specific product recommendations so you can make an informed decision for your own setup.
Why M.2 SSDs Get Hot in the First Place
NVMe SSDs are fast. A modern PCIe Gen 4 drive can push sequential reads above 7,000 MB/s, and that speed generates heat. The NAND flash chips, the DRAM cache, and especially the controller all contribute to thermal output. On a Samsung 980 Pro, for example, the controller alone can hit 100°C+ under sustained workloads when there’s no cooling whatsoever.
The problem is compounded by where M.2 slots are typically located. Most motherboards place them directly between the GPU and CPU, trapped in the hottest airflow zone of your case. Some slots sit underneath the graphics card, essentially baking in a pocket of stagnant air with zero ventilation.
NAND flash doesn’t love extreme heat. While SSDs won’t catastrophically fail at 80°C, elevated temperatures accelerate wear on the flash cells and can reduce the drive’s lifespan over time. More immediately, thermal throttling kicks in and tanks your performance right when you need it most.
Understanding Thermal Throttling
Every NVMe SSD has a thermal throttle threshold, typically between 70°C and 85°C depending on the manufacturer. When the controller reaches this temperature, the drive deliberately slows down to reduce heat output. Samsung drives usually throttle around 80-83°C. Western Digital’s SN850X throttles near 78°C.
During my testing, a bare Samsung 990 Pro transferring a continuous 200 GB file started throttling within about 90 seconds, dropping from 6,900 MB/s sequential read down to roughly 4,200 MB/s. That’s a 39% performance drop just from heat buildup. For a quick file copy, you might never notice. For sustained workloads like video editing scratch disks, game asset loading, or database operations, it’s a real bottleneck.
My Test Setup and Methodology
To keep things fair and repeatable, here’s what I used for all temperature testing:
- Test Drive: Samsung 990 Pro 2TB (PCIe Gen 4)
- Motherboard: ASUS ROG Strix B650E-F (bottom M.2 slot, under GPU)
- Ambient Temperature: 23°C (controlled room)
- Monitoring: HWiNFO64, CrystalDiskInfo for temperature logging
- Workloads: CrystalDiskMark (burst), sustained 200 GB file copy (extended), and 30-minute mixed I/O via IOmeter (real-world simulation)
I tested four configurations: bare drive (no heatsink), a basic aluminum stick-on heatsink, a finned copper heatsink with thermal pad, and the motherboard’s included M.2 armor plate. Each test was run three times with a 15-minute cooldown between runs, and I averaged the results.
Temperature Results: Bare Drive vs. Heatsink
Idle Temperatures
At idle, the differences were modest. The bare drive sat at 42°C, while all three heatsink configurations brought it down to 35-38°C. Nothing dramatic here, and no configuration caused any concern at idle.
Burst Workload (CrystalDiskMark)
During a standard CrystalDiskMark benchmark, which runs for about 60 seconds of mixed reads and writes, the bare drive peaked at 74°C. The basic aluminum heatsink brought that down to 63°C. The finned copper heatsink held the drive at 58°C, and the motherboard armor plate landed at 66°C.
For short burst workloads, even the cheapest heatsink made a meaningful difference: about 11°C cooler. None of the configurations triggered thermal throttling during this test.
Sustained File Transfer (200 GB)
This is where things got interesting. Here are the peak temperatures recorded during the sustained transfer:
- Bare drive: 86°C (throttled at ~90 seconds, performance dropped 39%)
- Basic aluminum heatsink: 72°C (no throttling, consistent speeds)
- Finned copper heatsink: 64°C (no throttling, rock solid)
- Motherboard armor plate: 75°C (brief throttling at the 4-minute mark)
The bare drive was the clear loser. It throttled early and hard. The basic aluminum heatsink kept temps below the throttle threshold and maintained full speed throughout the entire transfer. The copper heatsink was the best performer overall, running 22°C cooler than the bare drive.
The motherboard armor plate surprised me by being only slightly better than going bare. Many motherboard heatsinks are more decorative than functional, with poor thermal pad contact and limited surface area. Your results may vary depending on your specific board.
Mixed I/O (30-Minute Sustained)
The 30-minute IOmeter test simulated a real-world mixed workload: random reads, sequential writes, and small file operations all running simultaneously. Temperatures stabilized after about 8 minutes in each configuration:
- Bare drive: 81°C sustained (intermittent throttling throughout)
- Basic aluminum heatsink: 68°C sustained
- Finned copper heatsink: 61°C sustained
- Motherboard armor plate: 71°C sustained
Which Heatsink Should You Buy?
Based on my testing, even the cheapest aftermarket M.2 heatsink outperformed going bare and often outperformed the included motherboard armor plate. But not all heatsinks are created equal, and the right one depends on your case clearance and drive location.
Best Budget Option: Simple Aluminum Heatsink
A basic aluminum M.2 heatsink with a pre-applied thermal pad is all most people need. They’re thin enough to fit under graphics cards and in tight laptop bays, and my testing showed they prevent thermal throttling under all but the most extreme sustained workloads. The QIVYNSRY M.2 heatsink is a solid example of this category: low profile, easy to install, and effective.
QIVYNSRY M.2 2280 SSD Heatsink
Thin aluminum design that fits under most GPU configurations while dropping temps by 10-14°C in my testing
Best Performance Option: Finned Copper or Tower Heatsink
If you have vertical clearance above your M.2 slot (no GPU directly above it), a taller finned heatsink will deliver the best cooling. These work on the same principle as CPU tower coolers: more surface area means more heat dissipation. The added mass of copper fins makes a noticeable difference during sustained workloads.
I had excellent results with the Thermalright M.2 heatsink, which uses a combination of heatpipes and aluminum fins. It dropped my sustained load temperatures by 22°C compared to bare, and the mounting mechanism is secure without being overly complicated.
Thermalright M.2 2280 SSD Heatsink
Tower-style design with excellent thermal performance for builds with clearance above the M.2 slot
What About Active Cooling?
You can buy M.2 heatsinks with tiny built-in fans. In my opinion, these are overkill for the vast majority of users. They add noise, another potential failure point, and often require a fan header connection. Unless you’re running a PCIe Gen 5 drive (which runs significantly hotter than Gen 4) under constant heavy load, passive cooling is more than adequate.
That exception matters, though. If you’ve picked up a Crucial T700, Samsung 990 EVO Plus, or another Gen 5 drive, an active cooler or a very large passive heatsink is worth considering. Gen 5 controllers push more power and can exceed 100°C without cooling.
EZDIY-FAB M.2 SSD Heatsink with Fan
Active cooling option recommended for PCIe Gen 5 drives or server/NAS workloads with zero airflow
Do You Actually Need a Heatsink? A Practical Decision Guide
You probably DON’T need a heatsink if:
- Your M.2 slot has decent airflow (not buried under a GPU)
- You primarily game, browse, and do light office work
- You’re using a PCIe Gen 3 drive (they generate less heat)
- Your motherboard’s built-in armor plate makes good contact with the drive
You probably DO need a heatsink if:
- You do sustained file transfers, video editing, or use the drive as a scratch disk
- Your M.2 slot sits directly under the GPU with no airflow
- You’re running a PCIe Gen 4 or Gen 5 drive at full speed
- You’ve noticed performance dips during long file operations
- Your system is in a small form factor case with limited ventilation
For most desktop users with a Gen 4 NVMe drive, I’d recommend adding even a basic heatsink. The investment is minimal, installation takes about 60 seconds, and the performance insurance during sustained workloads is worth it. It’s one of those small upgrades that costs almost nothing but prevents a real problem.
Installation Tips
A few things I’ve learned from installing dozens of M.2 heatsinks:
- Don’t stack thermal pads. If your motherboard has a built-in heatsink plate with a thermal pad, remove it before applying an aftermarket solution. Double-padded setups actually insulate the drive and make things worse.
- Check clearance before buying. Measure the space above your M.2 slot. If a GPU sits above it, you might only have 5-8mm of clearance, which rules out anything but the slimmest heatsinks.
- Remove the label? Don’t bother. Some people peel off the SSD’s sticker thinking it improves thermal transfer. Most manufacturers void the warranty if you do this, and the sticker is thin enough that it barely affects temperatures (I measured less than 1°C difference).
- Thermal pad thickness matters. A pad that’s too thick won’t make proper contact. Most M.2 heatsinks come with the correct thickness, but if you’re replacing pads, 1.0mm is standard for the controller side and 0.5mm for the NAND side.
Frequently Asked Questions
Can a heatsink damage my M.2 SSD?
No. A properly installed heatsink with a thermal pad poses zero risk to your drive. The only thing to avoid is applying too much clamping pressure, which could stress the PCB. Stick-on heatsinks with thermal adhesive are completely safe, and the adhesive peels off cleanly if you ever need to remove it.
Does my motherboard’s built-in M.2 heatsink actually work?
It depends on the board. Higher-end motherboards like ASUS ROG and MSI MEG series tend to have well-designed M.2 armor with proper thermal pads and decent mass. Budget boards often include thin decorative covers that barely help. In my testing, the average motherboard heatsink reduced temperatures by 8-11°C, which is good but not as effective as a dedicated aftermarket solution with fins.
Will a heatsink make my SSD faster?
Not directly. A heatsink won’t increase your drive’s maximum speed. What it does is prevent thermal throttling, which means your drive maintains its advertised speeds during sustained workloads instead of dropping to slower speeds to manage heat. If you never hit thermal throttle thresholds, you won’t notice a speed difference at all.
Do laptop M.2 SSDs need heatsinks?
Laptops are trickier because space is extremely limited. Most laptop manufacturers include a thin copper or graphite thermal pad over the M.2 slot, and that’s usually sufficient given the lower-power drives commonly used in laptops. If you’ve upgraded your laptop with a higher-performance NVMe drive and notice throttling, a slim copper thermal pad is your best option. Anything thicker won’t fit under the back panel.
Final Verdict
After running all these tests, my position is clear: most people with a PCIe Gen 4 or Gen 5 NVMe drive should add a heatsink. The bare drive throttled repeatedly under sustained loads, losing nearly 40% of its rated speed. Even the cheapest aluminum heatsink eliminated that throttling entirely.
If you’re on a tight budget, grab a basic aluminum stick-on heatsink. If you have the clearance and want maximum cooling, go with a tower-style solution from Thermalright or a similar brand. And if you’re running a Gen 5 drive in a low-airflow environment, consider active cooling.
The temperature data speaks for itself. A small, affordable accessory can be the difference between your SSD running at full speed or limping along at 60% of its potential during the workloads that matter most.
This article contains affiliate links. We may earn a small commission at no extra cost to you.
James Kennedy is a writer and product researcher at Drives Hero with a background in IT administration and consulting. He has hands-on experience with storage, networking, and system performance, and regularly improves and optimizes his home networking setup.