Samsung Portable Ssd T7 Quick Start Guide: 10 Easy Steps!
The Samsung Portable SSD T7 Quick Start Guide provides step-by-step instructions on how to utilize your new storage device. It covers hardware setup, software installation, and essential troubleshooting tips.
The SSD T7 Quick Start Guide begins by instructing on how to connect your SSD to your device, be it a laptop, desktop, or smartphone.
It then guides you through the process of installing the proprietary Samsung Portable SSD Software 1.0, which enables password setup and the latest firmware updates.
Key Takeaway
Step-by-Step Samsung Portable SSD T7 Quick Start Guide: Effortless Setup
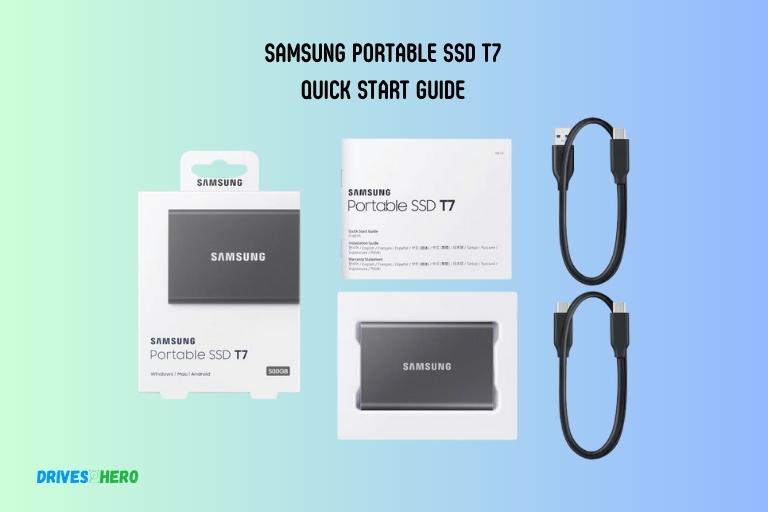
Step 1: Unboxing
Open the package to find the Samsung Portable SSD T7, a USB-C to USB-C cable, and a USB-C to USB-A cable.
Step 2: Check Compatibility
Ensure your device supports USB 3.2 Gen 2. For best results, use USB 3.2 Gen 2, but the T7 is backward compatible with USB 2.0.
Step 3: Connect the SSD
- Locate the USB-C port on the T7.
- Connect one end of the provided cable to the T7.
- Connect the other end to your computer.
Step 4: LED Indicator
- Blue: Connected and powered.
- Red: Data transfer or firmware update.
- Blinking Red: Errors or low power.
Step 5: Installation (Windows/Mac)
- For Windows, it’s plug-and-play.
- For Mac, follow on-screen prompts, and consider formatting for Time Machine use.
Step 6: Data Transfer
- Find the T7 drive on your computer.
- Drag and drop files or use your preferred transfer method.
Step 7: Eject Safely
Before unplugging, safely eject:
- Windows: Right-click and select “Eject.”
- Mac: Drag to trash or use the eject button.
Step 8: Security (Optional)
Explore Samsung Portable SSD Software for password protection and firmware updates.
Step 9: Disconnecting
Unplug the USB cable from your computer and the T7.
Step 10: Troubleshooting
Refer to the user manual for troubleshooting. Common issues include cable problems or driver conflicts.
Follow the simple steps outlined in the guide, and enjoy the convenience of this high-performance SSD.
Initializing And Setting Up The Samsung Portable Ssd T7
Get your Samsung Portable SSD T7 up and running quickly with the easy-to-follow Quick Start Guide. It provides step-by-step instructions for initializing and setting up your device, ensuring a smooth and hassle-free experience.
Guide To Formatting And Initializing The Ssd For First-Time Use
If you’ve just purchased the Samsung Portable SSD T7 and are excited to start using it, this guide will walk you through the initial setup process.
We’ll cover formatting and initializing the SSD as well as installing the necessary software and drivers.
Let’s get started!
Formatting And Initializing The Samsung Portable Ssd T7:
- Connect the SSD: Begin by connecting the Samsung Portable SSD T7 to your computer via the provided USB cable. Ensure a secure connection before proceeding.
- Open Disk Management (Windows) or Disk Utility (Mac): These built-in tools will help us format and initialize the SSD. To access Disk Management on Windows, right-click the Start button, select “Disk Management.” For Mac users, open the Applications folder, go to Utilities, and launch Disk Utility.
- Locate the Samsung Portable SSD T7: In Disk Management or Disk Utility, look for the Samsung Portable SSD T7 among the listed drives. It’s usually labeled as a new or unallocated drive.
- Format the SSD: Right-click on the Samsung Portable SSD T7 (Windows) or click on the Erase button (Mac). Follow the on-screen instructions to format the SSD. Ensure you choose the appropriate file system format (NTFS for Windows or APFS for Mac) and provide a desired name for the drive.
- Initialize the SSD: Once the formatting is complete, you’ll need to initialize the Samsung Portable SSD T7. In Disk Management (Windows), right-click on the drive and select “Initialize Disk.” For Disk Utility (Mac), select the SSD and click on the “Partition” tab. Choose the number of partitions you prefer and click “Apply” or “Partition” to finalize the process.
Installation Of Necessary Software And Drivers:
- Visit the Samsung website: Go to the official Samsung website and navigate to the support section.
- Locate the Samsung Portable SSD T7: Find the product page for the Samsung Portable SSD T7. You can search using the model number or browse through the available options.
- Download the software and drivers: Look for the downloads section on the product page. Here, you’ll find the necessary software and drivers for your Samsung Portable SSD T7. Click on the appropriate download links and follow the on-screen instructions to install them on your computer.
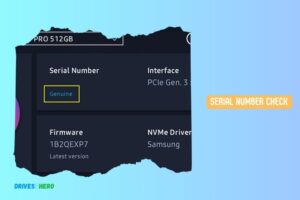
- Check for firmware updates: While you’re on the support page, it’s crucial to check for any available firmware updates for your SSD. Firmware updates can enhance performance, add new features, and fix any potential bugs. Download and install any updates if available.
By following these steps, you’ll be able to format, initialize, and install the necessary software and drivers for a smooth setup of your Samsung Portable SSD T7.
Using Samsung Portable Ssd T7 With Different Operating Systems
The Samsung Portable SSD T7 is compatible with various operating systems, making it a versatile choice for users.
Its quick start guide provides easy-to-follow instructions for setup and use on different platforms, ensuring seamless data storage and transfer.
How To Use The Ssd With Windows
- Connect the Samsung Portable SSD T7 to your Windows computer using the USB-C cable.
- Open File Explorer on your computer.
- Locate and double-click on the Samsung Portable SSD T7 drive.
- Now you can easily transfer or access your files stored on the SSD.
In case the SSD is not recognized by your Windows computer:
- Ensure that the USB-C cable is securely connected to both the SSD and your computer.
- Try connecting the SSD to a different USB port on your computer.
- Update the USB drivers on your computer.
- If the issue persists, visit the Samsung support website for further assistance.
How To Use The Ssd With Mac
- Connect the Samsung Portable SSD T7 to your Mac using the USB-C cable.
- Open Finder on your Mac.
- Look for the Samsung Portable SSD T7 drive listed in the sidebar under Devices.
- Double-click on the drive to access your files.
- To safely eject the SSD, right-click on the drive and select Eject.
If your Mac doesn’t recognize the SSD:
- Ensure that the USB-C cable is securely connected to both the SSD and your Mac.
- Try connecting the SSD to a different USB port on your Mac.
- Restart your Mac and try again.
- If the problem persists, check for any software updates on your Mac or contact Samsung support for further assistance.
How To Use The Ssd With Android
- Connect the Samsung Portable SSD T7 to your Android device using the USB-C cable.
- Open the file manager app on your Android device.
- Look for the Samsung Portable SSD T7 drive listed in the file manager.
- Tap on the drive to access your files.
- To safely disconnect the SSD, swipe down from the top of your Android screen to access the notifications panel.
- Tap on the USB connection notification and select “Eject.”
If your Android device doesn’t recognize the SSD:
- Ensure that the USB-C cable is securely connected to both the SSD and your Android device.
- Try connecting the SSD to a different USB port on your device.
- Restart your Android device and try again.
- If the issue persists, contact Samsung support for further assistance.
Compatibility Issues And Troubleshooting Tips
In case you experience slow performance or the SSD is not functioning properly, it’s important to check the following:
- Ensure that your operating system is up to date with the latest software updates.
- Make sure you have the latest firmware installed on the SSD. Visit the Samsung website for firmware updates.
- Confirm that your USB-C cable is in good condition and properly connected.
- If you encounter any compatibility issues or have trouble using the SSD with your operating system, reach out to Samsung support for assistance. They will be able to provide tailored troubleshooting tips and solutions to help you resolve any problems.
Now that you have a thorough understanding of how to use the Samsung Portable SSD T7 with different operating systems, along with troubleshooting tips, you can make the most out of this portable storage solution.
Troubleshooting Guide For Samsung Portable Ssd T7
Get your Samsung Portable SSD T7 up and running quickly with this troubleshooting guide. With easy-to-follow instructions, you’ll be able to resolve any issues and ensure optimal performance for your portable storage device.
Ssd Not Recognized By The Computer
If your computer fails to recognize the Samsung Portable SSD T7, try the following troubleshooting steps:
- Check the USB connection: Ensure that the USB cable is securely connected to both the SSD and your computer. Try using a different USB port on your computer as well.
- Update the device driver: Visit the Samsung website to download and install the latest device driver for the SSD.
- Restart the computer: Sometimes a simple restart can resolve connectivity issues.
Slow Transfer Speeds
Experiencing slow transfer speeds with your Samsung Portable SSD T7? Try these tips to boost performance:
- Use a USB 3.2 Gen 2 port: Make sure you are connecting the SSD to a USB 3.2 Gen 2 port to take advantage of its high-speed capabilities.
- Use the right cable: Ensure you are using the USB Type-C cable that came with the SSD or a high-quality alternative.
- Close other applications: Closing unnecessary applications and processes running in the background can free up system resources and enhance transfer speeds.
Ssd Not Working After A Firmware Update
If your Samsung Portable SSD T7 stops working after a firmware update, follow these steps to troubleshoot the issue:
- Power cycle the SSD: Disconnect the SSD from your computer and power it off. Wait for a few minutes, then reconnect and power it on again.
- Check for firmware conflicts: Make sure there are no other firmware updates running simultaneously on your computer that may interfere with the SSD firmware update process.
- Contact Samsung Support: If the issue persists, reach out to Samsung Support for further assistance and guidance.
Remember, these troubleshooting steps are just a starting point, and if you continue to experience issues with your Samsung Portable SSD T7, don’t hesitate to reach out to Samsung Support for personalized help.
Conclusion
The Samsung Portable SSD T7 is a reliable and efficient storage solution for users seeking high-speed performance and durability.
Its compact design, lightning-fast data transfer speed, and password protection feature make it an excellent choice for anyone on the go.
The quick start guide provided ensures that users can effortlessly set up their SSD and take full advantage of its capabilities right away.
Whether you’re a professional who needs to transfer large files quickly or a casual user looking for a reliable storage option, the Samsung Portable SSD T7 is a solid investment.

Harold Williams is a senior writer and technical editor at Drives Hero with 20+ years of experience in IT administration. He specializes in storage systems, SSD reviews, and performance testing, bringing real-world insight to every guide.