USB Drive Showing Wrong Size: How to Reclaim Full Capacity
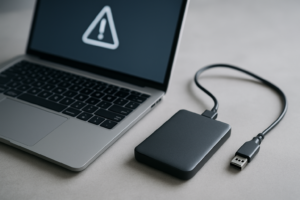
You plug in your 64GB USB drive, and Windows tells you it’s only 2GB. Or maybe 32MB. You know the drive isn’t damaged because it was working fine last week. You just used it to flash a Linux ISO or create a Windows installer, and suddenly most of your storage has vanished into thin air.
This is one of the most common and confusing USB issues people run into, and it’s almost never a hardware problem. When you use tools like Rufus, balenaEtcher, or the Windows Media Creation Tool to write a disk image, they create special partition layouts on your drive. Once you’re done with that bootable installer, your operating system can only see one small partition, and the rest of your drive sits there invisible and unusable.
The good part is that your full capacity is still there, hiding behind partition tables your OS doesn’t know how to display properly. You just need to wipe the slate clean and start fresh. This guide covers every reliable method to get your full drive capacity back, from built-in Windows tools to third-party utilities and even Mac and Linux solutions.
Why Your USB Drive Shows the Wrong Size
Before you fix anything, it helps to understand what happened. USB drives ship from the factory with a single partition that spans the entire drive, usually formatted as FAT32 or exFAT. This is the simple layout your computer expects to see.
When imaging tools write a bootable ISO to your drive, they don’t just copy files. They write an entire disk image, complete with its own partition table. A Windows 11 installer, for example, creates multiple partitions including an EFI system partition, a small boot partition, and a data partition. Some of these partitions use file systems that Windows can’t normally work with.
After you’re done with the bootable drive, Windows Explorer shows only the one partition it can read. Disk Management might show the other partitions, but it often can’t delete or merge them through its normal interface. The standard “Format” option you get from right-clicking the drive in Explorer only formats the visible partition, leaving the hidden ones untouched.
Common Causes of Reduced USB Capacity
- Disk imaging tools: Rufus, balenaEtcher, Win32 Disk Imager, and the Raspberry Pi Imager all write full disk images that restructure your drive’s partition table.
- Windows Media Creation Tool: Creates a multi-partition layout specifically for UEFI boot, and it’s one of the most frequent culprits.
- Linux Live USB creators: Tools like UNetbootin or direct
ddcommands overwrite the existing partition structure entirely. - Corrupted partition tables: Removing the drive during a write operation or a failed format can leave the partition table in a broken state.
- Fake or counterfeit drives: Some cheap USB drives are programmed to report a larger capacity than they actually have. This is a different problem that requires a different solution.
Method 1: Using Diskpart in Windows (Most Reliable)
Diskpart is a command-line disk utility built into every version of Windows, and it’s my top recommendation for this problem. Unlike Disk Management’s graphical interface, Diskpart can wipe every partition on the drive regardless of type or file system. It works every single time, as long as the drive isn’t physically damaged.
Step-by-Step Diskpart Instructions
- Insert your USB drive into your computer.
- Open Command Prompt as Administrator. Press Win + S, type cmd, right-click Command Prompt, and select Run as administrator.
- Type diskpart and press Enter. You’ll see the prompt change to
DISKPART>. - Type list disk and press Enter. You’ll see all connected disks with their sizes.
- Identify your USB drive by its size. A 64GB drive might show as roughly 58GB or 59GB. Triple-check this. Selecting the wrong disk will erase that disk entirely.
- Type select disk X (replace X with your USB drive’s disk number) and press Enter.
- Type clean and press Enter. This removes all partitions and data from the drive.
- Type create partition primary and press Enter.
- Type format fs=exfat quick and press Enter. Use fs=fat32 if you need compatibility with older devices, or fs=ntfs for files larger than 4GB on Windows-only systems.
- Type assign and press Enter. This gives the drive a letter so it appears in File Explorer.
- Type exit and press Enter to close Diskpart.
Warning: The
cleancommand is irreversible. All data on the selected disk will be permanently erased. Make absolutely sure you’ve selected the correct disk number. If your internal hard drive is Disk 0, your USB will typically be Disk 1 or Disk 2, but always verify by checking the size column.
After completing these steps, open File Explorer. Your USB drive should appear with its full capacity, formatted and ready to use.
Method 2: Using Disk Management (GUI Alternative)
Sometimes Disk Management can handle this on its own, though it’s less reliable than Diskpart for stubborn partition layouts. It’s worth trying if you’d rather avoid the command line.
- Press Win + X and select Disk Management.
- Find your USB drive in the lower pane. You’ll likely see multiple partitions, some possibly labeled as “Unallocated” or with file systems you don’t recognize.
- Right-click each partition on the USB drive and select Delete Volume. Do this for every partition until the entire drive shows as unallocated space.
- Right-click the unallocated space and select New Simple Volume.
- Follow the wizard, choosing your preferred file system and assigning a drive letter.
Disk Management sometimes grays out the “Delete Volume” option for certain partition types, particularly EFI system partitions. When that happens, you’ll need to fall back to Diskpart or a third-party tool.
Method 3: Third-Party Tools
Several free tools handle this job with a more visual interface than Diskpart. If you fix USB drives regularly or manage multiple removable drives, these are worth keeping in your toolkit.
SD Card Formatter (SD Association)
Despite the name, the SD Card Formatter from the SD Association works on USB flash drives too. It’s designed to restore removable storage to its factory state, and it handles weird partition layouts better than the Windows built-in formatter. Download it, select your drive, choose “Overwrite Format” for a thorough job, and click Format. It’s a small, focused utility that does exactly one thing well.
Rufus
Here’s an ironic twist: the same tool that probably caused your problem can also fix it. Rufus has a “Non bootable” option under the Boot selection dropdown. Select that, choose your drive, pick your file system, and click Start. Rufus will clean the partition table and create a fresh, normal layout. Since many people already have Rufus installed, this is often the quickest solution.
MiniTool Partition Wizard (Free Edition)
MiniTool Partition Wizard offers a full graphical partition manager that lets you see, delete, and recreate partitions on any drive. The free edition handles everything you need for USB drive recovery. You can delete all partitions, then create a new one spanning the full drive. It’s particularly useful if you want to visually confirm what’s going on with your drive’s layout before making changes.
Method 4: Fixing the Issue on macOS
Mac users can restore a USB drive’s full capacity using Disk Utility, which comes preinstalled on every Mac.
- Open Disk Utility from Applications > Utilities.
- In the top-left corner, click View and select Show All Devices. This is critical because the default view hides the physical disk and only shows partitions.
- Select the physical USB drive (not any partition listed underneath it).
- Click Erase in the toolbar.
- Choose a name, select your format (ExFAT for cross-platform compatibility), and choose GUID Partition Map as the scheme.
- Click Erase.
The key step most people miss is selecting “Show All Devices.” Without it, you’ll only be able to erase individual partitions, which won’t solve the underlying problem.
Method 5: Fixing the Issue on Linux
Linux offers multiple approaches. The fastest is using the wipefs and fdisk commands in the terminal.
- Identify your drive with lsblk. Your USB will typically show up as
/dev/sdbor/dev/sdc. - Unmount any mounted partitions: sudo umount /dev/sdX* (replace sdX with your drive).
- Wipe all filesystem signatures: sudo wipefs -a /dev/sdX
- Create a new partition table: sudo fdisk /dev/sdX, then press o for a new DOS partition table (or g for GPT), then n to create a new partition, accept the defaults, then w to write changes.
- Format the new partition: sudo mkfs.exfat /dev/sdX1
Alternatively, GParted provides a graphical interface similar to Windows Disk Management but far more capable. Install it through your package manager, select your USB drive from the dropdown, delete all partitions, create a new partition table (Device > Create Partition Table), then create a fresh partition.
How to Tell If Your Drive Is Actually Fake
If none of the methods above restore your expected capacity, you might have a counterfeit USB drive. This is especially common with drives purchased from marketplace sellers on Amazon, eBay, or AliExpress at suspiciously low prices. A “256GB” drive might actually contain a 16GB chip that’s been reprogrammed to report false capacity.
Test your drive with f3 (Fight Flash Fraud) on Linux/macOS or H2testw on Windows. These tools write data across the entire reported capacity and then read it back. If the drive is fake, the tool will tell you the actual usable size. A genuine drive will pass the test with flying colors.
Stick with reputable brands like Samsung, SanDisk, Kingston, or Corsair, and buy from authorized retailers. The SanDisk Ultra Fit and Samsung FIT Plus are both excellent, well-priced options that you can trust to deliver their advertised capacity.
Preventing This Problem in the Future
You can’t completely avoid this issue if you regularly create bootable USB drives, but you can make the cleanup process painless.
- Keep a dedicated USB drive for bootable images. Label it clearly so you don’t accidentally grab it thinking it’s your regular storage drive. A cheap 8GB or 16GB drive is perfect for this purpose.
- Use Ventoy instead of traditional imaging tools. Ventoy installs once on your USB drive and then lets you boot ISO files just by copying them onto the drive like regular files. You keep your normal file storage alongside bootable images, and you never need to reflash the drive.
- Re-format immediately after use. As soon as you’re done installing an OS from your USB drive, run the Diskpart clean process right away. It takes 30 seconds, and you won’t have to wonder why your drive looks broken three months later.
- Choose exFAT as your default format. It works on Windows, macOS, and modern Linux systems without any file size limitations. FAT32 still can’t handle files over 4GB, which is increasingly problematic.
Choosing the Right File System When Reformatting
After reclaiming your drive’s full capacity, you’ll need to pick a file system. Here’s what I recommend for different situations:
- exFAT: Best for most people. Works across Windows, macOS, Linux, game consoles, and modern TVs. No practical file size limit. This should be your default choice.
- FAT32: Use this only if you need compatibility with older devices like car stereos, older game consoles, or embedded systems that don’t support exFAT. The 4GB file size limit is a real constraint.
- NTFS: Best for Windows-only use, especially for drives larger than 32GB that need to store very large files. macOS can read but not write to NTFS without third-party software.
- ext4: Linux-only. Not readable by Windows or macOS without extra tools. Only use this for drives dedicated to Linux systems.
Frequently Asked Questions
Will cleaning and reformatting my USB drive damage it?
No. Running Diskpart’s clean command and reformatting only affects the data stored on the drive, not the physical hardware. Flash memory has a limited number of write cycles (typically tens of thousands at minimum), but a single clean and format operation is negligible. You’d need to do this thousands of times before it would have any measurable impact on the drive’s lifespan.
Why does my 64GB drive only show 59GB even after fixing it?
This is completely normal and unrelated to the partition issue. Storage manufacturers measure capacity using decimal gigabytes (1GB = 1,000,000,000 bytes), while your operating system measures using binary gibibytes (1GiB = 1,073,741,824 bytes). A “64GB” drive actually contains 64,000,000,000 bytes, which Windows reports as roughly 59.6GB. The fuller your drive’s advertised capacity, the bigger this discrepancy appears. A “1TB” drive will show up as about 931GB.
Can I recover data from my USB drive before cleaning it?
Possibly. If the data is on a partition that your OS can’t see due to formatting differences, tools like TestDisk (free) or Recuva can sometimes recover files. However, if the drive was overwritten with a disk image, the original data in those sectors is gone. Always back up important
James Kennedy is a writer and product researcher at Drives Hero with a background in IT administration and consulting. He has hands-on experience with storage, networking, and system performance, and regularly improves and optimizes his home networking setup.