Where to Plug in Nvme Ssd
Nvme ssd’s are the fastest and most efficient type of solid state drive on the market. They offer significantly faster data transfer speeds than their SATA counterparts and are ideal for gamers, creative professionals, and anyone who needs the quickest possible access to their data. Nvme ssd’s can be plugged into any compatible motherboard or expansion card, but there are a few things to keep in mind when choosing the right location for your drive.
If you have an Nvme SSD, you may be wondering where to plug it in. The answer is simple – into an Nvme slot!Nvme slots are designed specifically for Nvme SSDs.
They offer the fastest data transfer speeds and lowest latency, making them ideal for gaming, video editing, and other demanding tasks.To find an Nvme slot on your motherboard, look for a black connector with gold pins. It will likely be labeled “Nvme” or “M.2.”
If you’re not sure which slot is which, consult your motherboard’s manual or manufacturer’s website.Once you’ve located the Nvme slot, carefully insert the SSD until it clicks into place. Then secure it with a screw (if applicable).
That’s it! Your Nvme SSD is now installed and ready to use.
How Do I Add Nvme Ssd to My Pc?
Adding an NVMe SSD to your PC can be a great way to improve its performance. Here are the steps you need to take:1. Connect the NVMe SSD to your PC.
This can be done via a USB port or by connecting it directly to the motherboard.
2. Format the NVMe SSD. This can be done using any Windows-based formatting tool, such as Disk Management orDiskpart.
3. Install any necessary drivers for the NVMe SSD. This may include a driver from the manufacturer of the SSD or a third-party driver.
4. Create a new partition on the NVMe SSD, if desired.
This can again be done using Disk Management or Diskpart.
What Port Does Nvme Plug Into?
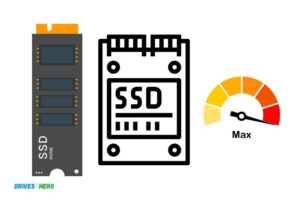
NVM Express (NVMe) is a specification for accessing solid-state drives (SSDs) attached through the PCI Express bus. It was designed to address the bottlenecks of traditional SSDs that used the older SATA interface. NVMe can achieve far lower latency and higher throughput than SATA, and it has been optimized for non-volatile memory such as flash drives.
NVMe controllers are available in several form factors, including:Single-width, half-height: For use in slim laptops and Ultrabooks
Double-width, half-height: For use in mainstream laptops and desktop computers
Full-height, double-width: For use in enterprise servers
M.2 Type 2280: The most common form factor for consumer NVMe SSDs
Most NVMe SSDs on the market today plug into an M.2 slot on your motherboard. M.2 is a newer standard that replaced mSATA, which was popular for a while as a way to increase storage capacity and speed without taking up too much space. If your computer doesn’t have an M.2 slot, you can usually add one by purchasing a PCIe adapter card that will fit into an unused PCIe slot on your motherboard—though this isn’t always possible or practical, especially in smaller laptops where space is already at a premium.
How Do I Plug in My M 2 Ssd?
M2 SSDs are becoming increasingly popular as the prices continue to drop and the capacities continue to increase. But with so many different form factors and connector types, it can be confusing trying to figure out how to plug in your M2 SSD.The first thing you need to do is determine which type of M2 SSD you have.
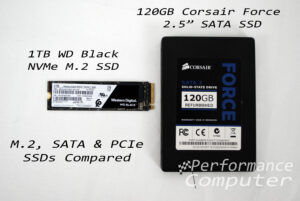
There are three main types of M2 SSDs: SATA-based, NVMe-based, and PCIe-based. SATA-based M2 SSDs use the same interface as a traditional 2.5″ SATA hard drive, so they will fit into any standard SATA slot on your motherboard. NVMe-based M2 SSDs use the PCI Express interface and require an available PCI Express slot on your motherboard.
PCIe-based M2 SSDs also use the PCI Express interface but are designed to work with specific slots that offer additional bandwidth for faster performance.Once you know which type of M2 SSD you have, you can then decide which connector type you need. The most common type of connector is called an “M key” or “B+M key” connector, which is compatible with both SATA-based and NVMe-based M2 SSDs.
Some newer motherboards also have an “E key” or “E+A key” connector that is specifically for PCIe-based M2 SSDs.Once you’ve determined which connector type you need, simply insert your M2 SSD into the appropriate slot on your motherboard and secure it with screws (if necessary). Then connect the appropriate cable from your power supply unit (PSU) to the power connector on your M2 SSD.
Finally, connect a data cable from one of your motherboard’s SATA ports (if using a SATA-based drive) or from a free PCI Express slot (if using an NVMe or PCIe based drive) to the data connector on your M2 SSD. That’s it!
Does Nvme Ssd Connect to Pcie?
Yes, NVMe SSDs connect to PCIe. This is because they use the PCIe bus to communicate with the computer, which allows for much higher data transfer speeds than older SATA-based SSDs. NVMe SSDs are also much more energy-efficient than their predecessors, making them ideal for laptops and other devices that need to conserve power.
Nvme Ssd Not Showing Up
As the owner of a new PC, you may be excited to try out the latest and greatest solid state drive technology. Unfortunately, if your NVMe SSD doesn’t show up in Windows, you may be left scratching your head.There are a few possible reasons why your NVMe SSD isn’t appearing.
First, check to make sure that it’s properly installed in your computer. Make sure that all of the cables are securely attached and that there’s no dust or debris blocking the connection. If everything looks good on the hardware front, move on to checking your BIOS settings.
Some motherboards have an option to disable PCIe devices from showing up in the BIOS. This is often used to prevent graphics cards from being detected if they’re not needed for a particular task. However, this setting can also inadvertently hide NVMe SSDs.
If you see such an option in your BIOS, make sure it’s set to Enabled before proceeding.
In this case, you’ll need to install a SATA-to-NVMe adapter in order to use the drive.Hopefully one of these solutions will help get your NVMe SSD working properly on Windows 10!
Installing M.2 Ssd on Asus Motherboard
Asus is one of the most popular motherboard manufacturers out there, and for good reason. They produce high-quality boards that are packed with features and offer great performance. If you’re looking to upgrade your Asus motherboard to include an M.2
SSD, then you’ve come to the right place. In this blog post, we’ll show you everything you need to know about installing an M.2 SSD on your Asus motherboard.
First things first: what is an M.2 SSD? An M.2
SSD is a newer type of solid state drive that offers a number of advantages over traditional SATA drives. One of the biggest benefits of using an M.2 drive is that it uses the PCI Express interface instead of SATA, which means that it can offer much higher data transfer speeds. Another advantage of M .2 drives is that they are much smaller in size than traditional 2 .5-inch SSDs, making them ideal for use in laptops and other devices where space is at a premium .
Now that we’ve answered the question “what is an M . 2 SSD?”, let’s move on to installation instructions . The first thing you’ll need to do is purchase a compatible Asus motherboard . Make sure to check compatibility before making your purchase , as not all Asus motherboards support M .
2 drives (although most newer models do ). Once you have your new motherboard , unplug all cables from your old one and remove it from your computer case . Next , install the new board into your case following the manufacturer’s instructions .
Once your new board is installed , it’s time to install your M .. 2 drive . Start by attaching the included mounting bracket to the bottom of your drive using screws ( if applicable ). Next , insert the drive into its slot on the motherboard making sure that it lines up correctly with any notches or cutouts present on either side .. Finally , secure the drive in place using screws or another type of retention mechanism depending on what’s provided by both your case and motherboard manufacturer .. Most cases will come with standoffs already installed in their screw holes which align perfectly with manymotherboards’M..slots; however, some motherboards may require special spacers which can be purchased separately if needed… With everything properly secured , reattach any cables or plugs that were removed earlier and power onyour computer ! YourM..should now be operational !
How to Install M.2 Ssd Windows 10
Are you looking to upgrade your computer by installing an M.2 SSD? If so, this guide will show you how to do it in Windows 10.
First, what is an M.2 SSD? It’s a newer type of solid-state drive that’s faster and more compact than the traditional 2.5-inch SSDs.
They come in different sizes, but the most common is 2280, which means it’s 22mm wide and 80mm long.
Just follow these steps:1) Shut down your computer and disconnect all cables from the power supply unit (PSU). Make sure there’s no static electricity by grounding yourself before touching any components inside the case.
remove the existing storage drive (if present) by unscrewing its mounting screws and carefully sliding it out of its bay; set it aside for now
How to Install Nvme Ssd Without M.2 Slot
Installing a Nvme SSD Without a M.2 Slot:If you’re looking to install a Nvme SSD without a M.2 slot, there are a few things you’ll need to do first.
Here’s what you need to know.1. Make sure your motherboard is compatible with Nvme SSDs. Not all motherboards are, so check your manual or manufacturer website to be sure.
If it is compatible, you’ll likely need to update your BIOS/UEFI firmware in order for the drive to be recognized. Check your motherboard’s support documentation for instructions on how to do this.2. Even if your motherboard doesn’t have a built-in M.2 slot, it may still have an available PCIe slot that you can use with an adapter card designed for installing Nvme SSDs (such as the StarTech PEX4M2E1).
These cards typically come with all of the necessary cables and mounting hardware included, making installation relatively straightforward. However, depending on how many other devices are installed in your system and how they’re configured, you may need to move some things around in order for everything to fit properly and/or ensure optimal airflow through the case (cooling is important for high-performance storage devices!). Again, consult your motherboard’s documentation for specific guidance on this front.
3. Once everything is physically installed, boot into your operating system of choice and follow the prompts/instructions from the adapter card manufacturer or included documentation in order to complete the setup process and begin using your new drive!
Conclusion
Nvme SSDs are the next big thing in solid state storage, and they offer a significant performance boost over traditional SSDs. However, not all computers have an Nvme slot, so you may be wondering where to plug in your new Nvme SSD.The good news is that most newer laptops and desktops will have an Nvme slot, which is typically located on the motherboard.
If you’re not sure whether or not your computer has an Nvme slot, you can check the documentation or just open up the case and take a look.Once you’ve located the Nvme slot, it’s just a matter of inserting the SSD and screwing it in place. Then you can close up the case and boot up your computer as usual.
Your new Nvme SSD should now be visible in Windows Explorer and ready to use!

Harold Williams is a senior writer and technical editor at Drives Hero with 20+ years of experience in IT administration. He specializes in storage systems, SSD reviews, and performance testing, bringing real-world insight to every guide.