NAS Setup for Beginners: Complete Home Network Storage Guide
You’ve got files scattered across multiple devices. Photos on your phone, movies on a laptop, important documents on a desktop, and backups on a couple of random USB drives you keep losing. It’s messy, it’s disorganized, and eventually something important is going to disappear forever. There’s a better way to handle all of this, and it doesn’t require a computer science degree.
A NAS, or Network Attached Storage, is essentially your own personal cloud server that sits in your home. It connects to your network and lets every device in your house access the same pool of storage. Think of it like a private Dropbox or Google Drive, except you own the hardware, you control the data, and there are no monthly subscription fees eating away at your wallet.
This guide will walk you through everything you need to know to get your first NAS up and running. We’ll cover what a NAS actually does, how to pick the right one for your needs, and the step-by-step process of setting it up on your home network. By the time you’re done reading, you’ll have a clear plan for getting organized.
What Exactly Is a NAS (and Why Should You Care)?
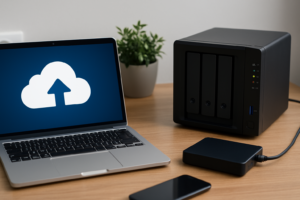
A NAS is a dedicated storage device that connects to your home router and makes files available to every device on your network. Unlike an external hard drive that plugs into one computer, a NAS is accessible from your laptop, phone, tablet, smart TV, and even from outside your home if you configure remote access.
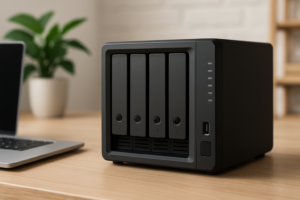
The device itself looks like a small box. Inside, it holds one or more hard drives and runs its own lightweight operating system designed specifically for file management, backups, and media serving. It stays on 24/7, quietly running in the background and consuming very little power.
Common Uses for a Home NAS
- Centralized file storage: One location for all your documents, photos, and videos accessible from any device.
- Automatic backups: Set your computers and phones to back up automatically to the NAS every night.
- Media server: Stream your movie and music collection to any TV or device using Plex or similar apps.
- Photo management: Replace Google Photos or iCloud with a self-hosted photo library you fully control.
- File sharing: Easily share large files with family members on the same network.
- Remote access: Grab files from your NAS while traveling, just like you would with a cloud service.
The beauty of a NAS is that it handles all of this simultaneously. It’s one box doing the work of several cloud subscriptions, and your data never leaves your home unless you want it to.
Choosing the Right NAS for Your Home
The NAS market can feel overwhelming at first, but the decision comes down to a few simple factors: how many drive bays you need, which brand and operating system you prefer, and what kind of hard drives to put inside.
How Many Drive Bays Do You Need?
NAS devices come in configurations ranging from single bay units all the way up to massive rack-mounted servers with 12+ bays. For home use, you’re looking at either a 2-bay or 4-bay unit.
A 2-bay NAS is perfect for most home users. You can install two drives, set them up in a mirrored configuration (RAID 1) for redundancy, and have plenty of storage for documents, photos, and a reasonable media library. If one drive fails, your data survives on the other drive.
A 4-bay NAS makes sense if you’re planning to store a large media collection, want more total capacity, or need more flexible redundancy options. It costs more upfront, but gives you room to grow.
For most people just getting started, a 2-bay unit hits the sweet spot between capability and cost.
Picking a Brand
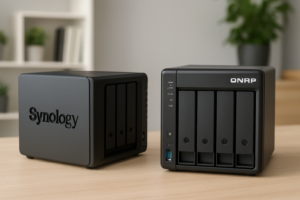
Two brands dominate the home NAS market: Synology and QNAP. Both make excellent hardware, but they differ in software philosophy.
Synology is my recommendation for beginners. Their DiskStation Manager (DSM) operating system is clean, intuitive, and extremely well-documented. The ecosystem of first-party apps is polished, and the community support is massive. When you run into a question, there are hundreds of tutorials and forum posts to help you out.
The Synology DS224+ is the most popular 2-bay NAS for home users right now. It runs an Intel Celeron processor, supports up to 18TB drives per bay, and handles everything from file serving to media transcoding with Plex.
Synology DS224+ 2-Bay NAS DiskStation
The best 2-bay NAS for beginners with an intuitive interface, strong app ecosystem, and reliable performance for home use.
QNAP tends to offer more hardware for the money, with features like HDMI output and more RAM in some models. Their QTS operating system is capable but has a steeper learning curve. QNAP is a solid choice if you’re tech-savvy and want more tinkering options, but for your first NAS, Synology’s polish is hard to beat.
Choosing Your Hard Drives
Most NAS devices are sold without drives, meaning you’ll need to buy them separately. This is actually a good thing because it lets you choose the exact capacity and type you want.
For NAS use, you want drives specifically designed for 24/7 operation in a multi-drive environment. The two main options are:
- WD Red Plus: Reliable, runs cool, and is specifically built for NAS environments. The CMR (Conventional Magnetic Recording) versions are preferred over SMR drives for NAS use.
- Seagate IronWolf: Another excellent NAS-specific line with built-in health monitoring sensors that integrate with most NAS operating systems.
For a 2-bay setup, 4TB or 8TB WD Red Plus drives are a great starting point. Two 4TB drives in a mirrored configuration give you 4TB of usable, protected storage. Two 8TB drives give you 8TB.
WD Red Plus 4TB NAS Internal Hard Drive
A reliable and proven NAS drive that runs cool and quiet, perfect for a first 2-bay NAS setup.
Avoid using regular desktop hard drives in a NAS. They aren’t designed for the always-on workload, and their vibration profiles can cause issues when multiple drives are running side by side. Spend the extra money on proper NAS drives. You’ll thank yourself later.
Setting Up Your NAS: Step by Step
Once your NAS and drives arrive, the physical setup takes about 15 minutes. The software configuration takes a bit longer, but the process is guided and approachable even if you’ve never done anything like this before.
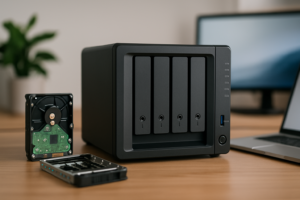
Step 1: Install the Hard Drives
Open the drive bays on your NAS (most Synology models have tool-free, slide-out trays). Snap or screw your hard drives into the trays, then slide them back in until they click. That’s it for the hardware side.
A quick note: handle the drives carefully and avoid touching the exposed circuit board on the bottom. Static discharge can damage electronics, so ground yourself by touching a metal surface before handling the drives.
Step 2: Connect to Your Network
Plug an Ethernet cable from the NAS into your router. Then connect the power cable and press the power button. The NAS will take a couple of minutes to boot up for the first time. You’ll hear the drives spin up and some beeping as it initializes.
Your NAS needs to be connected via Ethernet, not Wi-Fi. This is important for both speed and reliability. Place it near your router, or run an Ethernet cable to wherever you want the NAS to live.
Step 3: Find Your NAS on the Network
Open a web browser on any computer connected to the same network. For Synology devices, navigate to find.synology.com. The browser-based tool will automatically detect your NAS and walk you through the initial setup wizard.
If auto-detection doesn’t work, you can also try typing your NAS’s IP address directly into the browser. Check your router’s admin page to see what IP address was assigned to the NAS.
Step 4: Install the Operating System
The setup wizard will prompt you to download and install DSM (DiskStation Manager). This takes about 10 minutes depending on your internet connection. The NAS will restart once the installation is complete.
During this process, you’ll create an admin account with a username and password. Choose a strong password here. Even though your NAS is on your local network, security matters, especially if you plan to enable remote access later.
Step 5: Configure Your Storage
After DSM is installed, the Storage Manager will guide you through creating your storage pool and volume. For a 2-bay NAS, I recommend choosing SHR (Synology Hybrid RAID) with one drive of redundancy. SHR is Synology’s flexible RAID system that mirrors your data across both drives while making future drive upgrades easier.
The system will format the drives and build the storage pool. This can take several hours depending on drive size, but you can start using the NAS while it builds in the background.
Essential First-Time Configuration
With the basic setup done, there are a few important tweaks to make before you start loading files onto your new NAS.
Create User Accounts
Don’t use the admin account for daily access. Create individual user accounts for each family member, each with their own home folder and appropriate permissions. This keeps things organized and prevents accidental deletion of shared files.
In DSM, go to Control Panel > User & Group and create accounts as needed. You can set per-folder permissions so the kids can access the media library but can’t touch your important documents.
Set Up Shared Folders
Shared folders are the top-level organizational structure on your NAS. Common folders to create include:
- Photos for family photos and videos
- Music for your audio library
- Video for movies and TV shows
- Documents for important files
- Backups for computer backup data
Go to Control Panel > Shared Folder to create these. Assign read/write permissions based on which user accounts should access each folder.
Enable Automatic Updates
Keep your NAS firmware updated to patch security vulnerabilities and get new features. In DSM, go to Control Panel > Update & Restore and enable automatic update checks. I recommend setting it to notify you of updates rather than auto-installing them, so you can choose when to restart the system.
Configure Backups (Yes, Your Backup Needs a Backup)
A NAS with mirrored drives protects you from a single drive failure, but it doesn’t protect against ransomware, accidental deletion, fire, theft, or a power surge that fries both drives simultaneously. You need an additional backup.
Synology’s Hyper Backup app lets you back up your NAS to an external USB drive, another NAS, or a cloud service like Backblaze B2 or Amazon S3. At minimum, connect a USB hard drive to your NAS and schedule a weekly backup through Hyper Backup. Keep this drive unplugged when not actively backing up for extra protection against ransomware.

Seagate Expansion 8TB External Hard Drive USB 3.0
An affordable external drive that works perfectly as a NAS backup target through Synology’s Hyper Backup app.
Install Useful Apps
Synology’s Package Center has a library of apps you can install directly on your NAS. A few worth setting up right away:
- Synology Photos: A Google Photos alternative that organizes and browses your photo library from any device.
- Synology Drive: Works like Dropbox, syncing folders between your computers and the NAS automatically.
- Plex Media Server: Turns your NAS into a full media streaming server for movies, TV, and music.
- Hyper Backup: Manages backup jobs to external drives or cloud storage.
Accessing Your NAS from Different Devices
Once your NAS is configured, connecting your devices is the fun part. On Windows, open File Explorer and type \\YourNASName in the address bar. You’ll see your shared folders appear as network drives. Right-click any folder and choose “Map Network Drive” so it shows up permanently in your sidebar.
On Mac, open Finder and look for your NAS in the sidebar under “Locations.” If it doesn’t appear, press Command+K, type smb://YourNASName, and connect with your user credentials.
On phones and tablets, install the Synology apps (DS File, Synology Photos, DS Video) from your device’s app store. These give you clean, mobile-friendly access to your files from anywhere on your network.
For remote access outside your home, Synology’s QuickConnect feature creates a relay connection without requiring you to configure port forwarding on your router. It’s the easiest option for beginners, though advanced users may prefer setting up a VPN for better performance and security.
Common Beginner Mistakes to Avoid
After helping several friends set up their first NAS, I’ve seen the same mistakes come up repeatedly. Here’s what to watch out for.
- Skipping drive redundancy: Don’t run your NAS in JBOD or RAID 0 just to maximize space. Use SHR or RAID 1 so a single drive failure doesn’t destroy everything.
- Using consumer desktop drives: Spend the extra money on NAS-rated drives. They’re designed for continuous operation and will last significantly longer.
- No off-NAS backup: RAID is not a backup. Repeat that to yourself. Set up Hyper Backup to an external drive or cloud service.
- Weak admin passwords: Your NAS holds your most important files. Use a strong, unique password and enable 2-factor authentication.
- Placing the NAS in a closet with no airflow: These devices generate heat, especially under load. Make sure there’s adequate ventilation wherever you put it.
Frequently Asked Questions
Can I use a NAS as a
James Kennedy is a writer and product researcher at Drives Hero with a background in IT administration and consulting. He has hands-on experience with storage, networking, and system performance, and regularly improves and optimizes his home networking setup.
James Kennedy is a writer and product researcher at Drives Hero with a background in IT administration and consulting. He has hands-on experience with storage, networking, and system performance, and regularly improves and optimizes his home networking setup.