How to Clone Your Hard Drive Without Losing Any Data
Cloning a hard drive is one of those tasks that sounds intimidating until you actually do it. You’re essentially making a perfect, byte-for-byte copy of everything on your drive, including your operating system, applications, settings, and personal files. When it’s done, you can swap drives and boot up like nothing happened.
Maybe you’re upgrading from a slow spinning hard drive to a snappy SSD. Maybe your current drive is making clicking noises and you want to get your data off it before it dies completely. Or maybe you just want a full backup you can pop in and go if disaster strikes. Whatever your reason, cloning is the most reliable way to migrate your entire system without reinstalling Windows, reconfiguring your apps, or losing a single file.
This guide walks you through the entire process, from choosing the right software to verifying your clone works perfectly. I’ll cover both HDD-to-SSD and HDD-to-HDD scenarios, recommend specific tools (both free and paid), and share troubleshooting tips for the problems that tend to trip people up.
What You’ll Need Before You Start
Before you begin cloning, gather your hardware and make a quick plan. A little preparation here saves a lot of frustration later.
Hardware Requirements
- Your source drive (the drive you’re cloning from)
- Your destination drive (the new drive you’re cloning to)
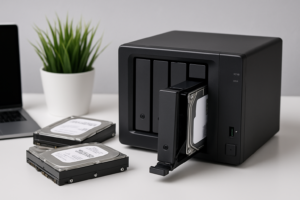
- A way to connect both drives simultaneously to your computer
- A power source for your computer that won’t be interrupted (use a UPS if you have one, and definitely don’t attempt this on a laptop running on battery)
If you’re cloning to an internal drive in a desktop, you can mount both drives inside the case. For laptops, or if you only have one drive bay, you’ll need a USB-to-SATA adapter or an external drive enclosure. The Sabrent USB 3.0 to SATA adapter is a popular and affordable option that works well for both 2.5-inch and 3.5-inch drives.
Sabrent USB 3.0 to SATA External Hard Drive Adapter
A simple, reliable adapter for connecting bare SATA drives via USB, perfect for cloning operations
Important: Check Your Drive Sizes
Your destination drive needs to have enough capacity to hold all the data on your source drive. If you’re going from a 1TB HDD to a 500GB SSD, cloning will only work if the actual used space on the 1TB drive is under 500GB. Most cloning software can handle this automatically by shrinking partitions, but it’s better to know ahead of time.
To check your used space on Windows, open File Explorer, right-click your C: drive, and select Properties. On a Mac, click the Apple menu, then About This Mac, then Storage.
Choosing Your Cloning Software
There are dozens of cloning tools available, but they’re not all created equal. Here are my top picks, broken into free and paid options.
Best Free Options
Clonezilla is the gold standard for free cloning. It’s open-source, incredibly powerful, and works with virtually any drive configuration. The downside is that it runs from a bootable USB drive and has a text-based interface that looks like something from 1995. If you’re comfortable following on-screen prompts carefully, it works beautifully. If you want a pretty GUI, keep reading.
Macrium Reflect Free (now called Macrium Reflect Home, with a free trial period) used to be the go-to recommendation for Windows users. The free version has become more limited over time, but it’s still worth checking for the trial. The interface is clean and the cloning process is very reliable.
Samsung Data Migration is completely free if you’re cloning to a Samsung SSD. It only works with Samsung destination drives, but if you bought a Samsung 870 EVO or 990 PRO, this is the easiest option by far. Download it directly from Samsung’s website.
Best Paid Options
Acronis True Image (now Acronis Cyber Protect Home Office) is my top recommendation if you’re willing to pay. It handles every cloning scenario gracefully, including GPT/MBR conversions, partition resizing, and even cloning active system drives on the fly. The interface is intuitive, and it doubles as excellent backup software after you’re done cloning. Check current pricing on Amazon.
EaseUS Todo Backup offers a good middle ground between free and premium. The paid Home edition includes disk cloning with an easy wizard-style interface. It’s particularly good for beginners who don’t want to deal with partition tables and boot sectors manually.
Acronis Cyber Protect Home Office
The most reliable paid cloning and backup solution for Windows, handles complex drive configurations with ease
Step-by-Step: Cloning HDD to SSD
This is the most common scenario: upgrading from a mechanical hard drive to a solid-state drive. The speed improvement is dramatic, often cutting boot times from over a minute to under 15 seconds. Here’s how to do it using Acronis True Image, though the general steps apply to most software.
Step 1: Connect Your SSD
Connect your new SSD to your computer. If you’re using a desktop, you can install it in an empty drive bay. For laptops, connect it via a USB-to-SATA adapter. Once connected, make sure your computer recognizes the drive. On Windows, open Disk Management (right-click the Start button, then select Disk Management). Your new SSD should appear, possibly as “Unallocated.” You don’t need to format it; the cloning software will handle that.
Step 2: Install and Launch Your Cloning Software
Download and install your chosen software. Open it and look for the “Clone Disk” or “Clone Drive” option. In Acronis, you’ll find this under Tools. In EaseUS Todo Backup, it’s on the main screen.
Step 3: Select Source and Destination
Select your current HDD as the source drive and your new SSD as the destination. Double-check this step. If you get it backwards, you’ll overwrite your original drive with a blank disk. I’ve seen this happen, and it’s a terrible feeling.
Step 4: Choose Your Clone Method
Most software offers two options:
- Automatic/Recommended: The software handles partition sizing for you. This is the best choice for most people, especially when going from a larger HDD to a smaller SSD.
- Manual: You define partition sizes yourself. Useful if you want to leave unallocated space for a second partition or have specific layout requirements.
If your SSD is smaller than your HDD, make sure the software is set to resize partitions proportionally. Most modern tools do this automatically.
Step 5: Start the Clone
Hit “Proceed” or “Start” and wait. Cloning speed depends on the amount of data and your connection type. Over USB 3.0, expect roughly 100-200 MB/s. A 500GB drive with 200GB of data might take 20 to 40 minutes. Over USB 2.0, it could take several hours, so avoid that if possible.
Don’t use your computer for anything else during the clone. Any file changes mid-clone can cause inconsistencies.
Step 6: Swap the Drives
Once cloning is complete, shut down your computer. Remove the old HDD and install the SSD in its place. If you’re on a desktop with multiple drive bays, you can keep both installed, but disconnect the old drive first to avoid boot confusion.
Step 7: Boot and Verify
Power on your computer. It should boot from the SSD exactly as it did from the old drive, just significantly faster. Check that all your files are there, your programs work, and Windows is activated. You may need to enter BIOS (usually by pressing F2, F12, or DEL during startup) to set the new SSD as the primary boot device.
Step-by-Step: Cloning HDD to HDD
Cloning from one hard drive to another follows the same general process, but there are a few differences worth mentioning.
When cloning HDD to HDD, the destination drive is usually the same size or larger. This simplifies things because you won’t need to worry about partition resizing. If the destination is larger, you’ll end up with unallocated space after the clone, which you can extend into your main partition using Windows Disk Management.
The cloning speed will be slower compared to SSD operations because both drives are mechanical. Expect transfer rates around 80-150 MB/s depending on drive age and condition. A full 1TB clone can take several hours.
One important tip for HDD-to-HDD cloning: if you’re creating a backup drive rather than a replacement, consider using your cloning software’s “image” feature instead. An image file is a compressed snapshot of your drive that you can restore later. This is more space-efficient than a direct clone if you plan to keep the backup drive stored away.
SSD Recommendations for Upgrades
If you haven’t picked your destination SSD yet, here are my top choices based on reliability and performance.
For SATA SSDs (2.5-inch form factor, compatible with virtually any computer made in the last 15 years), the Samsung 870 EVO remains the best all-around option. It’s fast, durable, and comes with Samsung’s free migration software. The Crucial MX500 is another excellent choice that tends to be slightly more budget-friendly.
Samsung 870 EVO SATA SSD
The best SATA SSD for cloning upgrades, comes with free Samsung Data Migration software included
For NVMe SSDs (M.2 form factor, for newer desktops and laptops with M.2 slots), the Samsung 990 PRO and WD Black SN850X are top-tier options. Make sure your motherboard has an M.2 slot before buying one of these. You can check your motherboard manual or use a tool like Crucial’s System Scanner to verify compatibility.
Troubleshooting Common Issues
Even with careful preparation, cloning doesn’t always go smoothly on the first attempt. Here are the most common problems and how to fix them.
The Cloned Drive Won’t Boot
This is the number one issue people run into. Usually, it’s caused by one of three things:
- Wrong boot mode: If your original drive uses UEFI/GPT and your BIOS is set to Legacy/CSM mode (or vice versa), the clone won’t boot. Enter BIOS and make sure the boot mode matches your partition style. You can check your partition style in Windows Disk Management by right-clicking the drive and selecting Properties, then the Volumes tab.
- Boot order: Your BIOS might still be trying to boot from the old drive. Change the boot priority to the new drive.
- Missing boot partition: Some cloning tools don’t properly copy the EFI System Partition or the boot recovery partition. If this happens, try a different cloning tool, or use Windows installation media to run Startup Repair.
The Clone Process Fails Partway Through
If cloning stops with an error, check for bad sectors on your source drive. Open Command Prompt as Administrator and run chkdsk C: /r (this will require a restart). Bad sectors can cause read errors that interrupt the cloning process. If your drive has significant damage, try Clonezilla with the “rescue” option enabled, which skips unreadable sectors.
Partitions Are Wrong Size After Cloning
If your main partition didn’t expand to fill the new drive, open Windows Disk Management. Right-click the partition you want to expand and select “Extend Volume.” Follow the wizard to use the remaining unallocated space. If the unallocated space isn’t adjacent to your partition (because a recovery partition is in between), you may need a tool like MiniTool Partition Wizard to rearrange things.
Windows Isn’t Activated After Cloning
This usually only happens when you’re also changing the motherboard at the same time. A straight drive swap on the same computer almost never triggers reactivation. If it does, go to Settings, Update & Security, Activation, and click “Troubleshoot.” Windows should reactivate automatically if your license is linked to a Microsoft account.
SSD Performance Seems Slow After Cloning
Make sure AHCI mode is enabled in your BIOS (not IDE mode). Also verify that your SSD’s firmware is up to date using the manufacturer’s tool (Samsung Magician, Crucial Storage Executive, etc.). If you cloned from an HDD that had its partitions misaligned, the SSD might not be performing optimally. A fresh clone using modern software usually handles alignment correctly, but older tools might not.
Tips for a Successful Clone
- Close all programs before starting the clone, especially cloud sync tools like Dropbox, OneDrive, or Google Drive.
- Disable antivirus temporarily during the cloning process. Some security software interferes with low-level disk access.
- Keep your old drive intact for at least a week after cloning. Don’t format it until you’ve verified everything works on the new drive.
- Use USB 3.0 or faster for external connections. The blue USB ports on your computer are USB 3.0. Cloning over USB 2.0 is painfully slow.
- Run TRIM after cloning to an SSD. Open Command Prompt as Administrator and type
Defrag C: /Oto optimize the SSD.
Frequently Asked Questions
Can I clone a drive while Windows is running?
Yes, most modern cloning software can clone the system drive while Windows is running. Tools like Acronis True Image and EaseUS Todo Backup use a technology called Volume Shadow Copy to create a consistent snapshot. For the best results, though, try not to make changes to files during the process. Some tools, like Clonezilla, require you to boot from a USB drive and run the clone outside of Windows, which avoids this issue entirely.
Will cl
James Kennedy is a writer and product researcher at Drives Hero with a background in IT administration and consulting. He has hands-on experience with storage, networking, and system performance, and regularly improves and optimizes his home networking setup.
James Kennedy is a writer and product researcher at Drives Hero with a background in IT administration and consulting. He has hands-on experience with storage, networking, and system performance, and regularly improves and optimizes his home networking setup.