How to Set Up Automated Backups to Your NAS in 30 Minutes
Losing files hurts. Whether it’s years of family photos, critical work documents, or your entire music library, a single hard drive failure can wipe out things you can never replace. And if you’re reading this, you probably already own a NAS (or you’re about to buy one), which means you’re halfway to solving this problem for good.
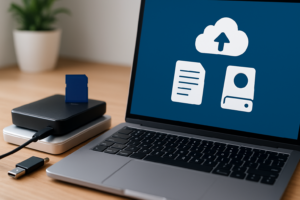
The other half is actually setting up automated backups so every computer in your home or office quietly sends its data to your NAS without you ever thinking about it. The whole process takes about 30 minutes, and once it’s running, you won’t need to touch it again. This guide walks you through every step for Mac, Windows, and cross-platform setups.
I’ve tested these methods across Synology, QNAP, and Western Digital NAS devices, and I’ll tell you exactly which approach works best depending on your setup. Let’s get your backups running before your next coffee gets cold.
Before You Start: What You’ll Need
Gather these things before you begin, and the actual setup will fly by:
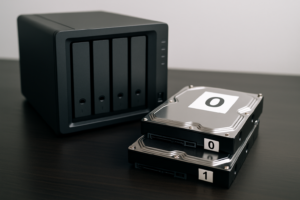
- A NAS on your local network with available storage space (at least 2x the data you plan to back up)
- A wired or stable Wi-Fi connection between your computers and the NAS
- Admin credentials for your NAS management interface
- 10-30 minutes per computer you want to back up
If you haven’t set up your NAS yet, start there first. Most Synology and QNAP units walk you through initial setup in their browser-based interface. For this guide, I’m assuming your NAS is online, connected to your router, and accessible from your computers.
Method 1: Time Machine for Mac Users (The Best Option on macOS)
Apple’s built-in Time Machine is still the single best backup tool for Mac users, and every major NAS brand supports it natively. You don’t need to install anything extra on your Mac. The entire setup takes about 10 minutes, plus however long your first backup needs to run.
Step 1: Create a Shared Folder on Your NAS
Log into your NAS admin panel through your web browser. On a Synology, go to Control Panel > Shared Folder > Create. Name it something like “TimeMachineBackup.” On QNAP, the process is nearly identical under Storage & Snapshots > Shared Folders.
Set a storage quota for this folder. I recommend limiting it to about 1.5x your Mac’s internal drive size. Time Machine will fill whatever space you give it with older versions of files, and without a quota, it can consume your entire NAS.
Step 2: Enable the Time Machine Service
On Synology, go to Control Panel > File Services > SMB > Advanced Settings and check “Enable Bonjour Time Machine broadcast via SMB.” Then select the shared folder you just created. On QNAP, head to Network & File Services > Win/Mac/NFS > Apple Networking and enable Time Machine support there.
Step 3: Connect Time Machine on Your Mac
Open System Settings > General > Time Machine on your Mac (or System Preferences on older macOS versions). Click “Add Backup Disk,” and your NAS share should appear in the list. Select it, enter your NAS credentials, and click “Set Up Disk.”
Your first backup will take several hours depending on how much data you have. Every backup after that is incremental, meaning it only copies files that changed. Most daily backups finish in under five minutes.
Method 2: Windows File History and Windows Backup
Windows gives you a couple of built-in options, and honestly, neither one is as polished as Time Machine. But they work, and they’re free.
Using File History (Windows 10 and 11)
File History backs up your libraries, desktop, contacts, and favorites on a schedule. To set it up with your NAS:
- First, map your NAS shared folder as a network drive. Open File Explorer, click “This PC,” then “Map network drive.” Enter your NAS path (like \\NASNAME\Backups) and check “Reconnect at sign-in.”
- Open Settings > Update & Security > Backup (Windows 10) or Settings > System > Storage > Advanced backup options (Windows 11).
- Click “Add a drive” and select your mapped NAS drive.
- Turn on “Automatically back up my files” and click “More options” to set your backup frequency. I recommend every hour.
The limitation with File History is that it only backs up user folders. It won’t create a full system image. For most people, that’s actually fine since your documents and photos are what matter most. You can always reinstall Windows, but you can’t reinstall your wedding photos.
Using Windows Backup (Full System Image)
If you want a complete system image that lets you restore your entire Windows installation, use the older “Backup and Restore (Windows 7)” tool that’s still available in Windows 10 and 11. Search for it in the Start menu, click “Set up backup,” choose your NAS network location, and follow the wizard. Schedule it to run weekly.
Method 3: Third-Party Backup Software (The Cross-Platform Winner)
If you have a mix of Mac and Windows machines, or if you want more control than the built-in tools provide, third-party software is the way to go. After testing several options, here are my top picks.
Synology Active Backup for Business (Free for Synology Owners)
If you own a Synology NAS, this is the best backup solution available, period. Active Backup for Business is completely free (included with your Synology), supports both Windows PCs and Mac computers, and offers features that compete with enterprise backup tools. You get full system image backups, incremental backups with deduplication, and a clean web-based management console.
Install it from the Synology Package Center, then install the agent on each computer you want to back up. The agent is lightweight and runs silently in the background. You can manage every computer’s backup schedule from your NAS’s web interface, which is incredibly convenient when you’re backing up multiple machines.
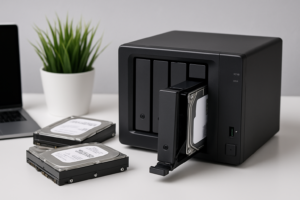
Synology DiskStation DS224+
The ideal 2-bay NAS for home backup with free Active Backup software included and excellent performance for Time Machine and Windows backups
Veeam Agent for Microsoft Windows (Free Tier Available)
For Windows users without a Synology NAS, Veeam Agent is excellent. The free version handles full system image backups to a NAS share, and it’s built by the same company that dominates enterprise backup. Download it from Veeam’s website, point it at your NAS during setup, and schedule your backups. It supports incremental backups and bare-metal recovery.
Acronis Cyber Protect Home Office
Acronis (formerly Acronis True Image) works on both Mac and Windows and adds some useful extras like ransomware protection and cloud backup alongside your NAS backup. It’s a paid product, but if you want a single tool that covers local NAS backup and offsite cloud backup simultaneously, it’s worth considering. Check current pricing on Amazon for the latest deals on subscription cards.
Carbon Copy Cloner (Mac Only)
For Mac users who find Time Machine too limited, Carbon Copy Cloner creates bootable backups and offers much more granular control over what gets backed up and when. It’s particularly useful if you want to back up specific folders to your NAS rather than your entire system.
Optimizing Your Backup Setup for Speed and Reliability
Getting backups running is step one. Keeping them running reliably is step two. These tips will save you headaches down the road.
Use a Wired Connection When Possible
Your first backup will transfer hundreds of gigabytes (or more). Over Wi-Fi, that initial backup could take days. If you can temporarily plug your computer into your router with an Ethernet cable for the first backup, do it. After that, incremental backups over Wi-Fi work just fine since they’re usually only transferring a few hundred megabytes at a time.
If your NAS supports 2.5GbE networking, like the Synology DS224+ or QNAP TS-264, a quick network upgrade can make a dramatic difference. A 2.5GbE USB Ethernet adapter for your computer paired with a 2.5GbE switch will roughly double your backup speeds compared to standard gigabit Ethernet.
QNAP QSW-1105-5T 5-Port 2.5GbE Switch
Affordable unmanaged 2.5GbE switch that instantly speeds up NAS backups for every device on your network
Schedule Backups During Off-Hours
Set your full system image backups to run at 2:00 AM or whenever your computers are on but idle. This prevents backup traffic from slowing down your network during the day. Time Machine and File History handle this well automatically since they run small incremental backups throughout the day and aren’t very network-intensive.
Enable Backup Verification
A backup you can’t restore is useless. Synology Active Backup lets you verify backup integrity automatically. Veeam does this too. If your backup tool supports verification, turn it on. If it doesn’t, manually test a restore every few months by pulling a random file from your backup and confirming it opens correctly.
Set Up Email Notifications
Every NAS worth owning can send you email alerts when something goes wrong. Configure your NAS to notify you about failed backups, drive health warnings, and storage space running low. On Synology, this is under Control Panel > Notification. On QNAP, check Control Panel > Notification Center.
The 3-2-1 Backup Rule: Don’t Stop at Your NAS
Your NAS backup is excellent protection against hard drive failures, accidental deletions, and ransomware. But it won’t protect you against a house fire, flood, or theft that takes out both your computers and your NAS simultaneously.
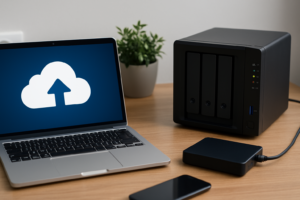
The gold standard is the 3-2-1 rule: three copies of your data, on two different types of media, with one copy stored offsite. Your computers are copy one. Your NAS is copy two. For copy three, consider setting up your NAS to replicate critical files to a cloud service like Backblaze B2, Synology C2, or even a second NAS at a friend’s house.
Most NAS devices have built-in apps for cloud sync. Synology’s Hyper Backup and QNAP’s Hybrid Backup Sync both support major cloud storage providers. Even backing up just your most important files (photos, documents, financial records) to the cloud adds a critical safety net.
WD Red Plus 4TB NAS Hard Drive (WD40EFPX)
Purpose-built NAS drive with CMR recording technology for reliable 24/7 backup operations and strong warranty coverage
Troubleshooting Common Backup Issues
Time Machine can’t find the NAS: Make sure SMB is enabled on your NAS and that Bonjour broadcasting is turned on. Restart the SMB service on your NAS, then restart your Mac. If it still won’t appear, try connecting manually by clicking “Connect to Server” in Finder and entering smb://your-nas-ip.
Windows File History fails intermittently: This is usually a network stability issue. Make sure your mapped network drive reconnects at login. If the drive keeps disconnecting, switch to a static IP for your NAS instead of relying on DHCP.
Backups are painfully slow: Check if another device is hammering your NAS (like a Plex server transcoding video). Also verify you’re not running backups over a congested 2.4GHz Wi-Fi band. Switch to 5GHz or wired Ethernet for much better throughput.
NAS storage filling up too fast: Reduce your backup retention period. Time Machine can be limited with a storage quota. In Veeam and Active Backup, reduce the number of restore points you keep. For most home users, 30 days of versioning history is more than enough.
Frequently Asked Questions
How much NAS storage do I need for backups?
A good starting point is 2x to 3x the total data you plan to back up across all your computers. If you have two computers with 500GB each of data, aim for at least 2TB to 3TB of usable NAS storage. This gives you room for multiple backup versions and some growth over time. Keep in mind that RAID configurations reduce your usable capacity, so a two-bay NAS with two 4TB drives in RAID 1 (mirroring) gives you only 4TB of usable space.
Can I back up multiple computers to the same NAS?
Absolutely, and this is one of the biggest advantages of using a NAS for backups. Create separate shared folders (or user accounts) for each computer to keep things organized and prevent one machine’s backup from interfering with another. Synology Active Backup for Business is particularly good at this since it gives you a centralized dashboard showing the backup status of every computer on your network.
Will running backups slow down my network or computer?
After the initial full backup, incremental backups are very lightweight. Most daily incremental backups transfer less than a few hundred megabytes and finish within minutes. You probably won’t even notice them running. If you’re concerned, schedule larger weekly or monthly full backups to run overnight. Time Machine is especially good at staying out of your way since it throttles itself when you’re actively using your Mac.
Do I still need cloud backup if I have a NAS?
Yes, ideally. A NAS protects you from hard drive failures, accidental deletions, and local disasters on your computer. But your NAS sits in the same physical location as your computer. A fire, flood, or burglary could take out both simultaneously. Adding even a basic cloud backup for your most critical files (family photos, financial documents, irreplaceable work) gives you true disaster recovery capability. Many NAS units can sync directly to affordable cloud storage like Backblaze B2, making this easy to automate.
Wrapping Up
Setting up automated backups to your NAS is one of those tasks that feels like a chore for 30 minutes and then silently protects you for years. Mac users should start with Time Machine. Windows users should try File History for simplicity or Veeam for full system images. And anyone with a Synology NAS should absolutely install Active Backup for Business since it’s the most capable free backup tool
James Kennedy is a writer and product researcher at Drives Hero with a background in IT administration and consulting. He has hands-on experience with storage, networking, and system performance, and regularly improves and optimizes his home networking setup.