What to Do If Your External Drive Stops Showing Up
You plug in your external drive, wait a few seconds, and nothing happens. No notification, no new drive letter in File Explorer, nothing. Your files might as well not exist. Before you panic and assume the drive is dead, there are several common causes for this problem, and most of them are fixable in under ten minutes.
This guide walks you through every practical troubleshooting step, from the simplest cable swap to more involved fixes in Disk Management and Device Manager. If you’ve already tried the basics and suspect hardware failure, check out our guide on how to recover data from a failed external drive. But don’t jump to that conclusion yet. Most “invisible” drives just need a nudge to come back to life.
Step 1: Rule Out the Obvious Cable and Port Problems
This sounds almost too simple, but a bad cable or flaky USB port is the single most common reason an external drive stops appearing. USB cables, especially the thin Micro-B ones that ship with portable drives, degrade over time. Internal wires fray, connectors loosen, and one day the cable just doesn’t carry enough power or data signal to register the drive.
Try these things first:
- Swap the USB cable. Use a different cable entirely, not just the same one plugged in again. If you’re using a USB 3.0 Micro-B cable, make sure the replacement is also USB 3.0 rated.
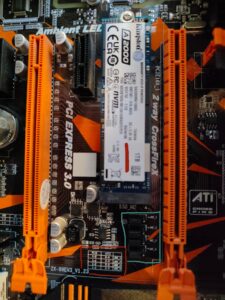
- Try a different USB port. Plug into a port directly on your computer, not a hub or monitor port. Front-panel USB ports on desktops are often underpowered, so use a rear port connected straight to the motherboard.
- Test on another computer. If the drive shows up on a different machine, the problem is with your original computer’s USB configuration, not the drive itself.
If your drive keeps disconnecting intermittently, that’s almost always a cable or power issue rather than a drive failure. Replace the cable before doing anything else.
Step 2: Check Power Supply for Desktop External Drives
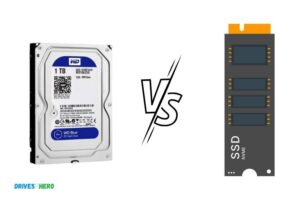
Portable 2.5-inch drives draw power directly from the USB port. Desktop 3.5-inch external drives, like the WD Elements Desktop or Seagate Expansion Desktop, need their own AC power adapter. If that adapter dies or the power brick’s LED goes dark, the drive won’t spin up at all.
Check that the power adapter is firmly connected at both ends and that any power LED on the drive enclosure lights up. If you can hear the drive spinning and feel a slight vibration when you touch it, power is fine. If the drive is completely silent, the power supply is likely the culprit.
Replacement power adapters are available, but you need to match the exact voltage and amperage. Check the label on your original adapter (typically 12V/2A for 3.5-inch drives) and find a compatible replacement. Getting this wrong can fry the drive’s controller board, so double-check before plugging anything in.
Step 3: Use Disk Management to Find the “Hidden” Drive
Your drive might actually be connected and recognized by Windows but not assigned a drive letter. This happens more often than you’d think, especially after Windows updates or when you’ve been swapping multiple USB devices.
Here’s how to check:
- Press Windows + X and select Disk Management.
- Look for your external drive in the list of disks at the bottom of the window. It’ll usually appear as “Disk 1” or “Disk 2” depending on how many drives you have.
- If you see the drive but its partition says “Unallocated”, you’ll need to create a new volume. Right-click the unallocated space, choose New Simple Volume, and follow the wizard. Be aware that this formats the drive, so you’ll lose any existing data.
- If the drive shows a healthy partition but no letter, right-click the partition and select Change Drive Letter and Paths. Assign an available letter, and the drive should appear in File Explorer immediately.
- If the drive shows as “Not Initialized”, right-click the disk name and choose Initialize Disk. Select GPT for drives over 2TB or MBR for smaller ones.
One important note: if the drive contains data you need and it’s showing as RAW or Unallocated, don’t format it. Use data recovery software first, or consult a professional. Formatting will overwrite the file system and make recovery much harder.
Step 4: Update or Reinstall USB Drivers
Corrupted or outdated USB drivers can prevent Windows from communicating with your external drive. This is especially common after major Windows updates that replace driver files.
Open Device Manager (press Windows + X, then select Device Manager) and expand the Disk drives section. If your external drive appears here with a yellow exclamation mark, you’ve found the problem. Right-click it and select Update driver, then choose Search automatically for drivers.
If updating doesn’t help, try uninstalling the driver entirely. Right-click the drive in Device Manager, select Uninstall device, then physically disconnect and reconnect the drive. Windows will reinstall the driver from scratch.
Also check under Universal Serial Bus controllers in Device Manager. Look for any devices marked with errors. You can uninstall and reinstall USB hub drivers here if the entire USB subsystem seems unreliable.
Step 5: Try a USB Drive Dock or Adapter
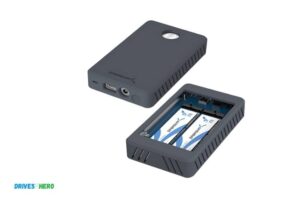
If you’ve exhausted software fixes and cable swaps, the problem might be the drive’s enclosure rather than the drive itself. The enclosure contains a small USB-to-SATA bridge board, and these boards do fail. When they do, the drive inside is usually perfectly fine.
A USB-to-SATA adapter or drive dock lets you connect the bare drive directly to your computer, bypassing the enclosure entirely. For 2.5-inch portable drives, you can often pry open the enclosure with a plastic spudger and remove the drive. For 3.5-inch desktop drives, just unscrew the casing.
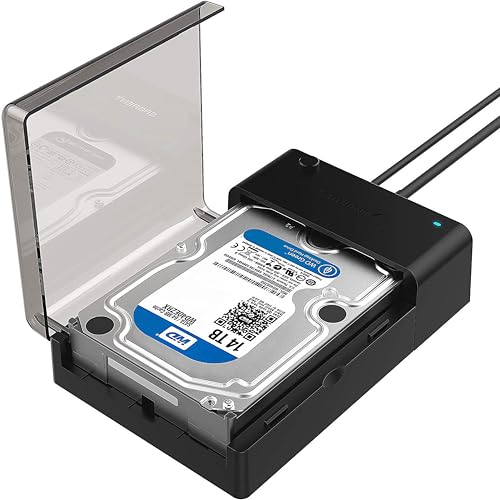
Sabrent USB 3.0 to SATA Hard Drive Docking Station
A reliable, well-reviewed dock that accepts both 2.5-inch and 3.5-inch SATA drives for quick troubleshooting and data recovery.
Once you have the bare drive connected through a dock, open Disk Management again. If the drive appears now, the enclosure’s bridge board was the problem. You can copy your data off, buy a new enclosure, and keep using the drive. If it still doesn’t show up, the drive itself has likely failed.
A drive dock is also invaluable if you ever need to securely wipe a drive before selling it or if you’re looking to clone a hard drive without losing data. It’s one of those tools that pays for itself the first time you use it.
When the Drive Is Truly Dead
If you hear clicking or grinding sounds coming from the drive, that’s a mechanical failure. Stop powering it on immediately, as every additional spin-up cycle can make data recovery harder and more expensive. Professional data recovery services can often retrieve files from mechanically failed drives, but costs typically run into the hundreds or even thousands of dollars.
For drives that are simply unresponsive with no sounds at all, the controller board may have failed. This is less dire than a head crash but still requires professional help if the data is critical.

Cable Matters USB 3.0 to SATA Hard Drive Adapter
A compact, affordable adapter that’s great for quickly testing bare drives without needing a full docking station.
Going forward, this is a good reminder to keep current backups. If you’re weighing your options between cloud storage and a local solution, we’ve broken down the costs of cloud backup versus a local NAS to help you pick the right approach.
Frequently Asked Questions
Why does my external drive show up in Device Manager but not in File Explorer?
This usually means the drive is recognized by Windows at the hardware level but doesn’t have a drive letter assigned, or the partition is corrupted. Open Disk Management and look for the drive. If it’s there, try assigning a drive letter manually. If the partition shows as RAW, the file system is damaged and you may need recovery software before you can access your files.
Can a USB hub cause my external drive not to show up?
Absolutely. USB hubs, especially unpowered ones, split the available power among all connected devices. A portable external drive that draws power from USB may not get enough juice through a hub, especially if other devices are connected. Always plug external drives directly into your computer’s built-in USB ports for the most reliable connection. If you must use a hub, get a powered one with its own AC adapter.
My external drive works on one computer but not another. What’s going on?
This points to a software or driver issue on the computer where it fails. Check Device Manager for USB driver errors, try different USB ports, and make sure the operating system is up to date. On Macs, drives formatted as NTFS will mount as read-only or may not appear in Finder at all. Similarly, drives formatted as APFS or HFS+ won’t show up natively on Windows. If you’re using a Mac, our guide to the best external hard drives for Mac covers compatible formatting options.
This article contains affiliate links. We may earn a small commission at no extra cost to you.
James Kennedy is a writer and product researcher at Drives Hero with a background in IT administration and consulting. He has hands-on experience with storage, networking, and system performance, and regularly improves and optimizes his home networking setup.