Can I Add Ssd to My Dell Laptop? Yes!
Yes, you can add an SSD to your Dell laptop to enhance its performance and storage capacity.
Adding an SSD (Solid State Drive) to your Dell laptop can significantly improve its speed, performance, and overall user experience.
SSDs are known for their faster read and write speeds compared to traditional HDDs (Hard Disk Drives), which results in quicker boot times, application launches, and data transfers.
Before adding an SSD to your Dell laptop, make sure to check the laptop’s compatibility with the chosen SSD type, such as SATA or NVMe.
Additionally, consult your laptop’s user manual or Dell’s support website for installation instructions and guidelines.
Remember to backup your data before starting the upgrade process to prevent any data loss.
Compatible SSD Options for Different Dell Laptops Model
| Model | Ability to Add SSD | SSD Type | Installation Difficulty |
|---|---|---|---|
| Dell Inspiron 15 3000 | Yes | 2.5″ SATA SSD / M.2 NVMe SSD | Easy |
| Dell Inspiron 15 5000 | Yes | 2.5″ SATA SSD / M.2 SSD | Easy |
| Dell Inspiron 15 7000 | Yes | M.2 NVMe SSD | Moderate |
| Dell Latitude 7490 | Yes | M.2 NVMe SSD | Moderate |
| Dell XPS 13 | Yes | M.2 NVMe SSD | Moderate |
| Dell XPS 15 | Yes | M.2 NVMe SSD | Moderate |
| Dell G3 15 | Yes | 2.5″ SATA SSD / M.2 SSD | Easy |
| Dell G5 15 | Yes | 2.5″ SATA SSD / M.2 SSD | Easy |
| Dell G7 15 | Yes | M.2 NVMe SSD | Moderate |
| Dell Precision 5530 | Yes | M.2 NVMe SSD | Moderate |
Key Takeaway
Five Facts About Adding SSD to Dell Laptops
Understanding Ssd And Why It’S Important To Add It To Your Dell Laptop
Brief History Of Ssd
Solid state drives or ssds were first introduced in the 1990s. However, due to their high cost and limited storage capacity, they were not widely popular until the early 2000s.
Over time, advancements in technology have made ssds much more affordable and reliable.
In today’s tech-savvy world, ssds have gained immense popularity among laptop users, and it has become an essential upgrade for those who want improved performance and increased storage.
Benefits Of Adding Ssd To Your Dell Laptop
Adding ssd to your dell laptop can provide various benefits to its users.
Some of the significant benefits are:
- Improved system performance: Ssds can significantly boost system performance by reducing boot time, file transfer speed, and application loading time. This faster performance can help users get more done in less time.
- Increased durability: Ssds are more durable than traditional spinning hard disk drives (hdds) because they have no moving parts, making them shock-resistant and less prone to data loss.
- Higher storage capacity: Ssds offer high storage capacity, which is essential for users who often use large files or run graphics-intensive applications.
- Longer battery life: Ssds consume less power than traditional hdds, which can increase the battery life of your dell laptop.
Comparison Between Hdd And Ssd
While both hdds and ssds serve the same purpose of storing data, there are significant differences between them.
Here are some of the key differences to help you make an informed decision:
- Speed: Ssds are faster than hdds in terms of data transfer and boot-up times.
- Durability: Ssds are more durable than hdds because they have no moving parts, making them shock-resistant and less prone to data loss.
- Price: Ssds are generally more expensive than hdds in terms of cost per gb.
- Storage capacity: Hdds offer more storage capacity than ssds at a price, making them a better choice for those who need large storage capacity.
- Noise: Ssds are typically quieter than hdds because they have no moving parts.
Adding ssd to your dell laptop can be a game-changer in terms of performance, durability, and storage capacity.
The benefits of ssd technology justify the investment cost. So, if you want to upgrade your dell laptop for better functionality, consider adding an ssd to your setup.
Compatibility Requirements For Adding Ssd To Your Dell Laptop
Check The Compatibility Of Your Laptop
Before adding an ssd to your dell laptop, you need to make sure your device supports it. After all, it would be terrible to purchase an ssd only to realize that it isn’t compatible with your laptop.
Here are some things to keep in mind when checking ssd compatibility for your dell laptop:
- First and foremost, you need to confirm that your laptop model supports the installation of an ssd.
- Check whether the ssd’s connection interface matches the corresponding port on your laptop motherboard, whether it’s sata, nvme, or pcie.
- Determine if your laptop has an m.2 slot or 2.5-inch drive bay that can accommodate the ssd’s physical size.
- Additionally, you should make sure that the ssd’s capacity will meet your requirements, and that it’s within your budget.
Determine The Type And Size Of The Ssd
Once you’ve determined that your laptop is compatible with an ssd, the next step is to choose the right ssd type and size.
Here’s what you need to consider before purchasing:
- Determine the type of ssd that’s best suited for your needs. You can opt for a sata-based ssd if you want to replace your laptop’s hdd, or an nvme-based ssd if you want to achieve faster read/write speeds.
- Make sure you buy an ssd with enough storage capacity to meet your needs and budget. Generally, ssds come in 128gb, 256gb, 512gb, 1tb, and 2tb storage capacities.
- Check your laptop documentation or the manufacturer’s website to determine the maximum storage capacity your laptop can handle.
How To Access The Laptop’S Storage Compartment
After purchasing the ssd and verifying its compatibility with your dell laptop, it’s time to install it. For this, you need to access your laptop’s storage compartment.
Here’s a brief guide to accessing this storage compartment:
- Power off your laptop and make sure it’s disconnected from any power sources.
- Remove the laptop’s battery and any other peripherals that might be attached to it.
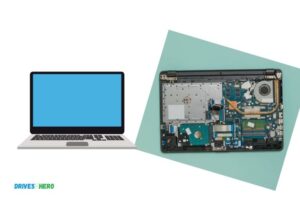
- Depending on your laptop model, locate the small compartment on the bottom cover or remove the entire bottom cover to access the storage compartment.
- Once you’ve located the storage compartment, unscrew the ssd retainer screws and detach the sata or nvme cable from the motherboard.
- Carefully insert the ssd into the slot, using the screws to secure it in place.
Adding an ssd to your dell laptop can help to improve its performance significantly.
By following these compatibility requirements, determining the type and size of your ssd and accessing the laptop’s storage compartment, you’ll be able to install the ssd with ease and start enjoying its performance benefits.
Steps To Add Ssd To Your Dell Laptop
Backup Your Data And Prepare The Laptop
Before you start to add an ssd to your dell laptop, it’s important to backup all your data and make sure that you have everything saved on an external hard drive.
This way, you won’t lose any important files while swapping out the old hard drive for the new ssd. After backing up your data, you should also prepare your laptop.
The following steps will help you:
- Turn off your laptop and unplug it from the power source.
- Remove the battery – if it’s removable.
- Locate your hard drive (typically found on the bottom of the laptop).
- Gather the necessary equipment: The new ssd drive, a screwdriver, and an external drive reader.
Remove The Old Hard Drive
Once you’ve gathered everything you need, it’s time to remove the old hard drive.
Here’s how:
- Remove the screws that hold the hard drive in place.
- Carefully detach the hard drive from its bracket.
- Disconnect the cable connector that connects to the hard drive.
- Slide out the drive.
Insert The New Ssd Drive
Now that you’ve removed the old hard drive, it’s time to insert the new ssd drive.
Here’s how:
- Slide the new ssd into the same spot where you removed the old hard drive.
- Reconnect the cable connector.
- Put the screws back in place to secure the new drive.
Install Your Operating System And Set Up Your Dell Laptop
After installing the new ssd drive, it’s time to reinstall your operating system and set up your dell laptop.
Here are the steps to follow:
- Connect your external hard drive containing your backup data.
- Turn on the laptop.
- Follow the prompts to install the operating system.
- Once the operating system is installed, restore your backup files to your new ssd drive.
Troubleshoot Any Issues During Installation
While installing your new ssd, you may encounter some issues.
Here are some troubleshooting tips to ensure a smooth installation:
- If you encounter any errors while installing the operating system, try restarting your dell laptop.
- If you have issues with booting your computer, make sure the cables are connected correctly.
- If your dell laptop doesn’t recognize your new ssd, you may need to update your bios.
Following these steps will help you add an ssd to your dell laptop. Remember to take care when handling your laptop and make sure to back up all your data before proceeding.
With a new ssd, you’ll be able to enjoy faster boot times, quicker file transfers and a smoother computing experience.
Tips To Maintain Your Ssd
Ssds have become a popular choice for upgrading laptops these days. With their faster read and write speeds, they can significantly improve the overall performance of your device.
If you own a dell laptop, you might wonder if you can add an ssd to it. The answer is yes! This article will discuss the tips to maintain your ssd to keep it running at its best.
Best Practices To Extend The Lifespan Of Ssd
Here are some best practices that you can follow to extend the lifespan of your ssd:
- Enable trim – trim is a command that helps to keep your ssd clean and free from unnecessary data. You can enable trim on your windows computer by opening the command prompt as an administrator and entering this command: Fsutil behavior set disabledeletenotify 0.
- Disable hibernation – hibernation creates a large file on your ssd, which takes up a lot of space. You can disable hibernation by opening the command prompt as an administrator and enter this command: Powercfg /hibernate off.
- Disable system restore – system restore creates restore points that take up space on your ssd. You can disable system restore to free up space by going to system > system protection > configure then select turn off system protection.
- Keep your ssd cool – overheating can shorten your ssd’s lifespan. You can keep your ssd cool by using a cooling pad or by ensuring that your laptop is well-ventilated.
How To Optimize The Performance Of Your Ssd
To get the best performance from your ssd, you can follow these tips:
- Disable indexing – indexing can slow down your ssd. You can disable it by opening the command prompt as an administrator and enter this command: Net.exe stop “windows search”.
- Disable superfetch and prefetch – superfetch and prefetch are two windows services that can slow down your ssd. You can disable them by opening the command prompt as an administrator and enter these two commands: Net.exe stop “sysmain” and net.exe stop “wsearch”.
- Enable ahci – ahci stands for advanced host controller interface. Enabling it can improve your ssd’s performance. You can enable ahci by going to device manager > ide ata/atapi controllers > standard sata ahci controller.
Do’S And Don’Ts For Ssd Maintenance
Here are some do’s and don’ts that you should follow when maintaining your ssd:
- Do update your ssd’s firmware – updating your ssd’s firmware can fix bugs and improve performance.
- Do backup your data – it’s essential to backup your data regularly to prevent data loss.
- Don’t defragment your ssd – defragmenting your ssd can cause unnecessary wear and tear.
- Don’t fill up your ssd completely – filling up your ssd completely can slow down your computer.
Following these tips to maintain your ssd can help you keep it running at its best for a longer time.
By extending its lifespan and optimizing its performance, you can get the most out of your ssd upgrade and enjoy a faster, more responsive laptop experience.
FAQ On Adding SSD to Dell Laptops
What Are The Benefits Of Adding An Ssd To My Dell Laptop?
Adding an ssd can significantly boost your laptop’s speed, reduce boot and program launch times, and increase overall performance.
Is It Difficult To Add An Ssd To My Dell Laptop?
No, it is not difficult to add an ssd to your dell laptop. However, if you are not familiar with computer hardware, it is recommended to seek help from a professional.
What Type Of Ssd Is Compatible With My Dell Laptop?
The type of ssd you need will depend on the model of your dell laptop. Consult dell’s website or a professional for compatibility information.
Will Adding An Ssd Void My Dell Laptop’S Warranty?
Adding an ssd to your dell laptop may not necessarily void your warranty, but it is recommended to check with dell’s terms and conditions to be sure.
Conclusion
Adding an ssd to your dell laptop can be a great way to boost its overall performance. Not only will you benefit from faster boot and load times, but you’ll also enjoy quicker access to your apps and files.
Whether you’re a gamer, a professional, or just a regular computer user, an ssd upgrade can make a noticeable difference in your daily experience.
And the good news is that the process is relatively easy and shouldn’t take more than an hour or so. Knowing your laptop specifications will help you to choose the right ssd.
Always make sure to backup your data before you start the installation process. With this simple upgrade, you can breathe new life into your old laptop and get back to using it with speed and efficiency.

