Can I Boot from Nvme Ssd
I have an Nvme Ssd and I want to know if I can boot from it. I have read that some people say that you can and some say that you can’t. Can someone please tell me if this is possible?
- Restart your computer and enter the BIOS/UEFI settings
- Find the Boot Order or Boot Priority section and change the boot order to make sure that your Nvme SSD is listed first
- Save these changes and restart your computer again
- It should now boot from the Nvme SSD drive!
How Do I Make My Nvme Ssd Bootable?
If you have an NVMe SSD that you want to use as your boot drive, there are a few things you need to do in order to make it happen. First, check to see if your motherboard is compatible with NVMe drives- most newer motherboards should be, but it’s always good to double check. If it is compatible, then you’ll need to make sure you have the latest BIOS update installed.
Once that’s taken care of, the next step is to format the drive and install your operating system of choice.
Assuming you’re using Windows 10, the process is actually pretty straightforward. Just head to the “Disk Management” tool and format the drive as NTFS.
Then go ahead and install Windows 10 on the drive- when prompted during installation, just choose the option to “Custom Install” and select your new NVMe SSD as the location for Windows 10. That’s really all there is too it! After completing installation, you should now have a fully functioning bootable NVMe SSD drive.
Enjoy the speed boost!
Can an M 2 Ssd Be a Boot Drive?
An M.2 SSD can be a boot drive, but there are a few things to keep in mind. First, check with your motherboard manufacturer to see if they support booting from an M.2
SSD. Second, make sure your BIOS is up-to-date and supports booting from an M.2 SSD.
Third, install the operating system on the M.2 SSD. And fourth, install any required drivers for the M.2
SSD.
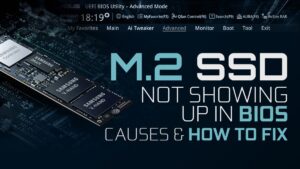
How Do I Enable Nvme Ssd in Bios?
If you have an NVMe SSD, you will need to enable it in BIOS before you can use it. Here’s how:
1. Restart your computer and enter BIOS.
This is usually done by pressing a key during the boot process, such as F2 or Del.
2. Navigate to the Storage section of BIOS. This is usually located under a heading like “Advanced” or “Chipset.”
3. Find the option for NVMe Support and enable it. This may be listed as “NVMe,” “M.2 NVMe,” or something similar.
If there is more than one M.2 slot on your motherboard, make sure to enable NVMe support for the correct slot.
4) Save your changes and exit BIOS. Your computer should now boot normally and you can use your NVMe SSD!
Using M.2 Nvme As Boot Drive
In the past, if you wanted to get the fastest possible speeds from your computer, you had to use a solid state drive (SSD) that was connected to your motherboard via a PCI Express (PCIe) slot. This meant sacrificing one of your PCIe slots, which could be used for other purposes, such as graphics cards or sound cards.
Now, there’s a new type of SSD called an M.2
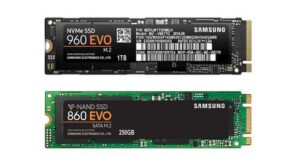
NVMe SSD that uses the PCI Express bus for even faster speeds. These drives are available in both SATA and PCIe versions, but the PCIe version is much faster. If you’re looking for the absolute fastest possible speeds from your computer, an M.2
NVMe SSD is the way to go.
While most newer motherboards will have an M.2 slot that’s compatible with NVMe drives, some older ones may not. That means you’ll need to do your research before buying an M.2
Can’T Boot from Nvme
If you’re trying to boot from an NVME drive, there are a few things that could be causing the issue. First, check to make sure that your BIOS is configured to boot from NVME. If it’s not, you’ll need to change the settings in your BIOS before you’ll be able to boot from the drive.
Another potential issue is that your system may not have the drivers necessary to boot from an NVME drive. This is especially true if you’re using an older system with newer hardware. In this case, you’ll need to install the appropriate drivers before you’ll be able to boot from the drive.
Finally, it’s also possible that your NVME drive isn’t compatible with your system. This is relatively rare, but it can happen. If this is the case, you won’t be able to do anything except replace the drive with one that is compatible with your system.
Boot from Nvme Without Bios Support
Nvme drives are the next generation of storage devices, offering incredibly fast read/write speeds and low latencies. However, many older computers don’t have BIOS support for Nvme drives, which means you can’t boot from them.
There are a few workarounds for this problem, however.
One is to use a tool like NVMEFix, which allows you to patch your computer’s BIOS to add Nvme support. Another option is to use a bootable USB drive with Nvme support built in. This can be created using a tool like Rufus or Win32 Disk Imager.
Once you’ve created your bootable USB drive, simply insert it into your computer and restart. The computer should now be able to boot from the Nvme drive without any issue.
How to Set Nvme As Boot Drive Asus
If you want to set an NVMe as your boot drive on an ASUS motherboard, there are a few things you need to do. First, make sure that your BIOS is up to date. The latest version will have the necessary drivers for NVMe support.
Next, go into the BIOS and navigate to the Storage section. Here you should see your NVMe listed as a boot option. If not, you may need to enable it in the BIOS settings first.
Once you’ve found it, select it as your boot device and save your changes.
That’s all there is to it! Your system should now be able to boot from the NVMe drive without any issues.
Conclusion
Yes, you can boot from an NVMe SSD. In fact, it is becoming more and more common to do so as the technology gets faster and cheaper. The main benefit of doing so is that it can significantly speed up your computer’s boot time.
Additionally, NVMe SSDs tend to be more reliable than traditional hard drives.


