How To Raid 0 Nvme Ssd? A Step-by-Step Guide!
Raid 0 NVMe SSD is a configuration that uses RAID (Redundant Array of Independent Disks) technology to combine multiple SSDs into a single, larger virtual drive.
This setup not only increases the storage capacity but also enhances the speed and performance of the system.
RAID 0 works by dividing the data into blocks and then writing those blocks across all the drives in the array.
This configuration is often referred to as ‘striping’. Because the data is written to all drives simultaneously, the speed of data transfers can be significantly increased.
However, since there is no data redundancy in this RAID configuration, if one drive fails, all data in the array will be lost.
Implementing RAID 0 NVMe SSD configuration can dramatically boost system performance, primarily if it involves data-intensive tasks.
However, due to its lack of data redundancy, this configuration might not be suitable for systems where data security is vital. Always ensure regular backups to protect data.
10 Steps: Setting Up RAID 0 with NVMe SSDs
| Steps | Description |
|---|---|
| 1. | Identify Compatible NVMe SSDs |
| 2. | Purchase Required SSDs |
| 3. | Install SSDs into Your System |
| 4. | Access Your BIOS or UEFI Firmware |
| 5. | Enable RAID in Your System BIOS |
| 6. | Configure RAID 0 Array |
| 7. | Select RAID 0 Array as Boot Device |
| 8. | Install Operating System |
| 9. | Install Necessary Drivers |
| 10. | Verify RAID 0 Setup is Working Properly |
Key Takeaway
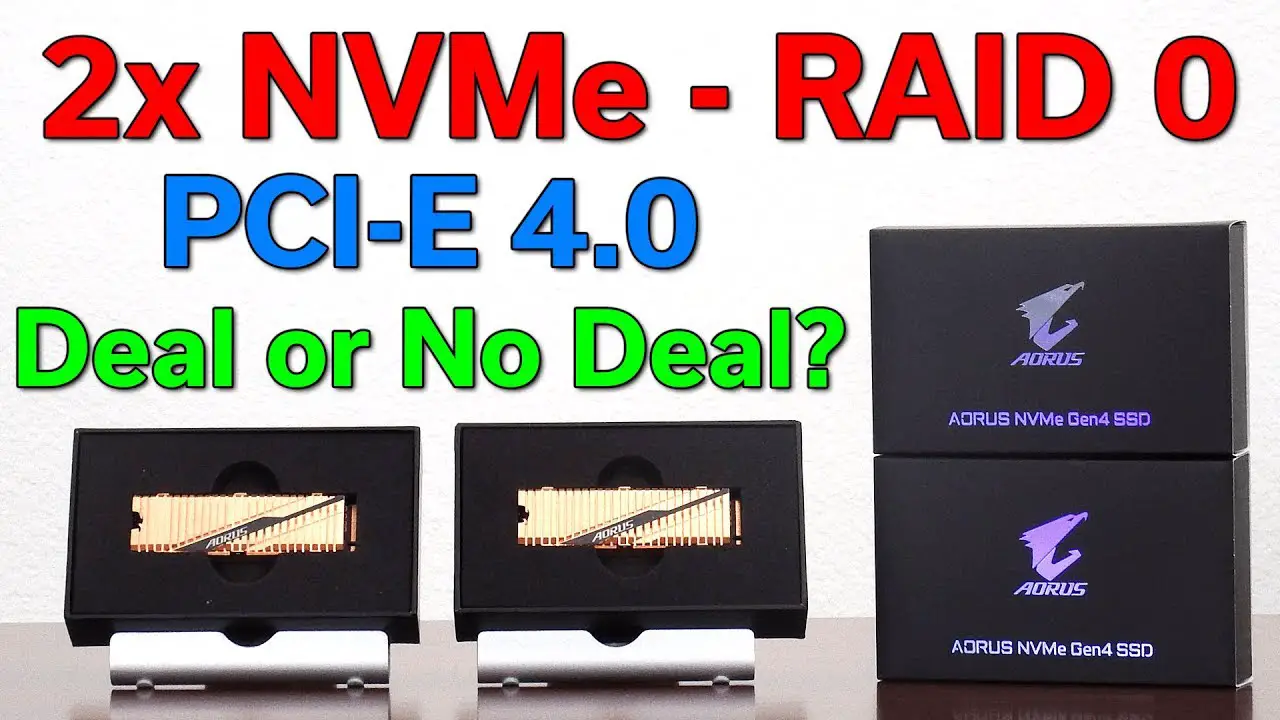
Five Facts About: RAID 0 Configuration with NVMe SSDs
Why Use Raid 0 For Nvme Ssds
RAID 0 for NVMe SSDs provides a powerful solution for maximizing speed and storage capacity. By combining multiple SSDs into a single logical unit, RAID 0 improves performance and enhances data access.
Unlock the full potential of NVMe SSDs through RAID 0 for a seamless and efficient storage experience.
If you’re looking to turbocharge your system’s storage performance, RAID 0 for NVMe SSDs is an excellent choice.
By combining multiple NVMe SSDs in a RAID 0 configuration, you can unlock remarkable benefits that will elevate your computing experience.
Let’s delve into the reasons why RAID 0 is a game-changer for NVMe SSDs.
Benefits Of Raid 0 For Nvme Ssds:
Faster data transfer speeds with RAID 0:
Harnessing the power of RAID 0 brings a significant boost in data transfer speeds.By striping data across multiple NVMe SSDs, this configuration enables simultaneous read and write operations, enhancing overall throughput.
With RAID 0, you can experience lightning-fast data access, ensuring near-instantaneous loading times for applications, games, and large multimedia files. Say goodbye to frustrating wait times!
Increased storage capacity with RAID 0:
One of the primary advantages of RAID 0 is its ability to combine the storage capacity of multiple NVMe SSDs into a single logical volume.
By pooling the drives together, you enjoy an increased overall storage capacity. This means you can store more data, including large files, high-resolution videos, and resource-intensive applications. With RAID 0, space constraints become a thing of the past.
Enhanced performance for demanding tasks:
RAID 0’s stellar performance capabilities make it the perfect solution for resource-intensive tasks. Whether you’re a video editor, graphic designer, or gamer seeking seamless gameplay, RAID 0 provides the speed and efficiency required to handle these demanding workloads with ease.
Render times are reduced, allowing for quicker project completion, while games load rapidly, ensuring you have a competitive edge.
Redundancy considerations:
While RAID 0 offers undeniable performance benefits, it’s important to note that it does not provide any data redundancy.
Unlike other RAID configurations, if one NVMe SSD in a RAID 0 array fails, you may lose all the data stored across all drives.
Therefore, it is essential to conduct regular backups to safeguard your valuable data.
With the benefits RAID 0 brings to NVMe SSDs, it’s clear why it is favored by enthusiasts and professionals looking to elevate their storage performance.
Harness the power of RAID 0 to experience unmatched speed, increased storage capacity, and enhanced performance for your demanding tasks.
Just remember to keep data redundancy in mind and regularly back up your files to ensure peace of mind.
Understanding Raid 0 Configuration
Raid 0 Nvme Ssd configuration enhances speed and performance by distributing data across multiple drives.
This guide explains how to set up Raid 0 for Nvme Ssd, optimizing storage capabilities for efficient data management.
What Is Raid 0?
RAID 0, also known as disk striping, is a configuration that combines multiple NVMe SSDs into a single logical unit, resulting in improved performance and increased storage capacity. Unlike other RAID levels, RAID 0 does not offer redundancy or fault tolerance.
Instead, it focuses solely on enhancing speed by distributing data across multiple drives.
Key points about RAID 0 include:
- Data is divided into smaller segments, or stripes, and written across the drives simultaneously.
- Each drive in the array contributes its portion to the overall read and write operations, effectively increasing the data transfer speed.
- RAID 0 does not provide data redundancy. If one drive fails, all data stored on the array can be lost.
- The overall storage capacity is the total sum of all the drives in the RAID 0 array.
How Raid 0 Works For Nvme Ssds
RAID 0 configuration for NVMe SSDs operates similarly to traditional RAID 0, but takes advantage of the high-speed capabilities of NVMe technology.
Here’s how it works:
- Multiple NVMe SSDs are combined to form an array, usually connected through a RAID controller or motherboard’s built-in RAID capability.
- The data is divided into stripes, with each stripe consisting of small segments.
- These stripes are then distributed across all the SSDs in the array, allowing for parallel data access and significantly improving the overall performance.
- When reading or writing data, requests are distributed among the SSDs, allowing for simultaneous operations and faster transfers.
- The speed increase achieved with NVMe SSDs in a RAID 0 configuration is even more substantial than with traditional SSDs or HDDs, owing to the faster data access times and high bandwidth offered by NVMe technology.
Configuring Raid 0 On Nvme Ssds
To configure RAID 0 using NVMe SSDs, follow these steps:
- Ensure that your motherboard or RAID controller supports RAID functionality for NVMe SSDs.
- Depending on your system’s configuration, enter the BIOS/UEFI settings by pressing the designated key during startup (typically Del or F2).
- Navigate to the storage or SATA/RAID configuration section.
- Enable RAID mode and save the changes before exiting the BIOS/UEFI.
- Connect all the NVMe SSDs you want to include in the RAID 0 array to the appropriate motherboard connectors.
- Boot into your operating system and install the necessary RAID drivers provided by the motherboard manufacturer.
- Open the RAID management software included with your motherboard or RAID controller.
- Create a new RAID 0 array and select the NVMe SSDs you wish to use. Customize any optional settings according to your requirements.
- Initialize and format the RAID 0 array within your operating system.
- You can now take advantage of the increased speed and expanded storage capacity of your RAID 0 NVMe SSD array.
Remember that RAID 0 does not offer fault tolerance, so it’s crucial to regularly backup your data to avoid potential loss in case of drive failure.
Preparing For Raid 0 Configuration
Learn how to prepare for RAID 0 configuration with NVMe SSDs. Follow these steps to optimize your storage system for enhanced performance and data scalability.
If you’re considering RAID 0 configuration for your NVMe SSDs, there are a few important steps to undertake to ensure everything runs smoothly.
In this section, we’ll discuss how to choose compatible NVMe SSDs for RAID 0, check motherboard compatibility, and update BIOS and firmware accordingly.
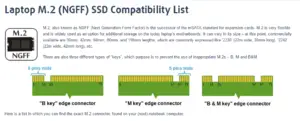
Choosing Compatible Nvme Ssds For Raid 0:
To successfully configure RAID 0 with NVMe SSDs, it’s crucial to select compatible drives that work seamlessly together.
Here are some points to consider:
- Brand and model compatibility: Ensure that the NVMe SSDs you choose come from the same manufacturer and are of the same model to avoid potential compatibility issues.
- Capacity and speed: Match the storage capacity and speed of the NVMe SSDs as closely as possible, as any disparities might affect the overall performance of your RAID 0 setup.
- Quality and reliability: Opt for reputable brands known for their reliability and durability. Checking customer reviews and professional opinions can help in making an informed decision.
Checking Motherboard Compatibility For Nvme Ssd Raid:
Before embarking on the RAID 0 configuration, it’s essential to verify that your motherboard supports NVMe SSD RAID.
Here’s what you should do:
Consult the motherboard manual:
Look for information about NVMe SSD RAID support in the motherboard’s user manual or online documentation. This will help you identify whether RAID 0 is a viable option for your specific motherboard.
Check the motherboard specifications:
Visit the manufacturer’s website to confirm compatibility. Look for motherboard specifications, paying close attention to RAID support and available PCIe lanes for NVMe SSDs.
Updating Bios And Firmware For Raid 0:
To avoid potential issues and take full advantage of your NVMe SSD RAID setup, it’s important to update the BIOS and firmware of your motherboard and NVMe SSDs.
Here’s what you need to do:
Visit the manufacturer’s website:
Check the manufacturer’s website for the latest BIOS and firmware updates for your motherboard and NVMe SSDs. Download the appropriate files following the provided instructions.
Follow the update procedures:
Every manufacturer has a specific process for updating BIOS and firmware, so make sure to carefully follow their instructions.
This typically involves booting into the motherboard’s BIOS interface and using a USB drive to perform the update.
Double-check compatibility:
Before updating, ensure that the BIOS and firmware updates are compatible with your specific motherboard model and NVMe SSDs. Installing an incompatible update can lead to system instability.
By adhering to these crucial steps in preparing for RAID 0 configuration, you’ll ensure that your NVMe SSDs are compatible, your motherboard supports the configuration, and your BIOS and firmware are up to date.
With these preparations complete, you’ll be well on your way to maximizing the performance of your RAID 0 setup.
Configuring Raid 0 On Nvme Ssds
Learn how to configure RAID 0 on NVMe SSDs for enhanced storage performance.Gain faster data transfer speeds and improved overall system efficiency with this step-by-step guide.
If you want to improve the performance of your storage system, configuring RAID 0 can be a great way to achieve that. RAID 0, also known as striping, combines multiple NVMe SSDs into a single logical drive, boosting data transfer speeds and enhancing overall efficiency.
In this step-by-step guide, we will walk you through the process of configuring RAID 0 on NVMe SSDs, from installing the SSDs in your motherboard to accessing the BIOS settings for RAID configuration.
Step-By-Step Guide To Configuring Raid 0:
Installing NVMe SSDs in the motherboard:
- Ensure your motherboard supports NVMe SSDs and has multiple M.2 slots available.
- Carefully insert the NVMe SSDs into the M.2 slots, making sure they are firmly seated.
- Secure the SSDs using the provided screws to ensure they do not come loose.
Accessing BIOS settings for RAID configuration:
- Power on your computer and press the designated key to enter the BIOS setup.
- Navigate through the BIOS menus and locate the RAID configuration section.
- Enable RAID mode or change the SATA configuration to RAID.
- Save the changes and exit the BIOS setup. Your computer will restart.
Configuring RAID 0:
- Now that your computer has restarted, enter the BIOS setup again.
- Navigate to the RAID configuration section and select the option to create a new RAID volume.
- Choose the NVMe SSDs you want to include in the RAID 0 configuration.
- Select RAID 0 as the RAID level and choose the desired strip size.
- Save the changes and exit the BIOS setup.
Congratulations! You have successfully configured RAID 0 on your NVMe SSDs.
With the increased data transfer speeds of RAID 0, you can now enjoy improved performance for your storage system.
Remember that RAID 0 does not provide any redundancy, so it is essential to maintain regular backups to prevent data loss.
Setting Up Raid 0 In Bios
Setting up RAID 0 for NVMe SSDs in the BIOS allows for faster data transfer and improved performance. Learn how to configure RAID 0 efficiently for your NVMe SSD setup in this step-by-step guide.
Setting up RAID 0 in BIOS can significantly boost your PC’s speed and performance by combining multiple NVMe SSDs into a single logical drive.
If you’re ready to take advantage of this advanced storage configuration, let’s dive into the steps of setting up RAID 0 in BIOS.
Navigating RAID configuration options in BIOS:
- Access BIOS by restarting your computer and pressing the designated key (such as Delete, F2, or F10) during the boot process.
- Once inside BIOS, navigate to the “Storage” or “Advanced” tab, where you’ll find the RAID configuration options.
Creating a new RAID volume:
- Locate the RAID configuration menu and select “Create RAID Volume” or a similar option.
- Choose RAID 0 as the RAID level for optimal performance and speed.
- Name your RAID volume to easily identify it in the future.
Selecting NVMe SSDs for RAID 0:
- Depending on your motherboard, you may have different slots for NVMe SSDs. Ensure that each SSD is correctly inserted into the appropriate slot.
- In the RAID configuration menu, select the NVMe SSDs you want to include in the RAID 0 array.
- Specify the strip size, which determines the size of data chunks that will be distributed across the SSDs. Generally, a smaller strip size can enhance random performance.
- Confirm the selection and save the changes in BIOS.
By following these steps, you can harness the power of RAID 0 in BIOS to maximize the performance of your NVMe SSDs.
Remember to back up your data before setting up RAID 0, as it combines multiple drives into one and any failure could result in data loss.
Configuring Raid 0 Parameters
Learn how to easily configure RAID 0 parameters for NVMe SSDs, optimizing their performance and maximizing data storage capabilities efficiently. Increase your storage capacity and enhance read and write speeds with this step-by-step guide.
If you want to optimize the performance of your RAID 0 NVMe SSD setup, there are several key parameters you need to configure.
By carefully adjusting these settings, you can ensure that your RAID 0 array operates at its full potential.
Let’s take a closer look at the important factors that can influence the performance of your RAID 0 configuration.
Setting Raid Strip Size For Optimal Performance:
To achieve the best performance with RAID 0, it is crucial to configure the strip size appropriately.
The strip size determines the amount of data that is written to each disk in the array before moving on to the next drive.
A larger strip size can improve the performance of large sequential read and write operations, while a smaller strip size may enhance small random I/O performance.
Consider the nature of your workload and the type of data you will be handling when selecting the strip size.
- Large strip size: Suitable for applications that perform large sequential read and write operations. It allows for faster data transfer and can significantly enhance overall performance.
- Small strip size: Ideal for workloads that involve small random I/O operations. It helps to reduce latency and improve response times.
Choosing Raid 0 Block Size:
The block size refers to the unit of data that is written to or read from the RAID 0 array. Selecting an appropriate block size is essential to maximize the performance of your NVMe SSDs in RAID 0.
Consider the following factors when determining the optimal block size for your setup:
- Larger block size: Provides better performance for large sequential transfers, such as video editing or data-intensive tasks.
- Smaller block size: Offers improved performance for small random read or write operations, such as database applications or virtualization workloads.
Enabling Write Caching For Raid 0:
Enabling write caching can significantly enhance the performance of your RAID 0 NVMe SSD configuration.
Write caching allows the array to store write data temporarily in cache memory before writing it to the disks.
This improves write performance by allowing the system to acknowledge writes immediately and delay the physical write operation to a more opportune time.
Consider the following benefits of enabling write caching:
- Improved write performance: Write caching speeds up data write operations, resulting in faster overall performance for your RAID 0 array.
- Reduced latency: By buffering write operations in cache memory, write caching reduces the latency associated with physical disk writes.
- Increased longevity: Write caching minimizes the number of write operations directly to the disks, extending their lifespan.
By carefully configuring the RAID strip size, selecting the appropriate block size, and enabling write caching, you can optimize the performance of your RAID 0 NVMe SSD setup.
Remember to consider your specific workload requirements to ensure you achieve the best possible performance for your configuration.
Migrating And Cloning Data On Raid 0
Migrate and clone your data effortlessly on RAID 0 and make the most of your NVMe SSD with this comprehensive guide. Boost your storage performance and ensure efficient data storage and retrieval.
Transferring Data To Raid 0 From Existing Drives
Transferring data from your existing drives to RAID 0 involves a few simple steps.
Here’s how you can seamlessly migrate your data:
- Backup your data: Before starting the migration process, it’s crucial to create a backup of your existing data. This ensures that you have a safety net in case anything goes wrong during the transfer.
- Disconnect the existing drives: To begin with, disconnect your existing drives from your system. This will prevent any conflicts or interference during the migration process.
- Install the NVMe SSDs: Next, install the NVMe SSDs that you intend to set up in RAID 0. Make sure they are properly connected and detected by your system.
- Initialize the RAID array: Access your system’s BIOS settings and configure the RAID 0 array using the NVMe SSDs. Consult your motherboard or system documentation for specific instructions on configuring RAID.
- Format the RAID array: Once the RAID array is configured, format it to make it usable. This will erase any existing data on the SSDs, so ensure that you have a backup before proceeding.
- Restore data from backup: Finally, restore the data from your backup to the newly created RAID 0 array. This can be done by copying the files and folders from the backup location to the RAID array.
By following these steps, you can transfer your data smoothly to your RAID 0 setup, ensuring a seamless transition and improved storage performance.
Using Cloning Software For Data Migration
Cloning software can simplify the data migration process, making it quick and efficient.
Here are the steps to use cloning software for migrating data to RAID 0:
- Select a cloning software: Choose a reliable cloning software that supports RAID configurations and NVMe SSDs. There are various options available in the market, so pick one that suits your requirements.
- Install and launch the software: After downloading the cloning software, install it on your system. Launch the software to begin the data migration process.
- Select the source and destination drives: In the cloning software, choose the source drive, which is your existing drive, and the destination drive, which is your RAID 0 array.
- Configure cloning settings: Adjust the cloning settings as per your needs. You can choose options like sector-by-sector cloning or automatic resizing of partitions.
- Start the cloning process: Begin the cloning process by clicking the appropriate button in the software. The software will then start copying the data from the source drive to the destination RAID 0 array.
- Monitor the progress: Keep an eye on the cloning progress to ensure that it completes successfully. Some cloning software provides a visual representation or a progress bar to track the migration.
- Verify the cloned data: Once the cloning process finishes, verify the data on the RAID 0 array to ensure that everything has been transferred accurately. Check for any discrepancies or missing files.
- Disconnect the source drive: After verifying the data on the RAID 0 array, disconnect the source drive to avoid conflicts or duplicate data.
Using cloning software can save you time and effort when migrating data to RAID 0. It streamlines the process and reduces the chances of errors or data loss.
Verifying Data Integrity On Raid 0
Ensuring data integrity is crucial when setting up RAID 0.
Here are some steps to verify the integrity of your data on RAID 0:
- Perform a thorough data check: Run a data check utility or software that is specifically designed for RAID arrays. These tools scan the RAID 0 array for any inconsistencies or errors in the stored data.
- Monitor SMART attributes: Check the Self-Monitoring, Analysis, and Reporting Technology (SMART) attributes of your RAID 0 array. SMART can provide valuable insights into the health and performance of your drives.
- Regularly check for bad sectors: Conduct routine checks for bad sectors on your RAID 0 array. Bad sectors can lead to data corruption, so identifying and fixing them promptly is crucial.
- Monitor RAID controller status: Keep an eye on the status of your RAID controller to ensure that it is functioning optimally. Faulty or malfunctioning controllers can impact data integrity.
- Implement RAID management software: Utilize RAID management software that provides real-time monitoring and alerts for any potential issues with your array. This helps in proactive troubleshooting and maintaining data integrity.
- Regularly backup your data: Despite RAID 0 providing improved performance, it does not offer redundancy or protection against drive failures. Therefore, it is essential to regularly backup your data to safeguard it from potential loss or corruption.
By following these steps, you can verify the data integrity on your RAID 0 array and ensure that your valuable information remains safe and secure.
Monitoring And Maintaining Raid 0
Monitoring and maintaining RAID 0 for NVMe SSDs is crucial for optimal performance and data protection.
Regularly check disk health, update firmware, and keep backups to ensure the reliability and stability of your RAID 0 array.
Monitoring Raid 0 Performance
Monitoring the performance of your RAID 0 configuration is crucial to ensure optimal functioning and identify any possible issues.
Here are some key aspects to consider when monitoring RAID 0 performance:
- RAID management software: Utilize dedicated RAID management software tools provided by the manufacturer. These tools offer real-time monitoring and help track the health of your RAID array.
- Performance metrics: Regularly check performance metrics such as read and write speeds, IOPS (Input/Output Operations Per Second), and latency. Monitoring these metrics will help you identify any potential bottlenecks or performance issues.
- Disk usage and space: Monitor the disk usage on your RAID 0 array to ensure that it does not exceed its capacity. Also, keep an eye on available space to prevent data loss due to a lack of storage.
- SMART monitoring: Use SMART (Self-Monitoring, Analysis, and Reporting Technology) to monitor the health of individual SSDs in the RAID array. SMART can provide early warnings of potential disk failures.
- Alerts and notifications: Set up alerts and notifications to receive real-time alerts in case of critical events or abnormalities within the RAID 0 setup. This allows for timely intervention and prevention of data loss.
Performing Regular Backups On Raid 0
Although, RAID 0 offers enhanced performance and storage capacity, it lacks fault tolerance. This means that if one drive fails in the array, all data may be lost.
Therefore, it is essential to perform regular backups to safeguard your valuable data.
Consider the following backup strategies:
- Scheduled backups: Set up automated backups on a regular basis using reliable backup software. This ensures that your data is consistently backed up without any manual intervention.
- Off-site backups: Store backups in off-site locations such as cloud storage or external drives. This protects your data from unforeseen circumstances like physical damage or theft.
- Redundant backups: Maintain multiple backups by storing data on different storage devices or in different locations. This provides an additional layer of protection against data loss.
- Verify backup integrity: Regularly test and verify the integrity of your backups. Ensure that the backup files are accessible and can be restored successfully if needed.
Addressing Common Issues With Raid 0
Although, RAID 0 offers improved performance and storage capacity, it also comes with certain risks and issues. Being aware of these common problems allows you to address them effectively.
Consider the following steps to address common RAID 0 issues:
- Drive failure: In the event of a drive failure, replace the faulty drive as soon as possible. Ensure that you have spare drives readily available for quick replacement.
- Data loss: Implement a reliable backup strategy to mitigate the risk of data loss. Regularly create backups and store them in secure locations.
- Data corruption: Run regular disk checks and scans to identify and rectify any potential data corruption issues. Utilize appropriate disk checking utilities or RAID management software.
- Performance degradation: Watch out for signs of performance degradation, such as increased response time or reduced transfer speeds. Thoroughly analyze the underlying causes and take necessary actions like optimizing file systems or hardware upgrades.
- Compatibility issues: Before adding or replacing drives in the RAID 0 array, ensure compatibility with the existing drives to prevent compatibility-related complications.
By effectively monitoring and maintaining your RAID 0 configuration, performing regular backups, and addressing common issues, you can maximize the performance and resilience of your NVMe SSD RAID 0 setup. Stay vigilant to ensure the safety and availability of your valuable data.
FAQ About How To Raid 0 Nvme Ssd
What is RAID 0 for an NVMe SSD?
RAID 0 is a type of data storage system wherein data is divided and spread across multiple storage drives. It is used to increase the storage capacity, as well as the overall performance of an NVMe SSD.
How do I configure RAID 0 on my NVMe SSD?
To configure RAID 0 on an NVMe SSD, you must first set up the NVMe controller to support RAID. Then, connect each NVMe SSD to the controller and create a RAID array. Lastly, configure the RAID settings and create the partition.
Are there any risks associated with using RAID 0 for an NVMe SSD?
Yes, there are risks associated with using RAID 0 for an NVMe SSD. Data stored on a RAID 0 array is more susceptible to being lost if one of the drives fails. Therefore, it is important to back up important data regularly.
What are the performance benefits of using RAID 0 for an NVMe SSD?
Using RAID 0 for an NVMe SSD can give you faster read and write speeds, as well as improved overall performance. RAID 0 also increases the
Conclusion
RAID 0 with NVMe SSDs can significantly enhance your system’s performance and speed up data transfers.
By striping data across multiple drives, RAID 0 maximizes the utilization of NVMe SSDs’ lightning-fast speeds, giving you unparalleled read and write performance.
With the right hardware and configuration, you can experience blazing fast boot times, reduced loading times for applications and games, and improved overall system responsiveness.
However, it’s important to note that RAID 0 does not provide any data redundancy, so proper backup measures should be in place to prevent data loss in case of drive failure.
Additionally, it’s recommended to regularly monitor the health of your drives to identify any potential issues.
With the right setup and precautions, RAID 0 with NVMe SSDs can take your system’s performance to new heights, delivering an exceptional user experience.


