Diy Ssd External Hard Drive: 8 Easy Steps!
Creating a DIY SSD external hard drive involves procuring compatible SSD and enclosure, connecting them, and setting up the drive on the computer.
This requires a basic understanding of hardware, but it allows for cost savings and customization.
Solid State Drives (SSD) are popular for their speed and reliability. They can be used as external hard drives by connecting them to the computer with a suitable enclosure.
This process enables the SSD to communicate with the computer and be recognized as an external storage device.
Creating a DIY SSD external hard drive offers a range of benefits beyond cost savings. It provides the flexibility to choose the SSD brand, size, and speed, and the enclosure’s design and functionality.
This customization allows users to create a drive tailored to their specific needs, whether it’s for large-scale data backups, speedy file transfers, or a portable OS boot drive.
8 Steps To Create a DIY SSD External Hard Drive
| Step No. | Materials Needed | Instructions |
|---|---|---|
| 1 | SSD Drive, External Hard Drive Case, Screwdriver | Purchase an SSD drive and an external hard drive case that is compatible with your SSD. Also, have a screwdriver on hand. |
| 2 | SSD Drive, External Hard Drive Case | Remove the cover of the external hard drive case. |
| 3 | SSD Drive, External Hard Drive Case | Insert the SSD into the case, ensuring that the connectors on the drive match up with the connectors in the case. |
| 4 | SSD Drive, External Hard Drive Case, Screwdriver | Secure the SSD in the case using the provided screws. |
| 5 | SSD Drive, External Hard Drive Case | Connect the case cover back, make sure it snaps into place securely. |
| 6 | SSD Drive, External Hard Drive Case | Connect the newly created SSD external hard drive to your device using the appropriate USB cable. |
| 7 | SSD Drive, External Hard Drive Case | Format the SSD to your desired file system using your device’s formatting tool. |
| 8 | SSD Drive, External Hard Drive Case | Begin using your SSD external hard drive for data storage and transfer. |
Key Takeaway
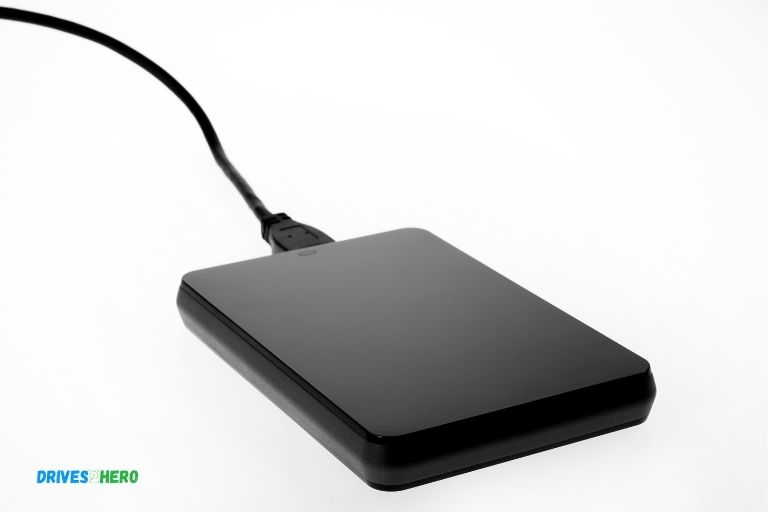
Five Facts About DIY SSD External Hard Drives
Benefits Of Diy Ssd External Hard Drives
Discover the advantages of DIY SSD external hard drives, providing faster data transfer speeds, improved durability, and increased storage capacity compared to traditional hard drives.
With easy installation and customization options, DIY SSD external hard drives offer a cost-effective solution for data storage needs.
Are you tired of slow data transfer speeds and limited storage capacity on your existing external hard drive? It’s time to consider the benefits of a DIY SSD external hard drive.
By following simple steps, you can create a high-performance storage solution that meets your ever-growing data storage needs.
Let’s explore the advantages of DIY SSD external hard drives:
Faster Data Transfer Speeds For Improved Performance
- SSDs (solid-state drives) offer significantly faster data transfer speeds compared to traditional HDDs (hard disk drives). This means that you can transfer files, backup data, and access your stored content much quicker.
- With faster read and write speeds, tasks like opening large files or running demanding applications become smoother and more efficient.
- Whether you’re working with multimedia files, gaming, or managing your important documents, a DIY SSD external hard drive ensures that data transfer doesn’t become a bottleneck in your workflow.
Higher Storage Capacity For Increased Data Storage Needs
- One of the primary benefits of SSDs is their ability to offer higher storage capacity. With larger SSDs available in the market, you can store more data in a single external drive.
- As data files, media, and software applications continue to increase in size, having ample storage capacity is essential. A DIY SSD external hard drive allows you to have all your data in one place, even if it includes extensive media libraries or complex projects.
- Whether it’s for personal use, professional work, or backups, an SSD-based external hard drive can accommodate your growing storage needs with ease.
Portable And Lightweight For Easy Transportation
- DIY SSD external hard drives are designed to be portable and lightweight. They are perfect for individuals who are constantly on the go or need to access their data from multiple locations.
- The compact size and reduced weight of SSDs make them more comfortable to carry in your bag or pocket. No longer will you have to compromise on storage capacity or performance to have a portable storage solution.
- Whether you’re a frequent traveler, a content creator, or need to transport large files between different devices, a DIY SSD external hard drive offers the convenience of mobility without sacrificing functionality.
DIY SSD external hard drives come with several benefits that make them a worthwhile investment for improved performance, increased storage capacity, and easy portability.
By following simple steps, you can create a high-performance storage solution that meets your data storage needs.
Say goodbye to slow data transfers and limited storage, and embrace the advantages of DIY SSD external hard drives.
Components Needed For Diy Ssd External Hard Drive
Looking to create your own SSD external hard drive? You’ll need essential components like an SSD, an external enclosure, a USB cable, and a screwdriver for easy DIY assembly.
Take control and customize your storage solution. Creating your own SSD external hard drive can be an exciting and cost-effective project.
With the right components, you can have a high-performance storage solution customized to your needs.
Here are the key components you’ll need:
Ssd (Solid State Drive) With Appropriate Storage Capacity:
- Look for an SSD with suitable storage capacity based on your requirements. Options range from 128GB to 4TB or more.
- SSDs offer fast data transfer speeds, durability, and compact size.
External Hard Drive Enclosure For Ssd:
- Choose an external enclosure specifically designed for SSDs. It should provide a secure and convenient housing for your SSD.
- Make sure the enclosure is compatible with your SSD size, typically 2.5-inch for most consumer SSDs.
Screwdriver And Screws For Enclosure Assembly:
- You’ll need a small Phillips head screwdriver to assemble the enclosure.
- The enclosure should come with the necessary screws for securing the SSD inside.
Usb Cable For Data Transfer And Power Connection:
- Ensure you have a USB cable suitable for your SSD enclosure, commonly a USB Type-C or USB 3.0 cable.
The USB cable will fulfill two purposes:
- Data transfer between the SSD and your computer, and power connection to the enclosure.
Benefits Of Diy Ssd External Hard Drive:
- Customizability: You have the freedom to choose the SSD with the storage capacity that suits your needs.
- Cost-effectiveness: Creating your own SSD external hard drive can often be more affordable than buying a pre-built one.
- Performance: SSDs provide fast data transfer speeds, allowing for quick file transfers and improved system responsiveness.
Creating your own DIY SSD external hard drive gives you the flexibility to tailor your storage solution to your requirements.
By gathering these simple components, you’ll be well on your way to building a reliable and high-performance external storage device.
Step-By-Step Guide To Building A Diy Ssd External Hard Drive
Discover how to build your very own DIY SSD external hard drive with our step-by-step guide.
With easy-to-follow instructions, you’ll be able to create a high-speed storage solution tailored to your needs. Perfect for enhancing your data storage capabilities.
Looking to expand your storage space? Building your own DIY SSD external hard drive is an excellent option. We’ll take you through the step-by-step process of creating your own high-performance external storage solution.
Choose The Right Ssd And External Hard Drive Enclosure:
To ensure optimal performance and compatibility, it’s crucial to select the right components for your DIY SSD external hard drive.
Here’s what you need to do:
- Research SSD options: Look for a reliable SSD with sufficient capacity for your needs. Consider factors such as read/write speeds and durability.
- Select an external hard drive enclosure: Choose an enclosure that supports the type and size of your SSD. Ensure compatibility with your computer’s ports, such as USB 3.0 or Thunderbolt.
Install The Ssd Into The Enclosure:
Once you have your SSD and enclosure ready, it’s time to install the SSD into the enclosure.
Follow these steps:
- Open the enclosure: Carefully remove any screws or clips to access the internal components of the enclosure.
- Connect the SSD: Locate the appropriate connection pins or slots within the enclosure and attach the SSD securely. Ensure a snug fit to prevent any loose connections.
Secure The Ssd And Enclosure With Screws:
After inserting the SSD, it’s vital to secure it firmly in place.
Here’s what you should do:
- Use the provided screws: Most enclosures come with screws designed specifically for securing the SSD. Follow the instructions provided and fasten the SSD to the enclosure securely.
Connect The Usb Cable To The Enclosure And The Computer:
To connect your DIY SSD external hard drive to your computer, follow these simple steps:
- Plug in the USB cable: Connect one end of the USB cable to the external hard drive enclosure and the other end to an available USB port on your computer.
- Ensure a stable connection: Make sure the USB cable is firmly connected to both the enclosure and your computer to ensure a stable data transfer.
Format And Partition The Ssd For Optimal Performance:
Before you can start using your DIY SSD external hard drive, you’ll need to format and partition it.
Here’s what you need to do:
- Open the Disk Management utility: On Windows, search for “Disk Management” in the Start menu. On Mac, go to the “Disk Utility” in the “Applications” folder.
- Format the SSD: Right-click on the SSD in the Disk Management utility and select the option to format it. Choose the desired file system, such as NTFS (Windows) or APFS (Mac).
- Partition the SSD: If needed, create partitions on the SSD based on your storage requirements. Assign appropriate drive letters or names to each partition.
Transfer Files And Data To The Diy Ssd External Hard Drive:
With the formatting and partitioning complete, you’re now ready to transfer files and data to your DIY SSD external hard drive.
Follow these steps:
- Drag and drop files: Simply drag and drop the files or folders you wish to transfer from your computer to the SSD’s drive letter or name.
- Copy and paste: Alternatively, you can copy files from your computer and paste them into the SSD’s drive letter or name.
Congratulations! You have successfully built your DIY SSD external hard drive. Enjoy the increased storage capacity and faster data access speeds.
Tips And Best Practices For Diy Ssd External Hard Drive Assembly
Discover essential tips and best practices for assembling your DIY SSD external hard drive. Learn how to expertly put together your device, ensuring seamless performance and optimal storage capacity.
Master the art of DIY storage solutions with these simple yet effective techniques. As you embark on the journey of creating your own DIY SSD external hard drive, it’s important to ensure compatibility between the SSD and the enclosure.
Following manufacturer instructions for installation and setup will help you successfully assemble your device.
Here are some tips and best practices to keep in mind:
Ensure Compatibility Between The Ssd And Enclosure
- Check the dimensions and form factor of your SSD to ensure it will fit properly within the enclosure.
- Verify that the enclosure supports the interface of your SSD (such as SATA or NVMe) to avoid any compatibility issues.
- Research the maximum storage capacity supported by the enclosure to ensure it can accommodate your SSD.
Follow Manufacturer Instructions For Installation And Setup
- Review the instruction manual or online resources provided by the SSD and enclosure manufacturers.
- Properly connect the SSD to the enclosure following the recommended steps.
- Install any necessary software or drivers as instructed for seamless operation.
Use High-Quality Screws And Secure The Enclosure Properly
- Utilize high-quality screws that are designed for securing SSDs and enclosures.
- Follow the manufacturer’s guidelines for tightening the screws to avoid damaging the SSD or enclosure.
- Double-check that the enclosure is securely closed to prevent any potential data loss or damage.
Handle The Ssd And Enclosure With Care To Prevent Damage
- Avoid touching the contacts or circuitry on the SSD, as static electricity can harm the components.
- Use an anti-static wristband or work on an anti-static mat when handling the SSD to minimize the risk of damage.
- Be gentle when inserting or removing the SSD from the enclosure to prevent any physical harm.
Keep The Diy Ssd External Hard Drive In A Cool And Ventilated Area
- Choose a suitable location for your DIY SSD external hard drive that allows for proper ventilation.
- Avoid placing the drive near sources of heat, such as direct sunlight or other electronic devices that generate heat.
- Adequate airflow will help maintain optimal performance and extend the lifespan of your DIY SSD external hard drive.
By adhering to these tips and best practices, you can assemble your DIY SSD external hard drive with confidence. Enjoy the benefits of enhanced storage capacity and the freedom to customize your device to meet your specific needs.
Troubleshooting Common Issues With Diy Ssd External Hard Drives
Learn how to troubleshoot common issues that may arise with your DIY SSD external hard drives, ensuring optimal performance and reliability for your storage needs.
Find solutions for various problems and enhance your overall experience with a few simple steps.
If you’ve built your own SSD external hard drive, you may encounter a few common issues along the way. Don’t worry, though, as these problems are quite fixable!
Below are some troubleshooting tips to help you resolve any problems you may encounter with your DIY SSD external hard drive.
Ssd Not Being Recognized By The Computer:
- Check the connections: Ensure that the SSD is properly connected to the computer via USB or Thunderbolt. Disconnect and reconnect the cables to make sure they’re securely attached.
- Update device drivers: Install the latest drivers for your SSD to ensure compatibility with your computer’s operating system.
- Verify power supply: Confirm that the SSD is receiving sufficient power. Try using a different USB port or power adapter to eliminate any potential power-related issues.
- Disk management: Open the “Disk Management” utility on your computer and check if the SSD is listed but not assigned a drive letter. If so, assign a drive letter to make it accessible.
Slow Data Transfer Speeds:
- Check USB version: Ensure your computer’s USB port is compatible with the SSD’s USB version. Upgrading to a faster USB version, such as USB 3.0 or USB-C, can significantly improve transfer speeds.
- Use quality cables: Substandard or damaged cables may restrict the data transfer rate. Replace them with high-quality cables and make sure they are properly connected.
- Reduce file fragmentation: Regularly defragmenting your SSD can enhance its performance and increase data transfer speeds. Use a trusted disk defragmentation tool for optimal results.
- Update firmware: Check for any available firmware updates for your SSD. Manufacturers often release updates to improve performance and address any compatibility issues.
Error Messages During Setup Or File Transfer:
- Scan for malware: Run a comprehensive scan on your computer to ensure it is free from malware and viruses that can interfere with file transfer operations.
- Check file system compatibility: Verify that the file system of your SSD is compatible with the one on your computer. Reformatting the SSD to a compatible file system may help resolve this issue.
- Error log analysis: Examine the error message to identify any specific error codes or troubleshooting resources provided by the SSD manufacturer. This information can assist you in resolving the issue.
Inconsistent Performance Of The Diy Ssd External Hard Drive:
- Monitor drive temperature: Ensure that the SSD is not overheating during extended usage periods. Elevated temperatures can negatively impact performance. Install additional cooling solutions if necessary.
- Check for firmware updates: Manufacturers often release firmware updates to address performance issues or improve stability. Check for any available updates and apply them as needed.
- Data encryption: If your SSD is encrypted, ensure that the encryption software is up to date. Older or incompatible encryption software can potentially impact performance.
- Disable background applications: Certain applications or processes running in the background can consume system resources and affect the performance of your DIY SSD external hard drive. Temporarily disable unnecessary applications to see if performance improves.
Remember, these troubleshooting steps should help you identify and resolve common issues with your DIY SSD external hard drive. If the problems persist, consider reaching out to the SSD manufacturer’s support team for further assistance.
Enhancing The Performance Of Diy Ssd External Hard Drives
Enhance the performance of your DIY SSD external hard drive by optimizing storage capacity and increasing transfer speeds for seamless data access and backup.
Achieve greater efficiency with simple upgrades and enjoy the benefits of this reliable storage solution. With the increasing demand for storage and faster data transfer speeds, many tech-savvy individuals are turning to DIY SSD external hard drives.
These do-it-yourself setups not only provide ample storage space but also offer enhanced performance compared to traditional hard drives.
To take full advantage of the benefits that DIY SSD external hard drives offer, it is essential to optimize their performance. We will explore some key strategies to enhance the performance of your DIY SSD external hard drive.
Updating Ssd Firmware For Improved Compatibility And Stability:
Keeping your SSD firmware up to date is crucial for ensuring optimal performance. Firmware updates often include bug fixes, compatibility improvements, and performance enhancements.
By regularly updating your SSD firmware, you can maintain stability, resolve potential issues, and even unlock additional features.
Here are some steps to help you update your SSD firmware:
- Check the SSD manufacturer’s website for firmware updates.
- Download the latest firmware for your specific SSD model.
- Follow the manufacturer’s instructions to install the firmware update.
Optimizing Software Settings For Faster Data Transfer Speeds:
To achieve faster data transfer speeds on your DIY SSD external hard drive, it’s important to optimize the software settings. These settings can significantly impact the overall performance of your drive.
Consider the following strategies to maximize data transfer speeds:
- Enable the TRIM command: TRIM helps maintain optimal performance by allowing the operating system to inform the SSD which data blocks are no longer in use.
- Adjust power management settings: By disabling power-saving settings, you can ensure consistent performance without any unnecessary slowdowns.
- Enable write caching: Write caching allows data to be temporarily stored in RAM before being written to the SSD, resulting in faster write speeds.
Utilizing Ssd Caching For Enhanced Performance:
SSD caching can bring a significant boost to the performance of your DIY SSD external hard drive. Caching involves using a portion of your system’s memory to temporarily store frequently accessed data, resulting in quicker access times.
Here’s how you can leverage SSD caching:
- Check if your motherboard supports SSD caching.
- Install an SSD caching software application.
- Configure the caching software to use your DIY SSD external hard drive as the cache.
Implementing Regular Maintenance And Monitoring Of The Diy Ssd External Hard Drive:
Just like any other storage device, regular maintenance is essential to ensure the longevity and performance of your DIY SSD external hard drive.
Here’s what you should do to keep your drive running smoothly:
- Perform regular disk cleanup: Remove any unnecessary files or temporary data to optimize storage space and prevent performance degradation.
- Defragmentation: Although not recommended for SSDs, if you have a hybrid setup (SSD+HDD), defragmenting the hard drive portion can improve overall system performance.
- Monitor drive health: Use software tools to monitor your DIY SSD external hard drive’s health, such as temperature, wear leveling, and SMART attributes.
By following these tips, you can enhance the performance of your DIY SSD external hard drive, ensuring faster data transfer speeds, improved stability, and increased compatibility.
Implementing regular maintenance and monitoring will also help prolong the lifespan of your drive and maintain its optimal performance.
Now that we have explored these strategies, you are ready to take your DIY SSD external hard drive to the next level.
FAQ About Diy Ssd External Hard Drive
What Do I Need to Build an External Ssd Hard Drive?
To build an external SSD hard drive, you will need a solid-state drive (SSD), an enclosure for the SSD, and a USB cable to connect it to your computer.
Can I Use a Diy External Ssd Hard Drive With My Laptop?
Yes, you can use a DIY external SSD hard drive with your laptop. However, it is important to make sure that the drive is compatible with your laptop and its operating system before purchasing or installing it.
Does Building an External Ssd Hard Drive Require Any Special Skills Or Tools?
No, building an external SSD hard drive does not require any special skills or tools. It is relatively simple to build one with just a USB cable and the right case for the SSD.
How Much Faster is an External Ssd Compared to Traditional Spinning Platter Drives?
An external SSD is typically up to 10 times faster than a traditional spinning platter drive. It can also access data more quickly and offers better performance, particularly when it comes to transferring large files or loading applications.
Conclusion
Creating your own DIY SSD external hard drive can be a cost-effective and versatile solution for your storage needs.
By following the simple steps outlined in this blog post, you have the opportunity to customize your external hard drive to fit your specific requirements.
The advantages of using an SSD include faster data transfer speeds, increased durability, and reduced power consumption.
Additionally, SSDs are small, lightweight, and portable, making them ideal for on-the-go storage. With the rising popularity of cloud storage, having an external hard drive offers a convenient alternative for those who prefer offline data backup.
Whether you are a student, a professional, or a gamer, having a reliable storage solution is essential for ensuring the safety and accessibility of your data.
So, why not give DIY SSD external hard drives a try and unlock the full potential of your storage capabilities today!
Bonus Topic: Diy Ssd External Hard Drive
Can You Make an Ssd an External Hard Drive?
Yes, it is possible to make an SSD an external hard drive. This can be done by connecting the SSD to your computer with a USB cable and then formatting the hard drive so that it can be used as an external device.
The main benefit of using an SSD as opposed to a regular HDD (hard disk drive) is its speed and reliability; due to its lack of moving parts, SSDs are much faster than HDDs at data transfer rates, making them ideal for tasks such as video editing or gaming.
Additionally, they are less prone to failure since there are no mechanical components in need of repair or replacement.
However, keep in mind that while you may save some money by buying a cheaper internal HDD and converting it into an external one, if you plan on using this setup for long-term storage purposes then investing in a higher quality external SSD would definitely be worth considering.
Is It Better to Make Your Own External Ssd?
Making your own external SSD can be a great way to get the performance and storage you need without spending a fortune on a pre-made drive. It also allows for more customization in terms of interface, form factor, and capacity.
The downside is that it requires more knowledge and technical know-how than buying an off-the-shelf product, so if you’re not confident with building hardware or software then purchasing an already made external SSD might make more sense.
Ultimately, the decision will come down to your budget and how much time/effort you are willing to put into creating your own external SSD versus just buying one that is ready to go out of the box.
How Do I Clone My Os to an External Ssd?
Cloning your OS to an external SSD is a great way of creating a backup or duplicate of your current system. It can also be used to upgrade the storage capacity of your computer without having to reinstall the OS.
To clone your OS, you’ll need special software such as EaseUS Todo Backup that will allow you to easily move all elements from one drive (your primary one) onto another (the external SSD).
The process may take some time depending on how much data needs transferring so sit back and wait for it finish before disconnecting both drives safely!
Diy Ssd Pcb
DIY SSD PCBs are printed circuit boards (PCBs) that can be used to build your own Solid State Drive. They offer an affordable way to make a reliable storage device at home, with features such as high speed and long lifespan.
With the right components and tools, you can assemble your own custom SSD from scratch in no time saving you money on costly pre-made drives.
DIY projects like this allow for more control over the design of your drive, giving you greater customization options when it comes to performance and capacity.
Diy External Ssd Thunderbolt
DIY external SSD Thunderbolt is a great option for those who want to build their own ultra-fast storage device.
Using an external drive enclosure and a solid state drive (SSD), you can create your own high-performance storage solution that offers improved speed, reliability, and portability over traditional hard drives.
With the help of Thunderbolt technology, it’s now possible to connect multiple devices through one connection, allowing users to easily access data from multiple sources with ease.
This makes DIY external SSD Thunderbolt an ideal choice for anyone looking for reliable storage options that are both affordable and powerful.
External Ssd Enclosure
An external SSD enclosure is a small device that allows users to connect an internal solid-state drive (SSD) to their computer via USB.
This gives the user access to faster data transfer speeds than what traditional hard drives can provide, as well as increased storage capacity in a smaller form factor.
By using an external SSD enclosure, users can easily upgrade their storage without having to open up their PC or laptop and install the new drive internally.
Ssd External Hard Drive 4Tb
An SSD external hard drive is a great way to expand the storage capacity of your computer.
The 4TB model offers plenty of space for all your files and documents, allowing you to back up important data without having to worry about running out of room.
This type of hard drive also provides faster data transfer speeds since it uses solid-state technology, making it ideal for transferring large files quickly and efficiently.

