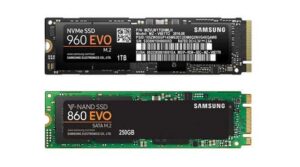
Do You Need to Screw in Nvme Ssd
If you’re looking to upgrade your computer’s storage, you might be wondering if you need to screw in an NVMe SSD. The answer is no – you don’t need to screw in an NVME SSD, and in fact, it’s not recommended.
If you’re looking to upgrade your computer’s storage, you may be wondering if you need to screw in an NVME SSD. The answer is: it depends.For the most part, NVME SSDs are designed to be plugged in and used without any special installation process.
However, some models may require that you screw them into place for stability or other reasons.If you’re not sure whether your particular model needs to be screwed in, check the documentation that came with it or contact the manufacturer. In most cases, though, you should be able to just plug and play with no issues.
Do You Need to Screw Nvme?
No, you do not need to screw NVMe.
Do Nvme Ssd Come With Screws?
Yes, NVMe SSDs typically come with four screws that can be used to secure the drive to a mounting bracket. These screws are usually made of steel or aluminum and have a Torx head. Some drives may also come with a plastic spacer that helps to keep the drive level when mounted.
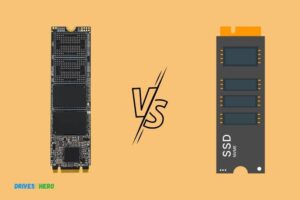
Do M2 Drives Need Screws?
M2 drives are becoming more popular as the size of data files continue to increase. Many people are wondering if M2 drives need screws to secure them in place. The answer is no, M2 drives do not require screws to be installed.
This is due to the fact that M2 drives use a different type of connector than traditional hard drives.
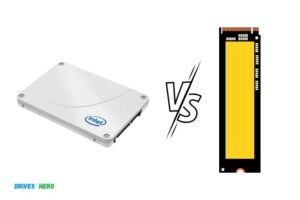
Does Ssd Need to Be Screwed In?
SSDs (Solid State Drives) are becoming more and more popular, as they offer many advantages over traditional hard drives. One common question that arises is whether or not SSDs need to be screwed in.
The answer is no, SSDs do not need to be screwed in.This is because SSDs have no moving parts, unlike hard drives which do have spinning disks. Therefore, there is nothing inside an SSD that needs to be secured in place.However, some people prefer to screw their SSDs in anyway, just to be on the safe side.
If you choose to do this, make sure that you use the proper screws and don’t overtighten them, as this could damage your SSD.
Can I Tape My M.2 Ssd
As technology advances, so do the types of drives available to store data. One newer type of drive is the M.2 SSD.
Can you tape your M.2 SSD?The short answer is no, you cannot tape your M.2
SSD. The reason for this has to do with how an M.2 drive is designed and how it connects to a computer motherboard.M.2 drives are designed with a notched connector that allows them to be plugged into a special slot on a motherboard.
This slot provides both power and data connections to the drive. Taping over this notch would prevent the drive from being properly connected and could damage both the drive and the motherboard.In addition, because M .2 drives are designed to be very thin, they are not as rugged as other types of drives and are more susceptible to physical damage .
Taping an M . 2 drive could also cause it to warp or bend , which could further damage the delicate circuitry inside .For these reasons, it’s best not to try taping your M .
2 SSD – even if it’s just for temporary protection . If you need to transport your computer or store it for any length of time , it’s better to remove the M..
2 drive and keep it in a safe , protective case .
M2 Ssd Screw Alternative
If you’re looking for an M2 SSD screw alternative, there are a few options available. You can either use a standard Phillips head screw or opt for a more specialized option like a Torx head screw.Phillips head screws are the most common type of screws used in household applications.
They’re also commonly used in computer hardware, so finding Phillips head screws that fit your M2 SSD shouldn’t be too difficult.Torx head screws are less common than Phillips head screws, but they offer some advantages. First, they’re less likely to strip than Phillips head screws.
Second, they provide more torque, meaning they’ll hold your M2 SSD more securely in place.When choosing an M2 SSD screw alternative, it’s important to consider the size and length of the screw you need. M2 SSDs are relatively small, so you won’t need a very long screw.
A shorter screw will be easier to work with and less likely to damage your M2 SSD during installation.
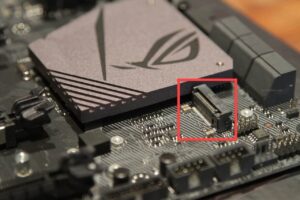
How to Screw in M.2 Ssd
M.2 SSDs are becoming more and more popular as storage options for laptops and PCs. They offer a ton of benefits over traditional HDD or even SSDs, including faster data transfer speeds, lower power consumption, and a smaller form factor.
If you’re looking to upgrade your storage with an M.2 SSD, the process is actually pretty simple. In this article, we’ll walk you through everything you need to know about how to screw in an M.2
SSD.Tools Needed:
– Phillips head screwdriver
– Torx T5 screwdriver (optional)
– Anti-static wrist strap (optional)
First, power down your computer and unplug all cables from the back. Then open up your case using the screws on the back or side (depending on your case). If you’re not sure how to do this, consult your case’s manual for instructions.
2a. Inside, locate where your current storage drive is mounted (usually towards the front of the case). There should be two or four screws holding it in place – remove these screws and set them aside somewhere safe.
You may also need to remove any mounting brackets that are attached to the drive – these can usually be unscrewed as well.2b. With your old drive removed, take a look at where it was mounted – this is where you’ll be installing your new M …
Do I Need to Screw in Ssd
No, you don’t need to screw in an SSD. In fact, many people say it’s not necessary and can actually void your warranty.
Conclusion
If you’re wondering whether or not you need to screw in your new NVMe SSD, the answer is most likely no. The vast majority of NVMe drives come with a mounting bracket that simply snaps into place, making installation a breeze. However, there are a few exceptions where you may need to use screws.
For example, if your computer case has particularly tight tolerances, it’s possible that the drive won’t fit without screws. In any case, it’s always a good idea to check with your motherboard or case manufacturer to be sure.

Harold Williams is a senior writer and technical editor at Drives Hero with 20+ years of experience in IT administration. He specializes in storage systems, SSD reviews, and performance testing, bringing real-world insight to every guide.