How to Change Hdd to Ssd Macbook Pro 2011? 12 Steps!
Upgrading your MacBook Pro 2011 with an SSD is a practical step to boost speed and performance markedly. We’ll walk you through the process of replacing your laptop’s hard disk drive with a solid-state drive for improved performance, speed, and reliability.
Whether you’re looking to breathe new life into your aging MacBook or simply seeking a boost in productivity, this guide will help you make the transition smoothly.

Key Takeaway
Upgrading MacBook Pro 2011: Changing HDD to SSD
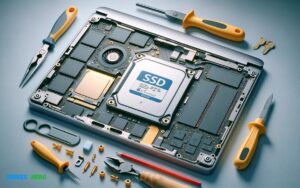
Step 1: Gather Necessary Tools
- Gather the required tools: Phillips #00 screwdriver, SATA-to-USB cable or external enclosure (optional), and your new SSD.
Step 2: Backup Your Data
- Before starting, back up your data to an external drive or cloud storage to avoid data loss.
Step 3: Prepare Your SSD
- If your SSD didn’t come with macOS pre-installed, create a bootable macOS installer on a USB drive.
Step 4: Shut Down Your MacBook
- Ensure your MacBook Pro is powered off completely before proceeding.
Step 5: Remove the Bottom Cover
- Unscrew the screws on the bottom cover of your MacBook Pro using the Phillips #00 screwdriver.
Step 6: Remove the Old HDD
- Carefully disconnect the HDD cable and remove the old HDD from its bay.
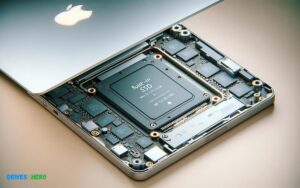
Step 7: Install the SSD
- Connect the SSD to the HDD cable, ensuring a secure connection.
- Place the SSD into the HDD bay and secure it in place.
Step 8: Replace the Bottom Cover
- Put the bottom cover back on and tighten the screws.
Step 9: Boot from External Drive (If Necessary)
- If your SSD didn’t come pre-installed with macOS, boot your MacBook Pro from the bootable USB drive you created.
Step 10: Install macOS on the SSD
- Follow the on-screen instructions to install macOS on your new SSD.
Step 11: Transfer Data (Optional)
- If you backed up your data, transfer it back onto your MacBook Pro from the external drive or cloud storage.
Step 12: Enjoy Your Faster MacBook Pro!
- With the SSD installed, your MacBook Pro 2011 will now run faster and smoother, providing improved performance and responsiveness.
By following this guide, you’ve unlocked the full potential of your laptop, experiencing faster boot times, snappier performance, and enhanced reliability.
With your new SSD installed, you’re ready to tackle tasks with newfound efficiency and enjoy a smoother computing experience.
Preparation For Upgrade
Revamping your MacBook Pro with a new SSD is like giving it a fresh lease on life. Speedier load times, faster data transfer, and overall improved performance await.
However, diving headfirst into this upgrade without proper prep is akin to setting sail without a compass. To ensure a smooth sail, let’s walk through the preparation process, starting with identifying your MacBook Pro model.
Checking Macbook Pro Model
Before purchasing an SSD, you need to confirm the compatibility with your MacBook Pro. Apple has released various models over the years, each with its specifications.
To pinpoint your model:
- Click on the Apple icon in the top-left corner of your screen.
- Select About This Mac.
- A window will pop up detailing your Mac’s version and model year.
With this info, you can procure an SSD made to fit the distinctive architecture of your 2011 MacBook Pro.
Backing Up Data
Backing up your data is an indispensable step. It protects against data loss during the upgrade. Implementing a complete backup can be accomplished using Time Machine, a built-in feature that pairs seamlessly with an external storage device.
Follow these steps:
- Connect an external hard drive with sufficient storage to house your data.
- Open System Preferences and select Time Machine.
- Click Select Backup Disk and choose your external hard drive from the list.
- Initiate the backup process by clicking Use Disk and wait for Time Machine to work its magic.
Once the backup completes, rest assured your files stand safe and you can proceed with the SSD upgrade.
Gathering Necessary Tools
Before delving into the heart of upgrading your MacBook Pro 2011 from an HDD to an SSD, it’s crucial to have the right tools at your disposal. Starting off on the right foot means properly equipping yourself, preventing any mid-operation hiccups.
Ensuring you have all the necessary tools before you begin will make the process smoother, safeguarding your data and hardware.
Anti-static Wrist Strap
- Fasten the strap to your wrist, ensuring metal contact with skin.
- Attach the alligator clip to a grounded, unpainted metal object.
- Check that connections are secure before proceeding with the SSD upgrade.
Remember, preparation is just as important as the upgrade itself. With the above-mentioned tools in hand, you’re now ready to transform the performance of your MacBook Pro by upgrading from an HDD to an SSD.
Opening Macbook Pro
Removing Screws
- Keep track of each screw’s original location they come in varying lengths.
- Remove all perimeter screws, which are typically longer.
- Follow with the remaining screws that secure the center area.
- Place screws on a magnetic mat or in a container to prevent loss.
Locating Hard Drive
With the back cover set aside, your MacBook Pro’s internal components are on full display.
The hard drive is typically located in the front right corner when the MacBook Pro is oriented with the hinge away from you. Look for a rectangular piece secured by a retaining bracket.
Here’s what you do next:
- Locate the hard drive retaining bracket, which is usually held down by two screws.
- Remove these screws with your Phillips #00 screwdriver.
- Carefully detach the bracket and set it aside with its screws.
- Gently lift the plastic pull tab attached to the hard drive and slide it out of its bay.
Removing Hdd
Before upgrading your MacBook Pro 2011 with a speed-enhancing SSD, you must safely remove the existing HDD. Proceed with caution, as improper handling can damage your Mac’s internal components.
Disconnecting Cables
- Identify the SATA connector attached to the HDD.
- Use a spudger or your fingertips to gently disconnect the SATA cable without straining the connector.
- Ensure that all cables are fully disconnected before attempting to remove the hard drive.
Sliding Out Hard Drive
With the cables detached, it’s now time to actually remove the HDD from its bay. The hard drive is typically held in place by screws or a bracket that will need to be taken out.
- Locate the screws or bracket securing the HDD to the bay.
- Using the appropriate screwdriver, remove the screws or bracket carefully.
- Once free, slide out the hard drive gently from its slot, handling it by the sides to prevent static damage to the delicate components.
Now that you have the HDD removed, you’re well on your way to installing a new SSD and giving your MacBook Pro a significant performance boost.
Installing Ssd
Welcome to the heart of your MacBook Pro’s upgrade journey by installing an SSD. This critical step breathes new life into your 2011 MacBook Pro, giving it a speed and performance boost that rivals newer models.
An SSD, or solid-state drive, offers faster data access, lower power consumption, and improved reliability over your old HDD.
Prepare to enhance your MacBook Pro’s capabilities by carefully following the guidelines outlined below to ensure a successful SSD installation.
Inserting Ssd
Transitioning from an HDD to an SSD in your MacBook Pro begins with the physical insertion of the drive:
- Power down your MacBook Pro and disconnect all cables.
- Flip your laptop and remove the ten screws securing the bottom cover. Set the cover aside.
- Locate the hard drive area; it’s usually on the left or right corner, depending on your model.
- Remove the screws attaching the HDD bracket and keep them in a safe place.
- Gently slide out the old HDD, disconnecting it from the SATA connector.
- Now, attach the SSD to the bracket you just removed using the same screws.
- Slide the SSD into the SATA connector, ensuring a snug and secure fit.
- Reattach the bracket with the SSD to the MacBook’s frame.
- Replace the bottom cover and securely fasten the screws.
Connecting Cables
Connecting your new SSD to your MacBook Pro properly is crucial for optimal performance:
- Ensure the SSD is appropriately aligned with the SATA connector.
- Apply gentle pressure to connect the SSD; you’ll feel it slot into place.
- Check that there are no loose cables or connections that could impede your MacBook Pro’s ability to recognize the new SSD.
- Secure the drive with the bracket to prevent any movement that could dislodge the connection.
After you have physically installed your SSD, you will need to format it and install macOS, ensuring your system runs smoothly with its new component.
The steps above outline a critical phase in your upgrade process, allowing your MacBook Pro to tap into the speed and efficiency of solid-state technology.
Important Considerations:
- Make sure to have the right tools before you begin the SSD installation process, such as screwdrivers and anti-static wrist straps.
- Back up your data from your existing HDD to an external drive or cloud storage to prevent data loss during the upgrade process.
- Check compatibility with your specific MacBook Pro 2011 model, as there may be variations that affect SSD installation.
- Follow the SSD manufacturer’s guidelines for handling and installation to avoid accidental damage.
- If you’re not comfortable performing the upgrade yourself, consider seeking assistance from a professional technician.
Closing Macbook Pro
Now that you’ve successfully swapped your old HDD for a sleek new SSD in your MacBook Pro 2011, you’re almost at the finish line. It’s time to carefully close up your MacBook Pro, ensuring everything is put back together correctly and securely.
This final step is crucial as it protects the new SSD and the internal components of your MacBook Pro. Follow these detailed steps to properly close up your laptop and enjoy the enhanced performance of your SSD.
Reattaching Screws
With the SSD installed, the next step is to make sure the back cover of your MacBook Pro fits as snugly as it did before.
Here’s how:
- Align the bottom cover with the MacBook Pro’s chassis.
- Working from one corner to another, replace all 10 screws. However, remember the three longer screws correspond to the back, tilt side of your Mac.
- Use the correct Phillips screwdriver size to avoid stripping the screws.
Meticulous attention here prevents potential damage from loose parts rattling inside the MacBook Pro, which could lead to further complications down the line.
Finalizing The Installation
Congratulations! Once all the screws are reattached, you’re on the path to finalizing your SSD installation. Don’t rush to power up your MacBook Pro just yet.
Here are the remaining checks:
- Double-check all screws are tight and the cover is flush with the MacBook chassis.
- Clean any fingerprints or dust from the MacBook Pro with a soft cloth. A clean device ensures proper cooling and functioning.
- Flip your MacBook Pro back over and press the power button. You should see the startup screen if everything is connected correctly.
Conclusion
Upgrading your MacBook Pro 2011 from an HDD to an SSD is a wise move. It enhances speed, efficiency, and the overall performance of your device.
With the simple steps outlined in this guide, the process is straightforward and beneficial. Embrace the change, and enjoy a revitalized Mac experience!


