How To Clone Your HDD To SSD On Windows 11
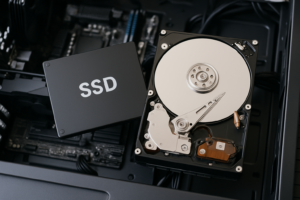
Upgrading from an old spinning hard drive to a solid-state drive is one of the single best things you can do for a sluggish Windows 11 PC. We’re talking boot times that drop from two minutes to fifteen seconds, apps that launch almost instantly, and a system that actually feels responsive again. The difference is night and day.
But here’s what stops most people from making the switch: they don’t want to reinstall Windows, set up all their programs again, and spend a weekend getting everything back to normal. The good news is you don’t have to. Cloning your existing HDD to an SSD copies everything, your operating system, your files, your settings, your programs, all of it, to the new drive. When you boot up, it’s like nothing changed except the speed.
This guide walks you through the entire process from start to finish. We’ll cover the tools you need (both hardware and software), how to prepare your system, the actual cloning procedure, and what to do after the clone is complete. Even if you’ve never opened your computer case before, you can do this in about an hour.
What You’ll Need Before You Start
Before you clone anything, gather your supplies and do a little housekeeping. Skipping the prep work is the number one reason clones fail or produce unbootable drives.
Choose Your New SSD
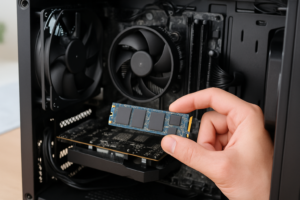
Your SSD choice depends on what your computer supports. Most modern laptops and desktops have an M.2 NVMe slot, which offers the fastest speeds. Older machines might only support 2.5-inch SATA SSDs, which are still a massive upgrade over a spinning hard drive.
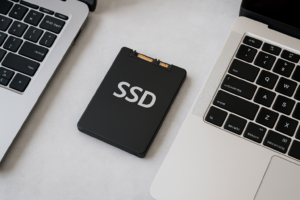
For most people, a 2.5-inch SATA SSD like the Samsung 870 EVO or Crucial MX500 is the easiest upgrade path. These drives fit in the same bay as your old HDD and use the same SATA cable. If your motherboard has an M.2 slot, consider an NVMe drive like the Samsung 980 or WD Blue SN570 for even better performance.
One critical rule: your new SSD must be equal to or larger than the used space on your current HDD. If your 1TB hard drive only has 200GB of data on it, a 250GB or 500GB SSD will work fine. But if you’ve got 400GB of data, you’ll need at least a 500GB drive.
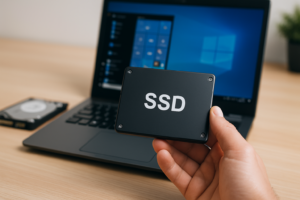
Get a USB-to-SATA Adapter (Or Enclosure)
Unless your desktop has an extra internal SATA port you can use temporarily, you’ll need a way to connect your new SSD to your computer externally during the cloning process. A USB-to-SATA adapter cable is the simplest solution.
The Sabrent USB 3.0 to SATA adapter is a popular and reliable choice that works with both 2.5-inch SSDs and older hard drives. It’s a simple cable with a USB connector on one end and a SATA connector on the other. Plug and play.
Sabrent USB 3.0 to 2.5-Inch SATA Adapter
A reliable and affordable adapter cable that makes connecting your new SSD for cloning dead simple.
If you’re cloning to an M.2 NVMe drive, you’ll need an NVMe-to-USB enclosure instead. The UGREEN M.2 NVMe enclosure or similar products work well for this. Just make sure the enclosure matches your SSD’s form factor (M.2 NVMe vs. M.2 SATA, they are not the same).
Clean Up Your Current Drive
The less data you need to clone, the faster the process goes and the smaller an SSD you can get away with. Take fifteen minutes to clean house:
- Empty your Recycle Bin
- Run Windows Disk Cleanup (search for it in the Start menu, and select “Clean up system files” for the full version)
- Uninstall programs you no longer use through Settings > Apps > Installed apps
- Move large files like videos, photos, or game libraries to an external drive if you’re trying to fit onto a smaller SSD
- Clear your browser cache and downloads folder
Also, open File Explorer, right-click your C: drive, and check the Properties to see exactly how much space is used. Write that number down. This is what you’re cloning.
Choosing Your Cloning Software
You have several free options for cloning, and I’ll cover the two best ones. Both are completely free for personal use and produce reliable clones.
Option 1: Macrium Reflect Free (My Recommendation)
Macrium Reflect Free has been the go-to recommendation for disk cloning for years. It has a clean interface, it’s fast, and it handles partition resizing automatically during the clone. For most Windows 11 users, this is the tool I’d pick first.
Download it directly from Macrium’s website. The installer will download some additional components during setup, so make sure you have an internet connection. Once installed, you don’t need the internet for the actual cloning process.
Important note: Macrium has changed its licensing model over time. As of recent updates, the free version may have limitations or require registration. Check their website for the latest availability. If the free version is no longer offered, Clonezilla (below) is an excellent alternative.
Option 2: Clonezilla (Free and Open Source)
Clonezilla is a powerful, free, open-source cloning tool. It’s more technical than Macrium because it runs from a bootable USB drive rather than inside Windows, but it’s extremely reliable and has been around forever.
The tradeoff is that Clonezilla doesn’t have a pretty graphical interface. You’ll be working with a text-based menu system. Don’t let that scare you, though. The steps are clearly labeled, and I’ll walk you through them below.
Download the ISO from Clonezilla’s official site, then use a tool like Rufus to create a bootable USB drive from that ISO.
Option 3: Manufacturer-Specific Tools
Some SSD manufacturers include free cloning software with their drives. Samsung offers Samsung Data Migration, Western Digital offers Acronis True Image WD Edition, and Crucial offers a free version of Acronis as well. These tools typically only work if the destination drive is their brand, but they’re polished and easy to use. Check your SSD manufacturer’s support page before downloading third-party tools.
The Cloning Process: Step by Step
I’ll walk through the process using Macrium Reflect Free since it’s the most user-friendly option. The general concepts apply to any cloning tool.
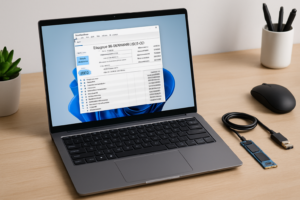
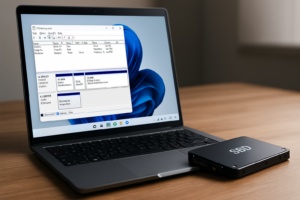
Step 1: Connect Your New SSD
Plug your new SSD into the USB-to-SATA adapter and connect it to your PC. Windows should recognize the drive automatically. If it doesn’t show up in File Explorer, don’t panic. Open Disk Management (right-click the Start button > Disk Management) and look for the new drive there. If it asks you to initialize the disk, choose GPT (GUID Partition Table) for Windows 11 systems.
You don’t need to format or create partitions on the new drive. The cloning software will handle all of that.
Step 2: Launch Macrium Reflect and Select Your Source Disk
Open Macrium Reflect Free. You’ll see a list of all connected disks. Find your current HDD (usually Disk 1 or your C: drive) and click “Clone this disk” beneath it.
In the cloning window, you’ll see your source disk at the top with all its partitions. For a typical Windows 11 installation, you’ll see several partitions: an EFI System Partition, a Microsoft Reserved partition, your main C: partition, and possibly a recovery partition.
Step 3: Select Your Destination Disk
Click “Select a disk to clone to” and choose your new SSD. If your SSD is smaller than your HDD (but larger than the used space), Macrium will automatically resize the main partition to fit. You can also manually adjust partition sizes by dragging the partition boundaries.
Make absolutely sure you select the correct destination disk. Cloning overwrites everything on the target drive. Double-check the disk sizes and labels to confirm you’re writing to the new SSD and not to another drive you care about.
Step 4: Start the Clone
Review the summary screen, confirm everything looks correct, and click Finish, then OK to start the process. Macrium will ask if you want to run the clone immediately or schedule it. Choose to run it now.
The cloning speed depends on how much data you’re copying, the speed of your USB connection, and the drives involved. Expect anywhere from 20 minutes to over an hour for a typical 200-500GB clone over USB 3.0. Don’t interrupt the process, close the lid on a laptop, or disconnect anything while it’s running.
Using Clonezilla Instead
If you’re using Clonezilla, the process is a bit different. Boot from the Clonezilla USB drive (you may need to change your boot order in BIOS). Select “device-device” mode, then “disk_to_local_disk” to clone the entire disk. Choose your source disk (the HDD) first, then the destination disk (the SSD). Confirm, and let it run.
Clonezilla will also ask if you want to check the source file system before cloning. I recommend saying yes. It only adds a few minutes and can catch errors before they become problems.
Samsung 870 EVO 500GB 2.5-Inch SATA SSD
One of the most reliable and fast SATA SSDs on the market, perfect for HDD replacement clones in laptops and desktops.
Post-Clone: Swapping the Drives and Booting Up
Once the clone finishes successfully, it’s time to swap the drives.
For Laptop Users
Power down your laptop completely (don’t just close the lid). Unplug the charger. Remove the bottom panel (most laptops use Phillips head screws, some use Torx). Locate the 2.5-inch drive bay, disconnect the old HDD, and slide in your new SSD. Secure it with the same screws or bracket that held the old drive.
If your laptop has both an HDD bay and an M.2 slot, and you cloned to an M.2 drive, install it in the M.2 slot instead. You’ll need to remove the old HDD later or repurpose it as extra storage after wiping it.
For Desktop Users
Desktop swaps are even easier. Shut down, unplug the power cable, and open the case. You can either disconnect the old HDD’s SATA cable and power cable and connect them to the new SSD, or install the SSD in a separate bay and simply change the boot order in BIOS. Most 2.5-inch SSDs come with a 3.5-inch mounting bracket, or you can just set the SSD in the bottom of the case temporarily. It has no moving parts, so it doesn’t need to be perfectly secured to function.
Verifying the Boot
With the new SSD installed, power on your computer. If everything went right, Windows 11 should boot up just like before, only much faster. You might notice the first boot takes slightly longer than subsequent boots as Windows adjusts to the new hardware.
If your PC doesn’t boot from the new SSD automatically, enter your BIOS (usually by pressing F2, F12, Delete, or Esc during startup, depending on your manufacturer) and change the boot order to prioritize the new SSD. Look for the drive in the boot priority list and move it to the top.
Troubleshooting Common Issues
Cloning doesn’t always go perfectly on the first try. Here are the most common problems and how to fix them.
“Windows didn’t boot from the cloned SSD”
This is the most common issue. First, check your BIOS boot order. If the old HDD is still connected, your PC might be trying to boot from it instead. Disconnect the old drive and try again. If that doesn’t work, the clone may have failed to copy the boot partition correctly. Re-run the clone and make sure you’re cloning all partitions, including the EFI System Partition and any recovery partitions.
“The SSD shows the wrong size after cloning”
If your SSD is larger than the old HDD, you might find that the main partition doesn’t fill the entire drive. Open Disk Management in Windows, right-click your C: partition, and select Extend Volume to claim the unallocated space. This takes seconds and doesn’t risk any data.
“The clone process fails or freezes”
Bad sectors on the source HDD can cause cloning failures. Run chkdsk /f /r from an elevated Command Prompt on your HDD before attempting the clone again. Also, try a different USB port (preferably USB 3.0, the blue ones) and make sure your adapter cable is firmly connected.
“My cloning software doesn’t detect the SSD”
If your SSD doesn’t appear in the cloning software, open Windows Disk Management to see if it shows up there. You may need to initialize the disk. Also, try a different USB adapter or cable. Cheap adapters sometimes fail with certain drives.

Crucial MX500 1TB 2.5-Inch SATA SSD
An excellent value SSD with great reliability, ideal for cloning larger HDDs where you need more storage capacity.
What to Do With Your Old HDD
Once you’ve confirmed that everything works perfectly on the new SSD (give it a few days of normal use to be sure), you have a few options for the old drive:
- Repurpose it as external storage: Put it in a USB enclosure and use it for backups or extra file storage.
- Install it as a secondary internal drive: If your desktop has the room, wipe it and use it for storing large files, games, or media.
- Recycle it responsibly: If the drive is old and failing, don’t just throw it in the trash. Most electronics stores and recycling centers accept old hard drives. Wipe it with DBAN first if it contained sensitive data.
I’d recommend keeping the old drive as-is for at least two weeks after the clone. If anything
James Kennedy is a writer and product researcher at Drives Hero with a background in IT administration and consulting. He has hands-on experience with storage, networking, and system performance, and regularly improves and optimizes his home networking setup.