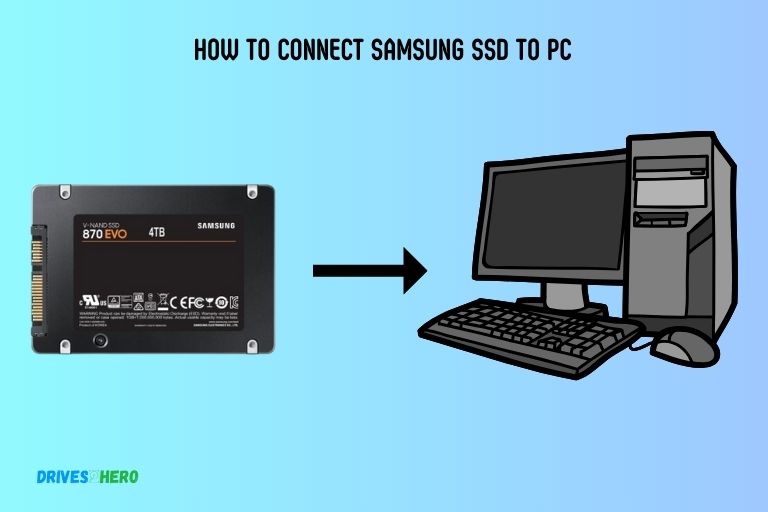
How to Connect Samsung Ssd to Pc? 8 Steps!
Integrating a Samsung SSD into your PC is a fundamental step toward enhancing storage and overall system performance.
This concise guide provides a step-by-step walkthrough, ensuring a smooth and straightforward process to connect your Samsung SSD to your computer.
Whether you’re upgrading your existing storage or installing a new SSD, these instructions will help you seamlessly integrate the Samsung SSD into your PC setup. Let’s dive into the simple steps for a hassle-free connection.
Samsung SSD to PC Connection Guide: Quick Steps
Step 1: Gather Necessary Equipment
- Ensure you have the Samsung SSD and the appropriate SATA or NVMe cable.
- If using a desktop, identify an available SATA port on the motherboard. For laptops, check for an M.2 slot.
Step 2: Power Off Your Computer
- Shut down your PC completely to avoid any electrical issues or data corruption during the connection process.
Step 3: Open Your Computer Case (Desktop Only)
- If you’re installing the SSD in a desktop, open the computer case using the appropriate tools.
- Identify an available SATA port on the motherboard.
Step 4: Connect SATA or NVMe Cable
- If using a SATA SSD, connect one end of the SATA cable to the SSD and the other end to an available SATA port on the motherboard.
- For NVMe SSDs, gently insert the SSD into the M.2 slot on the motherboard.
Step 5: Secure the SSD (Desktop Only)
- If you’re installing a SATA SSD in a desktop, secure it in place using the appropriate screws on the case.
Step 6: Close the Computer Case (Desktop Only)
- If you opened the computer case, securely close it to protect internal components.
Step 7: Power On Your Computer
- Turn on your PC and wait for it to boot up.
- The Samsung SSD should be automatically recognized by the system.
Step 8: Check SSD Recognition
- Open “File Explorer” on your PC.
- Verify that the Samsung SSD is listed as a new drive.
Connecting a Samsung SSD to your PC is a straightforward process. Just follow these steps, and you’ll have your SSD seamlessly integrated into your computer system, ready for use.
Preparing For The Connection
Learn how to connect a Samsung SSD to your PC easily and seamlessly with these simple steps. Enjoy faster data transfer speeds and improved storage capacity for your computer.
Checking System Compatibility:
Before connecting your Samsung SSD to your PC, it’s crucial to ensure that your system is compatible.
Here are a few things to check:
- Verify that your PC has an available SATA port. Most Samsung SSDs use the SATA interface, so your computer needs to have an unused SATA port to connect the SSD.
- Verify the SATA version supported by your PC. Samsung SSDs typically support SATA III (6.0 Gbps), but older systems may only support SATA II (3.0 Gbps) or SATA I (1.5 Gbps). It’s essential to know the SATA version your PC supports to make the necessary adjustments.
- Check your computer’s operating system compatibility. Samsung SSDs are compatible with various operating systems, including Windows, macOS, and Linux. Ensure that your PC’s operating system is compatible with the SSD.
Gathering Required Hardware:
Connecting your Samsung SSD to your PC requires some essential hardware components.
Here’s what you’ll need:
- Samsung SSD: Choose the appropriate Samsung SSD model for your needs. Consider factors such as capacity, performance, and budget when selecting the SSD.
- SATA cable: You’ll need a SATA cable to establish the connection between your SSD and the motherboard. Ensure that the cable is long enough to easily reach the desired SATA port.
- Power cable: Connecting the SSD also requires a power cable for the necessary power supply. The power cable typically connects from the power supply unit (PSU) to the SSD.
- Screwdriver: Depending on your PC case, you may need a screwdriver to remove the side panel, secure the SSD in a drive bay, or attach it to a bracket. Check the requirements of your PC case before proceeding.
- Optional: If your PC lacks available SATA ports, you may need to consider purchasing a SATA expansion card or an external SSD enclosure that connects via USB.
Installing Necessary Software:
Once you’ve ensured system compatibility and gathered the required hardware, it’s time to install the necessary software for your Samsung SSD.
Follow these steps:
- Visit the Samsung official website and navigate to the SSD product support page to download the latest SSD firmware and software, if available. Keeping your SSD’s firmware up to date ensures optimal performance and compatibility.
- Install any required drivers. In most cases, modern operating systems automatically detect and install the necessary drivers for the Samsung SSD. However, if your operating system requires specific drivers, you can download them from the Samsung website or the manufacturer’s website.
- Consider installing Samsung’s SSD management software, such as Samsung Magician, to monitor and optimize your SSD’s performance. This software provides features like performance benchmarking, firmware updates, and drive health monitoring.
By following these steps, you’ll be well-prepared for connecting your Samsung SSD to your PC. Checking system compatibility, gathering the required hardware, and installing necessary software are vital parts of the process.
Connecting The Samsung Ssd
Learn how to effortlessly connect your Samsung SSD to your PC with our simple step-by-step guide. Maximize your storage capacity and increase your computer’s efficiency in just a few easy steps.
Identifying The Sata Interface
One of the first steps to connecting your Samsung SSD to your PC is identifying the SATA interface. The SATA interface is responsible for connecting the SSD to the motherboard of your computer.
Here’s how you can identify the SATA interface:
- Look for the SATA ports on your motherboard. These ports are usually located near the storage slots and are labeled as SATA.
- Determine the SATA generation of your SSD and ensure that your motherboard supports that generation. SATA generations include SATA I, SATA II, and SATA III, with SATA III being the latest and fastest. This information can usually be found in the specifications of your SSD and motherboard.
Removing The Pc’S Casing
Once you have identified the SATA interface, the next step is to remove the PC’s casing.
Removing the casing will give you access to the internal components of your computer, including the motherboard and storage slots.
Here’s how you can remove the PC’s casing:
- Turn off your computer and unplug it from the power source.
- Locate the screws or latches that hold the PC’s casing in place. These are typically located on the back or side of the casing.
- Use a screwdriver or your hands to remove the screws or unlatch the latches.
- Carefully slide or lift off the casing from the computer, taking caution not to damage any internal components.
Connecting The SSD to The Motherboard
Now that you have removed the PC’s casing, it’s time to connect the Samsung SSD to the motherboard. This step involves plugging the SSD into the SATA port on the motherboard.
Here’s how you can connect the SSD to the motherboard:
- Locate an available SATA port on the motherboard. It is recommended to use the SATA port with the highest generation supported by your SSD for optimal performance.
- Take your Samsung SSD and align the SATA connector on the SSD with the SATA port on the motherboard.
- Gently push the SSD into the SATA port until it is securely connected.
- If necessary, secure the SSD to the motherboard using screws or brackets provided.
Once you have successfully connected the Samsung SSD to the motherboard, you can proceed with securing the PC’s casing back in place and powering on your computer to enjoy the benefits of the newly added SSD storage.
Setting Up The Samsung Ssd
Setting up your Samsung SSD and connecting it to your PC is a simple process. Just follow the easy steps provided in this guide to ensure a smooth and efficient setup without any hassle.
Entering The Bios:
To begin setting up your Samsung SSD, you need to enter the BIOS (Basic Input/Output System) of your PC. The BIOS is responsible for controlling your computer’s hardware before the operating system loads.
Follow these steps to access the BIOS:
- Restart your computer.
- During the boot process, quickly press the indicated key to enter the BIOS Setup. The key to access the BIOS can vary depending on your PC’s manufacturer, but common keys include F2, Del, or Esc.
- Once you’re in the BIOS Setup, navigate to the “Boot” or “Advanced” tab using the arrow keys.
- Look for an option called “Boot Order,” “Boot Priority,” or similar. Set the Samsung SSD as the primary boot device.
- Save the changes and exit the BIOS. Your computer will restart.
Configuring The Ssd:
Now that you’ve entered the BIOS and set the Samsung SSD as the primary boot device, it’s time to configure it.
Follow these steps to ensure your SSD performs optimally:
- Once your computer restarts, allow it to boot from the Samsung SSD.
- Install the necessary drivers and software provided by Samsung. Visit their official website and download the latest versions.
- Open the software and follow the on-screen instructions to configure your SSD. This will involve setting up partitions, enabling features like TRIM, and updating firmware if necessary.
Formatting The Ssd:
Before you can start storing data on your Samsung SSD, you need to format it. Formatting prepares the drive for use and allows your operating system to recognize it.
Here’s how to format your SSD:
- Press the Windows key + R on your keyboard to open the Run dialog box.
- Type “diskmgmt.msc” and hit Enter. This will open the Disk Management utility.
- Locate your Samsung SSD in the list of drives.
- Right-click on the SSD and select “Format.”
- Follow the prompts to choose the formatting options you prefer, such as the file system (NTFS is recommended) and the allocation unit size.
- Click “OK” to start the formatting process. Be aware that formatting will erase all data on the drive, so ensure you have backed up any important files.
You’ve successfully set up your Samsung SSD and formatted it for use with your PC. Enjoy the improved performance and storage capacity that your new SSD brings.
Conclusion
Connecting a Samsung SSD to your PC is a straightforward process that anyone can follow. The first step is to gather all the necessary materials, including the Samsung SSD, the appropriate cables, and any required software.
Once you have everything you need, it’s just a matter of physically connecting the SSD to your PC and then initializing it through the operating system.
Remember to double-check your connections and ensure that the SSD is properly recognized by your computer. By following these steps, you can take full advantage of the benefits offered by a Samsung SSD, such as faster load times and improved overall performance.

Harold Williams is a senior writer and technical editor at Drives Hero with 20+ years of experience in IT administration. He specializes in storage systems, SSD reviews, and performance testing, bringing real-world insight to every guide.