How to Connect Sata Ssd to Laptop? Use An External USB!
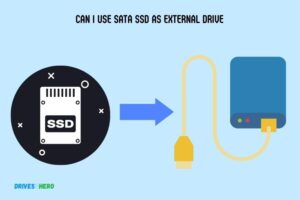
To connect a SATA SSD to a laptop, you need to use an external USB to SATA adapter. Firstly, plug the SATA connector of the adapter to your SSD.
Subsequently, connect the USB end of the adapter to an available USB port on your laptop. Once connected, your laptop should automatically detect and configure the SSD for use.
SATA SSDs are typically designed for internal use in desktops and some larger laptops. Hence, connecting a SATA SSD to most laptops externally requires a USB to SATA adapter.
This adapter converts the data and power interfaces of the SSD to a USB interface that can be used with most laptops.
Remember, disk initialization might be necessary if the SSD is not detected initially. You can do this by accessing the disk management section of your laptop.
Check the instructions specific to your operating system for detailed steps. Always eject the SSD safely from your system to prevent any data loss or damage.
8 Steps To Connect SATA SSD To Laptop
| Step Number | Step Description |
|---|---|
| 1 | Purchase a compatible SATA SSD and a USB-to-SATA adapter. |
| 2 | Connect the SATA SSD to the USB-to-SATA adapter. |
| 3 | Connect the USB-to-SATA adapter to an available USB port on your laptop. |
| 4 | Your laptop should automatically detect the SATA SSD as an external drive. If it does not, you may need to manually configure it in your laptop’s BIOS settings. |
| 5 | Format the SSD if it is not already formatted. |
| 6 | If you wish to use the SSD as your primary storage device, you will need to clone your laptop’s existing hard drive onto the SSD. |
| 7 | If you wish to use the SSD as a secondary storage device, you can begin using it immediately after it has been detected and formatted. |
| 8 | Always safely eject the SSD when you are finished using it to prevent data loss or damage. |
Key Takeaway
Four Facts About Connecting SATA SSD To Laptop
Factors To Consider When Selecting A Sata Ssd
Consider these key factors when choosing a SATA SSD for your laptop: storage capacity, speed, reliability, compatibility, and price.
To connect the SATA SSD to your laptop, simply insert it into the appropriate slot in the laptop’s hard drive bay and secure it with screws.
When it comes to upgrading your laptop’s storage, selecting the right SATA SSD is crucial. Whether you’re enhancing your laptop’s performance or simply need more space for your files.
Considering these key factors will ensure you make an informed decision:
Capacity:
- Choose an SSD with sufficient capacity to meet your storage needs.
- Consider the types of files and applications you’ll be storing on your laptop.
- Determine the amount of storage space required by considering factors such as the size of your operating system, the number of programs you use regularly, and the size of your media files.
- SSDs typically come in a range of capacities, so be sure to select one that offers ample room for both your current and future storage requirements.
Speed:
- Consider the speed at which data can be read and written on the SSD.
- Opt for SSDs with high read and write speeds to ensure faster performance.
- Look for SSDs with sequential read and write speeds, as they directly impact loading times for applications and file transfers.
- Faster SSDs provide quicker boot times and enable seamless multitasking, enhancing your overall user experience.
Compatibility With Your Laptop:
- Ensure the SATA SSD you choose is compatible with your laptop model.
- Check if your laptop supports SATA SSDs, as some older models may not have this option.
- Verify the interface and form factor of the SSD and compare it with your laptop’s specifications.
- Consider the connection type (e.g., SATA III) and physical dimensions to ensure a proper fit within your laptop.
- Some SSDs come with additional features like encryption or power loss protection, which you may want to consider depending on your needs.
By considering these factors of capacity, speed, and compatibility, you can confidently select a SATA SSD that suits your laptop upgrade requirements.
Enhance your storage space, improve performance, and enjoy the benefits of faster data transfer speeds with a new SATA SSD.
Installing The Sata Ssd In Your Laptop
Installing a SATA SSD in your laptop is simple and efficient. Follow these steps to connect the SSD seamlessly, enjoy faster speeds, and enhance your laptop’s performance.
If you’re looking to upgrade your laptop’s storage capacity and speed, installing a SATA SSD is a great option. This step-by-step guide will walk you through the process of connecting a SATA SSD to your laptop.
Follow these instructions to ensure a smooth installation:
Preparing Your Laptop For Installation:
- Before you begin, make sure to back up all your important files and data to an external storage device.
- Shut down your laptop and unplug it from the power source.
- Ground yourself to prevent any static electricity from damaging the components. You can do this by touching a metal object or using an anti-static wrist strap.
- Gather all the tools you’ll need for the installation, including a screwdriver and the SATA SSD.
Removing The Old Hard Drive:
- Locate the compartment where the old hard drive is located. This is usually on the bottom or side of the laptop and secured with screws.
- Carefully remove the screws and set them aside. Keep track of which screws belong to which compartment, as they may differ in size.
- Once the screws are removed, carefully take out the old hard drive from its slot. Be mindful of any connections or cables attached to it.
- Disconnect any cables or connections from the old hard drive, ensuring a clean removal.
Connecting The Sata Ssd To The Laptop:
- Take the SATA SSD and align it with the slot where the old hard drive was located.
- Gently slide the SATA SSD into the slot, making sure it is properly seated.
- Secure the SATA SSD in place by replacing the screws that were removed earlier. Be cautious not to overtighten the screws.
- If any cables or connections need to be reattached, carefully reconnect them to the SATA SSD.
- Double-check all connections and ensure that the SATA SSD is firmly in place.
That’s it! You have successfully installed the SATA SSD in your laptop. Now you can reconnect the power source, power on your laptop, and enjoy the increased storage capacity and speed provided by the new SSD.
Transferring Data To The New Sata Ssd
Learn how to easily connect your new SATA SSD to your laptop and transfer data seamlessly without any hassle. Our step-by-step guide provides all the information you need to ensure a smooth and efficient data transfer process.
So you’ve just gotten yourself a shiny new SATA SSD for your laptop, and now it’s time to transfer all your important data. Fear not, because we’ve got you covered.
We’ll discuss three different methods for seamlessly transferring your data to the new SSD.
Whether you prefer cloning the old hard drive, migrating the data using software, or manually transferring files, we’ll guide you through each process step by step.
Cloning The Old Hard Drive:
Cloning your old hard drive is a straightforward method to migrate all your data to the new SATA SSD effortlessly.
Here’s how you can do it:
- Connect the SATA SSD to your laptop using the appropriate cable.
- Ensure you have cloning software installed on your computer.
- Launch the cloning software, and select the option to clone your old hard drive to the new SSD.
- Follow the on-screen instructions provided by the software.
- Once the cloning process is complete, shut down your laptop, remove the old hard drive, and replace it with the newly cloned SATA SSD.
- Power up your laptop and enjoy the speed and storage space of your new SSD.
Migrating The Data Using Software:
If you prefer not to clone the entire old hard drive and only want to migrate specific data, using software is a more selective approach.
Here’s how you can migrate your data using software:
- Connect the SATA SSD to your laptop using the appropriate cable.
- Install reliable migration software on your computer.
- Run the migration software and select the specific files and folders you wish to transfer to the new SSD.
- Choose the SATA SSD as the destination drive for your migrated data.
- Initiate the data migration process and let the software transfer your selected files to the new SSD.
- Once the migration is complete, safely disconnect the SATA SSD from your laptop and store your old hard drive as a backup.
Manually Transferring Files To The New Ssd:
If you prefer a more hands-on approach, manually transferring files to the new SSD is the way to go.
Here’s a quick guide on how to do it:
- Connect the SATA SSD to your laptop using the appropriate cable.
- Locate the files and folders you want to transfer from your old hard drive.
- Copy and paste these files and folders onto the new SATA SSD.
- Ensure that the new SSD has enough storage space for all the transferred data.
- Once the transfer is complete, safely disconnect the SATA SSD from your laptop and verify that the files are intact on the new SSD.
- Proceed to remove the old hard drive from your laptop and install the new SSD.
By following these methods, you’ll be able to transfer your data to the new SATA SSD seamlessly. Choose the approach that suits you best and experience the benefits of improved speed and storage capacity with your new SSD.
Ensuring Proper Connection And Compatibility
Looking to connect a SATA SSD to your laptop? Follow these simple steps to ensure proper compatibility and connection for seamless storage expansion.
When it comes to connecting a SATA SSD to your laptop, it is essential to ensure a proper connection and compatibility. We will explore some important steps to follow for a successful connection:
Checking The Sata Port Compatibility:
Identify the type of SATA port on your laptop: Before connecting the SSD, you need to check if your laptop has a SATA III (6.0 Gbps) or SATA II (3.0 Gbps) port.
The SATA III port offers higher data transfer speeds, so if your laptop has this port, it’s recommended to connect your SSD to it for optimal performance.
Check the physical shape of the port: SATA ports on laptops can vary in shape, so it’s important to ensure that the SSD’s connector matches the port on your laptop.
The most common type of SATA connector is a narrow L-shaped connector known as the SATA data connector.
Verifying The Sata Cable Connection:
Ensure a stable power connection: Make sure that your laptop is powered off and unplugged from the electrical outlet before proceeding.
Then, locate the SATA power connector and the corresponding power cable. Connect the power cable securely to the SSD and the laptop’s power supply.
Connect the SATA data cable: Find the SATA data cable, which usually comes with the SSD or can be purchased separately.
Connect one end of the data cable to the SATA port on the laptop and the other end to the SSD. Ensure that both ends are connected securely, without any loose connections.
Updating Drivers And Firmware:
- Update SSD drivers: To ensure proper functionality and compatibility, it’s crucial to keep your SSD drivers up to date. Visit the manufacturer’s website and download the latest drivers specific to your SSD model. Install the drivers following the provided instructions for a smooth experience.
- Check firmware updates: Manufacturers often release firmware updates to address compatibility issues and improve performance. Visit the manufacturer’s website and check if there are any firmware updates available for your SSD model. If yes, download and install the firmware update, following the instructions provided by the manufacturer.
By following these steps to ensure proper connection and compatibility, you can successfully connect your SATA SSD to your laptop.
Remember to double-check the compatibility of the SATA port, securely connect the cables, and keep your drivers and firmware updated for an optimal experience.
Resolving Data Transfer Issues
Discover the simplest way to connect a SATA SSD to your laptop and resolve any data transfer issues effortlessly. Achieve seamless connectivity and smooth data transfer with this step-by-step guide.
So you’ve got an SSD that you want to connect to your laptop but you’re facing some data transfer issues? Don’t worry, we’ve got you covered! We’ll explore some steps you can take to resolve those problems.
Cleaning The Contacts On The Ssd And Laptop:
- Ensure that both the SSD and laptop are powered off before starting any cleaning procedures.
- Gently remove the SSD from the laptop and inspect the contacts on both the SSD and laptop. Look for any signs of dirt, dust, or corrosion.
- If you notice any debris or dirt on the contacts, use a soft cloth or cotton swab lightly dampened with rubbing alcohol to clean them.
- Take caution not to use excessive force or liquid during the cleaning process as it may cause damage.
- Once the cleaning is complete, allow the contacts to dry completely before reinserting the SSD into the laptop.
Using Different Data Transfer Methods:
If you are experiencing slow data transfer speeds, consider using a different data transfer method to connect your SSD to your laptop.
Here are a few options:
- USB 3.0: Connect the SSD to a USB 3.0 port on your laptop for faster transfer speeds compared to older USB versions.
- SATA to USB adapter: Use a SATA to USB adapter to connect the SSD externally, allowing for easy data transfer between devices.
- Thunderbolt: If your laptop supports Thunderbolt connectivity, consider using a Thunderbolt cable for fast and reliable data transfer.
Troubleshooting Software Conflicts:
Sometimes, software conflicts can hinder data transfer between the SSD and laptop.
Here are some steps you can take to troubleshoot software conflicts:
- Update drivers: Ensure that you have the latest drivers installed for both your SSD and laptop. Visit the manufacturer’s website to download and install any available updates.
- Disable antivirus software: Temporarily disable your antivirus software to see if it may be interfering with the data transfer process. Remember to re-enable it once you’ve completed the transfer.
- Check for conflicting programs: Close any unnecessary programs running in the background that may be consuming system resources, causing slow data transfer.
By following these steps, you should be able to resolve any data transfer issues you may be facing when connecting your SATA SSD to your laptop.
Remember to take the necessary precautions when cleaning the contacts and explore alternative data transfer methods if needed.
Enabling Trim For Improved Performance
Improve the performance of your laptop by enabling trim for your SATA SSD. Boost speed and efficiency with this simple process of connecting your SSD to your laptop.
Solid-state drives (SSDs) are known for their fast performance and improved data access speeds compared to traditional hard disk drives (HDDs).
To optimize the performance of your SATA SSD on a laptop, it’s essential to enable Trim support. Trim helps to maintain the SSD’s performance by freeing up space and improving the efficiency of data storage.
You through the process of enabling Trim support on both Windows and macOS systems.
Checking Trim Support
Before enabling Trim on your laptop, it’s important to ensure that your SSD supports Trim.
Here’s how you can check for Trim support:
Windows:
- Open the Command Prompt by pressing Windows + R, typing “cmd,” and then hitting Enter.
- In the Command Prompt, type “fsutil behavior query DisableDeleteNotify” and press Enter.
- If the result is “DisableDeleteNotify = 0,” it means Trim is already enabled. If it’s “DisableDeleteNotify = 1,” Trim is currently disabled.
MacOS:
- Click on the Apple menu and select “About This Mac.”
- In the Overview tab, click on “System Report.”
- Under the Hardware section, select “SATA/SATA Express.”
- Look for your SSD in the list and check if “TRIM Support” is listed as “Yes.” If it’s “No,” Trim may not be currently enabled.
Enabling Trim For Windows And Macos
Now that you’ve confirmed Trim support, let’s go through the steps to enable it:
Windows:
- Press Windows + S and search for “Defragment and Optimize Drives.”
- In the Optimize Drives window, select your SSD drive and click on “Optimize.”
Trim should already be enabled by default for Windows 10 and newer versions.
If it’s disabled, you can enable it by opening the Command Prompt with administrator privileges and entering the following command:
MacOS:
- Open Terminal by pressing Command + Space and searching for “Terminal.”
- In the Terminal window, type “sudo trimforce enable” and press Enter.
- Enter your administrator password when prompted and follow the instructions to enable Trim on your SSD.
Enabling Trim for your SATA SSD on a laptop is a crucial step in maintaining its performance. By following these instructions, you can ensure that Trim is enabled, allowing your SSD to operate at its full potential.
Enjoy the enhanced speed and efficiency of your SSD when accessing and storing data on your laptop.
Configuring Bios Settings For Sata Ssd
Learn how to easily configure BIOS settings for connecting a SATA SSD to your laptop for enhanced storage performance. Improve your laptop’s speed and efficiency by following these simple steps.
When it comes to connecting a SATA SSD to your laptop, it’s essential to configure the BIOS settings correctly.
This ensures that your laptop recognizes and utilizes the SSD effectively. We’ll look at two crucial BIOS settings that you need to adjust: changing the boot order and enabling AHCI mode.
Follow these steps to configure your BIOS settings for a SATA SSD:
Changing The Boot Order:
To ensure your laptop boots from the SATA SSD, you need to change the boot order in the BIOS.
Here’s how you can do it:
- Restart your laptop and enter the BIOS setup by pressing the designated key (usually Del, F2, or Esc) during the boot process.
- Navigate to the Boot menu using the arrow keys.
- Look for the “Boot Order” or “Boot Priority” option and select it.
- Move the SATA SSD to the top of the boot order list using the arrow keys.
- Save and exit the BIOS settings.
By changing the boot order, you prioritize booting from the SATA SSD, allowing for faster startup times and improved overall performance.
Enabling Ahci Mode:
AHCI (Advanced Host Controller Interface) mode enables advanced features and optimizations for SATA devices such as the SSD.
Follow these steps to enable AHCI mode in your laptop’s BIOS:
- Restart your laptop and enter the BIOS setup.
- Navigate to the Storage Configuration or SATA Configuration menu.
- Look for an option related to AHCI mode and select it.
- Save and exit the BIOS settings.
Enabling AHCI mode unlocks the full potential of your SATA SSD, allowing for faster data transfer speeds and increased responsiveness.
Configuring BIOS settings for a SATA SSD is crucial to ensure proper functionality and optimal performance.
By changing the boot order and enabling AHCI mode, you can fully harness the capabilities of your SSD and enjoy a faster and more efficient computing experience.
Maximizing The Lifespan Of Your Sata Ssd
Maximize the lifespan of your SATA SSD by learning how to seamlessly connect it to your laptop. Achieve optimal performance and longevity with these practical tips and tricks.
To ensure your SATA SSD (Solid State Drive) serves you well for the long term, it’s crucial to adopt practices that maximize its lifespan.
By following these steps, you can optimize the performance and durability of your SSD:
Avoiding Excessive Writes:
- Limit unnecessary file transfers: Be mindful of moving large files back and forth, as each write operation can gradually wear down your SSD.
- Move cache and temporary folders: Relocating cache and temporary folders to a different drive reduces the frequency of writes on your SSD. This can be done through the settings of specific software or applications.
- Store files on a separate drive: Consider saving non-essential files, such as movies or large project folders, on a different drive to minimize unnecessary writes on your SSD.
Updating Firmware Regularly:
- Check manufacturer’s website: Visit the website of your SSD manufacturer regularly to look for firmware updates. These updates often come with performance improvements, bug fixes, and enhancements to ensure optimal operation of your SSD.
- Follow the manufacturer’s instructions: When updating the firmware, carefully follow the instructions provided by the manufacturer. It may involve using specific software or utilities to perform the update process.
- Backup data as a precaution: Before updating the firmware, it’s always wise to create backups of your important data. Although the chances of data loss during firmware updates are minimal, it’s better to be safe than sorry.
Monitoring Ssd Health Statistics:
- Use SSD monitoring software: Install and use SSD monitoring software that provides detailed information about your solid-state drive’s health status. These tools often display statistics such as temperature, drive health, and wear leveling count.
- Pay attention to warning signs: Keep an eye out for any warning signs or alerts from the monitoring software. High temperatures, increasing bad sectors, or excessive wear leveling count can indicate potential issues with your SSD.
- Schedule regular checks: Make it a habit to regularly check your SSD’s health statistics to identify any anomalies early on. This proactive approach can help detect problems before they escalate and impact your drive’s longevity.
By implementing these best practices, you can extend the lifespan of your SATA SSD, ensuring optimal performance and reliability for an extended period.
Remember to avoid excessive writes, update firmware regularly, and keep a close eye on your SSD’s health statistics to enjoy a longer-lasting storage solution.
FAQ For How To Connect Sata Ssd To Laptop
How Do I Connect My Ssd To My Laptop?
To connect your SSD to your laptop, follow these simple steps:
1. Shut down your laptop and unplug it from the power source.
2. Locate the SSD slot on your laptop and remove the cover if necessary.
3. Insert the SSD into the slot, ensuring it is securely connected.
4. Replace the cover and power on your laptop.
Your SSD is now connected and ready to use.
How Do I Connect My Sata Ssd To My Computer?
To connect your SATA SSD to your computer, follow these simple steps:
1. Power off your computer and unplug the power cord.
2. Open your computer case and locate an available SATA port on your motherboard.
3. Connect one end of the SATA data cable to the SSD and the other end to the motherboard’s SATA port.
4. Connect the SSD to the power supply using a SATA power cable.
5. Close the computer case, plug in the power cord, and power on your computer. Make sure to consult your SSD and motherboard manuals for specific instructions.
How Do I Connect My Sata 3 Ssd To My Laptop?
To connect your SATA 3 SSD to your laptop, follow these steps:
1. Turn off your laptop and unplug it from any power source.
2. Locate the SATA connector on your laptop’s motherboard.
3. Connect one end of the SATA cable to the SATA port on your SSD.
4. Connect the other end of the SATA cable to the SATA connector on your laptop’s motherboard.
5. Make sure the connection is secure.
6. If necessary, use screws to attach the SSD to your laptop’s chassis.
7. Turn on your laptop and check if the SSD is recognized in the BIOS.
8. Install the operating system and any other software on the SSD for maximum performance.
Can You Plug An Ssd Into A Sata Port?
Yes, you can plug an SSD into a SATA port. It is compatible and provides faster data transfer speeds.
How Do I Connect A Sata Ssd To My Laptop?
To connect a SATA SSD to your laptop, you will need an available SATA port on your laptop’s motherboard. Simply connect the SSD to the port using a SATA cable, and secure it in place with screws if necessary.
Conclusion
To sum up, connecting a SATA SSD to a laptop is a simple process that can greatly enhance your device’s storage and performance capabilities.
By following the steps outlined in this blog post, you can easily install and connect a SATA SSD to your laptop, ensuring that you can take full advantage of its benefits.
Remember to gather the necessary tools, back up your data, and handle the SSD with care during the installation process.
Additionally, be mindful of the BIOS settings and ensure that the SSD is properly recognized by your laptop. With a SATA SSD connected to your laptop, you’ll notice faster boot times, improved application responsiveness, and increased storage space.
So, what are you waiting for? Give your laptop the upgrade it deserves and enjoy the enhanced performance and storage capacity that a SATA SSD can provide.

