How To Format An SSD On Windows And Mac
Formatting an SSD sounds like it should be simple, and honestly, it mostly is. But between choosing the right file system, deciding whether to do a quick or full format, and making sure your drive works on both Windows and Mac, there are enough decision points to trip you up if you’re not paying attention.
I’ve formatted more SSDs than I can count, from fresh Samsung 990 Pro installs to portable USB-C drives that need to bounce between a MacBook and a Windows desktop. The process differs depending on your operating system and what you plan to do with the drive, but once you understand the logic behind the choices, you’ll handle it confidently every time.
This guide covers everything: formatting internal SSDs, external portable drives, picking the correct file system, and making drives work across platforms. Whether you’re setting up a brand new drive or wiping one clean for a fresh start, you’re in the right place.
Before You Format: Back Up Your Data
This should go without saying, but I’ll say it anyway. Formatting erases everything on the drive. If there’s anything on the SSD you want to keep, copy it somewhere else first. An external drive, cloud storage, another partition, whatever works.
I’ve personally watched someone format the wrong drive and lose a year’s worth of photos. Double-check the drive letter or volume name before you click that format button. Seriously.
Understanding File Systems: Which One Should You Pick?
The file system you choose determines how data gets stored on your SSD and which operating systems can read and write to it. This is the most important decision you’ll make during the formatting process, so let’s break down your options.
NTFS (Windows Default)
NTFS is the standard file system for Windows. It supports large files, file permissions, encryption, and journaling (which helps prevent data corruption). If your SSD will only ever be used with Windows machines, NTFS is the obvious choice.
The downside: macOS can read NTFS drives natively, but it can’t write to them without third-party software like Paragon NTFS or Tuxera. This makes NTFS a poor choice for cross-platform use.
APFS (Mac Default)
Apple File System (APFS) is optimized for SSDs and is the default for macOS High Sierra and later. It’s fast, supports encryption, and handles the way SSDs read and write data very efficiently.
However, Windows cannot read or write APFS drives without third-party tools. If your SSD is exclusively for Mac use, go with APFS. For anything else, skip it.
Mac OS Extended (HFS+)
This is the older Mac file system, still useful if you need compatibility with older Macs running macOS Sierra or earlier. For modern Macs with SSDs, APFS is better in every way. HFS+ still makes sense for mechanical hard drives used with Macs, but that’s about it.
exFAT (Cross-Platform Champion)
If your SSD needs to work on both Windows and Mac, exFAT is the answer. Both operating systems can read and write to exFAT drives natively, with no extra software required. It also supports files larger than 4GB, which makes it suitable for video files, disk images, and large archives.
exFAT lacks some advanced features like journaling and file permissions, but for an external SSD that moves between computers, those tradeoffs are completely acceptable. This is my go-to recommendation for portable drives.
ext4 (Linux)
ext4 is the default file system for most Linux distributions. Neither Windows nor macOS can read it natively. If you’re formatting an SSD for a Linux system, ext4 is the standard choice. For dual-boot setups, you might format one partition as ext4 and another as exFAT or NTFS.
My Recommendation
Here’s the short version:
- Windows only: NTFS
- Mac only: APFS
- Linux only: ext4
- Cross-platform (Windows + Mac): exFAT
- Cross-platform (Windows + Linux): NTFS (Linux reads it well) or exFAT
Quick Format vs. Full Format
When formatting on Windows, you’ll see a “Quick Format” checkbox. On Mac, Disk Utility defaults to a quick erase. Understanding the difference matters.
Quick Format
A quick format only deletes the file system’s index (think of it as removing the table of contents from a book). The actual data still exists on the drive until it gets overwritten. It takes seconds to complete.
For SSDs, a quick format is almost always what you want. SSDs handle data differently than hard drives, and the drive’s built-in TRIM command will clean up unused blocks in the background. There’s no benefit to a full format on a healthy SSD.
Full Format
A full format writes zeros to every sector of the drive and checks for bad sectors. On a traditional hard drive, this is useful for verifying drive health. On an SSD, it’s unnecessary and actually harmful because it adds extra write cycles that reduce the drive’s lifespan.
My advice: Always use quick format for SSDs. The only exception is if you’re formatting a traditional hard drive and want to check for bad sectors. For SSDs, save yourself the time and the unnecessary wear.
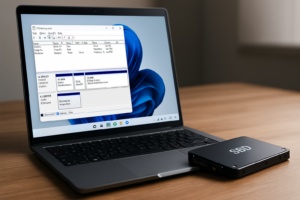
How To Format an SSD on Windows
Windows gives you two main tools for formatting: Disk Management (built-in GUI) and Diskpart (command line). For most people, Disk Management is the easier route.
Method 1: Using Disk Management
- Press Windows + X and select Disk Management from the menu.
- Find your SSD in the list of drives. Be careful to identify the correct one by checking the size and label.
- If the drive is brand new, you may be prompted to initialize it. Choose GPT (GUID Partition Table) for drives used with modern systems and UEFI. Only choose MBR if you need compatibility with very old hardware.
- Right-click the drive’s unallocated space (or existing partition) and select New Simple Volume (for unallocated space) or Format (for an existing partition).
- Choose your file system (NTFS for Windows-only, exFAT for cross-platform).
- Set the allocation unit size to Default.
- Make sure Quick Format is checked.
- Click OK and confirm.
The format should complete in a few seconds. Your drive will appear in File Explorer with the assigned drive letter.
Method 2: Using Diskpart (Command Line)
Diskpart is more powerful and useful when Disk Management doesn’t cooperate, which occasionally happens with drives that have unusual partition layouts.
- Open Command Prompt as Administrator (search “cmd,” right-click, Run as administrator).
- Type diskpart and press Enter.
- Type list disk to see all connected drives.
- Type select disk X (replace X with your SSD’s disk number). Triple-check this number.
- Type clean to remove all partitions and data.
- Type create partition primary.
- Type format fs=ntfs quick (or replace ntfs with exfat).
- Type assign to give it a drive letter.
- Type exit to close Diskpart.
Important: The “clean” command in Diskpart wipes the entire drive instantly with no confirmation prompt. Selecting the wrong disk number is one of the most common and devastating mistakes people make. Always verify the disk number by checking the size listed next to each disk.
Method 3: Quick Format from File Explorer
For drives that already have a partition and just need a fresh format, this is the fastest method. Open File Explorer, right-click the drive, select Format, choose your file system, check Quick Format, and click Start. Done in seconds.
How To Format an SSD on Mac
macOS uses Disk Utility for all drive formatting tasks. It’s a clean, visual tool, but it can be slightly confusing if you don’t know where to look.
Method 1: Using Disk Utility
- Open Disk Utility (Applications > Utilities > Disk Utility, or search for it with Spotlight using Command + Space).
- In the top-left corner, click View and select Show All Devices. This is critical because it lets you see the physical drive, not just the partition.
- Select the physical drive (the parent item, not the indented volume beneath it) in the left sidebar.
- Click Erase in the toolbar.
- Give the drive a name.
- Choose your format:
- APFS for Mac-only SSD use
- exFAT for cross-platform compatibility
- Mac OS Extended (Journaled) for older Macs or mechanical drives
- For Scheme, select GUID Partition Map (this is the modern standard; you only need Master Boot Record for very specific legacy situations).
- Click Erase and wait a few moments.
The drive will appear on your desktop (if you have that preference enabled) and in Finder’s sidebar.
Method 2: Using Terminal
For those comfortable with the command line, macOS Terminal offers the diskutil command. This is handy for scripting or when Disk Utility acts up.
- Open Terminal.
- Type diskutil list to identify your drive.
- To erase and format the entire drive, type: diskutil eraseDisk exFAT DriveName GPT /dev/diskX (replace DriveName with your preferred name and diskX with the correct disk identifier).
- Wait for the process to complete.
Just like with Windows Diskpart, make absolutely sure you have the right disk identifier. Formatting the wrong drive on a Mac is just as painful as doing it on Windows.
Formatting for Cross-Platform Compatibility
This is where most people get stuck, so let me give you a clear, step-by-step approach for creating an SSD that works perfectly on both Windows and Mac.
Format the drive as exFAT. You can do this from either operating system. I personally prefer doing it from Windows Disk Management because it’s slightly faster, but Disk Utility on Mac works just as well.
A few things to keep in mind with exFAT cross-platform drives:
- Always eject properly. exFAT doesn’t have the same journaling protections as NTFS or APFS. Yanking the drive out without ejecting is a fast track to corrupted files.
- Avoid using the drive as a boot drive. exFAT is great for data storage and file transfer, but neither Windows nor macOS will install on an exFAT partition.
- File size limits won’t be a problem. exFAT supports files up to 16 EB (exabytes) in theory. In practice, you’ll never hit that limit.
For external SSDs like the Samsung T7 Shield, SanDisk Extreme, or Crucial X9 Pro, exFAT is almost always the right call unless you know for certain the drive will only ever touch one operating system.
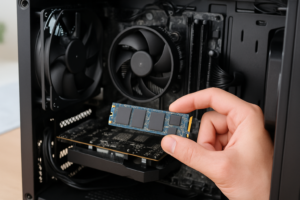
Formatting a New Internal SSD (Boot Drive)
If you’re installing a new internal SSD as your primary boot drive, the formatting process is different because it usually happens during OS installation.
On Windows
When you boot from a Windows installation USB, the setup wizard will let you create partitions and format the drive as part of the install process. Select your SSD, delete any existing partitions, and let Windows create the necessary partitions automatically. It will format the drive as NTFS.
On Mac
Boot into macOS Recovery (hold Command + R on Intel Macs, or hold the power button on Apple Silicon Macs). Open Disk Utility from the recovery menu, erase the internal SSD as APFS, then proceed with macOS installation. The installer will handle the rest.
Should You Secure Erase an SSD?
If you’re selling, donating, or recycling an SSD, a standard format (even a full one) might not completely remove all data. SSDs store data differently than hard drives, and some blocks may retain information even after formatting.
For a proper secure erase, use the SSD manufacturer’s software. Samsung Magician, Crucial Storage Executive, and Western Digital Dashboard all include secure erase functions that send the ATA Secure Erase command to the drive. This resets every cell in the SSD and is the most thorough way to wipe the drive.
On Mac, Disk Utility used to offer a “Security Options” slider for erasing drives, but Apple removed this for SSDs because the TRIM command already marks deleted blocks for cleanup. For Macs with Apple Silicon or the T2 security chip, erasing the drive from Recovery and removing your Apple ID association is generally considered sufficient.
Frequently Asked Questions
Does formatting an SSD reduce its lifespan?
A quick format has virtually zero impact on SSD lifespan. It only modifies the file system metadata, which involves a tiny amount of writing. A full format, on the other hand, writes to every cell on the drive and does use up some of your SSD’s finite write cycles. Stick with quick format and you won’t have any issues.
Can I format an SSD from NTFS to APFS without losing data?
No. Switching between different file systems always requires erasing the drive. There’s no way to convert NTFS to APFS (or vice versa) in place. Back up your data, format the drive with the new file system, and copy everything back.
Why doesn’t my Mac recognize my NTFS-formatted SSD?
Your Mac actually does recognize it, but only in read-only mode. You can see files and copy them off the drive, but you can’t add, edit, or delete anything. To get full read/write access, either reformat the drive as exFAT or APFS, or install a third-party NTFS driver like Paragon NTFS for Mac.
Is exFAT reliable enough for important data?
exFAT is reliable for everyday use, but it’s less resilient to corruption than NTFS or APFS because it lacks journaling. This means if a transfer gets interrupted (power loss, accidental disconnect), you’re more likely to end up with corrupted files. Always eject the drive safely, and keep backups of anything critical. For a portable drive that moves between computers, exFAT
James Kennedy is a writer and product researcher at Drives Hero with a background in IT administration and consulting. He has hands-on experience with storage, networking, and system performance, and regularly improves and optimizes his home networking setup.