How to Install Crucial Ssd in Desktop? 8 Steps!
Maximize your desktop’s potential with a Crucial SSD. This concise guide provides clear steps for seamlessly integrating a Crucial SSD into your desktop, irrespective of your technical expertise.
Elevate performance and storage capacity effortlessly by following this focused, step-by-step installation process.
Whether you’re a tech enthusiast or a beginner, this guide ensures a hassle-free upgrade to enhance your desktop experience.
Key Takeaway
Installing a Crucial SSD in Your Desktop: A Step-by-Step Guide
Requirements:
- Crucial SSD: Choose a compatible Crucial SSD for your desktop.
- Screwdrivers: Have Phillips screwdrivers (#1 and #2) for easy installation.
Step 1: Back Up Your Data
Safeguard your crucial data by creating a backup before initiating any installation.
Step 2: Power Off Your Desktop
Ensure your desktop is powered off completely and unplug all external cables.
Step 3: Identify Drive Bays
Locate the drive bays in your desktop where the current HDD/SSD is installed.
Step 4: Remove Existing Drive
Unscrew and disconnect the current drive carefully, noting cable connections.
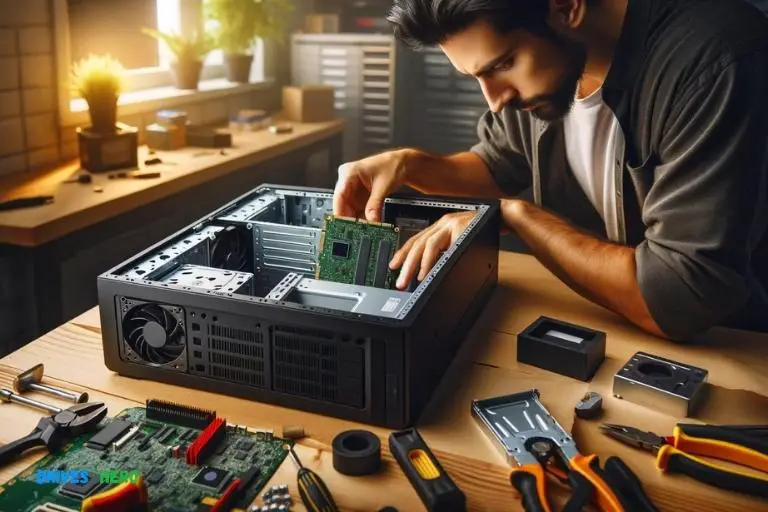
Step 5: Install Crucial SSD
Attach the new Crucial SSD to the vacant drive bay, securing it with screws.
Step 6: Reconnect Cables
Attach the necessary cables to the Crucial SSD to ensure proper connectivity.
Step 7: Secure SSD
If your desktop has brackets, use them to secure the Crucial SSD firmly.
Step 8: Power On Your Desktop
Switch on your desktop to verify the Crucial SSD is correctly detected.
You’ve successfully installed a Crucial SSD in your desktop, enhancing both performance and storage capacity.
Preparing For Installation
Learn how to install a Crucial SSD in your desktop with these easy steps to ensure a smooth installation process.
Understanding The Basics Of Crucial Ssds
- A Crucial SSD (Solid State Drive) is a storage device that can significantly enhance your desktop’s performance and speed. Unlike traditional hard drives, SSDs do not have moving parts, resulting in faster data access and reduced boot-up times.
- SSDs use flash memory technology to store data, providing a more reliable and durable solution compared to HDDs.
- Installing a Crucial SSD in your desktop can be a cost-effective upgrade that improves overall system responsiveness and enhances your computing experience.
Checking Compatibility With Your Desktop
Ensure that your desktop is compatible with a Crucial SSD by following these steps:
- Check the form factor: Crucial SSDs are available in various form factors such as 2.5-inch, M.2, and mSATA. Examine your desktop’s specifications or consult the manufacturer’s documentation to identify the compatible form factor.
- Verify the interface: Crucial SSDs use standard interfaces like SATA (Serial ATA) or NVMe (Non-Volatile Memory Express). Determine the interface supported by your desktop’s motherboard or consult the user manual for this information.
- Consider the storage capacity: Choose an SSD size that suits your needs. Crucial offers a range of capacities, from a few hundred gigabytes to several terabytes. Assess your storage requirements before making a decision.
- Note the power requirements: Ensure that your desktop’s power supply can handle the additional power requirements of the Crucial SSD. Check the power supply specifications or consult a professional if you are unsure about this aspect.
Gathering The Necessary Tools And Supplies
Before embarking on the installation process, gather the following tools and supplies:
- Crucial SSD: Acquire the Crucial SSD model that suits your desktop’s requirements, taking into account the form factor, interface, and storage capacity.
- Screwdriver: Depending on your desktop’s configuration, you may need a small Phillips or Torx screwdriver to remove and install the SSD.
- SATA Data Cable: If your desktop supports SATA SSDs, ensure you have a spare SATA data cable to connect the Crucial SSD to the motherboard.
- SATA Power Cable: Similarly, verify if your desktop has an available SATA power cable to provide power to the Crucial SSD. If not, you may need to purchase a SATA power cable splitter or an appropriate adapter.
- Mounting Bracket (if required): Some desktops, especially older models, may require a mounting bracket to correctly install the Crucial SSD. Check your desktop’s specifications or consult the manufacturer’s documentation to determine if a bracket is necessary.
- Anti-static wrist strap (optional but recommended): To prevent static discharge that could potentially damage electronic components, consider using an anti-static wrist strap during the installation process.
Now that you have understood the basics of Crucial SSDs, checked the compatibility with your desktop, and gathered the necessary tools and supplies, you are ready to proceed with installing your Crucial SSD.
Optimizing Crucial Ssd Performance
Enhance your desktop’s performance with these simple steps to install the Crucial SSD. Boost speed and storage capacity effortlessly.
Enabling Trim Support:
- Enabling TRIM support is crucial for maintaining the long-term performance of your SSD. TRIM is a command that allows the operating system to inform the SSD which blocks of data are no longer in use, allowing the drive to efficiently manage and clean up unused data.
To enable TRIM support, simply follow these steps:
- Open the Command Prompt as an administrator.
- Type “fsutil behavior set disabledeleteNotify 0” and press Enter.
- Restart your computer to apply the changes.
Updating The Ssd Firmware:
- Updating the firmware of your Crucial SSD is essential for optimal performance and compatibility with your system. Firmware updates often include bug fixes, performance improvements, and compatibility enhancements.
To update the SSD firmware, follow these steps:
- Go to the Crucial website and download the latest firmware update for your specific SSD model.
- Run the firmware update program and follow the on-screen instructions.
- Ensure that your computer is connected to a reliable power source during the firmware update process.
- After the update is complete, restart your computer to apply the changes.
Setting Up Regular Backup And Maintenance:
- Regular backup and maintenance are crucial for the long-term health and performance of your SSD. By implementing a backup and maintenance routine, you can ensure that your data is safe and your SSD remains in optimal condition.
Here are some key steps to consider:
- Set up automatic backups using reliable backup software. This will help you recover your data in case of any unforeseen issues.
- Run regular disk cleanup and optimization tools to remove temporary files and optimize the performance of your SSD.
- Perform regular virus scans to prevent any malware or security threats that may affect the performance of your SSD.
- Keep your operating system and applications up to date to ensure compatibility and security.
By following these steps to enable TRIM support, update the SSD firmware, and set up regular backup and maintenance, you can optimize the performance of your Crucial SSD and enjoy improved speed and reliability on your desktop.
Configuring And Initializing The Crucial Ssd
This step-by-step guide provides clear instructions on how to configure and initialize the Crucial SSD in your desktop. It covers the entire process, from installation to optimizing performance, without any unnecessary jargon.
Accessing The Bios And Changing The Boot Order:
- Start by turning on your desktop and immediately press the designated key (usually F2, F10, or Del) to access the BIOS (Basic Input/Output System).
- Navigate through the BIOS using the arrow keys on your keyboard and locate the “Boot” tab using the arrow keys.
- Within the “Boot” tab, identify the “Boot Order” or “Boot Priority” option and select it.
- Use the arrow keys to prioritize the Crucial SSD as the first boot device. This ensures that your desktop will boot up from the SSD rather than the previous boot device.
- Save your changes by pressing the designated key (usually F10) to exit the BIOS. Confirm the changes when prompted.
Booting Up The Desktop And Entering The Initial Setup:
- With the Crucial SSD now configured as the primary boot device, restart your desktop.
- As your desktop restarts, press the designated key (usually F2 or Del) to enter the initial setup.
- In the initial setup, you may be prompted to set the date, time, and language preferences. Follow the on-screen instructions to complete this step.
- Once the initial setup is complete, your desktop will boot up from the Crucial SSD, providing a faster and more efficient boot time.
Partitioning And Formatting The Crucial Ssd:
- After the desktop boots up from the Crucial SSD, you need to partition and format it for use.
- Open the “Disk Management” utility by right-clicking on the “Start” button and selecting “Disk Management” from the context menu.
- Locate the Crucial SSD in the list of disks displayed. It will likely be labeled as an “Unallocated” or “Raw” disk.
- Right-click on the Crucial SSD and select “New Simple Volume” to initiate the partitioning process.
- Follow the on-screen instructions to create a new partition on the Crucial SSD and assign it a drive letter.
- Once the partitioning is complete, right-click on the Crucial SSD partition and select “Format”. Choose a file system such as NTFS and follow the prompts to format the partition.
- After the formatting is finished, the Crucial SSD is now partitioned and ready for use.
By following these steps, you can easily configure, initialize, and prepare your Crucial SSD for use in your desktop.
Troubleshooting Common Installation Issues
Installing a Crucial SSD in your desktop can significantly boost its performance and storage capacity. However, you may encounter some common installation issues along the way.
Ssd Not Recognized In Bios
- Ensure that the SSD is properly connected to the motherboard, double-checking both the power and data cables.
- If you have more than one SSD or hard drive installed in your system, check if the boot order in the BIOS is set correctly. Make sure the Crucial SSD is selected as the primary boot device.
- Update your BIOS to the latest version, as outdated firmware may not support newer SSDs.
- Check if the SSD is faulty by trying it on another computer, or test another SSD in your desktop to see if it’s a compatibility issue.
- If the SSD is still not recognized, contact the Crucial support team for further assistance.
Incompatible Cables Or Connectors
- Ensure that you’re using the correct cables and connectors for your Crucial SSD. Refer to the manufacturer’s specifications or the motherboard manual for the appropriate connectors.
- Make sure the cables are firmly seated in both the SSD and the motherboard. Loose connections can lead to data transfer issues or a failure in SSD recognition.
- If you suspect that the cables may be faulty, try using new cables or swapping them with known-working ones.
- Check for any physical damage on the cables and connectors. Bent pins or frayed cables can cause connectivity problems.
Drive Failure Or Data Corruption
- Before jumping to conclusions, make sure that the SSD is properly connected and recognized in the BIOS. Sometimes, a loose connection can mimic a drive failure.
- If your SSD is making clicking or grinding noises, it could indicate a mechanical failure. In such cases, it’s best to contact the Crucial support team or a professional data recovery service.
- Run a disk diagnostic tool to check the health of your SSD and perform necessary repairs. Crucial provides a downloadable software called Storage Executive that can help diagnose and optimize your SSD.
- Backup your data regularly to prevent loss in case of drive failure. Consider using cloud storage or an external hard drive for secure data backup.
Remember, troubleshooting common installation issues requires careful attention to detail and patience. By following these steps, you’ll be able to resolve most problems and enjoy the benefits of your Crucial SSD in no time.
Conclusion
Installing a Crucial SSD in your desktop is a relatively simple process that can greatly enhance your computer’s performance.
By following the steps outlined in this guide, you can easily upgrade your existing hard drive to a faster and more reliable SSD.
The benefits of an SSD are numerous, including faster boot times, quicker application launches, and improved overall system responsiveness.
With the larger storage capacities available on modern SSDs, you can store more files and programs without worrying about running out of space.
This upgrade can also help extend the lifespan of your desktop by reducing wear and tear on the mechanical components found in traditional hard drives.

Harold Williams is a senior writer and technical editor at Drives Hero with 20+ years of experience in IT administration. He specializes in storage systems, SSD reviews, and performance testing, bringing real-world insight to every guide.