How to Install External Ssd on Pc? 8 Steps!
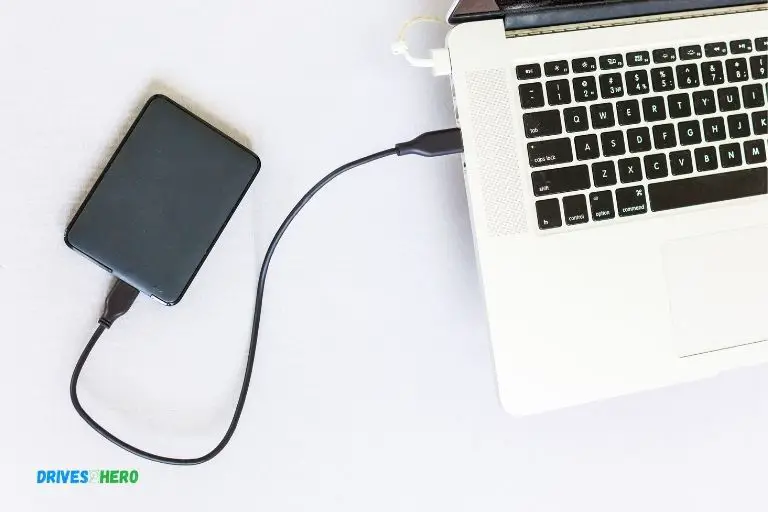
To install an external SSD on a PC, you first need to connect the SSD to your computer via the USB port by using a USB cable.
Next, you’ll need to initialize the SSD using the disk management tool on your PC.
After the SSD has been initialized, create a new volume and format the SSD.
Once all these steps are completed, your external SSD is ready to use.
Installing an external SSD on your PC is a relatively simple process that can significantly increase your computer’s storage space.
SSDs are faster and more reliable than traditional HDDs, making them a great option for upgrading your computer’s performance.
Installing an external SSD on your PC can greatly enhance its performance and storage capacity.
The process is quite straightforward, involving connection via a USB port, initialization, and formatting of the SSD.
Once these steps are achieved, your PC will be ready to use the newly installed SSD.
8 Steps: Installing External SSD on PC
| Step No. | Action | Expected Outcome |
|---|---|---|
| 1 | Secure all the required tools and components | An external SSD, USB cable, and a PC |
| 2 | Check PC compatibility | Confirm that the PC’s operating system supports the use of an external SSD |
| 3 | Connect the SSD to the PC | Use the USB cable to connect the SSD to the PC |
| 4 | Format the SSD | In the Disk Management utility, format the SSD to ensure it’s ready for use |
| 5 | Initialize the SSD | Right-click on the SSD in the Disk Management window and select ‘Initialize Disk’ |
| 6 | Create a New Volume | Right-click on the unallocated space on the SSD and select ‘New Simple Volume’ |
| 7 | Install SSD Drivers | Download and install the necessary SSD drivers from the manufacturer’s website |
| 8 | Test the SSD | Transfer a file to the SSD to confirm it’s working properly |
Key Takeaway
Five Facts About: Installing an External SSD on PC
Preparing Your Pc
Learn how to easily install an external SSD on your PC and enhance its storage space and performance.
Follow these step-by-step instructions to optimize your computer for faster data transfer and improved productivity.
Check Your Pc Specifications
- Ensure that your PC meets the requirements for installing an external SSD by checking its specifications.
Look for the following details to determine compatibility:
- Processor speed and type
- RAM capacity
- Available storage space
- USB ports
- Operating system version
- Make a note of these specifications to avoid any compatibility issues during the installation process.
Gather Necessary Tools And Components
- Before getting started, gather the tools and components necessary for installing an external SSD on your PC.
Here is a checklist of what you will need:
- External SSD: Choose a reliable and compatible external SSD that suits your storage needs.
- Screwdriver: Depending on your PC case, you might need a screwdriver to open it up and install the SSD.
- USB cable: Ensure you have a USB cable to connect the external SSD to your PC.
- Static wristband (optional): To prevent any damage from electrostatic discharge, consider using a static wristband during the installation process.
- Having these tools and components prepared will make the installation process smoother and more efficient.
Back Up Your Data
- Before proceeding with installing an external SSD, it is crucial to back up your data to avoid any potential loss during the process.
Here are a few steps to help you back up your data effectively:
- Identify important files: Determine the files you want to back up, like documents, photos, videos, and personal settings.
- Choose a backup method: Decide whether you want to use an external hard drive, cloud storage, or a combination of both for your backup.
- Transfer files: Copy your selected files to the backup destination using the chosen method.
- Verify backup: Double-check that all your files have been successfully backed up and are accessible.
- Taking the time to back up your data ensures that your valuable files are safe and can be easily restored if needed.
By following these steps to check your PC specifications, gather necessary tools, and back up your data, you will be well-prepared to install an external SSD on your PC.
These preparations will help ensure a smooth installation process without any compatibility issues or data loss.
Let’s move on to the next steps and get your external SSD up and running!
Choosing The Right Ssd
Looking to install an external SSD on your PC? Learn how to choose the right SSD for your needs without breaking the bank.
Get step-by-step guidance on installation and optimize your computer’s performance.
When it comes to enhancing the performance and storage capacity of your PC, installing an external SSD can be a game-changer.
Before diving into the installation process, it’s important to choose the right SSD that meets your needs.
Consider the following factors when making your decision:
Consider Storage Capacity And Performance Needs
Storage capacity:
Determine how much storage space you require based on your usage patterns. SSDs come in various capacities, ranging from 250GB to several terabytes. Assess your needs and choose accordingly.
Performance:
SSDs offer significant speed improvements over traditional hard drives. Look for SSDs with faster read and write speeds to ensure optimal performance.
Decide Between Sata Or Nvme Interface
SATA interface:
SATA SSDs are more common and generally more affordable. They provide a considerable performance boost compared to traditional hard drives. Ideal for everyday tasks and gaming, they offer ample speed for most users.
NVMe interface:
NVMe SSDs, on the other hand, are the latest and fastest option available.
They leverage the PCIe interface to deliver lightning-fast transfer speeds, making them perfect for individuals who demand top-tier performance for tasks like video editing or 3D rendering.
Check Compatibility With Your Pc
Operating System:
Ensure that the SSD you choose is compatible with your operating system.
Most modern SSDs are compatible with Windows, macOS, and Linux systems, but it’s always a good idea to double-check.
Connection:
Determine the type of connection your PC supports. SATA SSDs require a SATA port, while NVMe SSDs require an M.2 slot or an adapter card that supports NVMe.
Form factor:
Consider the physical size of the SSD. While most SSDs are of the 2.5-inch form factor, NVMe SSDs are usually in the M.2 form factor. Ensure there is enough space available in your PC for installation.
By carefully considering your storage capacity and performance needs, deciding between SATA and NVMe interfaces, and checking compatibility with your PC, you can choose the right external SSD to take your PC to the next level in terms of speed and storage capacity.
With the right SSD in hand, you’ll be well-prepared for the installation process.
Physically Installing The External Ssd
To install an external SSD on your PC, follow these simple steps for physical installation.
First, make sure your PC is powered off and disconnected from any power source. Then, locate the USB port on your PC and connect the external SSD.
Finally, secure the SSD in place and power on your PC to start enjoying the benefits of increased storage and speed.
Adding an external SSD to your PC can greatly enhance your device’s storage and overall performance.
Physically installing the external SSD is a simple process that can be done by following a few steps. Let’s get started!
Power Off Your Pc And Unplug
Before beginning the installation process, it’s crucial to power off your PC and unplug it from the electrical outlet.
This step ensures the safety of both you and your device during the installation process.
Keep in mind that handling any electronic components while the PC is powered on can be dangerous.
Locate An Available Usb Port Or Expansion Slot
To install the external SSD, you need to locate an available USB port or expansion slot on your PC.
The type of port or slot you have will depend on the specific model and make of your computer.
Most recent PCs have USB 3. 0 ports, which offer faster data transfer speeds compared to older versions.
Connect The Ssd To Your Pc Securely
Once you’ve identified the appropriate USB port or expansion slot, it’s time to connect the external SSD to your PC.
Make sure it is securely and firmly plugged in to ensure a stable connection.
If you’re using a USB port, insert the SSD into the port until it clicks into place.
If you’re using an expansion slot, follow the manufacturer’s instructions to correctly insert the SSD.
Test The Connection
After making the physical connection, it’s a good idea to test the connection to ensure everything is working correctly.
Power on your PC and check if the external SSD is recognized by the system.
You can do this by opening “My Computer” or “This PC” on Windows, or checking the desktop for the SSD icon.
Format The Ssd (If Necessary)
In some cases, the SSD may need to be formatted before it can be used.
Formatting erases any existing data and prepares the SSD for use with your PC.
Check the manufacturer’s instructions or the SSD documentation for specific formatting instructions.
Remember to backup any important data before formatting the SSD.
Secure The Ssd (If Required)
If you’re installing the SSD internally, ensure that it is securely fastened in its designated slot using screws or any additional attachment methods provided by the manufacturer.
This helps prevent any unnecessary movement or damage to the SSD during regular PC usage.
Update Drivers (If Needed)
To ensure optimal performance, it’s recommended to check for and install any necessary drivers for the external SSD.
Visit the manufacturer’s website to download the latest drivers and follow the instructions provided to update them on your PC.
Eject The Ssd Safely
Before disconnecting the external SSD, it’s important to eject it safely to prevent any data loss or damage.
Use the appropriate method to safely eject the SSD from your PC. This process may involve right-clicking on the SSD icon and selecting “Eject” or using the “Safely Remove Hardware” icon in the taskbar.
Disconnect The Ssd
Once you’ve safely ejected the SSD, you can now disconnect it from your PC.
For USB connections, gently remove the SSD from the port. For internal installations, carefully unplug any cables or connectors before removing the SSD.
Power On Your Pc
Now that the external SSD has been installed and disconnected, it’s time to power on your PC.
Once the device is powered on, you can start enjoying the benefits of your newly installed external SSD, such as improved storage capacity and faster data transfer speeds.
Enhancing your PC’s storage capabilities with an external SSD is a straightforward process.
By following the steps outlined above, you can easily physically install the external SSD and start reaping the benefits of increased storage and improved performance. Happy computing!
Configuring The External Ssd
Learn how to easily configure and install an external SSD on your PC with our step-by-step guide.
Increase your computer’s storage capacity and improve its performance with this straightforward process.
Get started today and enjoy the benefits of faster data transfer and enhanced efficiency.
Congratulations on successfully installing an external SSD on your PC! Now it’s time to configure the SSD to optimize its performance and make it ready for use.
Follow these steps to initialize, format, and assign a drive letter to your newly installed external SSD:
Initialize The Ssd In Windows:
To initialize the SSD in Windows, follow these simple steps:
- Open the Disk Management utility by right-clicking on the Start menu and selecting “Disk Management.”
- Locate the newly installed SSD in the list of available drives. It should be labeled as “Unallocated.“
- Right-click on the SSD and select “Initialize Disk.”
- In the Initialize Disk dialog box, ensure that the disk is selected and choose the desired partition style (MBR or GPT).
- Click “OK” to initialize the SSD.
Format The Ssd For Use:
Once the SSD is initialized, it needs to be formatted to ensure compatibility with your PC.
Here’s how you can format the SSD:
- Right-click on the “Unallocated” partition of the SSD and select “New Simple Volume.”
- In the New Simple Volume wizard, click “Next” to proceed.
- Specify the volume size for the SSD. If you want to use the entire drive, accept the default value and click “Next.”
- Assign a drive letter to the SSD. Choose an available letter from the drop-down menu and click “Next.”
- Select the file system format for the SSD. For most users, the default “NTFS” format is recommended. Click “Next.”
- Review the settings and click “Finish” to format the SSD.
Assign A Drive Letter:
Assigning a drive letter to your SSD is necessary to make it easily accessible in Windows.
Here’s how you can assign a drive letter:
- Open Disk Management by right-clicking on the Start menu and choosing “Disk Management.”
- Right-click on the newly formatted SSD partition and select “Change Drive Letter and Paths.”
- In the Change Drive Letter and Paths window, click “Add” to assign a drive letter.
- Choose an available drive letter from the drop-down menu and click “OK.”
- After assigning the drive letter, you will be able to access your external SSD through the assigned drive letter.
With these configuration steps, your external SSD is now ready for use. Enjoy the increased storage and faster data access that the SSD brings to your PC setup!
Transferring Data To The External Ssd
Learn how to easily install an external SSD on your PC and transfer data effortlessly. Increase your storage capacity and improve your system’s performance with this simple step-by-step guide.
So, you’ve installed your new external SSD on your PC and now you’re ready to transfer your data.
Whether you’re copying files and folders, migrating applications and settings, or verifying data integrity, this section will guide you through the process step-by-step.
Copying Files And Folders:
Transferring your files and folders to the external SSD is a straightforward process.
Here’s a quick guide to help you get started:
- Connect the external SSD to your PC using the provided cable or adapter.
- Open File Explorer by pressing Win + E on your keyboard or through the Start menu.
- Navigate to the location of the files and folders you want to transfer.
- Select the desired files and folders by either clicking and dragging to create a selection box or holding the Ctrl key and clicking on each item individually.
- Right-click on the selected files and folders and choose the “Copy” option from the context menu.
- Go back to File Explorer and locate the external SSD, which should appear as a separate drive.
- Right-click anywhere in the drive and choose the “Paste” option from the context menu to initiate the transfer.
- Wait for the transfer to complete. The time required will depend on the size of the data being copied.
Once the transfer is finished, you can access your files and folders directly from the external SSD, providing you with faster access and freeing up space on your PC’s internal storage.
Migrating Applications And Settings:
If you want to move your applications and settings to the external SSD, you’ll need to follow a slightly different process.
Here’s what you need to do:
- Check if your applications and settings are compatible with being moved to an external storage device. Some applications may not function properly when relocated.
- Install the external SSD on your PC and ensure it is properly recognized and connected.
- Open the Settings app by pressing Win + I on your keyboard or by searching for it in the Start menu.
- Click on the “Apps” category.
- Locate the application you want to migrate and click on it to expand the options.
- Click on the “Move” button and choose the external SSD as the destination.
- Follow the on-screen instructions to complete the migration process for that application.
- Repeat these steps for each application you want to move.
Remember to check if any specific settings need to be adjusted after the migration is complete, as some applications may require reconfiguration.
Verifying Data Integrity:
Once you’ve transferred all your data to the external SSD, it’s essential to ensure that the files are intact and error-free.
Here are some steps you can take to verify the data’s integrity:
- Use a file verification tool or utility program to compare the source files on your PC with the copied files on the external SSD. This will help identify any discrepancies or errors during the transfer process.
- Check the file sizes and compare them between the original files and the copies on the external SSD. Any significant differences may indicate a problem.
- Open a few randomly selected files from the external SSD to ensure they can be accessed and viewed without any issues.
- Consider running a file system check on the external SSD to detect and fix any potential file system errors.
- Optionally, create a backup of the files on another storage device as an additional precaution.
By verifying the data integrity, you can have peace of mind knowing that your files have been successfully transferred and are ready for use on your new external SSD.
With these steps, you should now be able to transfer your data to the external SSD hassle-free.
Enjoy the enhanced performance and increased storage capacity that it brings to your PC experience!
Optimizing Performance And Storage
Optimize your PC’s performance and storage by easily installing an external SSD. Boost your system’s speed and capacity with this simple and effective solution.
An external SSD is a great way to enhance the performance and storage capacity of your PC. In order to ensure that you’re getting the most out of your newly installed SSD, there are a few steps you can take to optimize its performance and manage your storage space efficiently.
Here are some key areas to focus on:
Enabling Trim Support:
- Enable TRIM support for your external SSD to maintain its performance over time.
- TRIM is a feature that allows the operating system to inform the SSD which blocks of data are no longer in use and can be erased.
- By enabling TRIM support, you’ll prevent performance degradation and ensure the longevity of your SSD.
Adjusting Power Settings:
- Adjust your PC’s power settings to optimize the performance of your external SSD.
- Set your power plan to “High Performance” to ensure consistent power supply to the SSD, maximizing its speed.
- Avoid the “sleep” or “hibernate” mode, as they may cause delays in accessing your SSD.
Managing Storage Space Efficiently:
- Regularly clean up unused files and applications to free up space on your external SSD.
- Uninstall unnecessary programs and delete duplicate or outdated files to maximize storage capacity.
- Utilize cloud storage or external hard drives for files that are not frequently accessed.
By following these steps, you can optimize the performance of your external SSD and effectively manage your storage space. Enjoy the enhanced speed and capacity that this upgrade brings to your PC!
Testing And Troubleshooting
Learn the process of installing an external SSD on your PC with these simple troubleshooting steps. Boost your computer’s performance and storage capacity efficiently.
Verifying The Ssd Is Recognized By Your Pc
Check the Device Manager:
Open the Device Manager by pressing Windows key + X and selecting Device Manager from the menu. Expand the Disk drives category to see if your external SSD is listed.
Use Disk Management:
Press Windows key + X and select Disk Management from the menu. Look for your SSD in the list of disks. If it appears, make sure it has a drive letter assigned.
Check BIOS settings:
Restart your computer and enter BIOS settings by pressing a specific key during startup.
Look for your SSD in the list of storage devices. If it’s not listed, try enabling any disabled ports or settings related to external storage.
Running Performance Benchmarks
Crystal DiskMark:
Download and install Crystal Disk Mark, a popular benchmarking tool. Launch it and select your external SSD as the target drive. Run the benchmark to measure the sequential and random read/write speeds of your SSD.
AS SSD Benchmark:
Download and install AS SSD Benchmark. Open the program and click “Start” to begin the test.
It will measure the performance of your SSD, including access time, sequential read/write speeds, and 4K-64Thrd speeds.
ATTO Disk Benchmark:
Download and install ATTO Disk Benchmark. Launch the program and select your SSD. Adjust the test file size if needed and click “Start”.
It will provide detailed results for different transfer sizes, helping you evaluate the SSD’s performance.
Troubleshooting Common Issues
Check cable connections:
Ensure that the cables connecting the SSD to your PC are securely plugged in on both ends.
Update USB drivers:
Visit the manufacturer’s website and download the latest USB drivers for your motherboard or PC. Install them and restart your computer.
Change drive letter:
If your SSD is not appearing in File Explorer, it might not have a drive letter assigned.
Go to Disk Management, right-click on the SSD, and select “Change Drive Letter and Paths”. Assign a new letter to the drive.
Format the SSD:
If the SSD is not recognized or is showing incorrect capacity, it might need to be formatted.
Be cautious as formatting erases all data on the drive. Right-click on the SSD in Disk Management, select “Format“, and follow the prompts.
Remember, if you encounter any issues with your SSD installation, consult the manufacturer’s documentation or seek assistance from a professional.
Final Step: Safely Ejecting The External Ssd
Find out how to safely eject your external SSD after installing it on your PC.
This essential final step ensures the protection of your data and extends the lifespan of your SSD.
Easily follow the guidelines to safely remove it without any damage or data loss.
Closing Active Files And Applications
When it comes to safely ejecting an external SSD from your PC, there are a few important steps you need to follow.
The first step is to close any files or applications that might be using the SSD.
This ensures that all data is properly saved and prevents any potential data corruption.
Here’s how to do it:
Save any open files:
Make sure you save any documents, projects, or files you are working on using the external SSD.
This ensures that all changes are saved and nothing is lost when you disconnect the SSD.
Close applications:
Close any programs or applications that are accessing the SSD. This can include file transfer software, video editing programs, or any other software that might be actively using the SSD.
Check your system tray or task manager to make sure there are no programs running in the background.
Wait for processes to complete:
Some applications may have background processes or tasks running, even after you close the main program window.
Take a moment to ensure that all processes related to the SSD are completed before proceeding to eject it.
Using The “Safely Remove Hardware” Feature
To safely eject your external SSD from your PC, it is recommended to use the “Safely Remove Hardware” feature provided by your operating system.
This feature ensures that all read and write operations are completed, and it helps prevent any data loss or corruption.
Follow these steps to use the “Safely Remove Hardware” feature:
Locate the “Safely Remove Hardware” icon:
Look for the small icon in your system tray that represents safely removing hardware.
It may look like a USB icon or have a caption that says “Safely Remove Hardware.”
Click on the icon:
Once you’ve located the icon, click on it to open the safely remove hardware menu. This will display a list of connected devices that can be safely removed.
Select the external SSD:
From the list of connected devices, find the external SSD and select it. This tells the operating system that you want to safely eject the SSD.
Wait for confirmation:
After selecting the external SSD, the operating system will notify you when it is safe to remove the device.
This confirmation message ensures that all read and write operations have completed.
Disconnecting The Ssd From Your Pc
Now that you’ve closed all active files and applications and used the “Safely Remove Hardware” feature, you can safely disconnect the external SSD from your PC.
Follow these steps to ensure a safe disconnection:
Double-check the SSD activity:
Before physically disconnecting the SSD, ensure that there is no activity indicator light or any data transfer happening. This step confirms that all processes have finished.
Gently unplug the SSD:
Using a firm but gentle grip, disconnect the external SSD from your PC. Avoid any sudden or forceful movements that could potentially damage the connector or the SSD itself.
Store or power off the SSD:
Once you have disconnected the SSD, store it in a safe place or power it off if it has its own power source.
This protects the SSD from any physical damage and extends its lifespan.
Following these steps ensures that you safely eject and disconnect your external SSD from your PC without any data loss or potential damage.
Take the time to close active files and applications, use the “Safely Remove Hardware” feature, and disconnect the SSD properly for a smooth and hassle-free experience.
FAQ About How to Install External Ssd on Pc
What Hardware Do I Need to Install an External Ssd on My Pc?
To install an external SSD on your PC, you will need a SATA to USB adapter, a power cable for the SSD, and an external hard drive enclosure.
How Do I Connect the External Ssd to My Computer?
To connect an external SSD to a computer, you will need a USB cable and the appropriate adapter for your computer’s connection type. Once connected, the drive should automatically be detected by the operating system and appear in File Explorer or Finder on Windows or macOS respectively.
Are There Any Specific Steps for Setting Up an External Ssd on a Laptop?
Yes, there are some steps for setting up an external SSD on a laptop:
Connect the external SSD to your laptop via USB cable. Install any necessary software drivers or utilities that came with your device, if needed. Format the drive with the file system of your choice Create one or more partitions on the disk as desired. Use Disk Management to assign each partition its own drive letter and set other properties as needed (e.g., volume label).
Is It Necessary to Use a Special Cable Or Software in Order to Install an External Ssd Onto My Pc?
No, it is not necessary to use a special cable or software in order to install an external SSD onto your PC. All you need is a USB port and the appropriate adapter for your HDD/SSD.
Conclusion
To sum up, installing an external SSD on your PC can greatly enhance its performance and storage capacity.
The process is relatively simple, requiring just a few steps. Begin by selecting an SSD that fits your needs and budget. Then, safely connect it to your PC using an available USB port.
Format the SSD and transfer your files onto it. Once completed, you can enjoy faster boot-up times, quicker file transfers, and more efficient multitasking.
Remember to regularly back up your data to ensure its safety. Considering the many benefits an external SSD offers, it’s a worthwhile investment for anyone looking to improve their PC’s speed and storage capabilities.
Don’t hesitate to try it out and enjoy the benefits of increased performance and productivity.

Harold Williams is a senior writer and technical editor at Drives Hero with 20+ years of experience in IT administration. He specializes in storage systems, SSD reviews, and performance testing, bringing real-world insight to every guide.