How to Install an NVMe SSD in a Desktop or Laptop
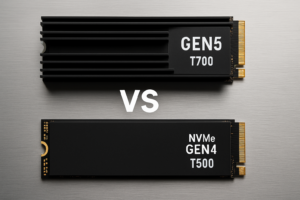
Installing an NVMe SSD is one of the best upgrades you can make to any computer. We’re talking read speeds up to 7,000 MB/s on Gen 4 drives, compared to roughly 550 MB/s on a traditional SATA SSD. Boot times drop, apps launch faster, and file transfers become almost instant. If you’re still wondering whether the upgrade is worth it, our SSD vs HDD comparison breaks down exactly why solid-state storage is the way to go.
The physical installation takes about 15 minutes, whether you’re working inside a desktop tower or a slim laptop. You don’t need special tools or advanced tech skills. Let’s walk through the entire process for both form factors.
What You’ll Need Before You Start
Gather these items before you open anything up:
- An M.2 NVMe SSD (make sure it’s NVMe, not SATA M.2)
- A Phillips #1 screwdriver (a #0 for laptops)
- Your motherboard or laptop manual (or look it up online)
- An anti-static wrist strap (optional but recommended)
For the SSD itself, the Samsung 990 Pro is an excellent Gen 4 option with consistent performance and great thermals. If you want something more budget-friendly, the WD Blue SN580 delivers solid speeds without paying a premium. Not sure what capacity to grab? Our guide on 1TB vs 2TB SSDs can help you decide.

Samsung 990 Pro 2TB NVMe SSD
Top-tier Gen 4 NVMe with excellent sustained write speeds and built-in heatsink compatibility
How to Identify Your M.2 Slot
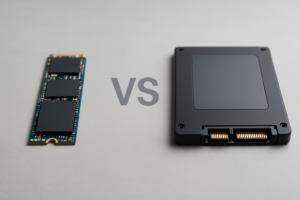
Not all M.2 slots are created equal. Your motherboard might have multiple M.2 slots, but some only support SATA M.2 drives, not NVMe. Check your manual for a slot labeled “M.2 (PCIe)” or “M.2 M-key.” The keying on the connector itself is also a clue: NVMe drives use an M-key notch (a single gap on the right side of the connector). If you’d like a deeper breakdown of the physical differences, our M.2 vs 2.5-inch SSD form factor guide covers this in detail.
Most modern motherboards label the slots directly on the PCB. Look for text like “M2_1” or “PCIE_SSD.” Desktop boards from ASUS, MSI, Gigabyte, and ASRock all follow similar labeling conventions.
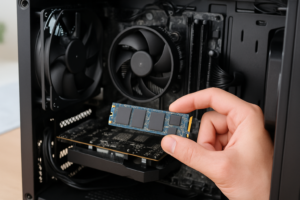
Desktop Installation: Step by Step
- Power down and unplug your PC. Press the power button once while unplugged to discharge residual electricity.
- Remove the side panel. Most cases use thumbscrews on the back.
- Locate the M.2 slot on your motherboard. It’s typically between the CPU socket and the first PCIe x16 slot, or below the GPU area.
- Check the standoff screw. You should see a small brass or silver standoff already installed at the 2280 position (the standard length for most NVMe drives). If it’s missing, check your motherboard accessory box. Some boards include standoffs that you need to thread in yourself.
- Remove any heatsink or cover over the M.2 slot. Many modern motherboards include a built-in M.2 heatsink. If yours has one, peel off the plastic film from the thermal pad underneath before reinstalling it.
- Insert the SSD at a 30-degree angle into the M-key connector. Push it in firmly until the gold contacts are fully seated.
- Press the drive flat and secure it with the mounting screw. Don’t overtighten. Snug is enough.
- Reinstall the heatsink (if applicable), making sure the thermal pad makes contact with the SSD’s controller and NAND chips.
If your motherboard doesn’t include a built-in heatsink, consider adding a third-party M.2 NVMe heatsink. This is especially important for Gen 4 and Gen 5 drives, which can throttle under sustained workloads without adequate cooling.

M.2 NVMe SSD Heatsink with Thermal Pads
Prevents thermal throttling on Gen 4 and Gen 5 drives during heavy file transfers and gaming sessions
Laptop Installation: Step by Step
- Power off and disconnect the charger. If your laptop has a removable battery, take it out.
- Remove the bottom panel. Most laptops use Phillips #0 screws around the perimeter. A plastic spudger helps pop the panel clips without scratching anything.
- Disconnect the internal battery if possible. Many laptops have a battery ribbon cable you can gently pull free from the motherboard connector. This is a safety step that protects both you and the components.
- Find the M.2 slot. In most laptops, it’s near the center or edge of the board, often covered by a small metal shield or left open.
- Insert the NVMe SSD at a slight angle and press it into the connector.
- Secure with the screw. Laptops typically have a tiny Phillips screw holding the drive flat. Some models (like certain Lenovo ThinkPads) use a retention clip instead.
- Reconnect the battery, replace the back panel, and power on.
A word about thermal pads in laptops: many thin laptops include a pre-applied thermal pad on the bottom panel or on a metal bracket above the M.2 slot. Don’t remove or skip it. This pad transfers heat from the SSD to the laptop chassis. If your laptop didn’t include one, a 1mm thermal pad cut to size works well.
BIOS Recognition and Initial Setup
After installation, enter your BIOS (usually by pressing DEL or F2 during startup). Check your storage or boot menu to confirm the new NVMe drive appears by name. If it doesn’t show up, try these fixes:
- Re-seat the drive. Pull it out and insert it again. A loose connection is the most common culprit.
- Update your BIOS. Older motherboard firmware sometimes

James Kennedy is a writer and product researcher at Drives Hero with a background in IT administration and consulting. He has hands-on experience with storage, networking, and system performance, and regularly improves and optimizes his home networking setup.