How to Install Pcie Ssd in Laptop? 7 Steps!
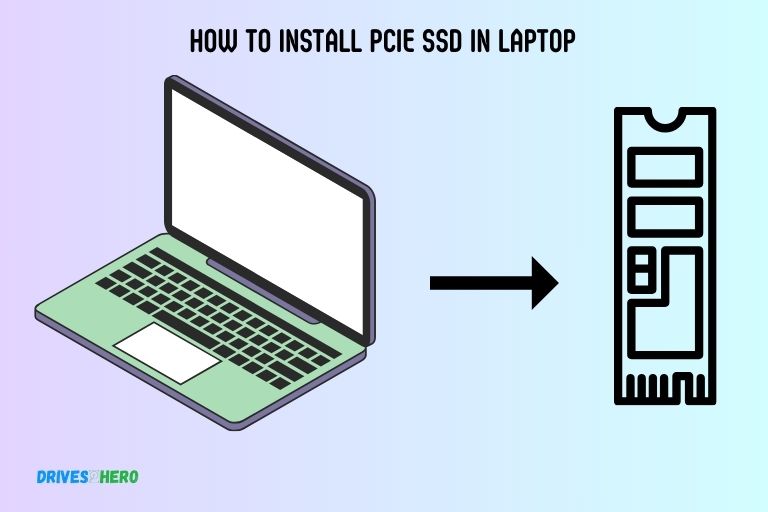
If you own a laptop and want to experience a significant performance boost, installing a PCIe SSD is a game-changer. A PCIe SSD can provide faster data access and improved system responsiveness, making it a valuable upgrade for your laptop.
We will walk you through the process of installing a PCIe SSD into your laptop. Whether you’re a tech enthusiast or a novice, this guide will help you harness the power of a PCIe SSD to elevate your laptop’s speed and storage capacity.

Step-by-Step Laptop PCIe SSD Installation Guide
Requirements
Before you start, ensure you have the following:
- A compatible PCIe SSD.
- Screwdrivers and mounting hardware.
- Backup of essential data from your existing storage drive.
- A laptop that supports PCIe SSD installation.
Step 1: Safety First
- Turn off your laptop and disconnect it from the power source.
- Ground yourself by touching a metal surface to prevent static discharge.
Step 2: Access the Laptop Internals
- Depending on your laptop model, access the internals by removing the back cover or a designated access panel.
Step 3: Locate M.2 Slot
- Identify the M.2 slot in your laptop, where the PCIe SSD will be installed. It’s typically labeled “M.2” or “NVMe.”
Step 4: Insert the PCIe SSD
- Gently insert the PCIe SSD into the M.2 slot.
- Secure it using the provided screws or fasteners.
Step 5: Reassemble Your Laptop
- Close the laptop’s back cover or access panel.
- Reconnect the power source and turn on your laptop.
Step 6: BIOS/UEFI Configuration
- Enter the BIOS/UEFI settings to verify that the PCIe SSD is detected.
- Set the PCIe SSD as the primary boot device if needed.
Step 7: Verify Installation
- Confirm in the BIOS/UEFI that the PCIe SSD is recognized.
- Enjoy the enhanced speed and storage capacity it provides.
With the proper M.2 PCIe SSD and some careful disassembly, you can greatly boost the storage performance of your laptop. Just take your time and ensure compatibility.
Why Upgrade To A Pcie Ssd?
Upgrade your laptop to a PCIe SSD for lightning-fast performance. Installing a PCIe SSD is a simple process that can significantly improve your laptop’s speed and efficiency.
Let’s explore why upgrading to a PCIe SSD is a worthwhile investment:
Improved Performance And Speed:
- Lightning-fast data transfer: PCIe SSDs utilize the high-speed PCIe interface, enabling them to deliver significantly faster data transfer rates compared to traditional hard drives. This means reduced waiting times when accessing files or launching applications.
- Enhanced boot times: With a PCIe SSD, your laptop can start up in seconds rather than minutes. Experience the convenience of quick boot times, allowing you to jump into your work or entertainment without delay.
- Smooth multitasking: Thanks to their superior read and write speeds, PCIe SSDs excel in multitasking scenarios. Whether you’re running multiple applications simultaneously or working with large files, you’ll enjoy seamless performance without slowdowns or lag.
Increased Storage Capacity:
Ample storage space: PCIe SSDs come in various storage capacities, ranging from a few hundred gigabytes to multiple terabytes.
This allows you to choose a storage size that suits your needs, whether you require additional space for multimedia files, large software installations, or extensive databases.
Streamlined storage management: Upgrading to a PCIe SSD gives you the opportunity to consolidate your data onto a single, high-capacity drive. This eliminates the need for multiple storage devices, simplifying your storage management and making it easier to keep track of your files.
Enhanced Multitasking Capabilities:
- Quick access to data: PCIe SSDs provide near-instantaneous access to your data, boosting your productivity across different tasks. Whether you’re opening files, performing data analysis, or editing multimedia content, you’ll experience minimal loading times.
- Responsive applications: With improved data retrieval speeds, your applications will be more responsive, allowing you to work efficiently without frustrating delays. Enjoy seamless transitions between tasks and smoother operation of resource-demanding software.
Upgrading to a PCIe SSD offers a range of advantages that can significantly enhance your laptop’s performance. Experience faster speeds, increased storage capacity, and improved multitasking capabilities with this advanced storage solution.
Compatibility And Requirements
Installing a PCIe SSD in your laptop is a seamless process as long as you ensure compatibility with your device’s requirements.
Checking Laptop Compatibility:
Before installing a PCIe SSD in your laptop, it is important to check if your laptop is compatible with this type of storage.
Here are a few factors to consider:
- Laptop model: Different laptop models have different specifications and may or may not support PCIe SSDs. Check your laptop’s manual or the manufacturer’s website to determine if it supports PCIe SSDs.
- Interface compatibility: PCIe SSDs use a different interface than traditional hard drives. Ensure that your laptop has an available PCIe slot or supports an M.2 or NVMe interface for PCIe SSD installation.
- BIOS support: Some older laptops may not have BIOS support for PCIe SSDs. Make sure to update your laptop’s BIOS to the latest version to ensure compatibility.
Necessary Hardware And Tools:
Installing a PCIe SSD in your laptop requires a few hardware components and tools.
Here’s what you’ll need:
- PCIe SSD: Choose a PCIe SSD with the appropriate storage capacity and specifications for your needs.
- Screwdriver: Depending on your laptop model, you may need to unscrew the back cover to access the internal components. Make sure you have the right type and size of screwdriver.
- Thermal pads or thermal paste: PCIe SSDs can generate heat, so it’s essential to have proper thermal management. Check if your laptop requires thermal pads or thermal paste for heat dissipation.
- Antistatic wrist strap: To avoid damaging your laptop’s internal components with static electricity, it’s advisable to use an antistatic wrist strap.
Understanding Pcie Standards:
PCIe standards determine the data transfer speed and form factor of PCIe SSDs. It’s crucial to understand these standards to ensure compatibility and optimal performance.
Here are the key points:
- PCIe generations: PCIe standards are classified into different generations, such as PCIe Gen 3.0 and PCIe Gen 4.0. Each generation offers different speeds and backward compatibility. Check your laptop’s specifications to determine which PCIe generation it supports.
- Form factors: PCIe SSDs come in different form factors, such as M.2 and add-in cards (AIC). Verify which form factor your laptop supports and choose a compatible PCIe SSD accordingly.
- NVMe: NVMe (Non-Volatile Memory Express) is an interface protocol designed specifically for PCIe SSDs. It provides faster data transfer speeds and lower latency compared to older protocols like SATA. Ensure that your laptop supports NVMe for optimal performance.
Remember, before proceeding with the installation, always consult your laptop’s manual or manufacturer’s website for precise instructions and compatibility information.
By understanding laptop compatibility, gathering necessary hardware and tools, and being aware of PCIe standards, you’ll be well-prepared to install a PCIe SSD in your laptop.
Preparing Your Laptop For Installation
Before installing a PCIe SSD in your laptop, there are a few important steps you should follow to ensure a smooth and successful installation process.
Follow the steps below to get started:
Backing Up Data:
- Connect an external hard drive or use cloud storage to create a backup of all your important files and data.
- It’s essential to safeguard your data in case of any unforeseen circumstances during the installation process.
Shutting Down And Disconnecting Your Laptop:
- Save any ongoing work and close all applications before shutting down your laptop.
- Disconnect the power cable and remove any externally connected devices such as USB drives or headphones.
- Ensure that your laptop is completely powered off before proceeding to the next step.
Removing The Back Cover And Accessing The Internals:
- Carefully flip your laptop over and locate the screws holding the back cover in place.
- Use a screwdriver to unscrew and remove the back cover, keeping track of the screws to avoid misplacing them.
- Once the back cover is removed, you should be able to see the internal components of your laptop, including the storage drive area.
By following these steps, you are now ready to move on to the next phase of the installation process.
Connecting The Pcie Ssd
To begin the installation process of a PCIe SSD in your laptop, you need to connect the SSD to the motherboard using a connector cable.
Follow these steps to ensure a successful connection:
Attaching the connector cable:
- Locate the PCIe slot on your laptop’s motherboard where the SSD will be inserted.
- Connect one end of the connector cable to the PCIe slot on the motherboard.
- Gently insert the other end of the connector cable into the PCIe SSD, ensuring it is properly aligned.
Double-checking the connection:
- After connecting the cable, take a moment to inspect the connection points on both the motherboard and the SSD.
- Ensure the connector cable is firmly seated in both the motherboard slot and the SSD without any visible gaps.
- Check for any bent pins or misalignment and make any necessary adjustments.
Securing the cable in place:
- Once you have confirmed a secure connection, it’s important to secure the cable in place to prevent accidental disconnection.
- Use any included clips or fasteners to secure the cable to the laptop’s chassis or other nearby components.
- Ensure the cable is properly routed to avoid interfering with other internal components or obstructing airflow.
Remember, proper connection of the PCIe SSD to the motherboard is crucial for its functionality. Take your time and double-check the connection before moving forward with the installation process.
Now that you have successfully connected the PCIe SSD, you are one step closer to enhancing the storage capabilities of your laptop.
Reassembling Your Laptop
Learn how to easily install a PCIe SSD in your laptop with these step-by-step instructions. Upgrade your storage capacity and boost your laptop’s performance effortlessly.
Placing The Back Cover Back On:
After successfully installing your PCIe SSD in your laptop, it’s time to reassemble it and put the back cover back on.
Follow these steps to ensure a proper reassembly:
- Prior to placing the back cover on, make sure that there are no loose cables or components inside the laptop. Clear any obstructions to prevent any damage during reassembly.
- Slowly and carefully position the back cover over the laptop’s body. Pay attention to proper alignment and ensure that it fits snugly without force.
- Gently press down on the cover to make sure it is securely in place and sits flush with the laptop’s body.
Tightening The Screws Securely:
Once the back cover is in position, the next step is to tighten the screws securely. This ensures that your laptop is properly sealed and prevents any potential issues down the line.
Follow these guidelines:
- Begin by identifying the screw holes on the back cover. Typically, they are located around the edges of the cover.
- Using a screwdriver or the appropriate tool, tighten each screw in a clockwise direction. Be cautious not to overtighten, as this can cause damage to the laptop’s casing.
- Continue tightening all the screws until they are firm, but again, avoid excessive force.
Ensuring Proper Alignment Of The Cover:
Proper alignment of the back cover is crucial to prevent any gaps or misalignments.
Follow these steps to ensure everything lines up perfectly:
- Starting from one corner, inspect the alignment of the back cover with the laptop’s body. Ensure that it is straight and properly aligned.
- Slowly move along the edges of the laptop, checking that there are no gaps or misalignments at any point.
- If you notice any discrepancies, gently adjust the position of the cover until it fits correctly.
Remember to take your time during this reassembling process to avoid any mistakes or damages to your laptop. With proper care and attention to detail, you’ll successfully install the PCIe SSD and have your laptop fully operational in no time.
Configuring The Pcie Ssd
Configure your PCIe SSD effortlessly with our step-by-step guide for installing a PCIe SSD in your laptop. Maximize your storage capacity and boost your laptop’s performance with this simple and effective solution.
Accessing the laptop’s Bios Or Uefi Settings
To configure the PCIe SSD, you first need to access your laptop’s BIOS or UEFI settings.
Follow these steps:
- Start your laptop and press the designated key (usually Del, F2, or Esc) repeatedly during the boot process to enter the BIOS or UEFI settings.
- Once in the settings, navigate to the “Boot” tab using the arrow keys.
Selecting The Pcie Ssd As The Boot Drive
After accessing the BIOS or UEFI settings, you need to select the PCIe SSD as the boot drive.
Here’s what you should do:
- Look for the “Boot Option Priorities” or a similar option in the Boot tab.
- Identify the entry related to PCIe SSD from the listed devices.
- Move the PCIe SSD up in the boot order by pressing the designated key (usually F5 or F6) until it is at the top.
- Save the changes and exit the BIOS/UEFI settings.
Verifying The Recognition Of The Ssd
After configuring the PCIe SSD as the boot drive, it is crucial to confirm that the system recognizes the SSD properly.
Follow these steps to ensure that:
- Restart your laptop and allow it to boot up.
- Once the operating system loads, go to the “Disk Management” utility by right-clicking on the Start menu and selecting “Disk Management.”
- Check for the presence of the PCIe SSD in the list of drives.
- Verify that the SSD’s status is shown as “Online” and that it has the correct capacity information.
By following the steps above, you can successfully configure the PCIe SSD in your laptop. Enjoy the enhanced performance and increased storage capacity offered by this cutting-edge technology.
Can I Install Windows on a Laptop with a PCIe SSD?
Yes, you can install Windows on a laptop with a PCIe SSD. Installing Windows on PCIe SSD provides faster boot times and improved overall system performance. The high-speed data transfer capabilities of PCIe SSDs make them an ideal choice for running operating systems like Windows.
Testing And Verifying The Install
In the process of installing a PCIe SSD in your laptop, it is crucial to test and verify the installation to ensure proper functionality and performance.
This step ensures that the new SSD is properly connected and detected by the system, enabling you to enjoy faster data transfer speeds and improved overall performance.
Booting Up The Laptop And Checking For The Ssd:
- To begin, power on your laptop and make sure the PCIe SSD is properly connected.
- Once the startup process is complete, navigate to the BIOS or UEFI settings.
- Check if the laptop recognizes the PCIe SSD by going to the storage or drive configuration section.
- Ensure that the SSD is labeled and listed as a recognized storage device.
- Save any changes made in the BIOS or UEFI settings and exit.
Running Benchmark Tests:
- After confirming that the laptop recognizes the SSD, it’s time to run some benchmark tests to assess its performance.
- Choose a reliable and reputable benchmarking tool, such as CrystalDiskMark or AS SSD Benchmark.
- Open the benchmarking tool and select the PCIe SSD as the target drive for testing.
- Run the benchmark tests to measure the SSD’s read and write speeds, as well as its overall performance.
- Take note of the results provided by the benchmarking tool for future reference.
Verifying The Improved Performance And Speed:
- Once the benchmark tests are completed, it’s important to verify that the PCIe SSD brings noticeable improvements in speed and performance.
- Open various applications and programs that heavily rely on storage performance, such as video editing software or high-demand games.
- Observe how quickly these applications open, load files, and perform tasks compared to the previous storage setup.
- Pay attention to any significant reduction in loading times or lag during operation, indicating that the PCIe SSD is improving overall performance.
- In addition, compare file transfer speeds between the old storage drive and the new PCIe SSD to gauge the level of improvement.
By following these steps and verifying the install of your PCIe SSD, you can ensure that your laptop’s storage system is upgraded and running at its best. Enjoy the improved performance and speed provided by your new SSD!
Conclusion
Installing a PCIe SSD in your laptop can greatly enhance its performance and storage capacity. By following the step-by-step guide outlined, you can easily upgrade your laptop’s storage solution and enjoy faster boot times, quicker application launches, and improved overall system responsiveness.
Remember to choose a compatible PCIe SSD that fits your laptop’s specifications and consider transferring your data from your existing storage device before installation.
With a little patience and careful handling, you can successfully install a PCIe SSD in your laptop and reap the benefits of faster and more efficient storage.


