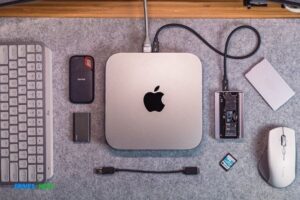
How to Make External Ssd Bootable
An external SSD can be a great way to increase the storage on your computer. But if you want to use it as your main boot drive, you’ll need to make it bootable first. Here’s how:
First, connect the SSD to your computer. Then, open Disk Management (in Windows) or Disk Utility (on a Mac). Find the SSD in the list of drives and right-click (or control-click) on it.
- Download and install the latest version of Etcher on your computer
- Connect your external SSD to your computer using a USB cable
- Open Etcher and select the image you want to use to create your bootable drive
- Select your external SSD as the destination drive in Etcher
- Review your selections and click ‘Flash!’ to begin creating your bootable drive
How Do I Make an External Drive Bootable?
Assuming you would like to know how to make an external drive bootable in order to install Windows:First, you will need to format the external drive as NTFS. To do this, open “My Computer,” right-click on the external drive, and select “Format.”
In the Format window that pops up, choose “NTFS” from the File System dropdown menu and click “Start.”Next, you will need to copy the Windows installation files onto the external drive. The easiest way to do this is to use Microsoft’s Media Creation Tool.
Once you have downloaded and run the tool, select “Create installation media for another PC” and then follow the prompts. When prompted, choose your external drive as the location to save the Windows installation files.Once the files have been copied over, you will need to modify your BIOS settings in order to boot from the external drive.
To do this, restart your computer and enter BIOS setup (the key needed to enter BIOS varies by manufacturer – common keys include F2, F12, and DEL). Once in BIOS setup, navigate to the Boot tab and ensure that your external drive is listed as a priority boot device. Save your changes and exit BIOS setup.
How Do I Make My Ssd As Bootable?
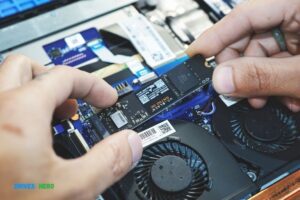
An SSD, or solid state drive, is a newer type of hard drive that stores data on interconnected flash memory chips. Unlike a traditional hard drive, an SSD has no spinning disks and reads data much faster. If you’re looking to improve your computer’s speed and boot time, making your SSD the bootable drive is a great way to do it.
Here’s how:First, you’ll need to connect your SSD to your computer. If you’re using a desktop computer, this will usually involve opening up the case and connecting the SSD to one of the available SATA ports.
If you’re using a laptop, you may need to open up the bottom panel to access the SATA port or purchase an external SSD enclosure.Once your SSD is connected, open up Disk Management in Windows by searching for it in the Start Menu. In Disk Management, find your SSD listed under “Disk Drives.”
Right-click on it and select “Initialize Disk.”
Just follow the prompts until you get to the “Format Partition” page. Here, make sure that NTFS is selected as the file system type and give your volume a label (this can be anything). Then click “Finish” to format your new bootable SSD!
Can an External Hard Drive Be Used As a Boot Drive?
Yes, an external hard drive can be used as a boot drive. However, there are some things to keep in mind when doing so. First, the external hard drive must be properly formatted and configured to work with your particular computer system.
Second, the external hard drive should have enough storage space to accommodate all of the data and programs that you want to use on it. Third, the external hard drive should be connected to your computer using a USB or Firewire cable for optimal performance. Finally, if you are using Windows, you will need to set up the external hard drive as a primary or active partition in order to be able to boot from it.
What is a Bootable External Drive?
A bootable external drive is a storage device that can be used to boot up a computer. The drive must be formatted with a specific file system and have all the necessary files for booting. To make a bootable external drive, you will need to use special software to copy the required files from your operating system’s installation media.
Once the files are copied, you can then connect the drive to your computer and boot from it.There are many benefits of using a bootable external drive. For one, it’s a convenient way to carry around your operating system and all your data with you.
You can also use it to troubleshoot problems on other computers – just connect the drive and boot up! Additionally, if your main computer breaks down, you can still access your data by booted into an alternate OS on the external drive.Of course, there are some drawbacks too.
For example, if you forget to bring your external drive with you, you won’t be able to access your data or programs! Additionally, they tend to be more expensive than regular storage devices since they require special components and software. Nonetheless, for many users the benefits outweigh the disadvantages – especially since modern laptops and Ultrabooks have limited internal storage space.
Make External Hard Drive Bootable Windows 10
Making an external hard drive bootable is a great way to have a portable version of Windows 10. This can be especially useful if you need to use Windows 10 on multiple computers. Here’s how to make your external hard drive bootable:
1. Plug in the external hard drive and open Disk Management (press Windows key + R, type diskmgmt.msc, press Enter). 2. Right-click on the external hard drive and select “Initialize Disk.” 3. Select “GPT” for the partition style and click “OK.”
4. Right-click on the unallocated space on the external hard drive and select “New Simple Volume.” 5. Follow the wizard to create a new volume and format it as NTFS with default settings. 6. Copy all of the files from your current Windows 10 installation onto the external hard drive (for example, C:\Windows\*.
*). 7 Make sure that the following files are present on your external hard drive: \Boot\BCD, \Boot\bootmgr, and \Boot\bootx64.efi . If these files are not present, you can copy them from another working Windows 10 installation or download them from Microsoft’s website .
8 Configure your computer to boot from USB by going into BIOS/UEFI settings (usually pressing F2 or DEL during bootup) and changing the Boot Order so that USB drives are listed before internal storage drives . Save changes and exit BIOS/UEFI settings .
Make External Hard Drive Bootable Windows 10 Rufus
An external hard drive is a great way to store extra data or backups, but what if you want to make it bootable? Windows 10 provides a built-in tool for this called Rufus, and it’s actually quite easy to use.Here’s how to make your external hard drive bootable with Rufus in Windows 10:
1. Connect your external hard drive to your PC.2. Download and launch Rufus (link below).3. Click the “Select” button and choose your external hard drive from the list of devices.
4. In the “Boot selection” drop-down, select “Disk or ISO image” and then click the “SELECT” button next to it.5. Choose the Windows 10 ISO file that you downloaded earlier and click “Open”.6. Make sure that the “Create a bootable disk using” checkbox is checked and then click “Start”.
7. Rufus will now start creating the bootable Windows 10 disk on your external hard drive – this process could take a while depending on the size of the ISO file and the speed of your externalhard drive so be patient! 8 . Once it has finished, you should have a fully bootable Windows 10external hard drive that you can use to install Windows 10 on anyPC!
Boot Windows from External Ssd
Windows can be installed on an external SSD, but it’s not as simple as just connecting the drive and installing Windows. Here’s a step-by-step guide to install Windows on an external SSD.1. Connect the external SSD to your PC.
2. Enter BIOS and change the boot order so that your PC boots from the external SSD.3. Install Windows on the external SSD just like you would install it on a regular internal hard drive. Make sure to select the custom installation option and choose the external SSD as the location for installing Windows.
4. Once Windows is installed, connect your PC back to its original hard drive and boot into Windows from there. You’ll need to change the boot order again in BIOS so that your PC boots from the internal hard drive first.
How to Make External Hard Drive Bootable With Rufus
If you’ve ever tried to install an operating system from a USB drive, you know that it can be a frustrating experience. Even if you manage to get the OS installed, it often won’t boot from the USB drive. The solution is to create a bootable USB drive with Rufus, a free utility that makes it easy to create bootable USB drives.
Here’s how to use Rufus to create a bootable USB drive:1. Download Rufus and launch it. You’ll see a screen that looks like this:
2. Plug in your USB drive and select it from the “Device” drop-down menu.3. Choose the “Create a bootable disk using” option and select ISO Image from the drop-down menu.4. Click on the “…” button and browse to the location of your ISO file.
Select the file and click Open.
5. Make sure that the “Boot Selection” options is set to “Disk or ISO image”. Underneath, you should see the name of your ISO file listed next to “Create bootable disk using”.
If not, click on the small icon next to it and browse for your ISO file again. When you’re done, click Start and wait for Rufus to finish creating your bootable USB drive!
Conclusion
If you’re looking to get the most out of your external SSD, you’ll want to make sure it’s properly formatted and bootable. Here’s a quick guide on how to do just that.First, connect your external SSD to your computer and open Disk Utility.
In the sidebar, select your external SSD and click on the “Erase” tab. Choose the “Mac OS Extended (Journaled)” format and click on the “Erase” button.Once your drive is erase, open Terminal and type in the following command: sudo diskutil partitionDisk /dev/disk2 1 GPT HFS+J “Untitled” 100%
Replace “/dev/disk2” with the identifier for your external SSD. This will create a single partition on your drive that is bootable.Now all you have to do is copy over your operating system files.
The easiest way to do this is to use Carbon Copy Cloner or SuperDuper!. Just select your internal hard drive as the source and your external SSD as the destination.
Once everything is copied over, restart your computer and hold down the option key when it starts up. You should see both drives listed as options; select your external SSD to boot from it.

Harold Williams is a senior writer and technical editor at Drives Hero with 20+ years of experience in IT administration. He specializes in storage systems, SSD reviews, and performance testing, bringing real-world insight to every guide.