How to Move Os from Ssd to M 2: A Step-by-Step Guide
To move your OS from an SSD to an M.2 drive, you’ll need to clone the SSD to the M.2 drive and then configure your BIOS to boot from the M.2 drive.
M.2 drives are a type of NVMe storage that offer faster read and write speeds than traditional SSDs.
Moving your OS to an M.2 drive can significantly improve boot times, application loading, and overall system performance.
To transfer the OS, you’ll need to clone your current SSD to the new M.2 drive and ensure your computer boots from the new drive.
To clone your SSD to an M.2 drive, you’ll need a cloning tool like Macrium Reflect or Clonezilla.
Once the cloning process is complete, shut down your computer, physically install the new M.2 drive, and boot your computer into the BIOS.
Locate your boot settings and configure your computer to boot from the M.2 drive first. Save your settings, exit the BIOS, and your computer should now boot from the new M.2 drive with your OS and all data intact.
Steps to Move OS from SSD to M.2
| Step | Description |
|---|---|
| 1. | Gather materials: M.2 SSD, screwdriver, and necessary cables |
| 2. | Backup data on your current SSD |
| 3. | Turn off your computer and disconnect all cables |
| 4. | Open computer case and locate M.2 slot |
| 5. | Install M.2 SSD into the slot and secure with the screw |
| 6. | Close the computer case and reconnect all cables |
| 7. | Turn on your computer and enter BIOS/UEFI |
| 8. | Configure the boot order to prioritize M.2 SSD |
| 9. | Save settings and exit BIOS/UEFI |
| 10. | Boot your computer with a cloning software or Windows installer USB |
| 11. | Clone your SSD or install a fresh copy of the OS onto the M.2 SSD |
| 12. | Restart your computer and ensure it boots from the new M.2 SSD |
| 13. | Optionally, format your old SSD for additional storage |
Key Takeaway
Five Essential Facts about Moving OS from SSD to M.2
Introduction To Ssds And M.2 Drives
Ssds and m. 2 drives have revolutionized the storage industry, offering high-speed data transfer rates and maximum capacity in minimal space.
If you’re considering upgrading your storage from an ssd to an m. 2 drive, you might be wondering how to move your os.
We’ll explore the differences between ssds and m. 2 drives and discuss the advantages of m. 2 drives over ssds. We’ll then help you understand the need to move your os from an ssd to an m. 2 drive.
Overview Of Ssds And M.2 Drives
- Solid-state drives (ssds) use nand flash memory to store data and provide faster data transfer rates than traditional hard disk drives.
- M.2 drives are a type of ssd that uses the m.2 interface to connect to the computer’s motherboard. They typically offer faster read/write speeds and come in smaller form factors than traditional ssds.
- Both ssds and m.2 drives are available in sata or pcie interfaces, with pcie offering faster speeds.
Advantages Of M.2 Drives Over Ssds
- M.2 drives are faster and more reliable than traditional ssds. They use nvme (nonvolatile memory express) technology, which provides superior speed and performance compared to traditional sata ssds.
- M.2 drives come in smaller form factors, making them ideal for ultra-thin laptops, ultrabooks and tablets that cannot accommodate bulky sata drives.
- M.2 drives do not require additional power cables, as they draw power from the motherboard.
Understanding The Need To Move Os From Ssd To M.2
- Moving your os from an ssd to an m.2 drive can significantly improve boot and loading times, providing faster access to your files and applications.
- Migrating your os requires cloning the ssd’s contents onto the m.2 drive. You can use software tools like easeus todo backup, macrium reflect, or clonezilla to perform the cloning.
- When migrating your os, you need to ensure that your m.2 drive has sufficient space to hold all your data, including the os, applications, and files.
- After cloning your ssd’s contents onto the m.2 drive, you’ll need to set your computer to boot from the m.2 drive to ensure that the system can load from it.
With these key points in mind, you should be better prepared for the process of moving your os from an ssd to an m. 2 drive.
By understanding the benefits of m. 2 drives over ssds and the need to migrate your os, you can take advantage of the fast data transfer rates and superior performance offered by m.
2 drives for your storage needs.
Preparing Your M.2 Drive
Selecting The Right Type Of M.2 Drive
When selecting an m. 2 drive, it’s essential to consider the following factors:
- Capacity: Look for an m.2 drive with sufficient storage capacity to accommodate your operating system and other essential files.
- Interface: Choose an interface that’s compatible with your system’s hardware. M.2 drives can come with either sata or nvme interfaces.
- Read/write speeds: Opt for an m.2 drive with fast read/write speeds to ensure speedy file transfers and enhanced system performance.
- Form factor: Select an m.2 drive that matches your system’s form factor. M.2 drives come in various sizes, including 2230, 2242, 2260, and 2280.
Cleaning The Drive
Before installing the m. 2 drive, ensure it’s clean and free from dust, debris, and fingerprints.
You can clean it by:
- Using compressed air to blow off the dust and debris.
- Wiping the drive gently with a microfiber cloth to remove fingerprints and smudges.
Creating A Bootable Drive
Here are the steps for creating a bootable drive:
- Download your operating system’s iso file and a bootable usb creation tool, such as rufus or unetbootin.
- Insert a usb drive and launch the bootable usb creation tool.
- Select the iso file and usb drive in the tool and start the bootable drive creation process.
- Once the process completes, the bootable drive is ready for use.
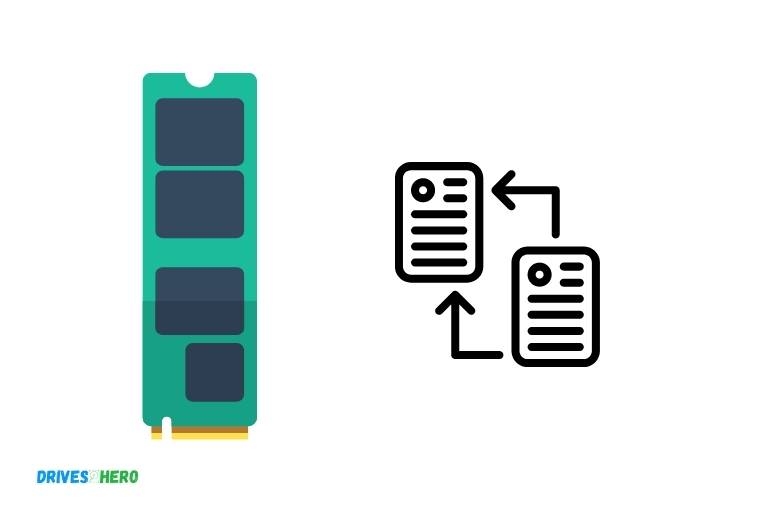
Cloning The Os To The M.2 Drive
Now it’s time to clone your operating system to the m. 2 drive.
Here’s a step-by-step guide:
- Connect the m.2 drive to your system and boot the computer.
- Launch a disk-cloning software, such as clonezilla or easeus todo backup.
- Select the source drive (your current operating system drive) and the destination drive (the m.2 drive).
- Click the ‘clone’ button and wait for the process to complete.
- Once the cloning process is over, restart your computer and go to the bios settings.
- Change the boot order to prioritize the m.2 drive over the previous os drive.
- Save the settings and restart the computer.
- Your computer should now boot from the m.2 drive successfully.
With these steps, you can easily move your operating system from an ssd to an m. 2 drive and enjoy faster boot and load times on your system.
Configuring The System For The M.2 Drive
When it comes to moving your os from ssd to m. 2, there are a few key things you need to do to configure your system properly for the m. 2 drive.
Here’s what you need to know:
Accessing The Bios And Updating Firmware
Before you can configure your system for the m. 2 drive, you’ll need to update your firmware and access the bios.
Here’s how to do it:
- Make sure your system is powered off completely.
- Boot up your system and press the key to access the bios (usually f2, f12, or del).
- Once you’re in the bios, look for a tab or setting labeled “firmware update” or “bios update.”
- Download the latest bios or firmware update from the manufacturer’s website onto a flash drive.
- Apply the update as directed by the manufacturer.
Changing The Boot Priority
In order to boot your system from the m. 2 drive, you’ll need to change the boot order in the bios.
Here’s how to do it:
- Access the bios as directed above.
- Look for a tab or setting labeled “boot order”.
- Change the boot order so that the m.2 drive is at the top of the list.
- Save your changes and exit the bios.
Disabling The Sata Controller
If you’re moving your os from an ssd to an m. 2 drive, you’ll need to disable the sata controller to avoid any conflicts.
Here’s how to do it:
- Access the bios as directed above.
- Look for a tab or setting labeled “sata configuration” or “sata mode”.
- Change the sata mode from “ahci” to “disabled”.
- Save your changes and exit the bios.
Installing The M.2 Drive
Now that you’ve updated your firmware, changed your boot priority, and disabled the sata controller, it’s time to install the m. 2 drive in your system.
Here’s how to do it:
- Make sure your system is powered off completely.
- Locate the m.2 slot on your motherboard (refer to your motherboard manual).
- Carefully insert the m.2 drive into the slot at a 30-degree angle.
- Gently press down on the top of the drive until it clicks into place.
- Replace the screw (if necessary) to secure the m.2 drive in place.
All of these steps are crucial to configure your system properly for the m. 2 drive.
By following these steps, you’ll be able to move your os from ssd to m. 2 without any issues. Now you can enjoy faster boot times and improved system performance!
Migrating The Os To The M.2 Drive
Upgrading your storage to an m. 2 drive can bring significant performance benefits. However, migrating an os can be a daunting task.
Here are some tips to make sure the process goes smoothly.
Using Built-In Tools To Clone The Os
If you want a straightforward way to clone your os to your new m. 2 drive, you don’t need to download third-party software. Your computer comes equipped with windows tools that can get the job done.
Here are a few pointers on how to use these tools effectively:
- Use disk management to format and prepare the m.2 drive.
- Use the built-in backup and restore tool to create a system image of your os.
- Use the system repair disc tool to boot from the new m.2 drive and restore the system image.
It’s essential to know that these tools can take a lot of time to complete, require some technical know-how, and might not work in all situations.
Using Third-Party Software For Migration
If the built-in windows tools aren’t an option, or you want more advanced features, third-party software can help you migrate your os.
Many options are available, like acronis true image, easeus todo backup, and aomei backupper.
These are the top features you should look for in third-party software for os migration:
- Cloning and imaging capabilities.
- Migration options for different drive types.
- Scheduling and backup options.
- Compatibility with your os version.
It’s important to remember that these software options come with different prices and functionalities, so make sure to research the best choice for your needs.
Common Issues And Troubleshooting
Migrating an os can be complicated and sometimes result in issues.
Here are some of the most common problems you might encounter and how to troubleshoot them:
- Errors during cloning: Check the source and destination drive statuses and try again.
- Drive not detected: Make sure the m.2 drive is installed correctly and is compatible with your system.
- Boot failure: Check your bios settings, boot order, and ensure the m.2 drive is selected as the boot drive.
Conversational style: moving your operating system to an m. 2 drive can do away with the storage bottlenecks on your system.
However, transferring an operating system can appear burdensome. It’s essential to follow these tips for a smooth experience since the migration process isn’t always as easy as some people may believe.
Markdown format:
Using Built-In Tools To Clone The Os
- Use disk management to format and prepare the m.2 drive.
- Use the built-in backup and restore tool to create a system image of your os.
- Use the system repair disc tool to boot from the new m.2 drive and restore the system image.
Using Third-Party Software For Migration
- Cloning and imaging capabilities.
- Migration options for different drive types.
- Scheduling and backup options.
- Compatibility with your os version.
Common Issues And Troubleshooting
- Errors during cloning: Check the source and destination drive statuses and retry.
- Drive not detected: Make sure the m.2 drive is installed correctly and is compatible with your system.
- Boot failure: Check your bios settings, boot order, and ensure the m.2 drive is set as the boot drive.
Optimizing The Performance Of The M.2 Drive
If you’re moving your os from ssd to m. 2, you’ll want to make sure your new drive is working as efficiently as possible.
Here are some key things to keep in mind.
Tweaking Windows Settings For The M.2 Drive
To get the most out of your m. 2 drive, you’ll want to adjust some settings in windows:
- Turn off disk defragmentation: M.2 drives don’t need to be defragmented, and it can actually decrease their performance.
- Disable superfetch: This feature preloads frequently used data into memory, but can slow down your m.2 drive.
- Turn off indexing: Indexing allows you to search your files quickly, but it can also slow down the m.2 drive.
Enabling Raid Mode
To further optimize the performance of your m. 2 drive, consider enabling raid mode:
- Enable raid mode in your bios: This allows you to treat your m.2 drive as part of an array rather than a single drive.
- Set the sata mode to raid: This is necessary for the m.2 drive to work in raid mode.
Updating Drivers For Better Performance
Make sure your drivers are up-to-date for the best performance:
- Download the latest drivers from the manufacturer’s website: This ensures compatibility with your m.2 drive.
- Install the latest chipset drivers: These control the communication between your cpu and the other components of your computer.
Future-Proofing Your System With Regular Maintenance
Keeping your computer running smoothly takes regular maintenance.
Here’s what you can do:
- Keep your drivers up-to-date: Update your drivers regularly to ensure they’re compatible with your m.2 drive.
- Clean out your computer regularly: Dust can clog up your fans and cause your system to overheat.
- Backup your data: Regularly backing up your data ensures you won’t lose important files if your m.2 drive fails.
By following these tips, you can ensure that your new m. 2 drive is performing at its best and is ready to handle anything you throw at it.
Frequently Asked Questions For How To Move Os From Ssd To M 2
How Do I Know If My Computer Supports M.2 Ssd?
Most modern computers support m. 2 ssds, but check your motherboard specs to confirm. Look for m. 2 slots and the supported key configurations.
Can I Clone My Os Onto An M.2 Ssd?
Yes, you can clone your os onto an m. 2 ssd using cloning software like acronis true image. Ensure the m. 2 ssd has adequate storage.
How Long Does It Take To Move Os From Ssd To M.2?
The time it takes to move os from an ssd to m. 2 depends on the amount of data you have, but it usually takes around 30 minutes to an hour.
What Should I Do After Moving Os To M.2 Ssd?
After moving your os to an m. 2 ssd, set it as the boot drive in your computer’s bios. Then, you can enjoy faster boot times and improved overall performance.
Conclusion
Now that you have understood how to move os from ssd to m. 2, it’s time to put your knowledge into practice. As ssds are becoming more affordable, upgrading your computer’s storage to m. 2 can be a smart decision.
By following the steps mentioned above, you can smoothly transfer the operating system to m. 2 without losing any data or facing compatibility issues.
Remember to back up your data before making any changes to the system and to choose the right type of m.
2 for your computer. With this guide, you can enjoy faster boot times and better performance with your upgraded m. 2 storage. So, take your time, follow the process, and enjoy the benefits of m. 2 storage!

Harold Williams is a senior writer and technical editor at Drives Hero with 20+ years of experience in IT administration. He specializes in storage systems, SSD reviews, and performance testing, bringing real-world insight to every guide.