How to Remove Nvme Ssd? Step By Step!
To remove an NVMe SSD (Non-Volatile Memory Express Solid State Drive), you first need to shut down your system completely.
Then, carefully open your desktop or laptop, locate the SSD, unscrew it from the motherboard, and gently pull it out from the PCIe (Peripheral Component Interconnect Express) slot.
The NVMe SSD is a type of storage device that uses the PCIe interface to connect to the motherboard. It’s known for delivering outstanding performance and speed compared to traditional storage devices.
However, when it comes to upgrading or replacing it, you need to follow a proper procedure to avoid any damage.
It is critical to handle the NVMe SSD with care. Any mishandling can lead to irreversible damage and data loss.
Always make sure you’re grounded to prevent electrostatic discharge when handling sensitive PC components. After removing the SSD, store
7 Steps: Removing an NVMe SSD
| Steps | Description |
|---|---|
| 1. Shutdown Your PC | Firstly, completely shut down your system. Do not use restart or sleep mode. |
| 2. Disconnect The Power Supply | Unplug the PC from the power outlet for safety purposes. |
| 3. Open The PC Case | Remove the screws on the back of your PC case to open it. The placement of these screws varies depending on the model. |
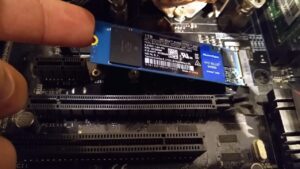
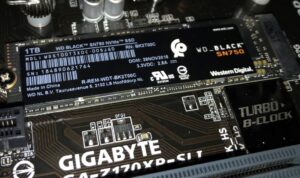
| 4. Locate The NVMe SSD | The NVMe SSD is typically located in the motherboard slot labeled ‘M.2.’ |
| 5. Unscrew The SSD | Carefully remove the screw holding the NVMe SSD in place. This is usually a small, single screw at one end of the SSD. |
| 6. Remove The SSD | Gently slide out the SSD from its slot. Be careful not to touch the connectors. |
| 7. Store/Dispose Properly | If you’re not immediately replacing the SSD, store it in an anti-static bag. If you’re disposing of it, follow electronic waste guidelines. |
Key Takeaway
Five Facts About: How to Remove Nvme Ssd
Understanding Nvme Ssds
Learn how to remove NVMe SSDs with this comprehensive guide. Discover step-by-step instructions and tips for safely removing these high-performance solid-state drives from your system.
NVMe (Non-Volatile Memory Express) SSDs are a type of storage device that offer incredibly fast data transfer speeds, making them ideal for users who require high performance and faster load times.
Let’s dive into the key differences between NVMe and SATA SSDs, as well as the advantages of NVMe SSDs.
Difference Between Nvme And Sata Ssds:
- Connectivity: NVMe SSDs utilize the PCIe (Peripheral Component Interconnect Express) interface, which allows for faster communication between the SSD and the motherboard compared to SATA SSDs that use the SATA interface.
- Speed: NVMe SSDs offer significantly faster read and write speeds compared to SATA SSDs. This is due to their ability to utilize the high bandwidth of the PCIe interface, resulting in faster data processing and reduced latency.
- Parallelism: NVMe SSDs are designed to handle multiple data requests simultaneously, thanks to their parallel data paths. This allows for a much higher input/output (I/O) performance when compared to SATA SSDs, which typically have limited parallelism.
- Scalability: NVMe SSDs are highly scalable, making them suitable for enterprise-level storage solutions. With the ability to support a large number of SSDs in a single system, NVMe empowers businesses with the flexibility to expand storage capacity as needed.
Advantages Of Nvme Ssds:
- Blazing Fast Speeds: NVMe SSDs offer lightning-fast data transfer speeds, significantly reducing loading times for applications, games, and files. This is particularly beneficial for users who work with large, data-intensive tasks, such as video editing or 3D rendering.
- Lower Latency: NVMe SSDs have incredibly low latency, meaning data retrieval is near-instantaneous. This results in a responsive user experience and seamless multitasking, allowing users to access files and applications without any noticeable delays.
- Improved Workflow Efficiency: With their high-speed performance and low latency, NVMe SSDs enhance overall workflow efficiency. Users can enjoy quicker system boot times, faster application launches, and swift file transfers, enabling them to work more productively and accomplish tasks in less time.
- Gamers’ Delight: Gamers can benefit greatly from NVMe SSDs, as they significantly reduce game loading times, allowing for faster access to game data. This means reduced waiting periods during level transitions and an overall smoother gaming experience.
- Future-Proof Storage: NVMe technology is continuously evolving, ensuring that users have access to the latest advancements in storage performance. As more applications and operating systems optimize for NVMe, investing in an NVMe SSD ensures compatibility and better performance in the long run.
- Energy Efficiency: NVMe SSDs consume less power compared to traditional hard disk drives (HDDs) or even SATA SSDs. This not only reduces energy costs but also helps extend laptop battery life for those constantly on the move.
NVMe SSDs offer a significant performance boost over SATA SSDs, delivering faster speeds, lower latency, and improved workflow efficiency.
Whether you are a professional, gamer, or simply someone who values quick and seamless computing, upgrading to an NVMe SSD can greatly enhance your overall user experience.
Preparing For Ssd Removal
Learn how to efficiently remove an NVMe SSD with these simple steps. From disconnecting cables to safely uninstalling the drive, this guide will help you prepare for a smooth SSD removal process.
Removing an NVMe SSD from your computer may seem like a daunting task, but with the right preparation, it can be a smooth and hassle-free process. In this section, we’ll guide you through the necessary steps to prepare for SSD removal.
By following these instructions, you’ll ensure that your computer is shut down properly, the power source is disconnected, and you have all the required tools at hand for a successful SSD removal.
Shutting Down The Computer
To begin the process, you’ll need to shut down your computer completely.
Follow these steps to ensure a safe shutdown:
- Save any open files and close all applications.
- Click on the “Start” menu and select “Shut down” from the options.
- Wait for the operating system to shut down completely before proceeding to the next step.
Disconnecting The Power Source
Before removing the NVMe SSD, it’s essential to disconnect the power source to avoid any electrical mishaps.
Here’s how you can do it:
- Power off your computer by pressing and holding the power button until it turns off.
- Unplug the power cord from the electrical outlet.
- If you’re using a laptop, remove the battery as well to ensure complete power disconnection.
Gathering The Necessary Tools
Having the right tools at hand can make the SSD removal process much easier.
Here are the tools you’ll need:
- A small Phillips screwdriver: You’ll need this to remove any screws holding the NVMe SSD in place.
- An anti-static wrist strap: This will help prevent electrostatic discharge that could damage the SSD or other components.
- A clean microfiber cloth: This will come in handy for wiping any dust or debris from the NVMe SSD or the surrounding area.
By following these steps and ensuring that you’ve shut down your computer, disconnected the power source, and gathered the necessary tools, you’re now ready to proceed with the actual removal of your NVMe SSD.
Stay tuned for the next section, where we’ll guide you through the step-by-step process of removing the NVMe SSD from your computer.
Steps For Removing An Nvme Ssd
Here’s a brief SEO-friendly description on how to remove an NVMe SSD: Learn the steps to smoothly remove an NVMe SSD without any hassle.
Follow these guidelines for a seamless process and ensure the successful removal of your NVMe SSD:
Opening The Computer Case
- To begin removing an NVMe SSD, you will first need to open your computer case.
- Before you start, make sure to shut down your computer and unplug it from the power source.
- Locate the screws that secure the computer case and remove them using a screwdriver.
- After removing the screws, gently slide off the side panel of the computer case to expose the internal components.
Locating The Nvme Ssd
- Once inside the computer case, you will need to locate the NVMe SSD.
- The NVMe SSD is typically a small rectangular circuit board that is connected to the motherboard.
- Carefully inspect the motherboard for the NVMe SSD slot, which is often labeled for easy identification.
- If needed, refer to the computer’s manual or manufacturer’s website for specific instructions on locating the NVMe SSD slot.
Removing The Nvme Ssd
- After finding the NVMe SSD slot, it’s time to remove the SSD.
- First, locate the screw or latch that secures the NVMe SSD in place.
- Use a screwdriver to remove the screw or release the latch, depending on the design of your computer.
- Once the screw or latch has been removed, gently pull the NVMe SSD straight out of the slot.
- Be cautious not to apply excessive force or twist the SSD, as this could cause damage.
Handling The Nvme Ssd With Care
- It’s essential to handle the NVMe SSD with care to prevent any potential damage.
- Avoid touching the gold connectors on the bottom of the SSD to prevent static electricity or oils from your fingers affecting its performance.
- If you need to store or transport the NVMe SSD, use an anti-static bag or wrap it in an anti-static material to protect it from static electricity.
- When reassembling your computer, ensure that the NVMe SSD is securely and properly inserted into the slot.
- Lastly, dispose of the old NVMe SSD responsibly by following local regulations or recycling programs to minimize environmental impact.
By following these steps, you can successfully remove an NVMe SSD from your computer. Remember to always handle the SSD with care to avoid any unnecessary damage.
Troubleshooting And Tips
Get troubleshooting tips on how to successfully remove an NVMe SSD in just a few simple steps. Discover the expert advice you need to tackle this task effortlessly.
Having trouble removing your NVMe SSD? Don’t worry, we’re here to help! In this section, we’ll cover common issues, how to resolve connection problems, and best practices for NVMe SSD removal.
Let’s dive right in:
Common Issues When Removing An Nvme Ssd:
- Incorrect orientation: Make sure you’re aligning the SSD properly before attempting to remove it. The connectors should match up and slide in smoothly for removal.
- Stuck SSD: Sometimes, an SSD can get stuck due to dust or debris. Gently wiggle it back and forth while pulling to free it from the slot. Be careful not to apply too much force and damage the components.
- Tight screws: If you’re having difficulty removing the screws that secure the SSD, try using a high-quality screwdriver with a good grip. Applying some downward pressure as you unscrew can also help loosen them.
Resolving Connection Problems:
- Check cables and connectors: Ensure that all cables are securely connected and that there are no loose connections. A loose cable can cause intermittent problems or prevent the SSD from being recognized.
- Clean connectors: Over time, connectors may accumulate dust or dirt, leading to poor connectivity. Use an air duster or a soft, dry brush to gently clean the connectors before reinserting the SSD.
- Update drivers: Outdated or incompatible drivers can cause connection issues. Visit the manufacturer’s website and download the latest drivers for your NVMe SSD to ensure optimal performance and compatibility.
Best Practices For Nvme Ssd Removal:
- Safety first: Before removing the SSD, always remember to power off your computer and unplug the power cord. Working on an energized system can be dangerous and may lead to damage or injury.
- Ground yourself: Protect your SSD and other components by grounding yourself. Use an anti-static wrist strap or touch a grounded object to discharge static electricity before handling the SSD.
- Handle with care: NVMe SSDs are delicate electronic devices, so it’s crucial to handle them gently. Avoid bending or applying excessive pressure to prevent damage to the connectors and circuitry.
- Keep the SSD clean: Dust and debris can affect the performance and lifespan of your SSD. Regularly clean the surrounding area and use an air duster to remove any buildup from the SSD itself.
Remember, troubleshooting and removing an NVMe SSD shouldn’t be a daunting task. By following these tips, you’ll have a smoother experience while ensuring the safety and longevity of your SSD.
Happy removing!
FAQ About How to Remove Nvme Ssd
How do I remove my NVMe SSD?
Before removing your NVMe SSD, ensure that both your computer and the NVMe SSD are powered off. Unplug all connections from the NVMe SSD and the computer and use an ESD wrist strap to protect any sensitive electronic components. Depending on the type of NVMe SSD that you have, you may need to unscrew the mounting screws or use a screwdriver to pry it off.
Is it safe to remove an NVMe SSD?
Yes, generally it is safe to remove an NVMe SSD from your computer. However, it is recommended that you follow the proper procedures outlined in your NVMe SSD’s user guide to ensure that your components are properly protected from static electricity.
Can I remove an NVMe SSD without powering down my computer?
No, you should always ensure that both your computer and the NVMe SSD are powered off before attempting to remove the drive.
Does removing an NVMe SSD delete my data?
Yes, unplugging your NVMe SSD will delete all of your data stored on the drive. Therefore, before removing your NVMe SSD, it is important to make sure that all important data is backed up so that it can be retrieved in the future.
What is the best way to store an NVMe SSD?
To keep your NVMe SSD in the best condition and to maximize its performance and lifecycle, it is important to
Conclusion
Removing an NVMe SSD is a relatively simple process that requires careful consideration and attention to detail.
By following the steps outlined in this guide, you can safely remove your NVMe SSD without causing any damage to your system or data.
Remember to back up your data before beginning the removal process, as this will ensure that you have a copy of your important files in case anything goes wrong.
Additionally, consider using an anti-static wrist strap to protect the delicate components of your NVMe SSD from static electricity.
By taking these precautions and following the steps carefully, you can successfully remove your NVMe SSD and either replace it with a new drive or complete any necessary maintenance or upgrades.


