How to Repair Nvme Ssd? 10 Easy Steps!
NVMe SSDs (Non-Volatile Memory Express Solid State Drives) are essential components in modern computing, offering high-speed data storage and retrieval.
However, like any electronic device, they may encounter issues requiring repair. We’ll outline a step-by-step process to help you diagnose and repair common problems with NVMe SSDs.
Whether you’re facing data corruption, unrecognized drives, or performance issues, this guide will equip you with the knowledge to troubleshoot and resolve issues efficiently.
Key Takeaway
Step-by-Step Guide to Repairing NVMe SSD
Step 1: Diagnosis
Before attempting any repairs, diagnose the issue with your NVMe SSD. Common issues include data corruption, unrecognized drive, or slow performance. Use diagnostic tools or check system logs for error messages to identify the problem.
Step 2: Backup Data
If possible, backup important data from the SSD to avoid data loss during the repair process. Use a secondary storage device or cloud storage to securely store your files.
Step 3: Check Connections
Ensure the NVMe SSD is properly connected to the motherboard. Disconnect and reconnect the SSD to ensure a secure connection. Inspect the connector pins for any signs of damage or debris and clean if necessary.
Step 4: Firmware Update
Check for firmware updates for your NVMe SSD from the manufacturer’s website. Download and install the latest firmware version following the provided instructions. Firmware updates often include bug fixes and performance improvements.
Step 5: Check for Physical Damage
Inspect the NVMe SSD for any physical damage such as dents, scratches, or bent connector pins. Physical damage may require professional repair services or replacement of the SSD.
Step 6: Test in Different System
If the SSD is still not functioning properly, test it in a different system to rule out compatibility issues or motherboard problems. If the SSD works in another system, the issue may be with your original system’s configuration.
Step 7: Software Repair Tools
Use software repair tools provided by the SSD manufacturer or third-party utilities to diagnose and repair logical errors on the SSD. Follow the instructions provided with the software to perform repairs safely.
Step 8: Contact Manufacturer Support
If none of the above steps resolve the issue, contact the manufacturer’s customer support for further assistance. Provide details of the problem and steps you’ve taken to troubleshoot. They may offer additional guidance or authorize a warranty repair or replacement.
Step 9: Professional Repair
If the NVMe SSD is still under warranty and the issue cannot be resolved through troubleshooting, consider sending it to a professional repair service authorized by the manufacturer. Attempting DIY repairs on a warranty-covered SSD may void the warranty.
Step 10: Restore Data
Once the repair process is complete and the NVMe SSD is functioning correctly, restore your backed-up data to the SSD. Verify that all files are intact and accessible before regular use.
By following these steps, you can effectively troubleshoot and repair common issues with NVMe SSDs, restoring functionality and ensuring the integrity of your data.
Five Facts About: How to Repair Nvme Ssd
Identifying Hardware Problems
Signs Of A Faulty Nvme Ssd
A faulty NVMe SSD can present various signs of hardware problems.
Below are the most common signs to look out for:
- Extreme slow performance: If your NVMe SSD is experiencing significant slowdowns and your system is struggling to read or write data at the usual speed, it could indicate a problem with the hardware.
- Frequent system crashes: If your computer crashes frequently or experiences sudden, unexplained reboots, it could be a sign of a faulty NVMe SSD. The SSD’s hardware failure can destabilize the system and lead to these crashes.
- Disk not recognized: If your computer fails to recognize the NVMe SSD or it doesn’t appear as a storage device in the system, it may signal a hardware problem.
- Frequent errors or failure to boot: If your system consistently displays errors such as “disk read error” or “boot device not found,” it may indicate a failing NVMe SSD.
- Overheating: If your NVMe SSD feels excessively hot to the touch, it could be a sign of a hardware problem. Overheating can cause the SSD to perform poorly or even fail.
Checking For Physical Damage
Physical damage to an NVMe SSD can contribute to hardware problems.
Here’s how to check for physical damage:
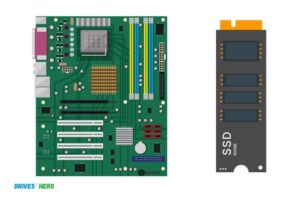
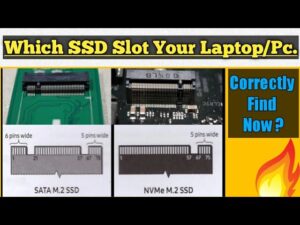
- Inspect the connector: Examine the connector pins on both the NVMe SSD and the slot in your computer. Look for any bent or broken pins which may prevent proper connection.
- Observe the PCB: Inspect the printed circuit board (PCB) on the NVMe SSD for any signs of burn marks, scorching, or physical damage. These could indicate a hardware problem.
- Examine the enclosure: If your NVMe SSD is housed in an external enclosure, check for any visible damage such as cracks, dents, or loose connections.
- Ensure proper seating: If the NVMe SSD is an internal drive, ensure that it is properly seated in the M.2 slot or PCIe slot. Sometimes, a loose connection can cause hardware issues.
- Monitor SMART data: Use SSD monitoring software to check the SMART (Self-Monitoring, Analysis, and Reporting Technology) data of your NVMe SSD. Look for any warnings or errors related to physical damage.
Remember, identifying hardware problems is the first step towards repairing an NVMe SSD. By recognizing the signs of a faulty SSD and checking for physical damage, you can better understand the extent of the issue and take appropriate measures to resolve it.
Software-Related Problems
Repairing NVMe SSD software-related problems can be challenging, but with the right steps, it is possible to fix issues efficiently.
When it comes to repairing NVMe SSDs, software-related problems are common issues that users encounter. Troubleshooting these conflicts can help restore the functionality of your SSD and ensure optimal performance.
Common Software Issues With Nvme Ssds:
Incompatibility with operating system: Some NVMe SSDs may experience compatibility issues with certain operating systems. This can result in the SSD not being recognized or performing poorly.
To address this problem:
- Check the manufacturer’s website for firmware updates specific to your SSD model.
- Install the latest drivers and patches provided by the SSD manufacturer.
- Ensure your operating system is up to date.
Driver conflicts and outdated drivers: Outdated or conflicting drivers can cause performance issues or even render the NVMe SSD unusable.
Here’s what you can do:
- Update your NVMe SSD driver to the latest version available. Check the manufacturer’s website for the most recent driver release.
- Uninstall any conflicting drivers that may be interfering with the SSD’s performance.
- Regularly check for driver updates to ensure optimal functionality.
Firmware issues: Firmware is the software embedded in the NVMe SSD. An outdated or corrupt firmware can lead to various problems.
To resolve this:
- Visit the manufacturer’s website to check for firmware updates specifically designed to address the issues you are encountering.
- Follow the instructions provided by the manufacturer to update the firmware correctly.
- Backup your data before performing any firmware update to avoid potential data loss.
Disk management and formatting issues: NVMe SSDs might not appear or function correctly if they are not properly formatted or recognized by the operating system’s disk management.
Consider the following steps:
- Open Disk Management utility on your operating system.
Check if the NVMe SSD is listed. If not, do the following:
- Right-click on the unallocated space and select “New Simple Volume.”
- Follow the on-screen instructions to format the NVMe SSD.
- If the NVMe SSD is listed but shows as unformatted or uninitialized, right-click on it and follow the formatting instructions.
Compatibility issues with other software: Certain software applications or utilities may conflict with the NVMe SSD’s drivers or firmware, affecting its performance.
Here’s what you can do:
- Identify any software applications or utilities that might be causing conflicts.
- Try updating or reinstalling the conflicting software.
- If the issue persists, consider reaching out to the software developer or the NVMe SSD manufacturer for further assistance.
Tackling software-related problems with NVMe SSDs is crucial for maintaining their performance and resolving any potential issues.
By following the troubleshooting steps mentioned above, you can effectively address common software issues and optimize the functionality of your NVMe SSD.
Backing Up Data
Repairing NVMe SSDs can be a crucial step in backing up your data and ensuring its safety. With proper guidelines and steps, you can easily repair your NVMe SSD and restore your valuable data effortlessly.
Importance Of Data Backup Before Repair
Backing up your data is an essential step before repairing your NVMe SSD. It ensures that you don’t lose valuable information in case something goes wrong during the repair process.
Here’s why data backup is crucial before you start repairing your NVMe SSD:
- Protection against data loss: Regardless of the repair method you choose, there’s always a risk of data loss. By backing up your data beforehand, you can safeguard your important files, documents, photos, and videos.
- Peace of mind: Knowing that your data is safely backed up will give you peace of mind during the repair process. You won’t have to worry about permanently losing your information if anything goes awry.
- Easy recovery: In the event of a repair failure or unforeseen issues, having a backup copy of your data allows for easy recovery. You can simply restore your files from the backup and resume normal operations without any significant disruption.
- Time-saving: Without a data backup, you may need to spend a considerable amount of time recreating or recovering lost data manually. By pre-emptively backing up your data, you can save time and focus on repairing your NVMe SSD efficiently.
Methods To Back Up Nvme Ssd Data
When it comes to backing up your NVMe SSD data before the repair, you have several options to choose from.
Here are some popular methods:
- External hard drive: Plug in an external hard drive to your computer and copy all your important files onto it. This method provides a physical backup that can be accessed even if your computer or NVMe SSD malfunctions.
- Cloud storage: Use a reliable cloud storage service, such as Google Drive, Dropbox, or Microsoft OneDrive, to store your data securely. This method offers the advantage of remote access to your files from any device with an internet connection.
- Disk imaging software: Utilize disk imaging software like Acronis True Image or Macrium Reflect to create an image of your entire NVMe SSD. This method captures the entire disk, including the operating system and installed programs.
- Network-attached storage (NAS): Connect your NVMe SSD to a NAS device, which acts as a central storage hub for multiple computers. This method allows for continuous data backup and synchronization across devices on the same network.
Remember, it’s best to have multiple backup sources to ensure redundancy and data integrity. Choose the method that suits your needs and preferences, and ensure that you regularly update your backups to keep them current.
By following these methods and backing up your NVMe SSD data before repair, you can protect yourself from potential data loss and ensure a smoother repair process.
Checking And Repairing Bad Sectors
Learn how to repair NVMe SSD bad sectors with these simple steps. Keep your SSD running smoothly and improve its performance by checking and repairing any bad sectors.
Understanding Bad Sectors And Their Impact On Performance
A solid-state drive (SSD) is a reliable and fast storage device that improves your computer’s overall speed and performance.
However, over time, like any other electronic device, an NVMe SSD may develop bad sectors. These are areas on the drive where data cannot be reliably written or read.
Bad sectors can significantly impact your SSD’s performance, causing slow file access, system crashes, or even data loss. It is essential to understand bad sectors and take appropriate measures to check and repair them.
Tools And Techniques To Check And Repair Bad Sectors
Below are the tools and techniques you can use to effectively detect and repair bad sectors on your NVMe SSD:
- Built-in Windows Tools: Windows operating systems provide tools that can help identify and repair bad sectors. These tools include:
- Error Checking: This utility scans your NVMe SSD for errors and attempts to fix them. To run this tool, right-click on your drive, go to Properties, click on the Tools tab, and select “Check” under the Error Checking section.
- Disk Cleanup: This tool removes unnecessary files from your NVMe SSD, improving its overall performance. It does not directly repair bad sectors, but it can help prevent further degradation.
- Third-Party Software: Dedicated software offers advanced functionality to tackle bad sectors effectively. Some popular options include:
- CrystalDiskInfo: This software provides comprehensive information about your NVMe SSD, including the health status, temperature, and any bad sectors detected. CrystalDiskInfo can help you detect and monitor bad sectors over time.
- HD Tune: Known for its extensive feature set, HD Tune offers a surface test that checks your NVMe SSD for bad sectors and repairs them if possible. It also provides detailed information about your drive’s health and performance.
- Hardware-Level Solutions: Sometimes, bad sectors can be caused by problems at the hardware level. In such cases, the following techniques can be useful:
- Replace SATA Cable: Faulty or loose SATA cables can cause data errors and bad sectors. Consider replacing the cable if you suspect it might be the cause.
- Check Power Supply: Insufficient power supply or unstable voltage can lead to data corruption and bad sectors. Ensure your power supply is functioning correctly.
- Contact Manufacturer: If you have tried all software and hardware-level solutions without success, contacting the manufacturer’s support team may be your best option. They can provide specialized guidance or even assist with a replacement if your NVMe SSD is still under warranty.
By leveraging these tools and techniques to check and repair bad sectors, you can ensure your NVMe SSD performs optimally and mitigate the risk of potential data loss or system instability.
Recovering Lost Data
Learn how to repair your NVMe SSD and recover lost data with these simple steps. Get your SSD back up and running in no time.
Causes Of Data Loss On Nvme Ssds
Data loss on NVMe SSDs can occur due to various reasons. Understanding the causes can help you take preventive measures to avoid future data loss.
Here are some common causes:
- Accidental deletion: Despite being careful, it’s easy to accidentally delete files or folders from your NVMe SSD. This can happen when you’re organizing your data or deleting unwanted files.
- File system corruption: Issues with the file system, such as errors or damage, can lead to data loss on your NVMe SSD. This can be caused by abrupt system shutdowns, power outages, or even malware infections.
- Physical damage: NVMe SSDs, like any other storage devices, can suffer physical damage due to various factors such as dropping the device, exposure to extreme temperatures, or manufacturing defects. This can result in data loss or complete SSD failure.
Data Recovery Methods And Tools
When it comes to recovering lost data from your NVMe SSD, there are several methods and tools available.
Here are some popular options:
- Data recovery software: Specialized data recovery software can help you retrieve lost files from your NVMe SSD. These programs scan your SSD for recoverable data and provide options to restore them to your desired location.
- Professional data recovery services: If you’re unable to recover your lost data using software, you can opt for professional data recovery services. These experts have advanced tools and techniques to recover data from damaged or malfunctioning NVMe SSDs.
- Backup and recovery solutions: Implementing regular backups of your NVMe SSD is an efficient way to protect your data and minimize the risk of data loss. By creating backups, you can restore your files from a previous point in time if you encounter any issues.
- Preventive measures: Taking preventive measures is essential to avoid data loss on your NVMe SSD. This includes keeping your operating system and drivers up to date, avoiding sudden system shutdowns, and using reliable antivirus software to protect against malware.
Remember, in the unfortunate event of data loss, it is crucial to act promptly and avoid writing new data to your NVMe SSD to maximize the chances of successful data recovery.
FAQ About How to Repair Nvme Ssd
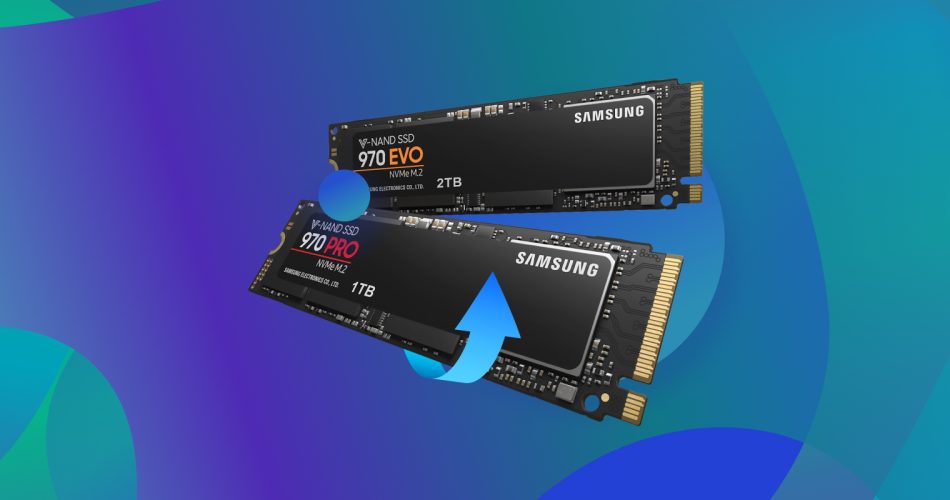
What is an NVMe SSD?
NVMe (Non-Volatile Memory Express) is an SSD storage protocol specifically designed for use with PCI-E storage media like solid-state drives (SSDs). It is optimized to deliver low latency and high performance, allowing for faster data transfers from an SSD to the system.
How do I repair an NVMe SSD?
Repairs to an NVMe SSD should only be attempted by a qualified technician or computer specialist. The process involves disassembling the SSD, replacing any defective components, reassembling the SSD, and ensuring proper working order.
Are there risks involved with repairing an NVMe SSD?
Any repair procedure on an electronic device carries a certain degree of risk. Damaging an NVMe SSD during the repair process may result in permanent data loss or device failure.
Can a damaged NVMe SSD be recovered?
Depending on the damage, it may be possible to recover data from a damaged NVMe SSD. However, specialist tools are generally required and the process should be left to a professional data recovery service.
Are there self-repair kits available for NVMe SSDs?
No, self-repair kits are not available for NVMe SSDs. The process of repairing an NVMe SSD requires specialist tools and knowledge and should only be attempted by a qualified technician.
Conclusion
Repairing an NVMe SSD can be a straightforward process if you follow the right steps. By understanding common issues that can arise with these drives, such as firmware corruption and overheating, you can take the necessary precautions to avoid such problems.
Regularly backing up your data and performing firmware updates are essential in maintaining the performance and reliability of your NVMe SSD.
Keeping the drive cool through proper ventilation and avoiding excessive heat can significantly extend its lifespan.
If you do encounter issues, troubleshooting methods such as checking cable connections and using diagnostic tools can help identify and resolve the problem.
Remember, prevention is key, so stay proactive in taking care of your NVMe SSD to ensure optimal performance and longevity.

Harold Williams is a senior writer and technical editor at Drives Hero with 20+ years of experience in IT administration. He specializes in storage systems, SSD reviews, and performance testing, bringing real-world insight to every guide.