How to Speed Up Nvme Ssd
There are a few things you can do to help speed up your Nvme SSD. One is to update your firmware. You can also make sure you have the latest drivers installed.
Another thing you can do is to use a tool like Iometer to benchmark your drive and see where the bottlenecks are. Finally, if you’re using an older operating system, you may need to upgrade to a newer one that has better support for Nvme SSDs.
- Check your Nvme Ssd’s health- Use a third party tool like CrystalDiskInfo to check the health of your drive
- A healthy Nvme Ssd should have a status of “Good” or “Very Good”
- Update your Nvme Ssd’s firmware- Firmware updates can improve performance and fix bugs
- Check with your manufacturer’s website to see if there are any available updates for your drive
- Optimize Windows for better Nvme Ssd performance- Microsoft has released several optimization patches for Windows that can improve Nvme Ssd performance
- These are typically found in the Windows Update section of the Settings app
- Use a third party tool to align your Nvme Ssd partitions- Proper partition alignment can improve performance and extend the life of your drive
- Tools like Partition Wizard can help you easily align partitions on your drive
- Enable write caching on your Nvme Ssd- Write caching allows data to be stored in memory temporarily before it is written to the drive, which can improve performance
- This setting is typically found in the Advanced Settings section of the Disk Management tool in Windows
How Can I Make Nvme Run Faster?
If you want to make your NVMe drive run faster, there are a few things you can do. First, make sure you have the latest firmware installed on your drive. You can usually find this information on the manufacturer’s website.
Next, check your BIOS or UEFI settings to make sure that your system is configured to use the NVMe drive as its primary boot device. Finally, if you’re using an older version of Windows, you may need to install the NVMe driver manually. These drivers are typically available from the manufacturer’s website as well.
What is a Good Speed for Nvme Ssd?
Solid state drives (SSDs) have been around for a while now, but they’ve only recently become affordable for the average consumer. One type of SSD that’s becoming more popular is the NVMe (Non-Volatile Memory Express) SSD. So, what is a good speed for an NVMe SSD?
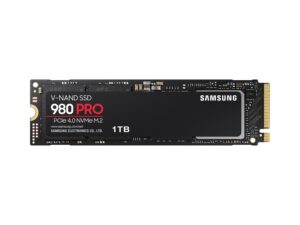
The answer depends on a few factors, such as what you’ll be using the drive for and what your budget is. If you’re just looking for a basic drive to use for everyday tasks, then something like the Samsung 970 EVO Plus would be a good option. It has read speeds of up to 3,500 MB/s and write speeds of up to 2,300 MB/s.
If you need something with a bit more speed, then you might want to consider something like the Intel Optane 905P. This drive has read speeds of up to 2,700 MB/s and write speeds of up to 1,600 MB/s. However, it’s important to note that this drive is more expensive than most NVMe SSDs on the market.
Ultimately, the best NVMe SSD for you will depend on your needs and budget. If you need a fast drive for gaming or other demanding applications, then you’ll want to spend more money on a higher-end model. However, if you just need an upgrade from your current HDD or SATA-based SSD, then something like the Samsung 970 EVO Plus should be plenty fast enough.
How Do I Get the Most Out of My Nvme Ssd?
If you’re looking to get the most out of your NVMe SSD, there are a few things you can do to ensure peak performance. First, make sure your system is properly configured for an NVMe drive. This typically involves enabling support in the BIOS/UEFI and installing the appropriate drivers.
Once that’s done, you can begin adjusting settings to eke out every last bit of speed. Here are a few tips:
Update your storage drivers – Keeping your drivers up-to-date is always important, but it’s especially crucial with new technologies like NVMe. Make sure you’re using the latest drivers from your motherboard or controller manufacturer.Tweak Windows 10 settings – There are a few tweaks you can make in Windows 10 that will help improveNVMe performance.
One is to disable hibernation (go to Control Panel > Power Options > Hardware and Devices > Device Manager and expand “Storage Controllers” then double click on “Intel Rapid Storage Technology Controller” and select “Do not allow hibernation”). Another is to enable write caching for your drive (go through the same steps as above but this time select “Write Cache Enabled”). Finally, you can try changing the SATA Link Power Management setting to “Off” (again, go through Device Manager > Storage Controllers).
You may need to experiment with these settings to find what works best for you.Format using NTFS – The New Technology File System (NTFS) has been optimized for use withNVMe drives and offers better performance than other file systems like FAT32 or exFAT. To format using NTFS, open Disk Management (press Window key + R then type diskmgmt.msc), right-click on your NVMe drive and select Format….
Choose NTFS from the File System dropdown menu and click OK.
How Do I Optimize Windows 10 for Nvme Ssd?
Windows 10 offers native support for Non-Volatile Memory Express (NVMe) solid state drives (SSDs). This means that you don’t need to install any third-party drivers or utilities to get the best performance from your NVMe SSD. In this article, we’ll show you how to optimize Windows 10 for NVMe SSDs.
First, let’s make sure that your NVMe SSD is properly connected. If you’re using a PCIe adapter card, make sure that it’s properly seated in the slot and that all of the power and data cables are securely connected. If you’re using an M.2 drive, make sure that it’s firmly inserted into the M.2 slot on your motherboard.
Once everything is plugged in, boot into Windows 10 and open the Disk Management tool by pressing Windows Key + R, typing diskmgmt.msc into the Run dialog box, and pressing Enter.In the Disk Management window, find your NVMe SSD in the list of disks. It will likely be labeled as “Disk 1” or something similar.
Right-click on it and select “Initialize Disk.” In the Initialize Disk dialog box, choose MBR (Master Boot Record) if you plan on installing Windows 7 or earlier on this drive; choose GPT (GUID Partition Table) if you plan on installing Windows 8 or later. Click OK to initialize the disk.
Once the disk has been initialized, right-click on it again and select “New Simple Volume.” In the New Simple Volume Wizard, click Next to continue past the Welcome screen. On the Specify Volume Size screen, leave both options set to their defaults and click Next to continue; this will create a single partition that uses all of available space on your NVMe SSD.
On The Assign Drive Letter Or Path screen, choose an unused drive letter from drop-down menu and click Next; alternatively, you can specify a mount point for this drive if you prefer not do use drive letters.. On The Format Partition screen format options: Choose NTFS unless you have a specific reason not too; doing so will allow files larger than 4GB to be stored on this drive Click next through screens until format starts This process may take some time depending upon size of total volume When finished close out wizard Your new volume should now appear under This PC in File Explorer with any other storage devices attached to system Congratulations!
How to Optimize SSD on Windows 10 /SSD USER WATCH THIS /SSD NEED THIS
How to Improve Ssd Performance in Windows 10
Solid State Drives (SSDs) are becoming more and more popular, but they still tend to be a bit more expensive than traditional hard drives. If you’ve decided to make the switch to an SSD, congratulations! You’re about to experience much faster boot times and overall improved performance.
That said, there are a few things you can do to ensure that your SSD is performing at its best. Here are four tips for improving SSD performance in Windows 10:1. Use the correct SATA port
If your motherboard has multiple SATA ports, be sure to use the one that’s specifically labeled for SSDs. This will ensure that your drive is getting the full 6Gbps of bandwidth it needs to perform optimally.2. Keep your drive updated with the latest firmware
Firmware updates can sometimes improve performance or fix bugs, so it’s always a good idea to keep your SSD’s firmware up-to-date. You can usually check for updates from within your BIOS or by visiting the manufacturer’s website.3. Avoid filling up your drive too much
While modern SSDs can handle being nearly full, it’s still best to leave some free space on the drive if possible. This gives the drive some “breathing room” and can help improve performance slightly. Aim for leaving at least 15% of the total capacity free if you can.
Make Ssd Faster Windows 11
As any PC user knows, one of the most frustrating things can be a slow computer. It seems like no matter what you do, your computer just doesn’t want to cooperate. Even with all of the advancements in technology, there are still some kinks that need to be worked out.
One common problem is a slow solid state drive (SSD).If you have an SSD and it’s running slowly, there are a few things you can do to try and speed it up. The first thing you should check is your TRIM status.
TRIM is a command that helps keep your SSD running at optimal speeds by cleaning up unused space. To check your TRIM status in Windows 10, open the Command Prompt and type “fsutil behavior query DisableDeleteNotify” (without the quotes). If the results say “DisableDeleteNotify = 0″ then TRIM is enabled on your system.
If it says “DisableDeleteNotify = 1″ then TRIM is disabled and you’ll want to enable it for better performance.Another way to help speed up your SSD is to make sure you have the latest firmware installed. Firmware updates can often provide significant performance gains so it’s worth checking if one is available for your particular model of SSD.
You can usually find firmware updates on the manufacturer’s website – just be sure to download and install the correct one for your drive!Finally, if all else fails, you may need to simply replace your SSD with a new one. This isn’t always necessary but if nothing else seems to be working then it may be time for an upgrade.
Luckily, SSD prices have come down significantly in recent years so this shouldn’t break the bank too much!
Nvme Bios Settings
If you’re looking to get the most out of your NVMe SSD, you’ll need to make sure your BIOS is configured correctly. In this article, we’ll go over the basics of NVMe BIOS settings and how to ensure your SSD is running at its best.The first thing to keep in mind is that not all BIOSes are created equal.
Some older BIOSes may not have support for NVMe drives at all, so it’s important to check that yours does before proceeding. If you’re not sure, a quick Google search should tell you what version of BIOS your motherboard uses and whether or not it supports NVMe drives.Assuming your BIOS does support NVMe drives, the next step is to make sure the drive is properly detected.
In most cases, this will happen automatically when you boot up with anNVMe drive installed, but it’s always good to check in the BIOS just to be sure. Once you’ve confirmed that the drive is detected, take a look at the boot order and make sure it’s set to boot from the NVMe drive first. This will ensure that your system boots as quickly as possible from the fast NVMe storage.
The final step is to configure any special settings that may be necessary for optimal performance. This will vary depending on both your motherboard and SSD, so consult your documentation for specific instructions. However, there are a few general things to keep in mind.
First, many motherboards have an “NVME Performance Mode” setting which should be enabled for best results – again, consult your documentation if unsure. Second, some systems require changes to SATA controller mode in order for an NVME SSDto work properly – again refer to your documentation here if needed. Finally, if you’re using an Intel CPU with integrated graphics (iGPU), there’s a setting in the BIOS called “IGPU Multi-Monitor” which should be disabled for best performance – once again refer toyour motherboard manual if unsure about this one.
That’s all there is too it! With these simple steps out of the way, you can enjoy blazing fast speed fromyour new NVMe SSD!
How to Enable Nvme in Bios Asus
Do you have an Asus computer with an Nvme drive that you’re trying to use, but don’t know how to enable it in the BIOS? Well, you’re in luck, because this guide will show you exactly how to do it.First, let’s make sure that your computer actually has an Nvme drive.
To do this, open up the Device Manager (you can search for it in the Start menu). Once it’s open, expand the “Disk drives” section. If you see anything listed under there that says “Nvme”, then congrats, you have an Nvme drive!
Now that we’ve confirmed that your computer has an Nvme drive, let’s go ahead and enable it in the BIOS. To do this, restart your computer and enter into the BIOS settings (the key to press to enter BIOS varies from motherboard to motherboard; on my Asus motherboard, I have to press F2 during boot). Once you’re in the BIOS settings, navigate to the “Boot” tab.
On this tab, there should be a setting called “Boot Priority”. Select this setting and change it from “Legacy” to “UEFI”. This will ensure that your computer boots into UEFI mode from now on (which is required for using Nvme drives).
Save your changes and exit out of the BIOS.That’s all there is to it! Now your Asus computer should be able to make full use of any Nvme drives that are installed.
Conclusion
If you want to speed up your Nvme SSD, there are a few things you can do. One is to make sure that you’re using the latest drivers for your SSD. You can also try changing the controller mode from AHCI to NVMe in your BIOS settings.
Finally, if you’re using Windows 10, you can enable the “Fast Startup” feature.

Harold Williams is a senior writer and technical editor at Drives Hero with 20+ years of experience in IT administration. He specializes in storage systems, SSD reviews, and performance testing, bringing real-world insight to every guide.