How to Replace Sata Cable? Step-By-Step!
1. Unplug the power cable and any other cables connected to the hard drive (optical, USB, etc.).
2. Remove the side panel of your computer case to access the internal components.
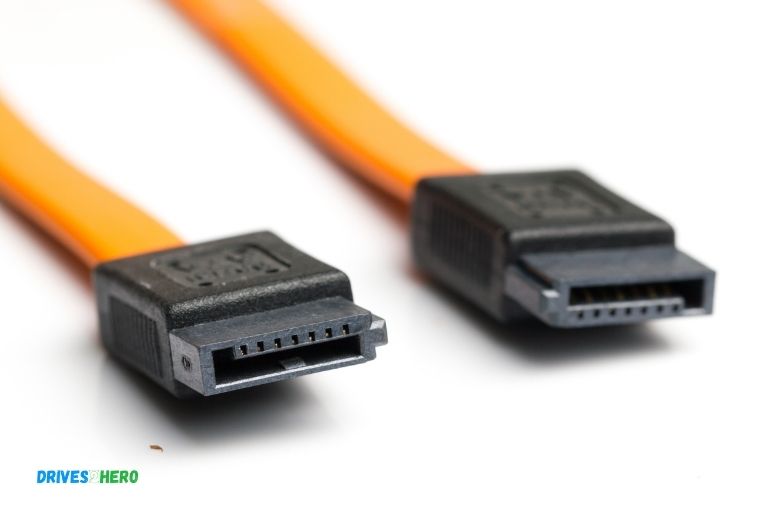
To replace the SATA cable, first unplug the power and data cables from your hard drive. Then, unscrew any screws holding the current Sata cable in place.
Carefully remove it from its slot and plug in a new one. Make sure all connections are secure before powering on your computer again.
Steps to Replace SATA Cable:
- Power down your computer and unplug it from the wall.
- Open the case of your computer by removing the screws or sliding the panels.
- Locate the SATA cable on your motherboard and the device you want to replace it with.
- Carefully remove the old SATA cable by gently pulling it out of its socket.
- Connect the new SATA cable to the device and the motherboard.
- Secure the new cable in place by tightening any screws or clips.
- Close the case of your computer and plug it back in.
- Power on your computer and check if the new SATA cable is working properly.
Can I Replace Sata Cable?
Yes, SATA cables can be replaced.
Here are a few tips to keep in mind:
• Check the length and shape of the replacement cable
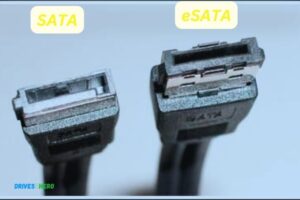
• Make sure it has the same connectors as your existing one
• Consider purchasing an additional power cable if needed.
Replacing a SATA cable is fairly straightforward and requires minimal setup. With just a few steps, you’ll have your device up and running again with its new SATA cable.
How Do I Install a New Sata Cable?
Installing a new SATA cable is easy.
Follow these steps:
– Unplug the power to your computer.
– Locate the hard drive which will be receiving the new SATA cable.
– Remove any screws holding it in place, then carefully remove it from its slot.
– Attach one end of the SATA cable to the hard drive and connect its other end to an available port on your motherboard or expansion card.
– Securely fasten both ends with screws if necessary.
– Replace your computer’s cover, plug in power and boot up as usual!
How Do I Know If My Sata Cable is Damaged?
A SATA cable can become damaged due to age, wear and tear, or improper use. To determine if your cable is damaged, look for the following signs:
• Check for physical damage – Look closely at each end of the cable. If you notice any cuts or bends in the wires or connectors, it’s likely that your SATA cable is faulty.
• Test the connection – Attempt to connect the SATA cables to a device such as a hard drive and see if it works correctly. If it doesn’t work properly with one device but then functions correctly with another one, then there might be an issue with your SATA cables.
• Perform a continuity test – Connect both ends of your cable together using an ohmmeter and check whether current flows through them correctly. A broken connection will result in no current flow between them.
If any of these tests lead you to believe that your SATA cables are damaged, replace them immediately as continued use could cause further issues for your system components.
How Do I Remove the Sata Cable from My Motherboard?
To remove the SATA cable from your motherboard:
* Unplug the power cord.
* Gently pull the connector away from its port to unplug it.
* Firmly grasp both ends of the SATA cable and gently pull them apart.
This will safely disconnect the cable, allowing you to replace or upgrade as needed.
Broken Sata Connector on Hdd
A broken SATA connector on a hard drive can be a serious issue. It is important to note that the SATA connector is not repairable, meaning that you will need to either replace the entire hard drive or purchase an external adapter in order to continue using it.
Additionally, when replacing a SATA connector, it is imperative that you use only original parts and follow manufacturer instructions carefully so as not to damage other components of the device.
How to Remove Sata Power Cable from Hard Drive
Removing a SATA power cable from a hard drive is simple and straightforward. All that’s needed is an appropriate tool to loosen the retaining screws, such as a Phillips-head screwdriver or nut driver. Simply loosen the screws and gently pull out the power cable from its socket on the hard drive.
Care should be taken to ensure that no pins are damaged in the process of removing or replacing the power cable.
Once removed, your hard drive will be disconnected from its external power source and can then be used with other devices or components.
Broken Sata Connector on Ssd
If your laptop’s Solid State Drive (SSD) is no longer working, it could be due to a broken SATA connector.
This connection between the drive and the motherboard may become damaged if there’s an excessive amount of movement or shocks applied to the laptop. If you believe that this is causing your SSD issue, then replacing the SATA connector will likely solve it.
Frequently Asked Question
What Tools Do I Need to Replace a Sata Cable ?
To replace a SATA cable, you will need a screwdriver and new SATA cable.
How Do I Know When It’S Time to Replace My Sata Cable ?
When your SATA cable is not providing the performance you expect from it, or when it starts showing signs of wear and tear, then it’s time to replace it.
What are the Risks Associated With Replacing a Sata Cable ?
The main risks associated with replacing a SATA cable include: physical damage to the drive, incorrect installation of the cables, and overheating due to poor ventilation. Additionally, improper handling can also cause static electricity which may damage components on the motherboard or hard drive.
Are There Any Special Instructions for Replacing a Sata Cable in Specific Types of Devices ?
Yes, there are special instructions for replacing a SATA cable in specific types of devices. Depending on the device, these instructions may include steps such as removing any screws or clips holding the existing cable in place and disconnecting it from the drive, inserting and connecting the new SATA cable to both ends of the drive, and finally re-securing any components that were removed during installation.
Conclusion
Replacing a SATA cable is quite simple and can be done in just a few steps. Once the old or damaged cable has been removed, the new one should be inserted into place. Once secure, you should then attach the power supply and data connectors to their respective ports on your hard drive.
After that, it is important to make sure that all screws are tightened correctly so as not to cause further damage or malfunctions with your device. By following these steps, replacing a SATA cable will take no time at all and you can get back to using your device with ease.

