How to Remove Sata Power Cable? 10 Easy Steps!
To remove a SATA power cable, first, ensure your computer is completely powered off and unplugged from any power source.
Next, open the computer case to access the interior. Then, locate the SATA power cable connected to your hard drive.
Gently wiggle the connector side to side while applying consistent easy pull to disconnect it. Be cautious not to pull too hard to avoid damaging the cable or the port.
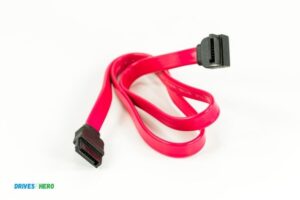
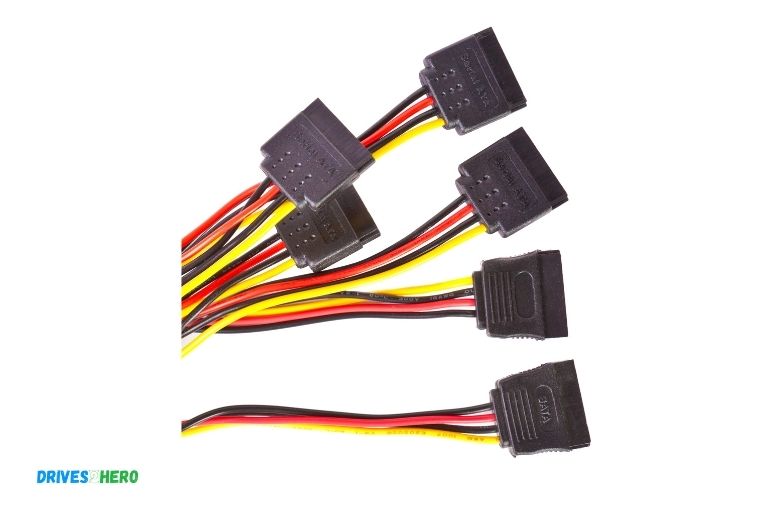
The SATA power cable supplies power from your computer’s power supply to your hard drive. It’s a larger, 15-pin connector that may be connected to your hard drive, SSD, or optical drive. It’s important to remove this cable carefully to avoid damaging any components.
When handling the SATA power cable, it’s crucial to be gentle and patient. Hurrying the process or using excess force could result in damage to the cable or the port, potentially causing further issues with your computer’s operation.
Always ensure you’re working in a static-free environment, as static electricity can harm the components. Lastly, while it’s possible to perform this task alone.
10 Steps: Removing a SATA Power Cable
| Steps | Description |
|---|---|
| 1 | Turn Off The Computer |
| 2 | Disconnect The Power Cable |
| 3 | Open The Computer Case |
| 4 | Find The SATA Power Cable |
| 5 | Identify The Connector Clip |
| 6 | Press The SATA Cable Clip |
| 7 | Pull The Cable Out |
| 8 | Repeat If Necessary |
| 9 | Close The Computer Case |
| 10 | Reconnect The Power Cable |
Key Takeaway
Five Facts About: How to Remove Sata Power Cable
Source: Lifewire, PCMag, Techopedia, MyFixGuide, OnlineTechTips
Preparing For Cable Removal
Learn how to efficiently remove the SATA power cable with this comprehensive guideline. Follow these steps to safely prepare for cable removal and avoid common pitfalls.
Before removing a SATA power cable from your device, it is important to properly prepare. This involves gathering the necessary tools, powering down the device, and discharging any static electricity to ensure a safe and smooth removal process.
Gathering The Necessary Tools:
- Screwdriver: Having a screwdriver at hand is important as it will be required to open the device and access the SATA power cable.
- Anti-static wrist strap: An anti-static wrist strap can help safeguard your device from potential damage caused by static electricity.
- Work gloves: Wearing work gloves can provide extra protection for your hands during the cable removal process.
- Flashlight: A flashlight will come in handy if the area you are working in is poorly lit, allowing you to clearly see what you are doing.
Powering Down The Device:
To avoid any potential electrical mishaps, it is crucial to power down the device before attempting to remove the SATA power cable.
Follow these steps:
- Save and close any open files or applications on your device.
- Click on the “Start” menu on your computer screen and select “Shut Down” or “Power Off.”
- Wait for your device to completely power down before proceeding with the cable removal.
Discharging Static Electricity:
Static electricity can cause damage to sensitive electronic components, so it’s important to discharge it before removing the SATA power cable.
Here’s how:
- Ensure that you are properly grounded by using an anti-static wrist strap or touching a grounded metal surface.
- If using an anti-static wrist strap, connect one end to your wrist and the other end to a metal part of the device’s chassis.
- If you don’t have an anti-static wrist strap, touch a grounded metal surface to discharge any static electricity. This could be the metal casing on a nearby appliance or the metal portion of a grounded electrical outlet.
By following these steps and preparing adequately, you can safely remove a SATA power cable from your device.
Remember to exercise caution and take your time to avoid any unnecessary damage to your device or yourself.
Locating The Sata Power Cable
Locating the SATA power cable is an essential step in removing it. This full guideline will help you understand the process and easily remove the SATA power cable from your device.
Follow the steps carefully to ensure a smooth removal process:
Are you looking to remove the SATA power cable? This guide will walk you through the process step-by-step, starting with locating the cable within your device.
Whether you’re upgrading components or troubleshooting, identifying the SATA power cable’s location is the first crucial step.
Here’s how you can find the SATA power cable within your device:
- Open the case of your computer or external device by removing any screws or latches securing it.
- Once the case is open, visually scan the components inside to locate the SATA power cable.
- Look for a thin, flat cable that connects to the hard drive or other SATA devices. It usually has a black or red connector.
- Follow the cable from the device it is connected to back to the power supply unit (PSU). This will help you locate the other end of the SATA power cable.
With these steps, you’ll be able to identify the SATA power cable’s location within your device easily and efficiently.
Now that we have found the cable, it’s time to move on to the next step: cable routing and management.
Disconnecting The Sata Power Cable
Disconnecting the SATA power cable is an essential step when removing it. Follow our comprehensive guide for a hassle-free process with clear instructions and helpful tips. Safely disconnect the cable without any worries.
Assessing The Type Of Connector Used
- The first step in removing a SATA power cable is to determine the type of connector used. This is important because different types of connectors may require slightly different removal methods.
- Look closely at the SATA power cable and the connection port on the device to identify the type of connector used.
- Common SATA power connectors include the standard 15-pin connector, a slimline connector, or a right-angle connector.
- Ensure you have a clear understanding of the connector type before proceeding with the removal process.
Gently Detaching The Cable From The Device
- Once you have identified the connector type, it’s important to remove the SATA power cable gently to avoid any damage to the device or the cable itself.
- Firmly hold the connector, making sure not to pull or exert excessive force.
- Wiggle the connector slightly from side to side to loosen it if it feels snug or stuck in place.
- Slowly and carefully pull the connector away from the device, applying even pressure to avoid any sudden tugs or jerks.
- If you encounter resistance, stop and reassess the removal process to prevent any potential damage.
- If necessary, use a small, non-metallic tool, such as a plastic pry tool or a flathead screwdriver, to help gently pry the connector out.
- Take your time and be patient during the removal process to ensure a clean and safe removal.
Remember, it’s essential to approach the removal of a SATA power cable with caution to prevent any unnecessary damage. Following these guidelines will help you safely disconnect the cable without any hassle or harm.
Troubleshooting Common Issues
Learn how to troubleshoot common issues with SATA power cables. Our comprehensive guide provides step-by-step instructions on safely removing the cable for easy troubleshooting. Discover the solutions you need to keep your computer running smoothly.
Handling Stubborn Or Stuck Connectors:
- Gently wiggle the connector back and forth to loosen it from the socket.
- Use a pair of pliers with a soft grip to provide better leverage.
- Apply even pressure to both sides of the connector while pulling it straight out.
- If the connector is still stuck, try using a small amount of silicone lubricant to reduce friction.
- Avoid using excessive force as it may damage the connector or the socket.
Dealing With Tight Spaces Or Limited Accessibility:
- Use a flashlight to identify the best angle and approach for accessing the connector.
- If possible, remove any nearby components that may obstruct access.
- Use a pair of needle-nose pliers to reach deep or narrow spaces.
- Consider using a cable extension or a flexible cable adapter for better reach.
- Take your time and be patient when working in tight spaces to avoid accidental damage.
Overcoming Resistance Or Tension During Removal:
- Before attempting removal, ensure that your device is fully powered off and unplugged.
- Firmly grip the connector and apply a steady pulling motion to remove it.
- Use a small amount of isopropyl alcohol to clean any corrosion or debris that may be causing resistance.
- Check for any locking tabs or levers that may need to be released before removing the connector.
- If necessary, use a small flathead screwdriver to gently pry the connector loose.
Remember, it’s important to handle these tasks with care. If you encounter any difficulties or feel unsure, it’s always a good idea to seek professional assistance to avoid causing damage to your equipment.
Safety Precautions And Best Practices
Learn the safety precautions and best practices for removing a SATA power cable with this comprehensive guideline. Ensure a smooth and risk-free process by following these step-by-step instructions.
Using proper grounding techniques:
Before starting the process of removing a SATA power cable, it is crucial to ensure that you are working in a safe environment.
Grounding yourself eliminates any static charges that could potentially damage sensitive components.
Here are some recommended grounding techniques:
- Wear an anti-static wrist strap or an anti-static grounding mat to discharge any static electricity from your body.
- Connect the wrist strap or mat to a grounded object, such as a metal part of the computer case or an electrical ground.
- Make sure to touch the grounded object periodically to maintain a continuous grounding connection.
Protecting against accidental damage or injury:
When dealing with hardware components, it is important to prioritize safety to prevent accidental damage or injury.
Follow these best practices to ensure a smooth removal process:
- Power off your computer and unplug it from the electrical outlet before starting any work.
- Allow sufficient time for the computer to cool down before working on it to avoid burns from hot components.
- Handle cables and connectors with care to prevent bending or breaking.
- Avoid placing unnecessary strain on the cables by gently pulling them from the connectors instead of yanking or twisting them forcefully.
- Use proper tools, such as a small, non-magnetic screwdriver, to remove the SATA power cable. Avoid using excessive force that may damage the connector or surrounding components.
- Inspect the cable for any signs of damage, such as frayed wires or bent pins, before reinstallation.
- Double-check the cable connections to ensure they are properly seated and secured after removal.
Being mindful of delicate components and connections:
While removing a SATA power cable, it is important to be aware of the delicate components and connections to prevent any unnecessary damage.
Keep the following considerations in mind:
- Avoid touching the delicate pins or connectors directly. Instead, grasp the connectors firmly by their housings and gently wiggle them to remove.
- Take note of the cable routing and any obstacles that may impede the removal process. Safely navigate around delicate components, such as cooling fans or circuit boards, while removing the cable.
- Pay attention to the orientation of the cable connectors and ensure they are correctly aligned when reattaching or connecting the new cable.
- Store the removed SATA power cable in a safe location, away from sharp objects or excessive heat, to prevent damage before reinstallation or replacement.
Remember, practicing proper safety precautions and following best practices will help you remove a SATA power cable safely and avoid any potential damage to your computer’s components.
By being mindful of grounding techniques, preventing accidental damage or injury, and handling delicate components with care, you can successfully complete the task without any hiccups.
Final Thoughts And Additional Resources
Discover the full guideline on how to remove a SATA power cable effortlessly. Find additional resources to further assist you in this process.
Recap On The Cable Removal Process
- Disconnecting the SATA power cable is a simple procedure that involves a few steps.
- Begin by locating the SATA power connector on your device, which is typically rectangular in shape and consists of multiple pins.
- Gently grip the cable near the connector, ensuring you have a firm hold.
- Slowly and steadily pull the cable straight out from the connector, avoiding any excessive force or twisting motions.
- Double-check that the cable is completely detached before moving on to avoid any accidental damage.
Tips For Reattaching The Sata Power Cable
If you need to reattach the SATA power cable, follow these tips for a smooth and successful process:
- Align the connector with the corresponding port on your device, making sure the pins match.
- Firmly push the connector into the port until it is fully seated, ensuring a secure connection.
- Avoid applying excessive force or bending the cable during reattachment to prevent any potential damage.
- Check that the cable is securely fastened by giving it a gentle tug, ensuring it doesn’t easily come loose.
- Once reattached, ensure that the cable is not obstructing other components or cables within your device.
Recommended Tools And Resources For Troubleshooting
Sometimes issues may arise while removing or reattaching the SATA power cable.
Here are some helpful tools and resources for troubleshooting:
- Cable tester: Use a cable tester to check the continuity and integrity of the SATA power cable. This can help identify any potential faults or issues.
- Online forums and communities: Joining online forums or communities related to computer hardware can provide valuable insights from experienced users and professionals.
- Manufacturer’s support: If you encounter persistent difficulties, reaching out to the manufacturer’s support team can provide specific guidance tailored to your device.
- YouTube tutorials: Visual tutorials on YouTube can be an excellent resource, offering step-by-step guidance on removing and reattaching SATA power cables.
- User manuals: Consult the user manual or documentation provided with your device for detailed instructions and troubleshooting tips specific to your model.
Remember, removing and reattaching the SATA power cable requires careful handling and attention to detail. With the proper techniques and resources, you can confidently navigate this process.
Conclusion
To sum up, removing a SATA power cable is a simple yet essential task for computer users. By following the step-by-step guidelines provided you can confidently disconnect the SATA power cable without causing any damage to your system.
Remember to power off your computer and unplug it from the wall before starting the removal process.
Then, locate the SATA power cable and gently detach it from the device. Take care not to force the cable or bend any pins during this process.
Once the cable is detached, you can make any necessary changes to your system or replace the cable if needed.
With these instructions in mind, you can easily remove a SATA power cable and keep your computer running smoothly.
So, the next time you need to handle a SATA power cable, you’ll have the knowledge and confidence to do it safely and effectively.
Bonus About The Topic: How to Remove Sata Power Cable
Is It Safe to Remove Sata Cable?
Yes, it is safe to remove SATA cable.
Here are some tips for doing so safely:
• Power down the device before unplugging any cables.
• Gently pull on the tabs of the connector rather than yanking on the wire itself.
• Be sure to keep track of which port you removed it from and make a mental note or take a photo for reference when plugging back in.
Once these steps have been followed, disconnecting and reconnecting SATA cables should be a simple process that can be done with minimal risk.
Are Sata Power Cables Hot Swappable?
Yes, SATA power cables are hot swappable. This means that hardware components can be changed without shutting off the computer’s power source.
Benefits of Hot Swapping:
– Allows for quick replacement of malfunctioning parts
– Reduces downtime and costs associated with system repair
– Easier to troubleshoot when compared to non-hot swappable components
Hot swapping is an important feature in modern computing, allowing for easy upgrade and maintenance of a device or system.
How Do You Remove a Motherboard Power Supply Cable?
To remove a motherboard power supply cable:
• Unscrew the retaining screws on either side of the cable.
• Carefully lift up and pull out the connector from its socket.
• Inspect both ends for any dirt or debris, wiping with a cloth if necessary.
• Store in an anti-static bag until ready to install again.
Removing a motherboard power supply cable is relatively straightforward and can be done with minimal tools and effort.
Be sure to take care when handling this delicate component as it is essential for proper functioning of your PC system.
What is the Sata Power Cable on the Case?
The SATA power cable on the case is a four-pin connector that provides power to your computer’s internal hard drives and optical drives.
It looks like this:
4 pin Molex connector, typically yellow in color
*12V +5V (red/black) Power connections
Two grounds (white) for data return lines.
This type of connection ensures reliable and consistent power delivery, which helps ensure stable performance from your components.
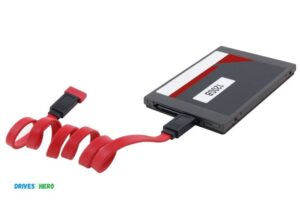
How to Remove Sata Cable from Hard Drive
Removing a SATA cable from your hard drive is relatively straightforward. First, locate the power and data connectors on the back of your hard drive. Next, press down firmly on either side of the connector to release it from its socket.
The cables should then easily slide out from their connection points – just make sure to hold onto them when removing so they don’t get tangled or pulled too far away!
Once disconnected, you can safely disconnect any additional cables connected to your hard drive before storing it away for later use.
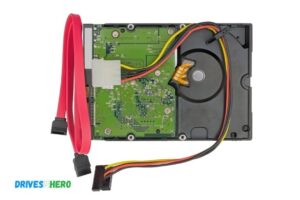
How to Remove Power Cable from Hard Drive
Removing the power cable from a hard drive is a simple process. First, make sure the hard drive is completely powered off and unplugged from both the wall socket and computer.
Next, locate the power connector at the back of the hard drive; it should be easy to identify since it will have several prongs on one end that fit into slots in your computer’s power supply unit.
Carefully pull out this connection to remove the power cable from your hard drive. Once removed, you can then safely store or discard your old hard drive as necessary.
Sata Cable Stuck in Motherboard
If your SATA cable is stuck in the motherboard, you should be extremely careful when trying to remove it.
It’s important to safely unplug the cable from the port without damaging either component. Before attempting to do so, shut down your computer and turn off all power sources.
Wear an anti-static wrist strap and use a static dissipative mat while working with internal components.
Once everything is powered down, gently wiggle the connector back and forth until it comes loose from its socket on the motherboard or drive unit.
If necessary, you may need a pair of needle nose pliers to loosen up any debris that has collected around the plug
FAQ About How to Remove Sata Power Cable
What is the Best Way to Safely Remove a Sata Power Cable ?
The best way to safely remove a SATA power cable is to press the release tab and pull gently on the connector until it comes free.
How Do I Know If My Sata Power Cables are Connected Properly?
To check if the SATA power cables are connected properly, look at the back of your computer to make sure that both ends of the cable are securely plugged into their respective ports.
The connection should be snug and secure without any wiggling or looseness. If you have an LED indicator on your power supply, it should also light up when plugged in correctly.
Is It Necessary to Use Protective Gloves When Disconnecting a Sata Power Cable ?
Yes, it is necessary to use protective gloves when disconnecting a SATA power cable as this can help protect against possible electric shock.
Are There Any Potential Risks Associated With Removing a Sata Power Cable ?
Yes, there are potential risks associated with removing a SATA power cable. Some of the risks include damaging the hard drive, damaging other components connected to the same SATA port, and causing data loss or corruption.
Conclusion
Removing the SATA power cable is a relatively simple process that requires minimal technical knowledge.
All you need to do is to make sure the computer is turned off, unplug any cables from the drive, unscrew and remove its mounting screws, carefully pull out the SATA power cable connector with your fingers or tweezers until it releases from its socket on the drive and lift it away. With these steps in mind, removing your SATA power cable should be a breeze!

Harold Williams is a senior writer and technical editor at Drives Hero with 20+ years of experience in IT administration. He specializes in storage systems, SSD reviews, and performance testing, bringing real-world insight to every guide.