How to Set Up New Sata Ssd? Step By Step Guide!
Setting up a new SATA SSD involves several steps:
1) Connect the SSD to your computer using a SATA cable.
2) Initialize the SSD in Disk Management.
3) Format the SSD with a file system compatible with your operating system.
4) Clone your old drive to the new SSD or install a new operating system.
SATA SSDs are commonly used as storage devices in computers due to their fast data transfer speeds. To set up a new SATA SSD, you first need to physically connect it to your system.
Once connected, you need to initialize the SSD in your computer’s Disk Management settings. This involves setting up a compatible file system so your operating system can recognize and use the SSD.
Finally, you can choose to either clone an existing drive to your SSD or install a fresh operating system.
Setting up a new SATA SSD is a straightforward process that can significantly improve your computer’s performance. This type of drive is faster and more reliable than traditional hard drives.
By connecting, initializing, and formatting your new SSD, you prepare it for use with your operating system.
Whether you’re cloning an existing drive or installing a new operating system, your SATA SSD can bring new life to your computing experience.
10 Steps To Setting Up a New SATA SSD
| Steps | Description |
|---|---|
| 1. Purchase SSD | Buy a new SSD that fits your needs in terms of storage and speed. |
| 2. Prepare Tools | Gather the necessary tools, typically a screwdriver. |
| 3. Power Off PC | Shut down your PC completely and unplug it. |
| 4. Open Case | Open your computer case using the screwdriver. |
| 5. Locate SATA Port | Find an empty SATA port on your motherboard. |
| 6. Connect SSD | Connect the SATA cable to the SSD and then to the motherboard. |
| 7. Secure SSD | Secure the SSD to the case with screws. |
| 8. Connect Power Cable | Connect the power cable from the power supply to the SSD. |
| 9. Close Case | Close your computer case, plug in and switch on your computer. |
| 10. Configure SSD | Set up the new SSD in your operating system for it to be recognized and used. |
Key Takeaway

Five Facts About Setting Up a New SATA SSD
Understanding Sata Ssds
Setting up a new SATA SSD is a straightforward process that can greatly enhance your computer’s performance. Follow these simple steps to install and configure your new storage drive with ease.
SATA SSDs, or Serial ATA solid-state drives, are a popular storage option for many computer users due to their improved performance and reliability compared to traditional hard disk drives (HDDs).
Understanding the basics of SATA SSDs is crucial if you are planning to set up a new one. We will explore what SATA SSDs are, their advantages over other storage options, and how they differ from other storage technologies.
What Are Sata Ssds?
- SATA SSDs are high-speed storage devices that use flash memory technology to store data.
- They connect to the computer’s motherboard using the SATA interface, which allows for fast data transfer between the SSD and other components.
- SATA SSDs come in different capacities, ranging from a few hundred gigabytes to multiple terabytes, catering to various storage needs.
- They are commonly used to store the operating system, software applications, and frequently accessed files, improving overall system performance.
Advantages Of Using Sata Ssds
- Faster Performance: SATA SSDs offer significantly faster data transfer speeds compared to traditional hard disk drives. This means faster boot times, quicker file transfers, and improved overall system responsiveness.
- Reliability and Durability: Unlike HDDs, SATA SSDs have no moving parts, which makes them more resistant to shocks and vibrations. This improves their reliability and reduces the risk of data loss due to physical damage.
- Energy Efficiency: SATA SSDs consume less power than HDDs, resulting in lower energy costs and increased battery life on portable devices.
- Noiseless Operation: As SATA SSDs lack spinning platters and moving read/write heads, they operate silently, eliminating the typical whirring sounds associated with HDDs.
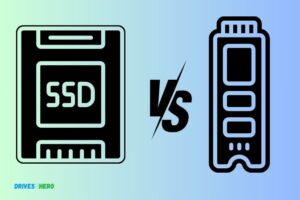
How Sata Ssds Differ From Other Storage Options
SATA SSDs vs. HDDs: The main difference between SATA SSDs and HDDs lies in their technology. HDDs rely on spinning magnetic disks to store and retrieve data, while SATA SSDs use flash memory.
This fundamental difference in technology allows SATA SSDs to offer faster speeds, better durability, and silent operation.
SATA SSDs vs. NVMe SSDs: SATA SSDs and NVMe (Non-Volatile Memory Express) SSDs both offer faster speeds compared to HDDs. However, NVMe SSDs use a different interface that directly connects to the computer’s PCI Express (PCIe) bus, allowing for even faster data transfer rates.
SATA SSDs, on the other hand, are more widely compatible and offer a more cost-effective solution for most users.
SATA SSDs vs. USB Flash Drives: While USB flash drives are also based on flash memory technology, they typically have lower storage capacities and slower transfer speeds compared to SATA SSDs.
SATA SSDs are designed for internal installations and provide higher performance and reliability for system storage needs.
By understanding the fundamentals of SATA SSDs, their advantages, and how they differ from other storage options, you can make an informed decision when setting up a new SATA SSD for your computer.
The next section will guide you through the step-by-step process of setting up a new SATA SSD, ensuring a smooth transition to this high-performance storage solution.
Choosing The Right Sata Ssd
Choosing the right SATA SSD is crucial for setting up your new storage device efficiently. Follow these tips and guidelines to ensure a smooth installation process and optimal performance.
When it comes to setting up a new SATA SSD, one of the most important steps is choosing the right SSD for your needs.
With so many options available in the market, it can be overwhelming to make the best decision.
However, by considering a few key factors, you can ensure that you select the perfect SATA SSD that meets your requirements.
Factors To Consider Before Purchasing A Sata Ssd:
Storage capacity options available:
- Determine the amount of storage space you require for your files, documents, applications, and operating system. Consider your current storage needs as well as any future expansion you may anticipate. Common storage capacity options for SATA SSDs range from 250GB to 4TB. It’s advisable to choose an SSD with slightly more capacity than you presently require to accommodate future growth.
Speed and performance considerations:
- Look for SSDs with high read and write speeds, as they directly impact the overall performance of your system.
- Faster speeds allow for quicker file transfers, faster boot times, and enhanced responsiveness.
- Consider SSDs that feature technologies like NAND flash or NVME (Non-Volatile Memory Express) for improved speed and reliability.
Endurance and durability:
- Evaluate the endurance and durability of the SSD, as it will affect its lifespan and performance over time.
- SSDs with higher endurance ratings are typically better equipped to handle frequent data writes, reducing the risk of performance degradation.
- Look for SSDs with features such as wear-leveling and error correction to enhance durability and reliability.
Compatibility and form factor:
Ensure that the SATA SSD you choose is compatible with your existing hardware. Check the form factor of the SSD to verify that it will physically fit into your computer or laptop.
SATA SSDs typically come in two sizes: 2.5-inch and M.2. Choose the one that is compatible with your device.
Price and budget:
Consider your budget when selecting a SATA SSD. Prices can vary depending on factors such as storage capacity, speed, brand, and additional features.
Compare prices from different manufacturers to find the best balance between performance and your budget.
By taking into account these key factors – storage capacity options, speed and performance considerations, endurance and durability, compatibility and form factor, as well as price and budget – you can confidently choose the right SATA SSD to set up your new storage solution.
Remember to consider your specific needs and future requirements to ensure optimal performance and longevity for your system.
Step-By-Step Guide To Setting Up A New Sata Ssd
This step-by-step guide provides an easy and efficient process for setting up a new SATA SSD. From connecting the SSD to installing the necessary software, this guide will ensure a smooth setup for your storage upgrade.
If you’re looking to upgrade your computer’s storage for improved performance, installing a new SATA SSD is a great choice.
With faster read and write speeds, SSDs can significantly enhance your system’s speed and responsiveness.
We’ll walk you through the process of setting up your new SATA SSD, from backing up your data to initializing and formatting the drive.
Backing Up Your Data Before Installation:
- Prioritize data safety by backing up all your important files and documents.
- Create a backup on an external hard drive or cloud storage to ensure nothing is lost.
- Alternatively, use cloning software to duplicate your current hard drive onto the new SSD.
Physically Installing The Sata Ssd:
- Shut down your computer and unplug it from the power source.
- Open your computer’s case following the manufacturer’s instructions.
- Locate the SATA slots on your motherboard and the corresponding power connectors.
- Attach the SATA cable to the SSD and connect it to an available SATA slot on the motherboard.
- Attach the power cable to the SSD, ensuring a secure connection.
- Close the computer’s case and plug it back into the power source.
Initializing And Formatting The New Drive:
- Start your computer and access the BIOS settings by pressing the appropriate key during startup (usually F2, Del, or Esc).
- Navigate to the storage configuration section and locate the newly installed SSD.
- Initialize the SSD from the BIOS settings to prepare it for formatting. Save any changes made in the BIOS.
- Restart your computer and allow it to boot from your primary operating system.
- Open the Disk Management utility in Windows or Disk Utility in macOS.
- Locate the new SSD drive and format it according to your preferences (e.g., NTFS for Windows, APFS for macOS).
- Assign a drive letter or mount the drive to make it accessible in your file explorer.
Congratulations! You have successfully set up your new SATA SSD. Enjoy the improved performance and faster data transfer speeds.
Remember to keep your old hard drive intact until you’ve verified that all your data has been successfully transferred to the new SSD.
Transferring Data To The New Sata Ssd
Learn how to effortlessly transfer data to your new SATA SSD with our easy step-by-step guide. Set up your SSD quickly and efficiently without any hassle.
Are you excited about upgrading your storage to a new SATA SSD? Well, you’re in luck! In this guide, we’ll delve into the various methods for transferring data from your old drive to the shiny new SATA SSD.
Whether you prefer using cloning software or manually transferring files, we’ve got you covered.
Methods For Transferring Data From An Old Drive:
Using cloning software for data migration:
Cloning software provides a hassle-free way to transfer all your data from the old drive to the new SATA SSD.
Here’s how it works:
- Connect both the old drive and the new SSD to your computer.
- Launch the cloning software and select the option to clone or migrate data.
- Follow the on-screen instructions to choose the source drive (old drive) and the destination drive (new SATA SSD).
- Start the cloning process and wait for it to complete.
- Once the cloning is done, you can disconnect the old drive and start using your new SATA SSD with all your data intact!
Manually transferring files to the new drive:
If you prefer a more selective approach in transferring your files, you can manually copy and paste them to the new SATA SSD.
Here’s how to do it:
- Connect both the old drive and the new SSD to your computer.
- Open the File Explorer (Windows) or Finder (Mac) and navigate to the old drive.
- Select the files and folders you want to transfer to the new SSD by either dragging and dropping or using the copy and paste method.
- Navigate to the new SATA SSD and paste the copied files and folders.
- Wait for the transfer process to complete, and you’re good to go!
So, whether you prefer the convenience of cloning software or the control of manual file transfer, these methods will help you seamlessly transfer all your precious data to your new SATA SSD.
Enjoy the improved performance and storage capacity with your upgraded setup!
Optimizing Performance And Settings
Learn how to optimize the performance and settings of your new SATA SSD for improved speed and efficiency.
Set up your SSD with these easy-to-follow steps to maximize its potential and enhance your overall computing experience.
Setting up a new SATA SSD is just the first step towards a faster and more efficient storage solution. To truly optimize the performance of your SSD, there are a few settings and configurations you need to consider.
We will explore how to enable TRIM for SSD maintenance, check and update your firmware, and adjust power settings for optimal performance.
Enabling Trim For Ssd Maintenance
One of the key features for maintaining the performance of your SSD is TRIM. TRIM helps the operating system inform the SSD which data blocks are no longer in use and can be erased.
This enhances the overall performance and lifespan of your SSD.
To enable TRIM:
- Open the Command Prompt as an administrator.
- Type “fsutil behavior set DisableDeleteNotify 0” and press Enter.
- TRIM is now enabled for your SSD, ensuring efficient maintenance and better performance.
Checking And Updating The Firmware
Firmware updates often contain important improvements and bug fixes that can enhance the performance and compatibility of your SSD.
To check and update the firmware:
- Visit the manufacturer’s website and download the latest firmware for your specific SSD model.
- Follow the manufacturer’s instructions on how to update the firmware.
- Make sure to back up your data before proceeding with the firmware update.
- After the update is complete, you can enjoy the benefits of improved performance and compatibility.
Adjusting Power Settings For Optimal Performance
To ensure optimal performance, you may need to adjust the power settings of your SSD. By default, the power settings are typically set to balance energy efficiency and performance.
However, adjusting these settings can help you maximize the performance of your SSD.
Here are a few tips:
- Open the Power Options in the Control Panel.
- Select the “High Performance” power plan to prioritize maximum performance.
- Customize the power plan settings to prevent the system from entering sleep mode or turning off the hard disk.
- Disable any power-saving features that might impact the performance of your SSD.
- Apply the changes and experience improved performance from your SSD.
Optimizing the performance and settings of your new SATA SSD is essential to make the most of this advanced storage technology.
By enabling TRIM, checking and updating the firmware, and adjusting power settings, you can maximize the speed, efficiency, and lifespan of your SSD.
Take the time to follow these simple steps, and you’ll reap the benefits of a high-performing storage solution.
Troubleshooting Common Issues
Having trouble setting up a new SATA SSD? Follow these simple steps to troubleshoot common issues and get your SSD up and running smoothly.
If you’ve recently set up a new SATA SSD (Solid-State Drive) and are experiencing issues, don’t fret! We’re here to help you troubleshoot common problems that may arise during the process.
Below, you’ll find solutions for common issues, including SATA SSD not being recognized by the system, slow boot times after installation, and dealing with compatibility issues.
Sata Ssd Not Recognized By The System:
- Check the SATA cable connection: Ensure that the SATA cable is properly connected to both the SSD and the motherboard. Sometimes, a loose connection can prevent the system from recognizing the SSD.
- Verify the power supply: Ensure that the SATA power cable is connected securely to the SSD and the power supply. A poor connection can cause the SSD to go unnoticed by the system.
- Update your BIOS: Outdated BIOS versions may not have the necessary support for newer SSDs. Visit the manufacturer’s website and check for any available BIOS updates for your motherboard.
- Try a different SATA port: Sometimes, a faulty SATA port can be the culprit. Connect the SSD to a different SATA port on the motherboard to see if it gets recognized.
Slow Boot Times After Installation:
- Optimize the SSD with TRIM: Enable TRIM support on your SSD. TRIM helps to maintain optimum performance by clearing unused data blocks. You can enable TRIM through your operating system settings.
- Check for firmware updates: Visit the manufacturer’s website to check if there are any firmware updates available for your SSD. Firmware updates often include performance enhancements.
- Disable unnecessary startup programs: Check your startup programs and disable any unnecessary ones. Too many startup programs can slow down the boot process.
- Ensure AHCI mode is enabled: In your BIOS settings, make sure that SATA is set to AHCI mode. This mode allows for the best performance and features of your SATA SSD.
Dealing With Compatibility Issues:
- Verify system requirements: Ensure that your system meets the minimum requirements of the SSD you are installing. Check the manufacturer’s specifications for compatibility information.
- Check for driver updates: Visit the manufacturer’s website to check if there are any driver updates available for your SSD. Updated drivers can often enhance compatibility with different systems.
- Consider firmware updates for other hardware: In some cases, firmware updates for other hardware, such as the motherboard or chipset, may be required for optimal compatibility with your new SATA SSD.
- Seek professional help: If you’ve exhausted all troubleshooting steps and are still experiencing compatibility issues, consider reaching out to the manufacturer’s support team for further assistance.
By following these troubleshooting tips, you’ll be able to identify and resolve common issues that may occur when setting up a new SATA SSD.
Remember to double-check your connections, update firmware and drivers, and ensure compatibility with your system for a smooth and efficient SSD experience.
Best Practices For Sata Ssd Maintenance
Discover the best practices for setting up a new SATA SSD with these helpful tips. Learn how to ensure optimal performance and longevity for your SSD with proper maintenance techniques.
To ensure optimal performance and longevity of your SATA SSD, it is crucial to follow best practices for maintenance.
By regularly updating firmware and drivers, cleaning up unnecessary files and folders, and monitoring the health and temperature of your SATA SSD, you can maximize its efficiency and lifespan.
Read on to learn more about each of these practices.
Regularly Updating Firmware And Drivers:
- Regularly check for firmware updates provided by your SSD manufacturer. Firmware updates often bring performance improvements, bug fixes, and enhanced stability to the SSD.
- Visit the manufacturer’s website and download the latest firmware version specific to your SSD model.
- Before updating the firmware, ensure that all data on the SSD is backed up to prevent loss.
- Similarly, keep your system’s drivers updated to ensure compatibility and optimal performance with the SATA SSD.
Cleaning Up Unnecessary Files And Folders:
- Over time, your SATA SSD may become cluttered with unnecessary files and folders, affecting its performance.
- Regularly perform disk cleanup to remove temporary files, internet cache, and other junk files that accumulate on the SSD.
- Uninstall unused applications and delete unnecessary files, freeing up storage space and improving SSD performance.
- Use a disk cleanup tool or built-in system utilities to identify and remove unnecessary files and folders.
Monitoring Health And Temperature Of The Sata Ssd:
- Monitoring the health of your SATA SSD allows you to identify potential issues before they become major problems.
- Use manufacturer-provided SSD monitoring tools or third-party software to check the SSD’s health status, including wear level, SMART attributes, and error rates.
- Keep an eye on the temperature of your SATA SSD to prevent overheating, which can negatively impact performance and lifespan.
- Use monitoring tools to ensure the SSD’s temperature remains within recommended operating limits.
Incorporating these best practices into your SATA SSD maintenance routine will help maximize its performance, longevity, and overall reliability.
Regularly updating firmware and drivers, cleaning up unnecessary files and folders, and monitoring the health and temperature of your SATA SSD are vital steps in ensuring optimal performance and extending the lifespan of your storage device.
FAQ On How To Set Up New Sata Ssd
How Do I Install A New Sata Ssd?
To install a new SATA SSD, follow these steps:
1. Turn off your computer and unplug the power cable.
2. Open the computer case and locate an empty drive bay.
3. Insert the SSD into the bay and secure it with screws.
4. Connect the SATA data cable to the SSD and the motherboard.
5. Connect the SATA power cable to the SSD.
6. Close the computer case and plug the power cable back in.
7. Turn on your computer and ensure that the SSD is recognized in the BIOS.
Remember to follow these instructions carefully to install your new
How Do I Get My Computer To Recognize My New Sata Ssd?
To get your computer to recognize your new SATA SSD, follow these steps:
1. Ensure your SSD is properly connected to your computer’s SATA port.
2. Access your computer’s BIOS settings and check if the SSD is detected.
3. If not detected, restart your computer and enter the BIOS again to check.
4. If still not recognized, try connecting the SSD to a different SATA port on your motherboard.
How Do I Activate A New Ssd In My Computer?
To activate a new SSD in your computer, follow these steps:
1. Shut down your computer and open the case.
2. Locate an available SATA port on the motherboard and connect the SSD.
3. Secure the SSD in place using screws or brackets.
4. Boot up your computer and enter the BIOS settings.
5. Identify the new SSD and set it as the boot drive.
6. Save the changes and exit the BIOS.
7. Install the operating system on the SSD and transfer your files if needed.
Remember to back up your data before making any changes to avoid losing any important information.
How Do I Set Up A New Sata Ssd?
To set up a new SATA SSD, first, shut down your computer. Then, connect the SATA SSD to an available SATA port on your motherboard. Finally, power on your computer and configure the SSD in your BIOS or through the operating system.
Do I Need To Format A New Sata Ssd?
No, you don’t need to format a new SATA SSD.
Conclusion
Setting up a new SATA SSD may seem daunting at first, but with the right steps and guidance, it can be a straightforward process.
By following the steps outlined in this blog post, you can ensure that your new SSD is properly installed and ready for use.
From preparing your system and gathering the necessary tools, to cloning or installing a fresh operating system, every detail has been covered.
Remember to back up your data and consult the manufacturer’s instructions for any specific requirements. In just a few simple steps, you can enjoy the benefits of a faster and more efficient storage solution.
Upgrade your system today and experience the improved performance that a new SATA SSD can provide. Don’t let the fear of installation hold you back, take the plunge and reap the rewards.

Harold Williams is a senior writer and technical editor at Drives Hero with 20+ years of experience in IT administration. He specializes in storage systems, SSD reviews, and performance testing, bringing real-world insight to every guide.