How to Sleeve Sata Cables? Complete Guideline!
Sata cables should be sleeved by first cutting the cable to the required length. The ends of the cut wires should then be stripped and tinned with a soldering iron, which allows for better insulation and protection.
Next, a heat shrink tube is placed over one end of the wires, followed by a sleeve that matches the size of the wire bundle.
Sata cables are easy to sleeve. To begin, measure the length of the cable you need to sleeve. Cut a piece of sleeving material that is about an inch longer than the measured length of your cable and slide it over one end.
Here is a table:
| Step | Description |
|---|---|
| 1 | Gather materials: heat shrink tubing, scissors, lighter or heat gun, SATA cables. |
| 2 | Measure the length of the cable you want to sleeve and cut a piece of heat shrink tubing to that length. |
| 3 | Slip the heat shrink tubing over the end of the cable, leaving some excess tubing at the end. |
| 4 | Use the lighter or heat gun to apply heat to the tubing. Make sure to move the heat source back and forth to distribute the heat evenly. |
| 5 | As the tubing heats up, it will shrink and conform to the shape of the cable. Continue applying heat until the tubing is snugly fitted to the cable. |
| 6 | Repeat steps 2-5 for each section of the cable you want to sleeve. |
| 7 | Once all sections are sleeved, arrange the cables neatly and use cable ties or velcro straps to secure them together. |
| 8 | Test the cables to make sure they are still functioning properly. |
| 9 | Enjoy your newly sleeved SATA cables! |
How Do You Sleeve a Cable Easily?
Sleeving cables is a simple process that involves inserting the cable into a sleeve and covering it.
Here are some steps to make it easier:
* Measure the length of the cable you need to sleeve, then cut an appropriate length of sleeving material.
* Separate the individual wires within the cable if needed.
* Slide one end of the sleeving over each wire individually, or slide all wires through at once if they’re already separated.
* Pull up on both ends until they meet in the middle and secure with a zip tie or clamp as necessary.
By following these instructions you will have your cables properly sleeved quickly and easily!
Is It Ok to Bend Sata Power Cables?
It is OK to bend SATA power cables, depending on how much tension you apply.
Here are some tips when doing so:
– Use soft hands and minimal force
– Make sure that the cable doesn’t have any kinks or bends in it
– Be careful not to damage the insulation around the wires.
If done properly, bending a SATA power cable won’t cause any harm and can actually help keep your computer neat and organized.
What is the Correct Way to Connect Sata Cables?
The correct way to connect SATA cables is as follows: * Connect one end of the cable to the SATA port on your motherboard.
* Plug the other end into your storage device, such as a hard drive or optical drive.
Make sure that all connections are firmly secured and ensure that no pins are bent during installation for optimal performance. Additionally, it may be helpful to label each cable for future reference.
Watch Video on How to Sleeve Sata Cables
How Do You Put on Sleeves Cables?
Putting on sleeve cables is easy and quick.
Here are the steps:
• Place cable inside the sleeve with patterned side facing up.
• Secure one end of the sleeve with a clamp or zip tie.
• Slide the other end over, being careful not to pinch any wires.
• Secure second end of cable with another clamp or zip tie.
That’s it! In no time at all you’ll have your cables neatly organized and protected from wear and tear.
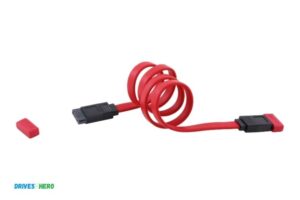
Diy Sata Cables
DIY SATA cables are a great way to save money and customize your computing setup. They’re relatively simple to construct, meaning that even the most novice of computer enthusiasts can make their own high-quality data connections with minimal effort.
With the right tools and supplies, you can easily create custom SATA cables in any length or color combination you desire.
This makes them perfect for anyone looking to optimize their system’s performance while also giving it an individualized aesthetic appeal.
How to Shorten Sata Cable
Shortening a SATA cable is a simple process that can be done with just a few tools. First, you’ll need to measure the length of the cable and decide how much shorter it needs to be.
Then, use wire cutters or scissors to trim off excess material from both ends of the cable until it reaches your desired length. Finally, make sure all connections are securely attached before reusing the shortened SATA cable.
Can You Paint Psu Cables
Yes, you can paint PSU cables. This is a relatively simple process that involves sanding the surface of the cable and then applying an acrylic-based spray paint to the outside of it.
However, it’s important to note that this may not be ideal for all applications as some paints may contain chemicals which could damage your PSU or interfere with its performance.
Additionally, painting your PSU cables should only be done by experienced individuals who are familiar with electronics and understand how to properly handle them.
Frequently Asked Question
How is a Sata Cable Properly Sleeved?
A SATA cable should be properly sleeved by using a heat-shrink sleeve, which is applied to the cable after it has been connected to the device. The heat-shrink sleeve prevents shorting out of any of the electrical components and helps manage excess cabling.
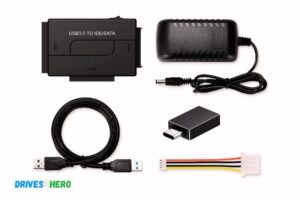
What Tools are Needed to Sleeve a Sata Cable ?
Tools needed to sleeve a SATA cable include wire cutters, heat gun/heat source, covering material for the sleeve (e.g. PET sleeving), and fasteners to secure the ends of the sleeves (e.g. zip ties).
Is It Necessary to Use Heat Shrink When Sleeving a Sata Cable ?
Yes, it is necessary to use heat shrink when sleeving a SATA cable in order to maintain the integrity of the cables and ensure that they are properly insulated. Heat shrink helps protect the wires from damage due to friction or other external forces, as well as providing strain relief on any connections made.
Are There Any Precautions That Should Be Taken When Working With a Sata Cable During the Sleeving Process ?
Yes, there are certain precautions that should be taken when working with a SATA cable during the sleeving process.
These include wearing protective gloves and eye protection, using caution when handling sharp objects such as scissors or knives, and ensuring that the cables are properly insulated before beginning any work.
Additionally, it is important to avoid stretching or bending the cables too much as this can cause damage to them.
Conclusion
Overall, this blog post has provided a helpful overview of how to sleeve SATA cables. It’s important to remember that the process requires some patience and basic tools such as wire cutters and heatshrink tubing. By following the steps outlined in this article, you should be able to safely and effectively sleeve your SATA cables with ease, giving them a neat, professional look.

Harold Williams is a senior writer and technical editor at Drives Hero with 20+ years of experience in IT administration. He specializes in storage systems, SSD reviews, and performance testing, bringing real-world insight to every guide.