How to Use a Sata Cable? 6 Steps!
Using a SATA (Serial Advanced Technology Attachment) cable is a straightforward process. It involves connecting one end of the SATA cable to the SATA port on your motherboard and the other end to your hard drive or SSD.
SATA cables are used to connect hard drives, SSDs and other storage devices to a computer’s motherboard. It’s a high-speed interface used for transferring data between a computer’s motherboard and storage devices.
The cable usually has different connectors for the motherboard and the drive, ensuring a secure connection.
Using a SATA cable is essential for setting up your computer’s storage system. All you have to do is securely connect the cable to the motherboard and the storage device.
It’s a simple process but crucial for the functioning and speed of your system. SATA cables are crucial for data transfer between your storage devices and the motherboard.
They are reliable and widely used in modern computers. Using the correct cable and making secure connections is vital for the proper functioning and speed of your storage system.
6 Steps To Use a SATA Cable
| Steps | Description |
|---|---|
| 1. Power Off | Always remember to power off and unplug your system before installing or connecting any components. |
| 2. Identify Connections | Look for the SATA ports on your motherboard. These are typically labelled as ‘SATA0’, ‘SATA1’, etc. |
| 3. Connect Data Cable | The SATA data cable has two ends. Connect one end to the drive (HDD or SSD) and the other end to the motherboard. |
| 4. Connect Power Cable | If your power supply has a SATA power cable, connect it to the drive. If not, you may use a Molex-to-SATA adapter. |
| 5. Initialize Drive | After all the physical connections are done, power on your computer and initialize the drive using your operating system’s disk management tool. |
| 6. Install OS/Transfer Data | Finally, you can either install a new operating system or transfer data to the newly connected drive. |
Key Takeaway
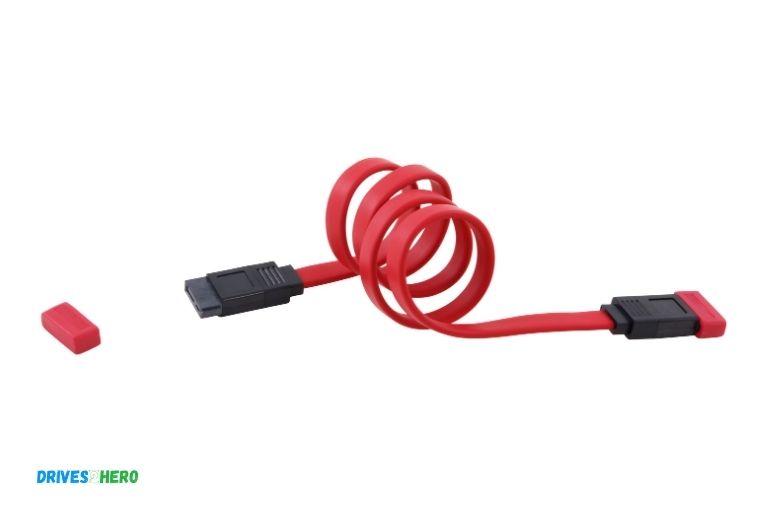
Five Facts About Using a SATA Cable
Understanding Sata Cables
SATA cables are essential for connecting storage devices like hard drives and SSDs to a computer.
To use a SATA cable, simply align the connectors with the appropriate ports on the device and motherboard, ensuring a secure connection for fast data transfer.
SATA cables play a crucial role in computer systems, particularly when it comes to connecting various storage devices such as hard drives, solid-state drives (SSDs), and optical drives.
These cables are essential components that allow for the smooth transmission of data between the motherboard and storage devices.
By understanding SATA cables and their importance, you can ensure efficient data transfer within your computer system.
Sata Cables And Their Importance In Computer Systems:
- SATA cables are thin, flat cables that are used to connect storage devices to the motherboard of a computer.
- They provide a high-speed data transfer interface, ensuring faster and more efficient communication between the storage devices and the computer’s central processing unit (CPU).
- SATA cables are widely used in modern computer systems due to their compatibility with a variety of storage devices, including hard drives, SSDs, and optical drives.
- These cables are designed with multiple data channels, allowing for simultaneous data transmission without compromising on speed and performance.
- SATA cables are essential for enabling the seamless exchange of data, ensuring that your computer system operates smoothly and efficiently.
Exploring The Different Types Of Sata Cables:
SATA Revision 1.0:
- This is the original version of SATA cables, offering a maximum transfer rate of 1.5 Gbps (gigabits per second).
- It is commonly used with older storage devices, providing a reliable connection for slower data transfer requirements.
SATA Revision 2.0 (SATA 3Gbps):
- This version of SATA cables supports a faster transfer rate of up to 3 Gbps.
- It is backward compatible with SATA Revision 1.0, making it compatible with a wide range of storage devices.
- SATA Revision 2.0 is commonly used in mid-range computer systems, offering improved speed and performance.
SATA Revision 3.0 (SATA 6Gbps):
- SATA Revision 3.0 provides the fastest transfer rate of up to 6 Gbps, making it ideal for high-performance storage devices.
- It is backward compatible with both SATA Revision 1.0 and Revision 2.0, ensuring compatibility across different generations of storage devices.
- SATA Revision 3.0 is commonly found in modern computer systems and offers enhanced speed for data-intensive tasks.
Benefits And Advantages Of Using Sata Cables:
Faster data transfer:
- SATA cables provide faster data transfer rates compared to older interfaces such as IDE.
- This allows for quicker access to data, improving overall system performance and responsiveness.
Easy installation and maintenance:
- SATA cables are easy to install and require minimal effort to connect or disconnect storage devices.
- With their straightforward design, they facilitate hassle-free maintenance and component upgrades.
Compatibility and versatility:
- SATA cables are widely compatible with various storage devices, allowing for easy integration into different computer systems.
- They can be used with both hard drives and SSDs, providing flexibility and versatility in storage options.
Improved airflow and cable management:
- SATA cables are thin and flexible, enabling better cable management within a computer system.
- Their compact design allows for improved airflow, reducing heat buildup and ensuring optimal cooling for the components.
Understanding the importance of SATA cables, exploring their different types, and recognizing the benefits they offer can help you make informed decisions when it comes to building or upgrading your computer system.
By utilizing SATA cables effectively, you can enhance data transfer speeds, improve system performance, and create a more efficient computing experience.
How To Connect A Sata Cable?
Learn how to connect a SATA cable with ease. Simply plug one end of the cable into your device’s SATA port, and the other end into your storage drive’s SATA port.
It’s a simple and essential step in setting up your computer or upgrading your storage.
Step-By-Step Guide For Connecting A Sata Cable To Various Devices:
- Begin by identifying the SATA ports on both the device and the motherboard. SATA ports are usually labeled with numbers, such as SATA1, SATA2, etc.
- Ensure that the device and the motherboard are powered off and unplugged from the power source to avoid any electrical accidents.
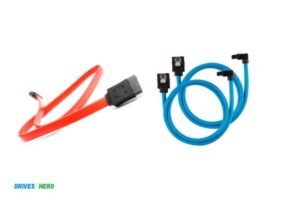
- Take the SATA cable and connect one end to the SATA port on the motherboard. Make sure to align the L-shaped connector with the corresponding port on the motherboard.
- Connect the other end of the SATA cable to the SATA port on the device you’re connecting, such as a hard drive or SSD. Ensure a secure connection by pressing the connector firmly into the port.
- Once both ends of the SATA cable are securely connected, proceed to connect the power cables. SATA cables usually have a separate power connector, which is a slim, L-shaped connector.
- Locate the power connector on the device, usually found near the SATA port. Align the slim L-shaped power connector with the corresponding port on the device.
- Firmly insert the power connector into the port until it is fully connected, ensuring a snug fit.
- Repeat the same steps if you have multiple SATA devices to connect, making sure each device is connected to a separate SATA port on the motherboard.
- Once all the connections are made, double-check that the cables are securely fastened, and there are no loose connections or cables hanging loosely.
- Finally, power on your devices and check if they are being recognized by the system. You can do this by accessing the BIOS or checking the device manager.
Proper Handling And Precautions When Connecting Sata Cables:
- Handle SATA cables with care to avoid any physical damage or bending of the cables.
- Ensure that the device and the motherboard are powered off and unplugged from the power source to avoid any electrical accidents.
- Do not force the connectors into the ports. Align them properly and apply gentle pressure to avoid bending or damaging the connectors or ports.
- Avoid pulling or tugging on the cables excessively, as this can lead to loosening or disconnection of the connectors.
- Keep the cables away from any sharp objects or edges that may cause damage to the cables or insulation.
- When disconnecting SATA cables, gently pull them out by holding the connectors rather than pulling on the cables themselves.
- Regularly check the cables for any signs of wear or damage, such as fraying or exposed wires. Replace any damaged cables immediately to prevent data loss or system instability.
Troubleshooting Common Issues When Connecting Sata Cables:
- If the device is not being recognized by the system, ensure that the cables are securely connected to both the device and the motherboard.
- Check if the SATA ports on the motherboard are enabled in the BIOS settings. If not, enable them and restart the system.
- Try using a different SATA cable to rule out any cable-related issues. Sometimes, faulty cables can cause connection problems.
- Ensure that the power cables are properly connected and delivering power to the devices. Faulty power cables can lead to devices not being detected.
- Reboot the system and access the BIOS to ensure that the SATA ports are set to the correct mode (AHCI or RAID) depending on your system configuration.
- Update the motherboard’s firmware or BIOS to the latest version, as outdated firmware can sometimes cause compatibility issues with SATA devices.
- If all else fails, try connecting the device to a different SATA port on the motherboard. It could be that a specific SATA port is malfunctioning.
Remember, by following these step-by-step instructions, handling the cables with care, and troubleshooting common issues, you can successfully connect SATA cables and ensure smooth operation of your devices.
Installing Sata Cables In Desktop Pcs
Learn how to easily install SATA cables in desktop PCs with this step-by-step guide. Connect your SATA cable to your motherboard and storage device for optimal data transfer and storage capabilities.
Preparing The Computer For Sata Cable Installation:
Before installing SATA cables in a desktop PC, it’s important to prepare the computer properly.
Here are the key steps you need to follow:
- Turn off your computer and unplug it from the power source.
- Open the computer case by removing the screws or latches.
- Locate available SATA ports on the motherboard, which are usually labeled.
- Identify the storage devices where you will connect the SATA cables.
- Ensure that you have the necessary SATA cables and any additional power cables if required.
- Keep in mind that SATA cables have a distinct L-shaped connector design, which helps in proper installation.
Installing Sata Cables On The Motherboard And Storage Devices:
Once you have prepared the computer, you are ready to install the SATA cables.
Follow these steps:
- Take a SATA cable and insert one end into a SATA port on the motherboard, aligning the L-shaped connector with the corresponding port.
- Connect the other end of the SATA cable to the storage device (e.g., hard drive or SSD). Insert it into the corresponding SATA port.
- Repeat the process for each storage device, connecting the SATA cables from each device to an available SATA port on the motherboard.
- Make sure the connections are secure, ensuring that the cables are inserted firmly into the ports.
- If you’re using additional power cables, connect them to the storage devices as well, following the manufacturer’s instructions.
Testing The Sata Connections And Ensuring Proper Installation:
After successfully installing the SATA cables, you need to test the connections and verify proper installation.
Here’s what you should do:
- Close the computer case and secure it with the screws or latches.
- Plug in the power cable and turn on the computer.
- Check the motherboard’s BIOS or UEFI settings to ensure that the connected storage devices are recognized.
- If the devices are recognized, proceed to your operating system and check if the drives are visible.
- To further ensure proper installation, you can transfer some files to and from the connected storage devices to test their functionality.
- In case you encounter any issues, double-check the cable connections and consult the motherboard and storage device manuals for troubleshooting guidance.
By following these steps, you can confidently install SATA cables in your desktop PC and ensure reliable data transfers and storage connectivity.
Configuring Sata Cables In Bios
Configuring SATA cables in the BIOS is a straightforward process that allows you to properly connect and use your SATA devices.
By accessing the BIOS settings, you can ensure that the cables are recognized and properly utilized within your system.
Configuring SATA cables in your BIOS is an essential step to ensure proper functioning and optimal performance of your storage devices.
By accessing the BIOS settings, you can set up the boot priority, storage options, and even optimize the SATA performance.
Accessing The Bios Settings For Sata Configuration:
To configure SATA cables in your BIOS, follow these steps:
- Start your computer and press the designated key (usually Del, F2, or F12) to access the BIOS settings during the boot process.
- Once in the BIOS, navigate to the “Storage” or “SATA Configuration” section.
- Here, you will find options to configure various aspects of your SATA cables, including enabling or disabling SATA ports, configuring RAID settings (if applicable), and adjusting port speeds.
- Use the arrow keys on your keyboard to navigate through the options and make the desired changes.
- Once you have made the necessary changes, save the settings and exit the BIOS.
Setting Up The Boot Priority And Storage Options In Bios:
Configuring the boot priority and storage options in your BIOS allows you to choose the order in which your computer boots from different storage devices.
Here’s how you can do it:
- In the BIOS settings, look for the “Boot” or “Boot Priority” section.
- Here, you can select the primary boot device by rearranging the order of the storage devices listed.
- Use the arrow keys to move your desired boot device to the top of the list.
- Additionally, you can choose the type of storage mode, such as AHCI or IDE, depending on your system configuration and requirements.
- Save the changes and exit the BIOS.
Optimizing Sata Performance Through Bios Settings:
To optimize the performance of your SATA devices, consider the following BIOS settings:
- Enable AHCI (Advanced Host Controller Interface) mode for improved performance and additional features.
- When using SSDs (Solid State Drives), enable TRIM support, which allows the drive to maintain optimal performance over time.
- Adjust the SATA transfer mode to the highest available speed supported by your hardware, such as SATA 3 (6 Gb/s).
- Disable unnecessary features like unused SATA ports or extra storage controllers to free up system resources.
- Update your BIOS firmware to the latest version to ensure compatibility and access any performance optimizations provided by the manufacturer.
By configuring SATA cables in your BIOS and optimizing the settings, you can enhance the performance and reliability of your storage devices.
Ensure that you make changes carefully and refer to your motherboard or system documentation for specific instructions related to your hardware.
Sata Cable Management And Organization
Learn how to effectively manage and organize your SATA cables with these easy steps. Discover the proper way to use a SATA cable and keep your cables tidy for improved airflow and enhanced system performance.
SATA cable management is an essential aspect of optimizing your computer’s performance and maintaining a neat and organized setup.
Proper cable management not only improves airflow within the computer case but also minimizes cable clutter, making it easier to troubleshoot and upgrade components in the future.
Here are some effective cable management techniques for SATA cables:
- Cable ties: Use cable ties to bundle SATA cables together and secure them neatly. This prevents cables from tangling and getting in the way of other components inside the case.
- Cable clips: Attach cable clips to the computer case or motherboard tray to guide SATA cables along an organized path. This helps to prevent cables from hanging loosely and potentially interfering with fans or obstructing other components.
- Velcro straps: Use Velcro straps to group SATA cables together, providing a clean and organized look. Unlike cable ties, Velcro straps can easily be adjusted and reused when you need to rearrange or add cables.
- Cable routing channels: Many modern computer cases come with built-in cable routing channels or grommets that allow you to hide SATA cables away from the main components and create a clutter-free environment.
- Drive caddies: If your computer case supports drive caddies or brackets, utilize these to securely mount your SATA drives. These caddies often come with cable management features, such as routing holes or clips, to keep the SATA cables tidy.
By implementing these cable management techniques, you can significantly improve the organization of your SATA cables.
This not only enhances the overall appearance of your computer setup but also ensures better airflow, minimizing the risk of overheating and improving system performance.
Keep in mind that a well-organized computer case is easier to work with when it comes to troubleshooting or upgrading your hardware components.
So, invest some time in cable management and reap the benefits of a clutter-free computer setup.
Using Sata Cable Extensions And Converters
Learn how to easily use SATA cable extensions and converters for your computer. These handy tools allow you to connect devices and expand your system’s capabilities without any hassle.
Plug in and enjoy seamless data transfer with SATA cable extensions and converters.
SATA cable extensions and converters are valuable tools that help expand the capabilities and flexibility of your SATA connections.
Whether you need to extend the reach of your existing SATA cables or convert between different SATA cable connectors, these solutions can come in handy.
We will explore the various aspects of using SATA cable extensions and converters, including extending the reach of SATA cables, converting between different connectors, and compatibility considerations.
Extending The Reach Of Sata Cables With Extensions
When your SATA cables fall short in reaching the desired destinations, SATA cable extensions offer a practical solution. These extensions allow you to bridge the gap and connect devices that are farther apart.
Here are some key points to consider when using SATA cable extensions:
- Length: SATA cable extensions are available in various lengths, ranging from a few inches to several feet. Choose the appropriate length based on your specific needs.
- Signal quality: Longer cable extensions may lead to signal degradation. To maintain optimal performance, consider using high-quality extensions or shorter lengths.
- Flexibility: SATA cable extensions are typically flexible and can be bent to fit into tight spaces or routed around obstructions.
Converting Between Different Sata Cable Connectors
In some cases, you may encounter situations where you need to connect SATA devices with different connector types. SATA cable converters provide a seamless solution to bridge this gap.
Here are some key considerations when using SATA cable converters:
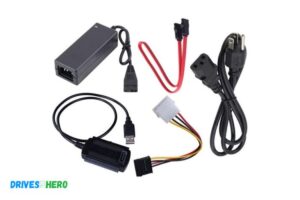
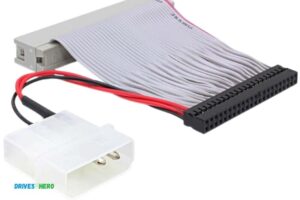
- Connector types: SATA cable converters are available for various connector types, such as SATA to IDE, SATA to Molex, or even different SATA generations. Ensure that the converter you choose matches the specific connector types you are working with.
- Compatibility: Check the compatibility of the converters with your devices and ensure that they support the appropriate data transfer rates and power requirements.
- Ease of installation: SATA cable converters are generally easy to install. Follow the manufacturer’s instructions and ensure a secure connection between the devices.
Compatibility Considerations When Using Extensions And Converters
While SATA cable extensions and converters can be useful, it’s vital to consider compatibility to ensure seamless operation of your SATA devices.
Here are some points to keep in mind:
- Device compatibility: Confirm that the extensions or converters you plan to use are compatible with the SATA devices you intend to connect. Verify the compatibility of data transfer rates, power requirements, and connector types.
- Quality and reliability: Ensure that you select high-quality extensions and converters from reputable manufacturers to maintain reliable data transmission and prevent potential issues.
- Cable management: With the addition of extensions and converters, cable management becomes crucial. Ensure that the cables are neatly organized and secured to minimize interference or accidental disconnections.
By understanding how to extend the reach of SATA cables, convert between different connector types, and consider compatibility factors, you can effectively utilize SATA cable extensions and converters to enhance your system’s functionality.
These tools provide the flexibility and adaptability required for efficient SATA connectivity in various scenarios.
Troubleshooting Sata Cable Issues
Learn how to troubleshoot common issues with SATA cables and ensure smooth data transfer. Discover step-by-step instructions on how to properly use a SATA cable for optimal performance.
Having trouble with your SATA cable?
We’ll guide you through identifying and resolving common SATA cable problems, checking for loose connections or damaged cables, and even advanced troubleshooting techniques for more complex issues.
Identifying And Resolving Common Sata Cable Problems:
- Loose connection: Ensure that both ends of the SATA cable are securely connected to the corresponding SATA ports on your motherboard and storage device.
- Incorrect insertion: Double-check that the cable is properly inserted into the SATA ports without any misalignment.
- Faulty cable: Try using a different SATA cable to see if the problem persists.
- Compatibility: Verify if your SATA cable is compatible with your specific hardware components, as certain devices may require specific cable types.
- Electrical interference: Keep your SATA cable away from any sources of electrical interference, such as other cables or electronic devices.
Checking For Loose Connections Or Damaged Cables:
- Visually inspect: Examine the SATA cable for any physical damage or loose connections. Make sure there are no bent or broken pins on either end of the cable.
- Secure connections: Ensure that the SATA cable is firmly plugged into the SATA ports. A loose connection can cause intermittent or no connectivity.
- Try a different cable: If you suspect a damaged cable, replace it with a known working cable to eliminate the possibility of a faulty connection.
Advanced Troubleshooting Techniques For More Complex Issues:
- Update firmware and drivers: Ensure that your storage device’s firmware and motherboard chipset drivers are up to date. Outdated software can sometimes cause compatibility issues with SATA connections.
- BIOS settings: Check your computer’s BIOS settings to ensure that SATA ports are properly configured and enabled.
- Check for errors: Run diagnostic software to scan for any errors or inconsistencies on your storage devices. This can help identify underlying issues that may affect SATA cable performance.
- Test on different ports: If you have multiple SATA ports available, try connecting your device to a different port to determine if the problem lies with a specific port.
Remember, troubleshooting SATA cable issues requires a systematic approach. Start with the basics like loose connections and cable integrity, and gradually move on to more advanced techniques if the problem persists.
With a little patience and these troubleshooting tips, you’ll be back up and running smoothly in no time.
Upgrading Sata Cables And Speeds
SATA cables are essential for connecting storage drives to your computer. Learn how to use a SATA cable to upgrade your speeds and improve overall performance.
Upgrading To Faster Sata Cable Versions (E.G., Sata Ii, Sata Iii):
- SATA (Serial ATA) cables are crucial components in connecting storage devices (like hard drives or solid-state drives) to a motherboard or other peripheral devices within a computer system. Upgrading to faster SATA cable versions, such as SATA II or SATA III, can significantly improve data transfer speeds and overall system performance.
- Upgrading SATA cables allows you to take advantage of the higher data transfer rates supported by newer versions. SATA II cables offer a maximum data transfer rate of 3Gb/s (gigabits per second), while SATA III cables can support up to 6Gb/s.
- When upgrading to a faster SATA cable version, it’s essential to ensure compatibility with your existing hardware. SATA III cables are backward compatible with SATA II and SATA I ports, but keep in mind that the data transfer rate will be limited to the speed supported by the lowest version.
- Upgrading SATA cables can be a cost-effective way to enhance your computer’s performance without investing in an entirely new system. However, it’s crucial to consider other factors, such as the capabilities of your storage devices and motherboard, to determine if upgrading the cable alone will yield significant improvements.
Understanding The Impact Of Sata Cable Speeds On Performance:
- The speed of a SATA cable directly affects the rate at which data can be transferred between storage devices and the motherboard. Faster SATA cable versions offer higher data transfer rates, resulting in improved performance.
- The data transfer rate determines how quickly information can be read from or written to a storage device. Higher transfer rates reduce the time required to load applications, access files, or perform data-intensive tasks.
- Upgrading to a faster SATA cable can be particularly beneficial when using solid-state drives (SSDs), which often surpass the data transfer speeds of traditional hard disk drives (HDDs). SSDs can take full advantage of SATA III cables’ higher throughput, delivering superior performance and responsiveness.
- It’s important to note that the actual data transfer speeds achieved also depend on other factors, including the specifications of your storage devices, the capabilities of your motherboard, and the overall system configuration.
Considerations When Upgrading Sata Cables In Existing Systems:
- Before upgrading SATA cables in an existing system, it’s crucial to identify the current cable version. This information can usually be found in the specifications of your motherboard or by consulting the product manual.
- Ensure compatibility between the new SATA cable version and both your storage devices and motherboard. Confirm that your storage devices and motherboard support the higher data transfer rates offered by the upgraded cable version.
- Consider the length of the SATA cable required for your system. SATA cables typically come in various lengths, so choose the appropriate size to avoid cable clutter and maintain proper cable routing within your computer case.
- When replacing SATA cables, handle them with care to prevent any damage to the connectors or cables themselves. It’s recommended to disconnect power sources and gently remove the cables by gripping the connectors, avoiding any unnecessary bending or twisting.
- Test the system after upgrading the SATA cables to ensure everything is functioning correctly and that the expected performance improvements have been achieved. Monitor transfer speeds and overall system responsiveness to confirm the successful upgrade.
Remember, upgrading SATA cables can be an effective way to boost your system’s performance, but it’s essential to consider your existing hardware specifications and ensure compatibility.
Enjoy the improved transfer speeds and enhanced overall experience once you’ve successfully upgraded your SATA cables!
FAQ About How to Use a Sata Cable
What Type of Devices Can I Use a Sata Cable With
SATA cables can be used with hard drives, optical drives, and solid state drives.
How Do I Correctly Connect the Sata Cable to My Device
To correctly connect a SATA cable to your device, ensure the SATA connectors are securely connected to the appropriate ports on both devices.
Check for any potential obstructions and make sure that both ends of the cable are properly aligned before pushing them together. Ensure that you have inserted the data side (the side with more pins) into your device’s port.
If there is a latch at one end of the connector, make sure it has snapped securely into place before powering up or using your device.
Is There a Difference between Different Types of Sata Cables
Yes, there is a difference between different types of SATA cables. The main differences include the speed at which data can be transferred and the number of pins used to connect to devices.
Different types of SATA cables also have different lengths and colors.
Are There Any Special Requirements for Using a Sata Cable
Yes, SATA cables must meet certain requirements in order to ensure reliable data transfer. These include using a cable that is no longer than one meter, using twisted-pair cabling, and having the correct connectors at each end of the cable.
Conclusion
Understanding how to use a SATA cable is essential for anyone working with computer hardware. The SATA cable serves as a vital component for connecting storage devices, such as hard drives and SSDs, to the motherboard.
By following a few simple steps, such as identifying the different connectors, aligning them correctly, and securing the cable firmly, users can ensure a reliable and efficient data transfer process.
Additionally, being aware of the correct handling and storage practices can help prolong the lifespan of the cable.
Whether you are building a new computer or upgrading existing hardware, knowing how to use a SATA cable enables you to take full advantage of the benefits provided by modern storage technology.
So, next time you find yourself in need of connecting your storage devices, refer back to this guide for a smooth and error-free experience.

