How to Transfer Photos from Iphone to External Ssd?
To transfer photos from an iPhone to an external SSD, you’ll first need to connect your iPhone to your computer.
From there, you’ll use a program like iTunes or the Photos app on Mac to import the photos to your computer. Then, you can easily drag and drop those photos onto your connected SSD.
The iPhone doesn’t allow you to transfer photos directly to an external SSD. Instead, you need to use a computer as an intermediary.
By connecting your iPhone to your computer, you can import all of your photos onto the computer’s hard drive.
Once the photos are on your computer, it’s as simple as dragging and dropping them onto the SSD.
The process of transferring photos from your iPhone to an external SSD might seem complicated, but it’s actually fairly straightforward.
It simply requires the use of a computer as an intermediary device. By importing your photos to your computer first, you can then easily drag and drop them onto your SSD.
Just make sure you have enough storage space on both your computer and SSD to complete the transfer.
9 Steps: Transferring Photos From iPhone to External SSD
| Steps | Description |
|---|---|
| 1. | Connect your iPhone to your computer. |
| 2. | Open the photos application on your computer. |
| 3. | Select the photos you want to transfer from your iPhone. |
| 4. | Choose the “Export” option. |
| 5. | Select the external SSD as the destination for the exported photos. |
| 6. | Click on the “Export” button to start transferring the photos. |
| 7. | Wait for the transfer to complete. |
| 8. | Disconnect your iPhone from your computer. |
| 9. | Check the external SSD to ensure the photos were transferred correctly. |
Key Takeaway
Five Facts About: How to Transfer Photos from Iphone to External Ssd
Organizing Your Photos On Your Iphone
Discover the hassle-free way to transfer photos from your iPhone to an external SSD. Easily organize and free up space with this step-by-step guide.
Why Organizing Your Photos On Your Iphone Is Important:
Plain Paragraph:
Keeping your photos organized on your iPhone is crucial for easy access, better management, and avoiding the frustration of searching through a messy gallery.
With a well-organized photo library, you can quickly find a specific photo or group of photos, create memorable albums, and free up space on your device.
Here are some key reasons why organizing your photos on your iPhone is important:
Bullet Points:
- Efficient retrieval: Organizing your photos ensures that you can easily locate them when needed. No more scrolling endlessly or scrolling past important memories.
- Quick browsing: With a neatly organized photo library, you can quickly browse through your photos and enjoy the memories they hold.
- Stress-free sharing: When your photos are well-organized, sharing them becomes a breeze. You can easily find and send photos to friends and family without wasting time.
- Creating meaningful albums: Organizing allows you to curate albums that tell a story or capture specific events. You can create albums for vacations, birthdays, or any other memorable moments.
- Avoiding clutter: By organizing your photos, you can declutter your iPhone’s storage space, ensuring you have room to capture new memories without constantly worrying about running out of space.
- Preserving memories: Organizing your photos helps preserve your precious memories for years to come. It allows you to relive those special moments and share them with future generations.
Organizing your photos on your iPhone is not only practical but also allows you to cherish your memories in a more meaningful way.
By following some simple organization techniques, you can transform your photo gallery into a well-structured collection of cherished moments.
Understanding The Benefits Of Transferring Photos To An External Ssd
Discover the advantages of transferring your photos from your iPhone to an external SSD. Streamline your workflow, free up valuable storage space, and keep your precious memories safe with this simple and efficient solution.
There are several advantages to transferring your photos from your iPhone to an external SSD (Solid State Drive).
This process allows you to save storage space on your iPhone while keeping your precious memories safe and secure. Let’s delve into the benefits of this transfer method:
Save Storage Space On Your Iphone:
- Maximizes available storage: By moving your photos to an external SSD, you can free up valuable space on your iPhone. This gives you more room for important files, apps, and other media.
- Prevents storage warnings: Transferring photos to an external SSD helps you avoid those annoying notifications about insufficient storage on your iPhone. Say goodbye to annoying pop-ups and enjoy a clutter-free device.
Keep Your Photos Safe And Secure:
- Protect against accidental deletion: Transferring your photos to an external SSD acts as an additional layer of security against accidental deletion. Even if something happens to your iPhone, your precious memories will remain safely stored on the SSD.
- Backup solution: An external SSD serves as an effective backup solution for your photos, ensuring that you’ll always have a copy of your cherished moments in case of any device malfunctions or data loss.
- Durability: Unlike traditional hard drives, SSDs have no moving parts. This means they are more resistant to physical shock or damage, making them a safer choice to store your photos compared to other storage devices.
Access And Manage Your Photos Easily:
- Fast transfer speeds: When you transfer your photos to an external SSD, you’ll experience faster transfer speeds compared to cloud-based solutions. This allows you to transfer large photo libraries quickly and efficiently.
- Easy file organization: With your photos safely stored on an external SSD, you can easily manage and organize them as you wish. Create folders, categorize your photos, and locate specific images without the limitations of your iPhone’s built-in photo app.
- Universal compatibility: External SSDs are generally compatible with multiple devices, including computers and other smartphones. This means you can access your transferred photos from various devices without any compatibility issues.
By understanding the benefits of transferring your photos to an external SSD, you can make an informed decision to maximize storage space, keep your memories secure, and have easy access to your photos wherever you go. Make sure to follow the next section to learn how to transfer your photos successfully.
Step-By-Step Guide To Transferring Photos From Iphone To External Ssd
Discover a step-by-step guide for seamlessly transferring your photos from your iPhone to an external SSD.
This comprehensive tutorial ensures a hassle-free process to conveniently store and access your photos on the go.
Are you running out of storage on your iPhone because of too many photos? Don’t worry! Transferring your precious memories to an external SSD is a simple solution.
In this step-by-step guide, we will walk you through the process, ensuring that you don’t miss a beat.
Let’s get started!
Connect Your Iphone To The External Ssd
To begin the transfer process, you need to establish a connection between your iPhone and the external SSD.
Follow these steps:
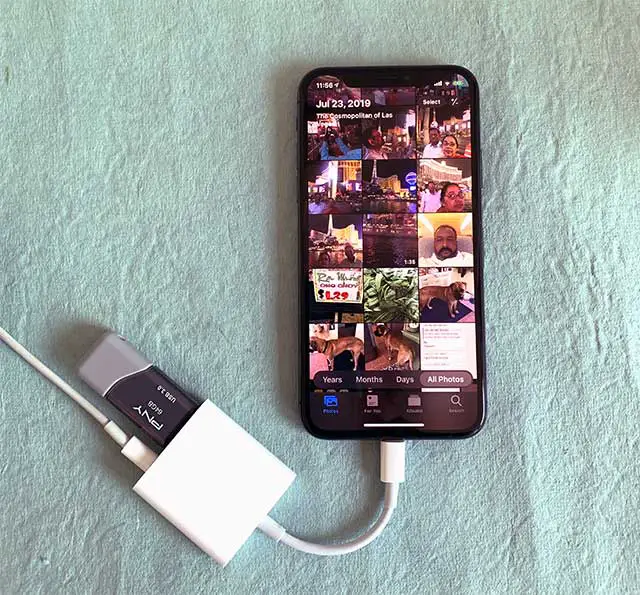
- Connect your iPhone and external SSD using a lightning-to-USB adapter or a USB-C cable (depending on the compatibility of your devices).
- Make sure your external SSD is formatted correctly and has ample storage space.
- If prompted, unlock your iPhone and allow access to the external device.
Select The Photos You Want To Transfer
Once your devices are connected, it’s time to select the specific photos you wish to transfer.
Here’s how you can do it:
- Open the Photos app on your iPhone.
- Navigate to the album or folder where your desired photos are located.
- Tap on the “Select” button at the top-right corner of the screen.
- Tap on each photo you want to transfer, which will be indicated by a blue checkmark.
- If you want to transfer all the photos in the album or folder, tap on “Select All” instead.
Start The Transfer Process
With your photos selected, it’s time to initiate the transfer process.
Follow these straightforward steps:
- Tap on the share icon (a square with an upward arrow) at the bottom-left corner of the screen.
- Scroll through the available options and choose “Save to Files.”
- Select your external SSD as the destination folder.
- Tap on “Save” to initiate the transfer.
It’s important to note that the transfer speed may vary depending on the number and size of the photos being transferred. Be patient, and avoid disconnecting your devices until the process is complete.
By following these simple steps, you can easily transfer your photos from your iPhone to an external SSD, freeing up valuable storage space on your device.
Safeguard your memories and ensure that you never miss capturing new ones again. Happy transferring!
Tips For Successful Photo Transfer
Learn how to easily transfer photos from your iPhone to an external SSD with these useful tips. Simplify the process and free up valuable storage space on your device.
If you’re looking to transfer your photos from your iPhone to an external SSD, there are a few key tips to keep in mind to ensure a successful transfer.
Here’s what you need to know:
Ensure Your External Ssd Has Enough Storage Space
Before you begin the photo transfer process, it’s essential to check if your external SSD has sufficient storage space to accommodate all the photos you wish to transfer.
Here’s how to determine if your SSD has enough capacity:
- Connect the external SSD to your computer using a high-speed USB connection.
- Open the file explorer or disk utility on your computer.
- Locate and select your external SSD.
- View the available storage space and compare it to the size of your photo library.
If your SSD storage is insufficient, consider upgrading to a larger capacity SSD or freeing up space by deleting unwanted files or transferring them to another storage medium.
Use A High-Speed Usb Connection For Faster Transfer
To ensure a smooth and speedy photo transfer process, use a high-speed USB connection between your iPhone and external SSD.
Follow these steps to set up a high-speed connection:
- Connect your iPhone to your computer using the original USB cable or a certified high-speed USB cable.
- Connect the external SSD to your computer using a compatible USB port.
- Make sure both your iPhone and external SSD are recognized by your computer and appear as accessible devices.
Using a high-speed USB connection will optimize the transfer speed and enable you to move your photos quickly and efficiently.
Remember, for a successful photo transfer, ensure your external SSD has enough storage space and use a high-speed USB connection.
By following these tips, you can securely transfer your precious memories from your iPhone to an external SSD hassle-free.
Managing Photos On Your External Ssd
Learn how to efficiently transfer photos from your iPhone to an external SSD, consolidating and managing your photo library with ease. Enjoy the benefits of extra storage and secure backup for your precious memories.
If you love capturing moments and taking photos with your iPhone, you’ll probably have a vast collection of pictures stored on your device.
However, as your photo library grows, you might find that it takes up a significant amount of storage space on your iPhone.
To free up space and ensure that your precious memories are safely backed up, transferring your photos to an external SSD is an excellent solution.
Here are some tips on how to manage your photos effectively on your external SSD:
Organize Photos Into Folders For Easy Access
- Create specific folders: Organize your photos into different folders based on themes, events, or dates. This way, you can easily locate and access your photos whenever you need them.
- Label folders descriptively: Use clear and concise labels for your folders, such as “Family Vacation 2021” or “Nature Photography.” This will help you quickly identify the content of each folder.
- Arrange folders systematically: Arrange your folders in a logical order, either alphabetically or chronologically. This will make it easier to navigate through your photo collection.
Backup Your External Ssd Regularly
- Establish a backup routine: Set a regular schedule to back up the contents of your external SSD. Whether it’s weekly, monthly, or quarterly, having an established routine ensures that you won’t miss any important updates.
- Use reliable backup software: Choose a reliable backup software that allows you to schedule automatic backups. This way, you can have peace of mind knowing that your photos are being safely copied to another storage device.
- Consider cloud storage as an additional backup: In addition to backing up your external SSD, consider utilizing cloud storage services as an extra layer of protection. Cloud storage offers the advantage of remote access to your photos, allowing you to view and download them from any device.
By organizing your photos into folders on your external SSD, you can easily find specific images without the need to scroll through thousands of pictures.
Additionally, regularly backing up your external SSD ensures that your photos are protected in case of any hardware failure or loss.
Remember, managing your photos effectively on your external SSD is not only about organization and backup; it’s also about taking care of your precious memories.
With proper management, you can enjoy your photos for years to come, knowing that they are safe and easily accessible at any time.
FAQ About How to Transfer Photos from Iphone to External Ssd
1.What is the best way to transfer photos from iPhone to external SSD?
The best way to transfer photos from an iPhone to an external SSD is to use the Apple Photos App and a USB 3.0 cable. The Photos App allows you to connect the iPhone to the computer and select which photos you want to export to the SSD.
2.Is it possible to transfer photos from an iPhone directly to an external SSD?
Yes, it is possible to transfer photos from an iPhone directly to an external SSD, but it requires an iPhone to USB adapter and an SSD enclsure. This setup allows you to directly connect the iPhone to the external SSD and transfer the photos over.
3.What can I do if my external SSD does not have supported iPhone file transfer capabilities?
If your external SSD does not have supported iPhone file transfer capabilities, you can download a third-party file manager application to your computer and connect the external SSD to it. This will allow you to transfer the photos from your iPhone to the external SSD.
What are some potential risks associated with transferring photos from an iPhone to an external SSD?
Potential risks associated with transferring photos from an iPhone to an external SSD include data security or corruption of the photos due to mishandling of the files. Additionally, if the external SSD is not compatible with the iPhone, there could be potential compatibility issues that can affect the transfer process.
Conclusion
Transferring photos from your iPhone to an external SSD is a convenient way to free up space on your device and ensure the safety and accessibility of your precious memories.
By following the step-by-step instructions outlined in this guide, you can easily make the transfer and organize your photos with ease.
Remember to connect your external SSD to your iPhone using the appropriate adapter or cable, then use the Files app or a third-party app to copy and paste your photos from your iPhone to the external SSD.
Take advantage of the additional storage capacity that an external SSD offers, as well as the ability to access and share your photos across different devices.
With this technique, you can maintain a clutter-free and organized photo library on your iPhone and enjoy peace of mind knowing that your photos are securely stored on an external SSD.

Harold Williams is a senior writer and technical editor at Drives Hero with 20+ years of experience in IT administration. He specializes in storage systems, SSD reviews, and performance testing, bringing real-world insight to every guide.