How to Use an External Ssd? 9 Steps!
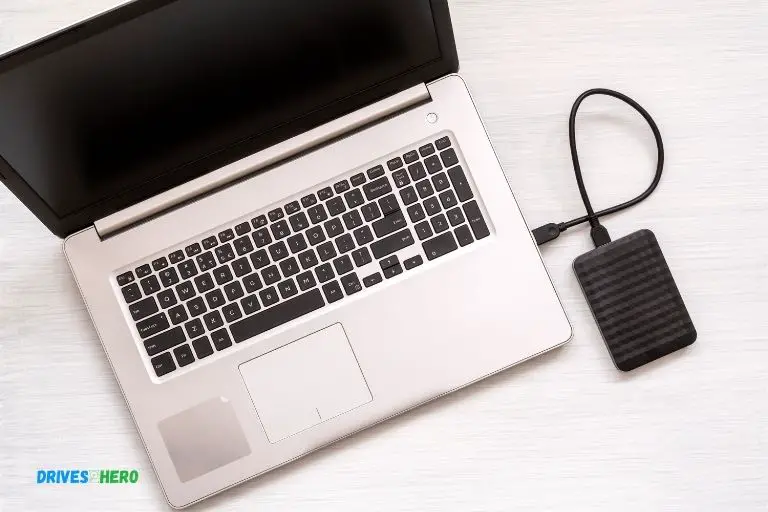
To use an external Solid State Drive (SSD), you need to connect it to your computer or laptop via a USB port. After it has been properly connected, the computer will automatically recognize it as a removable storage device.
You can now start transferring files or use it as a backup storage. An external SSD is a type of storage device that uses solid-state storage to save persistent data.
Due to their robust nature, external SSDs are immensely useful for backing up crucial data, enhancing gaming performance, or simply expanding storage capacity.
Using an external SSD involves plugging it into a device, typically through a USB port, and managing data through the device’s file manager.
Using an external SSD can greatly enhance your device’s storage capacity and performance. It’s ideal for professionals who deal with large files or gamers who require fast load times.
Simply plug it into a USB port and you’re ready to go. The device will automatically be recognized by your computer, providing an instantaneous and significant boost to your data management capabilities.
9 Steps To Use an External SSD
| Steps | Description |
|---|---|
| Step 1 | Purchase an SSD |
| Step 2 | Connect the SSD to the USB port |
| Step 3 | Initialize the SSD |
| Step 4 | Partition the SSD |
| Step 5 | Format the SSD |
| Step 6 | Transfer Files to the SSD |
| Step 7 | Set Up File Backup to the SSD |
| Step 8 | Eject the SSD |
| Step 9 | Update the SSD Firmware |
Key Takeaway
Five Facts About Using an External SSD
Factors To Consider When Selecting An External Ssd
Selecting an External SSD involves considering key factors such as storage capacity, transfer speed, durability, compatibility, and price, to ensure efficient and reliable usage.
These factors play a vital role in maximizing the benefits of using an external SSD for data storage and faster file transfers. When it comes to selecting an external SSD, there are several important factors to consider.
The right choice will ensure that you have a storage solution that meets your needs, providing reliable performance and ample space. Here are the key factors to keep in mind:
Storage Capacity
Consider how much storage capacity you require for your external SSD. It’s essential to have enough space to store and access all your files and data conveniently.
Some points to consider include:
- The size of files you typically work with, such as documents, photos, videos, and games.
- Future storage needs, as your data requirements may grow over time.
- The SSD’s available capacities and whether they align with your needs.
Connection Interface
The connection interface is crucial as it determines the speed and compatibility of your external SSD with various devices.
Here are some popular connection interfaces to consider:
- USB 3.0: Common and widely supported, offering decent speed for everyday tasks.
- USB-C: Provides faster data transfer speeds and a reversible connector, which is more convenient.
- Thunderbolt: Delivers exceptional speeds, ideal for professionals working with large media files or running resource-intensive applications.
Speed And Performance
Speed and performance are essential considerations when selecting an external SSD. Higher speeds mean faster file transfers and quicker access times, boosting overall productivity.
Here are some factors to evaluate:
- Read and write speeds: Look for SSDs with higher read and write speeds for speedy data transfers.
- Random access speeds: SSDs with high random access speeds enable faster file access, reducing loading times.
- Technology and cache: Advanced technologies like NVMe and DRAM cache can significantly improve performance.
Remember, when choosing an external SSD, balance your specific needs with your budget.
By considering storage capacity, connection interface, speed, and performance, you’ll be poised to select the perfect external SSD for your requirements. Choose wisely for a seamless, efficient, and reliable storage experience.
Formatting Your External Ssd
Learn the proper way to format your external SSD with these easy-to-follow steps. Ensure optimal performance and storage organization for your files and data.
Now that you have your shiny new external SSD, it’s time to get it ready for use. Properly formatting your external SSD is an essential step to ensure compatibility and optimal performance.
We’ll explore the compatible file systems for external SSDs and provide step-by-step instructions for formatting on both Windows and macOS.
Compatible File Systems
Before diving into the formatting steps, let’s familiarize ourselves with the compatible file systems for external SSDs. These file systems determine how the data is organized and stored on your SSD.
Here are the two commonly used file systems for external SSDs:
FAT32: This is a widely compatible file system that works with both Windows and macOS. It supports file sizes up to 4GB, making it suitable for smaller files.
However, it has some limitations, such as a maximum partition size of 32GB and lack of file-level security.
ExFAT: If you need to transfer large files between different operating systems, exFAT is the way to go. It eliminates the file size limitations of FAT32, allowing you to store files larger than 4GB.
It maintains compatibility with both Windows and macOS, making it an ideal choice for external SSDs.
Formatting Steps For Windows
If you’re using Windows, follow these simple steps to format your external SSD:
- Connect your external SSD to the USB port on your PC.
- Open File Explorer by pressing the Windows key + E.
- Right-click on the external SSD drive and select “Format.”
- Under the “File System” dropdown menu, choose either FAT32 or exFAT, depending on your needs.
- Provide a name for the drive (optional).
- Click on the “Start” button to begin the formatting process.
- Confirm the formatting prompt, as it will erase all the data on the SSD.
- Wait for the formatting process to complete.
- Once finished, you can safely eject the external SSD and start using it.
Formatting Steps For Macos
For macOS users, here’s how you can format your external SSD:
- Connect your external SSD to the USB port on your Mac.
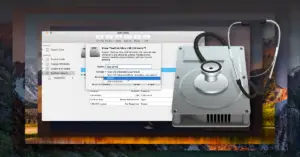
- Launch the “Disk Utility” by searching for it in Spotlight or locating it in the Applications > Utilities folder.
- In the Disk Utility window, select your external SSD from the left sidebar.
- Click on the “Erase” tab at the top.
- Choose either FAT32 or exFAT from the “Format” dropdown menu.
- Provide a name for the SSD (optional).
- Click on the “Erase” button to begin the formatting process.
- Confirm the formatting prompt, as it will erase all the data on the SSD.
- Wait for the formatting process to complete.
- Once finished, you can safely disconnect the external SSD and start using it.
Remember to backup any important data before formatting your external SSD, as it will lead to data loss.
By following these simple steps, you can ensure that your external SSD is ready to store and transfer your files efficiently across different platforms.
Using Drag And Drop Method
Learn how to effortlessly transfer data to an external SSD using the intuitive drag and drop method. Say goodbye to complex file transfers and enjoy the convenience of this user-friendly technique.
Transferring your files from an internal hard drive to an external SSD can be a breeze, especially when you utilize the drag and drop method.
This straightforward approach allows you to effortlessly move and organize your data in just a few simple steps.
Whether you’re looking to free up space on your internal drive or create a backup of important files, using the drag and drop method on your external SSD can provide you with the convenience and efficiency you need.
From Internal Hard Drive To External Ssd:
When transferring files from your internal hard drive to an external SSD using the drag and drop method, follow these steps:
- Connect your external SSD to your computer using the appropriate cable.
- Locate the files you wish to transfer from your internal hard drive.
- Select the desired files or folders by clicking and dragging your mouse cursor over them.
- Once you have made your selection, simply drag and drop the files or folders onto your external SSD icon on your computer’s desktop or file explorer.
- Wait for the transfer to complete, indicated by a progress bar or a notification.
- Double-check that the files have been successfully transferred to your external SSD by opening the destination folder.
From Cloud Storage To External Ssd:
If you have files stored in a cloud storage service and want to move them to your external SSD, the drag and drop method can also be utilized.
Here’s how:
- Access your cloud storage service through a web browser or desktop application.
- Locate the files or folders you wish to transfer to your external SSD.
- Select the desired files or folders by clicking on them.
- Drag and drop the files or folders from your cloud storage interface to a local folder on your computer.
- Connect your external SSD to your computer using the appropriate cable.
- Locate the files you just transferred to your local folder.
- Select the files or folders and drag and drop them onto your external SSD’s icon on your computer’s desktop or file explorer.
- Wait for the transfer to complete, ensuring that the files have been successfully moved to your external SSD.
By following these simple steps, you can effortlessly transfer files from your internal hard drive or cloud storage to your external SSD using the convenient drag and drop method.
This method offers a user-friendly approach, allowing you to efficiently organize and backup your data without any hassle.
Using Backup Software
Learn how to effectively use an external SSD by utilizing backup software. Safeguard your data with ease and ensure quick access whenever you need it. External SSDs are a popular choice for those seeking high-speed storage solutions.
They offer a portable and efficient way to store and access data, making them useful for both personal and professional use. When it comes to using an external SSD effectively, using backup software is crucial.
We will explore two popular backup tools for Windows and macOS: Windows Backup Tools and macOS Time Machine.
Windows Backup Tools:
- Windows Backup and Restore: This built-in tool in Windows allows you to schedule regular backups of your files, folders, and even system images. It offers flexibility and customization options for selecting what to back up and where to save it.
- File History: With File History, you can create automatic backups of your important files to an external SSD. It tracks changes and allows you to recover previous versions of files. File History is easy to set up and can provide an added layer of data protection.
Macos Time Machine:
- Time Machine: Time Machine is a built-in backup software for macOS. It automatically creates incremental backups of your entire Mac, including files, apps, and system settings.
- With Time Machine, you can easily restore files or even revert your Mac to a previous state. It works seamlessly with an external SSD, providing a reliable method for backing up your data.
Using backup software ensures that your data remains safe and easily recoverable in case of accidental deletion, hardware failure, or other unforeseen events.
By utilizing the backup tools mentioned above, you can take control of your data and enjoy peace of mind knowing that your valuable files are protected.
Both Windows and macOS offer powerful backup tools that are compatible with external SSDs.
Whether you’re using Windows Backup Tools or macOS Time Machine, taking advantage of backup software is essential for protecting and securing your data.
Make sure to regularly back up your files to an external SSD to ensure you have a reliable copy of your data in case of any mishaps.
Organizing Files And Folders
Learn how to effectively organize files and folders using an external SSD for seamless storage and easy access. Maximize efficiency and optimize your workflow by implementing these simple strategies.
When it comes to using an external SSD, one of the key benefits is the ability to easily organize your files and folders.
By following a few simple techniques, you can make sure that your data is structured in a way that is efficient and easy to navigate.
Let’s take a look at some essential tips for organizing files and folders on an external SSD:
Creating Folders And Subfolders
One of the first steps in organizing your files is to create folders and subfolders. This helps to group related files together, making it easier to locate specific items later on.
Here are a few pointers for creating folders and subfolders on your external SSD:
- Begin by identifying the main categories for your files. This could be based on projects, clients, subjects, or any other relevant criteria.
- Create a main folder for each category and assign it a descriptive name. For example, if you are organizing files by projects, you can name the main folder “Projects.”
- Within each main folder, create subfolders for further refinement. For instance, if you have multiple projects, you can create individual subfolders for each project within the main “Projects” folder.
- Give each subfolder a clear and concise name that accurately represents the contents it contains. This will help you quickly locate specific files when needed.
Remember, the key here is to create a logical structure that makes sense to you. By organizing files into folders and subfolders, you can easily maintain an organized external SSD.
Renaming Files And Folders
Renaming files and folders can greatly contribute to better organization and smoother workflow.
Here are some tips for renaming files and folders on your external SSD:
- Use descriptive and meaningful names that reflect the content of the file or folder. This will make searching for specific items much easier.
- Avoid using generic names or abbreviations that may not be easily understood later on. The more specific you can be, the better.
- Consider adding dates or version numbers to file names when dealing with multiple revisions or ongoing projects. This helps you keep track of the latest versions.
- Take advantage of capitalization and punctuation to enhance readability. Using proper case or underscores between words can make file names more legible.
By following these suggestions, you can keep your files and folders neatly organized and minimize any confusion or frustration when searching for specific items.
Deleting Unnecessary Files
Keeping your external SSD clutter-free is important to maintain optimal performance and efficient storage.
Here’s how you can effectively delete unnecessary files:
- Regularly review your files and identify any that are no longer needed or outdated.
- Before deleting any files, double-check to ensure they are not required for future reference. Consider backing up important files before removal for extra safety.
- Be cautious when deleting files, as once they are removed, they may not be recoverable.
- Empty your recycle bin or trash folder on a regular basis to free up space on your external SSD.
By periodically removing unnecessary files, you can optimize storage capacity and ensure speedy access to the files you need. Organizing files and folders on your external SSD is crucial for efficient data management.
By creating folders and subfolders, renaming files and folders, and deleting unnecessary files, you can maintain a well-structured and clutter-free storage system.
Take the time to establish a logical organization system that suits your specific needs, and you’ll reap the benefits of a more streamlined workflow.
Maintaining Your External Ssd’S Performance
To maintain optimal performance of your external SSD, it’s important to follow a few key steps.
Keep your drive clean and organized, regularly update firmware, use encryption to secure data, and avoid excessive read and write operations.
Additionally, be sure to safely eject your SSD before disconnecting it to prevent data loss. An external SSD can be a powerful tool for storing and accessing large amounts of data quickly.
However, just like any other storage device, it requires regular maintenance to ensure optimal performance and longevity.
Here are some essential steps you can take to maintain your external SSD’s performance:
Regularly Updating Firmware
Firmware updates are crucial for improving the functionality, security, and compatibility of your external SSD. They often include bug fixes and performance enhancements.
To keep your SSD up to date, follow these steps:
- Visit the manufacturer’s website: Go to the official website of your SSD’s manufacturer and check for any available firmware updates.
- Download the latest firmware: If an update is available, download the firmware file to your computer.
- Connect your SSD: Plug your external SSD into your computer using the appropriate cable.
- Run the firmware update utility: Open the firmware update utility provided by the manufacturer and follow the on-screen instructions to install the latest firmware.
Running Disk Cleanup Or Disk Utility
Over time, your external SSD can accumulate unnecessary files and fragments that may impact its performance. Running disk cleanup or disk utility tools can help you maintain your SSD’s speed and efficiency.
Here’s how you can do it:
Windows users:
- Press the Windows key and search for “Disk Cleanup.”
- Open the Disk Cleanup tool and select your external SSD drive.
- Check the files you want to delete, such as temporary files or system files, and click “OK” to remove them.
Mac users:
- Go to the “Applications” folder and open “Utilities.”
- Open “Disk Utility” and select your external SSD drive.
- Click on the “First Aid” tab and then click “Run” to scan and repair any disk errors.
Monitoring Drive Health
Regularly monitoring your SSD’s health can help you detect any potential issues and take preventive measures. Most SSD manufacturers offer software tools or utilities you can use to monitor your drive’s health.
Consider the following:
- Download the manufacturer’s drive health monitoring tool: Visit the manufacturer’s website and download the appropriate tool for your SSD.
- Install the software: Follow the installation instructions provided by the manufacturer to install the drive health monitoring tool on your computer.
- Run periodic scans: Open the tool and run periodic scans to check the health status of your external SSD. Pay attention to any warning signs or indicators of declining performance.
By following these simple steps, you can ensure that your external SSD remains in optimal condition, providing fast and reliable storage for your data.
Regular firmware updates, disk cleanup or disk utility runs, and drive health monitoring will help extend the lifespan and maintain the performance of your external SSD.
Proper Ejection On Windows
Learn how to properly eject an external SSD on Windows to prevent data loss and ensure optimal performance.
Using The Safely Remove Hardware Option
When it comes to using an external SSD on Windows, proper ejection is crucial to prevent data loss and potential damage to your drive.
Fortunately, Windows provides a built-in feature called the “Safely Remove Hardware” option that ensures a safe disconnection.
Here are the steps to use the Safely Remove Hardware option:
- Look for the “Safely Remove Hardware” icon in the system tray, located at the bottom right corner of your taskbar.
- Click on the icon to open the menu and identify your external SSD from the list of connected devices.
- Once you’ve found your SSD, click on its name to start the ejection process.
- After clicking, a notification will appear, informing you that it is safe to remove the device.
- Wait for a few seconds until Windows completes the ejection process.
- Once the notification disappears, you can safely disconnect your external SSD from your computer.
Ejecting the Drive from File Explorer:
If you prefer an alternative way to eject your external SSD on Windows, you can also do so directly from File Explorer. This method provides a more visual approach for easy identification and ejection.
Here are the steps to eject the drive from File Explorer:
- Open File Explorer by pressing the Windows key and E simultaneously.
- Navigate to the “This PC” or “My Computer” option on the left-hand side of the window.
- Locate your external SSD within the list of drives and connected devices.
- Right-click on the SSD’s icon and a context menu will appear.
- From the context menu, select the “Eject” option.
- Wait for a few seconds until Windows completes the ejection process.
- Once the SSD disappears from the File Explorer window, it is safe to disconnect from your computer.
To ensure the longevity of your external SSD and prevent any potential data corruption, always remember to use the Safely Remove Hardware option or eject the drive from File Explorer before disconnecting it from your Windows computer.
Following these steps will help preserve your data and maintain the optimal performance of your external SSD:
Unmounting Your External Ssd On Macos
Learn how to safely unmount your external SSD on macOS with these easy steps. Avoid data loss and ensure proper functioning of your device. Discover a hassle-free way to use an external SSD without any complications.
If you’re using an external SSD on your macOS device, it’s important to properly unmount it before disconnecting to avoid any potential data loss or damage to your drive.
Here are two easy methods to safely unmount your external SSD:
Using The Eject Button In Finder:
- Locate your external SSD icon on the desktop or in Finder.
- Click on the eject button next to your SSD’s name.
- Wait for the drive to be unmounted and the icon to disappear from the desktop.
- You can now safely disconnect your external SSD from your macOS device.
Dragging The Drive To The Trash Can:
- Locate your external SSD icon on the desktop or in Finder.
- Click and hold on the icon.
- Drag the icon towards the trash can located in the dock.
- Once the trash can icon changes to an eject symbol, release the external SSD icon.
- Wait for the drive to be unmounted and the icon to disappear from the desktop.
- You can now safely disconnect your external SSD from your macOS device.
Remember to always wait for the unmounting process to complete before physically disconnecting your external SSD.
Following these simple steps will help ensure that your data remains safe and your external SSD functions optimally for future use.
FAQ On How to Use an External SSD
What Type of Connection Do I Need to Use an External Ssd?
You will need to use a USB 3.0 or Thunderbolt connection to use an external SSD.
How Much Faster is an External Ssd Compared to Traditional Hard Drives?
External SSDs are typically around 10 times faster than traditional hard drives.
Is It Possible to Move Files from My Internal Storage Drive to the External Ssd?
Yes, it is possible to move files from an internal storage drive to an external SSD.
Can I Use an External Ssd With Both Windows And Mac Operating Systems?
Yes, you can use an external SSD with both Windows and Mac operating systems. It is compatible with both platforms and will work on either one.
Conclusion
Utilizing an external SSD can greatly enhance your computing experience. By following the step-by-step guide provided in this blog post, you can seamlessly set up and use an external SSD for improved storage and faster data transfer speeds.
The benefits are abundant from efficiently backing up important files and increasing your device’s overall performance to easily transporting and accessing data on the go.
When choosing an external SSD, consider your specific needs, budget, and compatibility with your devices. Remember to properly format and connect the SSD, and safely eject it before unplugging.
Utilizing an external SSD is a simple yet effective solution to expand your storage capacity and optimize your workflow, ensuring that you can effortlessly manage and access your files without any limitations.
Upgrade to an external SSD today and experience the convenience and efficiency it brings to your digital life.
Bonus Topic: How To Use An External SSD
How Do I Use an External Ssd for the First Time?
Using an external SSD for the first time can be exciting and a bit intimidating.
- To get started, you will need to connect your external SSD to your computer via USB or Thunderbolt cable. Make sure that it is securely connected before turning on your computer.
- Once the connection has been established, you may need to install any necessary drivers that are specific to your device’s make and model.
- After this is complete, open up File Explorer (or Finder on Mac) and check if your drive appears in the list of drives available for use; if it does not appear, try restarting the system again after making sure all connections are still secure.
- If everything checks out okay now, you should be able to access and use the drive as normal!
What is the Best Way to Use an External Ssd?
The best way to use an external SSD is to store large files that require quick access, such as videos and photos.
Using an external SSD can significantly improve the speed of file transfers and data access times compared to traditional hard drives, making them a great option for those who need fast storage solutions.
Additionally, since they are compact and lightweight, they provide portability benefits over regular hard drives.
To maximize the potential of an external SSD, make sure you back up your data regularly and use a reliable backup system in case something goes wrong.
Is It Ok to Use Ssd As External Drive?
Yes, it is okay to use SSD as an external drive. This can be a great way for people who need to store large amounts of data or require high speeds and reliability from their storage device.
An SSD offers faster read and write speeds than traditional hard disk drives (HDD), which makes them ideal for storing files that need quick access.
They also tend to be much more reliable than HDDs since they have no moving parts, so you won’t have to worry about the device failing due to mechanical issues like with HDD’s.
However, there are some drawbacks such as higher cost per gigabyte compared to HDD’s and potential compatibility issues in older systems that may not support the newer technology behind SSDs.
In general though, using an SSD as an external drive can provide great performance benefits if you’re willing to pay a bit extra upfront for the cost of the device itself.
How Do I Get My Computer to Recognize My External Ssd?
In order to get your computer to recognize an external SSD, you will first need to ensure that it is properly connected.
Connect the SSD using a USB or Thunderbolt cable and make sure it is securely attached. Once connected, open up the System Preferences on your Mac or Control Panel on Windows.
Look for a menu option labelled “Devices” or “Storage”, then select the external drive from the list of available devices.
If there are any drivers that need to be installed, follow instructions as provided by the manufacturer of your device in order to complete installation.
Once this has been done successfully, restart your computer and try accessing files from the newly-recognized external SSD.
How to Use External Ssd on Laptop?
External SSDs are becoming increasingly popular due to their fast data transfer speeds and large storage capacity.
To use an external SSD on a laptop, you will need to connect it via USB or Thunderbolt 3 port, then install your operating system onto the drive.
Once the OS is installed, you can start transferring files and programs onto the device for easy access.
Make sure that the external SSD meets the minimum requirements of your laptop before starting this process so that everything runs smoothly.
How to Use an External Ssd for Gaming?
Using an external SSD for gaming can be a great way to significantly improve your gaming experience.
With an external drive, you’ll enjoy faster loading times and improved performance compared to traditional hard drives.
To get the most out of your investment, make sure that your device is compatible with the drive and that it has USB 3.0 or better connection types available.
Additionally, ensure that you have enough storage space on the SSD for all of your games and applications before making any purchases!
How to Use an External Ssd on Mac?
Using an external SSD on a Mac is simple and can be done in just a few steps.
- First, you will need to connect the drive to your computer using either USB or Thunderbolt.
- Next, open Disk Utility, which is located under Applications>Utilities.
- Once there, select the External SSD from the list of available disks and click ‘Erase.’
- Then choose Format as APFS (or whatever file system suits your needs) and give it a name before clicking Erase.
- Finally, go back to Disk Utility and click Mount so that you can access your newly created disk from Finder!
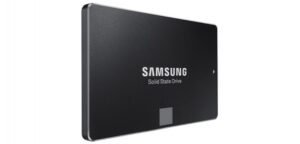
How to Use Samsung Ssd As External Drive
Using a Samsung SSD as an external drive is a great way to increase your storage capacity for media and other files.
To do this, you will need to purchase an external enclosure that is compatible with the type of Samsung SSD you own. Then, install the necessary software and connect your device via USB or Thunderbolt connections.
Once it’s connected, configure it within Windows Explorer or Mac Finder in order to access the drive from any computer.
With an external SSD from Samsung, you’ll enjoy blazing fast speeds and reliable performance for all your data needs!

