Why Your SSD Slows Down Over Time (And How to Fix It)
You bought your SSD expecting blazing-fast speeds, and for a while, it delivered. Boot times were nearly instant. Applications loaded before you could blink. Everything felt snappy and responsive. Then, somewhere around the six-month or one-year mark, things started to feel different. Not dramatically slower, but noticeably less impressive than day one.
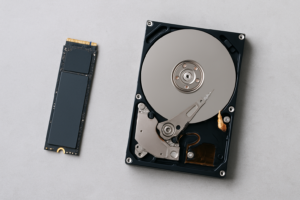
You’re not imagining it. SSDs genuinely do slow down over time, and the reasons are rooted in how flash memory actually works at a hardware level. Unlike hard drives that degrade mechanically, SSDs face a different set of challenges tied to the physics of storing data in NAND flash cells.
The good thing is that most of the performance loss is recoverable, or at least manageable, once you understand what’s causing it. This article breaks down the key reasons your SSD loses speed and gives you specific, practical steps to get it performing closer to factory-fresh again.
How SSDs Store Data (A Quick Primer)
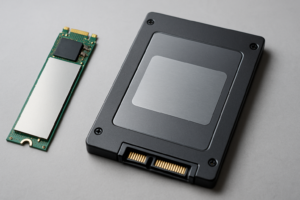
To understand why SSDs slow down, you need a basic grasp of how they work. SSDs store data in NAND flash memory cells. Each cell holds an electrical charge that represents your data as binary values. When you write data, the SSD traps electrons in these cells. When you erase data, it releases them.
Here’s where it gets interesting. SSDs can’t simply overwrite existing data like hard drives can. They have to erase a block of cells first, then write new data to it. This erase-then-write cycle is fundamental to every performance issue we’ll discuss.
Each NAND cell also has a limited number of program/erase (P/E) cycles before it starts to degrade. Consumer TLC (triple-level cell) drives like the Samsung 870 EVO typically handle around 1,500 to 3,000 P/E cycles per cell. QLC (quad-level cell) drives like the Intel 670p are rated for even fewer, often around 1,000 cycles. This finite lifespan creates a ticking clock that your SSD’s controller has to manage carefully.
The Main Causes of SSD Slowdown
1. Write Amplification and Garbage Collection
Remember how SSDs can’t overwrite data in place? When your drive needs to write new data and there aren’t enough empty blocks available, it has to perform a process called garbage collection. The controller reads valid data from partially filled blocks, moves it elsewhere, erases the original blocks, and then writes your new data.
This background shuffling means the SSD is doing significantly more writing than you actually requested. If you asked it to write 1 GB, it might internally write 3 or 4 GB after all the moving and erasing. This ratio is called write amplification, and it’s one of the biggest performance killers as your drive fills up.
On a nearly full SSD, write amplification can skyrocket because the controller has fewer empty blocks to work with. It’s constantly juggling data just to find space, and your real-world write speeds tank as a result.
2. TRIM Not Working Properly
TRIM is a command that your operating system sends to the SSD to tell it which data blocks are no longer in use. When you delete a file, the OS marks that space as available, but the SSD doesn’t automatically know those blocks can be erased. Without TRIM, the drive treats those blocks as occupied, which forces more garbage collection and increases write amplification.
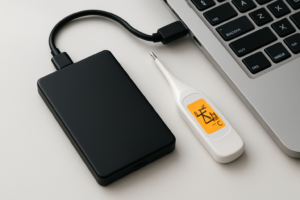
TRIM should be enabled by default on Windows 10/11 and modern versions of macOS and Linux. But there are situations where it silently stops working. Older RAID configurations, certain external USB enclosures, and some third-party disk encryption tools can all interfere with TRIM commands reaching your drive.
When TRIM isn’t functioning, your SSD’s performance degrades much faster because it never gets the chance to proactively clean up unused blocks during idle time.
3. Over-Provisioning Erosion
Every SSD reserves a portion of its total NAND capacity for internal operations. This reserved space, called over-provisioning (OP), gives the controller breathing room for wear leveling, garbage collection, and bad block replacement. Most consumer SSDs ship with about 7% over-provisioning built in. A 1 TB drive might actually contain roughly 1,074 GB of raw NAND, with the extra space hidden from you.
Some manufacturers let you adjust over-provisioning through software. Samsung Magician, for example, allows you to increase OP on Samsung drives. Crucial’s Storage Executive offers similar functionality. Adding more over-provisioning means you’ll have less usable storage, but the performance benefits, especially for write-heavy workloads, can be significant.
The issue arises when you fill your drive to capacity. With less free space available, the controller’s effective over-provisioning shrinks, and performance drops accordingly.
4. NAND Cell Wear and Wear Leveling
Every time a NAND cell goes through a program/erase cycle, its oxide layer degrades slightly. After enough cycles, the cell can’t reliably hold a charge, and the controller has to retire it. To prevent certain cells from wearing out prematurely while others sit idle, the SSD uses wear leveling algorithms to distribute writes as evenly as possible across all cells.
Wear leveling is essential for drive longevity, but it adds overhead. The controller sometimes moves data that hasn’t changed (called static wear leveling) just to even out the wear across blocks. This extra internal activity can temporarily reduce performance, and as more cells degrade over the drive’s lifetime, the controller has fewer healthy blocks to work with.
You can check your drive’s health using tools like CrystalDiskInfo (Windows) or smartmontools (Linux/macOS). Look for the “Percentage Used” or “Media Wearout Indicator” SMART attribute. If your drive shows 90% or more wear remaining, cell degradation isn’t your problem. If it’s below 50%, you should start planning for a replacement.
5. Thermal Throttling
This one catches a lot of people off guard. NVMe SSDs, especially fast PCIe 4.0 and 5.0 models, generate substantial heat under sustained workloads. When the controller or NAND chips exceed their thermal limits (typically around 70-80°C), the drive deliberately slows down to prevent damage.
M.2 drives stuffed under a GPU or in a poorly ventilated laptop are common victims. The WD Black SN850X and Samsung 990 Pro are both excellent drives, but they’ll throttle just like anything else if they can’t dissipate heat effectively.
6. Running Out of SLC Cache
Most modern TLC and QLC SSDs use an SLC (single-level cell) caching strategy to boost write speeds. The controller treats a portion of the NAND as if it were faster SLC memory, writing one bit per cell instead of three or four. This makes initial writes extremely fast, but once the cache fills up, speeds drop dramatically to the native TLC or QLC write speed.
On a drive like the Samsung 990 Pro (2 TB), the SLC cache is generous enough that most users rarely exhaust it during typical tasks. But on a budget QLC drive like the Crucial P3, you might burn through the cache during a large file transfer and see write speeds plummet from over 3,000 MB/s to under 200 MB/s. The fuller the drive, the smaller the available SLC cache becomes, which is why a nearly full SSD feels dramatically slower.
How to Restore and Maintain Your SSD’s Speed
Verify TRIM Is Active
On Windows, open Command Prompt as administrator and type: fsutil behavior query DisableDeleteNotify. If the result is 0, TRIM is enabled. If it’s 1, enable it with: fsutil behavior set DisableDeleteNotify 0.
On Linux, check your fstab file for the “discard” mount option, or confirm that a periodic TRIM timer is running with: systemctl status fstrim.timer. On macOS, TRIM is enabled automatically for Apple-installed SSDs and can be activated for third-party drives using sudo trimforce enable in Terminal.
Keep at Least 10-20% of Your Drive Free
This is the single most impactful thing you can do. Keeping free space available gives the controller room to perform garbage collection efficiently and maintains a healthy effective over-provisioning ratio. If you’re consistently using more than 80-90% of your SSD’s capacity, it’s time to offload files or upgrade to a larger drive.
For a practical target, aim to keep at least 20% free on drives under 500 GB and at least 10% free on 1 TB or larger drives.
Update Your SSD’s Firmware
SSD manufacturers regularly release firmware updates that improve performance, fix bugs, and optimize garbage collection algorithms. Samsung Magician, Western Digital Dashboard, Crucial Storage Executive, and Kingston SSD Manager all make this process simple. Check for updates every few months.
The Samsung 980 Pro, for instance, received a critical firmware update in 2023 that addressed a health reporting bug causing drives to show rapid degradation. Keeping firmware current matters more than most people realize.
Add a Heatsink to NVMe Drives
If thermal throttling is your issue, a simple M.2 heatsink can make a real difference. Many motherboards include them, but if yours doesn’t, aftermarket options from brands like Thermalright and EZDIY-FAB are widely available on Amazon for very little money. Even a basic aluminum heatsink with a thermal pad can drop temperatures by 10-20°C under load.
For laptops, your options are more limited, but ensuring good case airflow and avoiding sustained heavy writes (like gaming while downloading large files) can help.
Use Manufacturer Optimization Tools
Samsung Magician offers an “Over-Provisioning” feature that lets you dedicate extra space to internal operations. Setting aside an additional 10% on top of the factory default can noticeably improve sustained write performance, especially on smaller capacity drives like the 250 GB or 500 GB models.
Crucial Storage Executive has a “Momentum Cache” feature that uses system RAM to accelerate SSD operations. Results vary, and some users report stability issues, so test it carefully before relying on it for critical workloads.
Avoid Unnecessary Defragmentation
This should go without saying in 2024, but don’t defragment your SSD. Windows 10 and 11 are smart enough to send TRIM commands instead of defragmenting when they detect an SSD, but some third-party “optimization” tools still attempt traditional defragmentation. This burns through P/E cycles for zero benefit. If you’re using a tool like Auslogics Disk Defrag or IObit Advanced SystemCare, make sure SSD defragmentation is disabled.
Consider a Secure Erase as a Last Resort
If your SSD has slowed to a crawl and nothing else works, a secure erase resets the drive to a factory-like state. This wipes all data and resets the NAND cells, which can restore performance on drives suffering from severe write amplification or fragmented block allocation. Samsung Magician, Crucial Storage Executive, and most manufacturer tools offer a secure erase function.
Back up everything first. A secure erase is irreversible and destroys all data on the drive. This is a nuclear option, but it genuinely works when the drive’s internal state has become too fragmented for normal TRIM and garbage collection to resolve.
When It’s Time to Replace Your SSD
SSDs don’t last forever, and sometimes the slowdown you’re experiencing is a sign of genuine end-of-life degradation. Check your drive’s SMART data using CrystalDiskInfo or the manufacturer’s tool. Pay attention to these attributes:
- Percentage Used / Media Wearout Indicator: Above 80-90% means the drive is nearing the end of its rated lifespan.
- Reallocated Sector Count: A rising number indicates the controller is retiring bad blocks.
- Uncorrectable Error Count: Any value above zero is a warning sign.
If your drive is showing significant wear and you’ve had it for three or more years of heavy use, replacing it proactively is the smart move. For a reliable replacement, the Samsung 870 EVO (SATA) and Samsung 990 Pro (NVMe) remain my top recommendations for most users. The WD Black SN850X is an excellent alternative if you prefer Western Digital.
Frequently Asked Questions
Does an SSD slow down when it’s almost full?
Yes, and this is one of the most common causes of SSD performance degradation. When an SSD is more than 80-90% full, the controller has very little free space for garbage collection and SLC caching. Write amplification increases dramatically, and write speeds can drop by 50% or more compared to when the drive had plenty of free space. The simplest fix is to keep at least 10-20% of your drive’s capacity free at all times.
How long does an SSD last before it starts slowing down?
Most consumer SSDs are rated for 150 to 600 TBW (terabytes written), depending on capacity and NAND type. For a typical user writing 20-30 GB per day, a 1 TB TLC drive should last 10+ years before cell wear becomes noticeable. Performance degradation from a full drive, disabled TRIM, or thermal throttling can happen much sooner and is usually not related to cell wear at all. These issues are fixable without replacing the drive.
Should I enable TRIM on my SSD?
Absolutely. TRIM should be enabled on every SSD, and it’s active by default on most modern operating systems. Without TRIM, your SSD can’t efficiently reclaim deleted blocks, which leads to increased write amplification, more aggressive garbage collection, and reduced write performance over time. The only scenario where TRIM might not work is with certain hardware RAID controllers, older USB enclosures, or specific encryption configurations. Verify it’s active using the commands described earlier in this article.
Will a secure erase make my old SSD fast again?
In many cases, yes. A secure erase resets the drive’s NAND to a clean state, clears the block mapping table, and effectively reverses the fragmentation and write amplification that accumulated over months or years of use. It won’t repair physically degraded NAND cells, so if your drive has significant wear (check the SMART data), the improvement might be temporary. But for a drive that’s simply been used heavily and filled up repeatedly, a secure erase followed by a fresh OS install can make it feel almost new.
James Kennedy is a writer and product researcher at Drives Hero with a background in IT administration and consulting. He has hands-on experience with storage, networking, and system performance, and regularly improves and optimizes his home networking setup.