Building a Budget Home NAS for Under $300 (Complete Build)
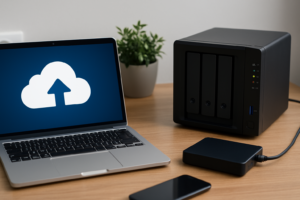
Cloud storage subscriptions add up fast. Between Google Drive, Dropbox, and iCloud, you might be spending a surprising amount every year just to store your family photos, documents, and media files. And you’re still trusting someone else’s servers with your data.
Building your own Network Attached Storage (NAS) device puts you back in control. You get local access to all your files, the ability to stream media throughout your house, automated backups, and zero monthly fees. The best part? You don’t need to spend a fortune to get started. With careful component selection and free open-source software, you can build a capable home NAS for under competitively priced total.
This guide walks you through every step of the build, from picking the right hardware to installing software and configuring your first shared folders. Even if you’ve never built a computer before, you’ll be able to follow along and have a working NAS by the end of the weekend.
Why Build Instead of Buy?
Pre-built NAS units from Synology and QNAP are excellent products, but you’re paying a premium for their proprietary software and compact form factor. A two-bay Synology DS224+ will eat up most of a competitively priced budget before you’ve even bought a single hard drive.
A DIY build gives you more storage bays, better processing power, and complete flexibility in your software choice. You can repurpose old components you might already have, and upgrading down the road is as simple as swapping parts. The trade-off is a larger physical footprint and some initial setup time, but for most home users, that’s a worthwhile exchange.
The Hardware You’ll Need
Here’s the complete parts list I recommend for a budget NAS build. I’ve chosen components that balance power efficiency, performance, and cost. Prices fluctuate on Amazon, so check current listings, but this full build should land comfortably under competitively priced (not including storage drives, which we’ll discuss separately).
CPU and Motherboard
For a NAS that will handle file serving, media streaming, and light Docker containers, the Intel N100 platform is the sweet spot right now. It sips power (just 6W TDP), supports hardware transcoding for Plex/Jellyfin, and has enough horsepower for everything a home NAS needs.
I recommend the CWWK or Topton N100 Mini-ITX motherboard. These boards come with the N100 soldered on, include dual 2.5GbE LAN ports, and support up to 16GB of DDR4 or DDR5 memory depending on the variant. They’re available on Amazon and are extremely popular in the home server community for good reason.
Intel N100 Mini-ITX NAS Motherboard
Perfect low-power NAS platform with built-in CPU, dual 2.5GbE, and hardware transcoding support
Memory (RAM)
You don’t need much RAM for a basic NAS, but having enough makes a difference if you plan to run applications alongside file storage. A single 8GB DDR4 SO-DIMM stick is the minimum I’d suggest. It’s plenty for TrueNAS or OpenMediaVault and leaves headroom for Docker containers. If you find a good deal on 16GB, grab it instead, because ZFS (used in TrueNAS) loves RAM.
Case
Your case needs to fit a Mini-ITX motherboard and hold multiple 3.5″ hard drives. The Jonsbo N2 or Jonsbo N3 are purpose-built for NAS builds, with hot-swap drive bays and compact footprints. They look great sitting on a shelf too. If those stretch your budget, a basic Mini-ITX case with multiple drive bays works just fine.
Power Supply
A NAS runs 24/7, so efficiency matters. You won’t need much wattage since the N100 and a few hard drives draw very little power. A 200W-250W Flex ATX PSU or a standard 80+ Bronze rated unit will work perfectly. Some Jonsbo NAS cases use a specific PSU form factor, so double-check compatibility before ordering.
Boot Drive
You’ll want a small SSD to run your NAS operating system from, keeping your larger drives dedicated entirely to storage. A 128GB M.2 NVMe SSD is more than enough for any NAS OS. Even a 64GB drive would work if that’s what you have on hand.
128GB M.2 NVMe SSD Boot Drive
Affordable boot drive to keep your NAS OS separate from your storage pool
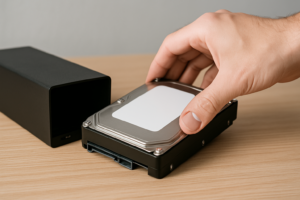
Storage Drives
This is where the bulk of any NAS budget goes, and it’s also where you have the most flexibility. You don’t need to fill every bay on day one. Start with one or two drives and expand later.
For bulk storage, the WD Red Plus and Seagate IronWolf lines are built specifically for NAS use. They’re rated for 24/7 operation and handle the vibration of multi-drive enclosures better than standard desktop drives. I’d start with at least 4TB per drive, but 8TB offers much better value per terabyte if you can stretch the budget.
Used enterprise drives (like the Seagate Exos series) are another solid option. Server pulls on eBay often come with plenty of life left, and the savings can be substantial. Just check the SMART data before trusting them with important files.
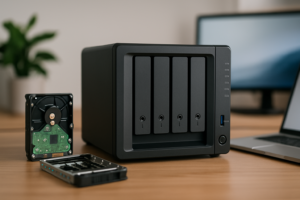
Assembly: Putting It All Together
Building a NAS is identical to building any small PC. If you’ve ever assembled a computer, you already know the drill. If this is your first time, don’t worry. There are only a handful of components to connect.
- Install RAM first. Snap the SO-DIMM stick into the slot on the motherboard at a 45-degree angle, then press down until the clips engage. This is easiest to do before mounting the board in the case.
- Install the M.2 boot drive. Slide the NVMe SSD into the M.2 slot and secure it with the included screw. Most N100 boards have the M.2 slot on the top side of the board.
- Mount the motherboard in the case. Line up the standoffs, place the board, and secure it with the provided screws. Don’t overtighten.
- Install the PSU. Route the power cables before fully securing the power supply. You’ll need the 24-pin ATX connector and the 4-pin CPU power connector.
- Connect SATA drives. Slide your hard drives into the bays (or mount them with screws, depending on your case), then connect SATA data cables to the motherboard and SATA power cables from the PSU.
- Connect front panel headers. Wire up the power button, any USB ports, and LEDs according to your motherboard manual.
- Double-check everything. Make sure all cables are seated properly, then close up the case and connect an ethernet cable and monitor for initial setup.
The whole physical build takes about 30 to 45 minutes. Take your time with cable management since good airflow keeps your drives cool and extends their lifespan.
Choosing Your NAS Operating System
This is where a DIY NAS really shines. You have several excellent free options, and your choice depends on what you prioritize most.
TrueNAS Scale (My Top Pick)
TrueNAS Scale runs on Linux and uses the ZFS file system, which is the gold standard for data integrity. It offers built-in app support through Docker/Kubernetes, a polished web interface, and excellent community support. ZFS features like checksumming, snapshots, and self-healing from bit rot make it the best option if protecting your data is the primary goal.
The one caveat: ZFS really wants at least 8GB of RAM, and more is better. With the 8GB stick I recommended above, you’ll be in good shape for a basic setup.
OpenMediaVault (OMV)
Built on Debian Linux, OMV is lightweight and beginner-friendly. It uses traditional Linux file systems (ext4, Btrfs) and runs well on minimal hardware. If you only have 4GB of RAM or want the simplest possible setup, OMV is a great choice. It’s also very extensible through plugins.
Unraid
Unraid isn’t free (it requires a license), but it’s worth mentioning because of its unique approach to storage. It lets you mix and match drive sizes, and losing a drive doesn’t mean rebuilding an entire array. If flexibility matters more than raw performance, check it out. The basic license is quite affordable for what you get.
Software Setup (TrueNAS Scale)
Since TrueNAS Scale is my recommendation, here’s a quick walkthrough of the initial setup:
- Download the ISO from the official TrueNAS website and flash it to a USB drive using Rufus or balenaEtcher.
- Boot from the USB and follow the installer. Select your M.2 SSD as the install target. Do NOT install to your storage drives.
- Set a root password and let the installation complete. Remove the USB drive and reboot.
- Access the web interface by navigating to the IP address shown on screen from any other computer on your network.
- Create a storage pool. Go to Storage, click “Create Pool,” select your drives, and choose your RAID level. For two drives, a Mirror (RAID 1) gives you redundancy. For three or more, RAIDZ1 is a solid choice.
- Create datasets and shares. Set up SMB shares for Windows access or NFS for Linux. You can create separate datasets for documents, media, backups, and more.
- Set up user accounts so each family member has their own login and storage space.
The entire software setup takes about 20 to 30 minutes. After that, your NAS is ready to use from any device on your network.
Performance Expectations
With this build, here’s what you can realistically expect:
- File transfer speeds: 110-115 MB/s over a standard 1GbE connection, which maxes out the network link. With the dual 2.5GbE ports on the N100 board, you can hit 280+ MB/s if your switch and client support it.
- Media streaming: The N100’s Intel UHD Graphics handles 4K HEVC transcoding in Plex or Jellyfin without breaking a sweat. You can comfortably serve 3 to 4 simultaneous transcodes.
- Power consumption: Expect 15 to 25 watts at idle depending on how many drives are installed. That’s roughly the same as a LED light bulb, translating to negligible electricity costs over a year.
- Noise: With NAS-rated drives and a quality case fan, you’re looking at whisper-quiet operation. Most people can keep this in a living room without noticing it.
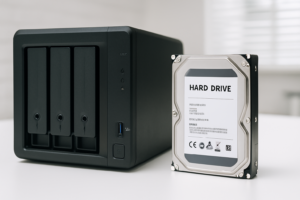
WD Red Plus 4TB NAS Hard Drive
Built for 24/7 NAS operation with CMR technology and a 3-year warranty
Expansion Options for the Future
One of the biggest advantages of building your own NAS is room to grow. Here are some upgrades you might consider down the road:
- Add more drives. Start with two drives in a mirror, then add more as your storage needs grow. TrueNAS makes it simple to expand your pool.
- Upgrade to 2.5GbE or 10GbE networking. The built-in 2.5GbE ports are great, but a 10GbE PCIe network card can dramatically speed up large file transfers if your workflow demands it.
- Add an NVMe cache. If your board has a second M.2 slot, adding an NVMe SSD as a read/write cache can significantly improve performance for frequently accessed files.
- Run additional services. Docker support means you can run Pi-hole (network-wide ad blocking), Home Assistant (smart home), Nextcloud (personal cloud), surveillance cameras, and much more alongside your file storage.
- Set up off-site backup. Use tools like Restic or Duplicati to encrypt and back up critical files to a cloud provider, giving you a true 3-2-1 backup strategy.
Tips to Keep Your NAS Running Smoothly
A few maintenance habits will keep your NAS reliable for years:
- Enable SMART monitoring for all drives and set up email alerts. TrueNAS does this out of the box. You’ll get warned before a drive actually fails.
- Run regular scrubs. ZFS scrubs check every block of data for errors and repair them automatically. Schedule these monthly.
- Keep your OS updated. TrueNAS and OMV both have simple update mechanisms. Stay current for security patches and bug fixes.
- Use a UPS. A small battery backup unit protects against sudden power loss, which can damage drives and corrupt data. Even a basic model with USB connectivity lets your NAS shut down gracefully during an outage.
- Monitor temperatures.

James Kennedy is a writer and product researcher at Drives Hero with a background in IT administration and consulting. He has hands-on experience with storage, networking, and system performance, and regularly improves and optimizes his home networking setup.