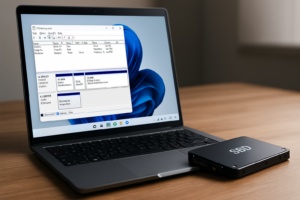
How To Use SSD And HDD Together In One PC
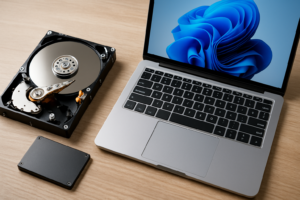
Using an SSD as your boot drive and an HDD for bulk storage is one of the smartest things you can do when building or upgrading a PC on a budget. You get the speed of solid-state storage where it matters most, like booting Windows and launching your favorite apps, while keeping a large, affordable hard drive around for games, media files, and backups.
This dual-drive setup has been a staple of budget and mid-range builds for years, and for good reason. A 500GB SSD paired with a 2TB HDD gives you the best of both worlds for a fraction of what an all-SSD setup would cost. The performance difference is dramatic where it counts, and you won’t feel the slower HDD speeds when you’re just storing photos or streaming video files.
This guide will walk you through everything from physically installing both drives to configuring Windows so your files automatically land on the right drive. Even if you’ve never opened your PC case before, you can handle this.
What You’ll Need Before Starting
Before you crack open your case, make sure you have the following ready:
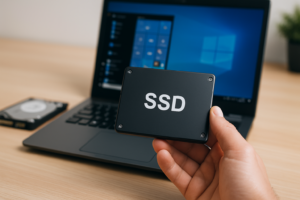
- An SSD: A 2.5-inch SATA SSD like the Samsung 870 EVO or Crucial MX500 works great. If your motherboard supports it, an NVMe M.2 drive like the Kingston NV2 or WD Blue SN580 is even faster and easier to install.
- An HDD: A 3.5-inch internal hard drive. The Seagate BarraCuda 2TB and WD Blue 2TB are both popular, reliable choices.
- SATA data cables: Your motherboard probably came with a couple. If not, they’re cheap and widely available.
- A Phillips-head screwdriver: That’s really the only tool you need.
- A Windows installation USB: If you’re doing a fresh install, use Microsoft’s Media Creation Tool to create one from any working PC.
Check that your power supply has enough SATA power connectors for both drives. Most modern PSUs have at least two or three, so this usually isn’t a problem.
Step 1: Physically Installing Both Drives
Installing an M.2 NVMe SSD
If you’re going with an M.2 drive, this is the easiest install you’ll ever do. Locate the M.2 slot on your motherboard (check your manual if you can’t find it). Remove the mounting screw, slide the SSD into the slot at a slight angle, then press it down and secure it with the screw. Done. No cables needed.
Installing a 2.5-Inch SATA SSD
Most PC cases have dedicated 2.5-inch mounting points, often behind the motherboard tray or in a drive cage. Mount the SSD using screws, then connect a SATA data cable from the drive to a SATA port on your motherboard. Finally, connect a SATA power cable from your PSU to the drive.
Some cases include a 2.5-inch to 3.5-inch adapter bracket if there aren’t dedicated SSD mounting points. You can also buy these adapters separately if needed.
Installing the 3.5-Inch HDD
Your case almost certainly has 3.5-inch drive bays, usually in the front section behind the intake fans. Slide the HDD into a bay and secure it with screws on both sides (or use the tool-less clips if your case has them). Connect a SATA data cable to the motherboard and a SATA power cable from the PSU, just like the SATA SSD.
A quick tip: try to plug your SSD into SATA port 0 or 1 on your motherboard, and the HDD into a higher-numbered port. This can help ensure the BIOS prioritizes the SSD during boot, though you can always manually set the boot order.
Step 2: Installing Windows on the SSD
If you’re building a new PC or doing a fresh install, boot from your Windows USB drive. When you reach the “Where do you want to install Windows?” screen, you’ll see both drives listed. Select the SSD (you can identify it by its size) and install Windows there.
I strongly recommend disconnecting or not selecting the HDD during Windows installation. Some users have reported Windows placing boot files on the wrong drive when both are connected. To be safe, you can physically unplug the HDD’s SATA cable, install Windows on the SSD, then reconnect the HDD afterward.
If you already have Windows installed on an HDD and want to migrate to a new SSD, cloning software like Macrium Reflect Free or Samsung Data Migration (for Samsung SSDs) can copy your entire installation over. After cloning, change your boot order in BIOS to prioritize the SSD.
Step 3: Initialize and Format the HDD
Once Windows is running on your SSD, your HDD might not show up in File Explorer right away. Don’t panic. It just needs to be initialized and formatted.
- Right-click the Start button and select Disk Management.
- You should see your HDD listed as “Unallocated” with a black bar. If a prompt appears asking you to initialize the disk, choose GPT (GUID Partition Table) and click OK.
- Right-click the unallocated space and select New Simple Volume.
- Follow the wizard. Assign a drive letter (D: is the traditional choice), choose NTFS as the file system, and give it a volume label like “Storage” or “Data.”
- Click Finish, and your HDD will appear in File Explorer.
This whole process takes about 30 seconds. Your drive is ready to use.
Step 4: Move Your Default User Folders to the HDD
This is the most important configuration step, and the one most people skip. By default, Windows saves your Documents, Downloads, Pictures, Music, Videos, and Desktop folders to your C: drive (the SSD). Over time, these folders fill up and eat into your precious SSD space.
Moving them to the HDD keeps your SSD lean and fast. Here’s how:
- Open File Explorer and create a folder structure on your D: drive. Something like D:\Documents, D:\Downloads, D:\Pictures, and so on.
- Open File Explorer, and in the left sidebar under “This PC,” right-click on Documents and select Properties.
- Click the Location tab.
- Click Move, then browse to your new D:\Documents folder.
- Click Select Folder, then Apply. Windows will ask if you want to move existing files. Click Yes.
- Repeat for Downloads, Pictures, Videos, Music, and Desktop.
After doing this, any time an application saves to “Documents” or you download a file, it automatically goes to the HDD. Windows handles the redirection behind the scenes, so everything still looks and feels normal.
I particularly recommend moving the Downloads folder. It’s amazing how quickly browser downloads can devour 50 or 100GB of SSD space if left unchecked.
Step 5: Change Default Install Locations for Apps and Games
Windows lets you change the default installation drive for new apps from the Microsoft Store. Go to Settings > System > Storage > Advanced storage settings > Where new content is saved. Change each category to your D: drive as appropriate.
For traditional desktop applications, most installers let you choose the installation path during setup. Instead of accepting the default C:\Program Files path, point it to something like D:\Programs. Keep critical, performance-sensitive applications on the SSD (your web browser, productivity apps, creative tools like Photoshop or Premiere Pro) and put less demanding software on the HDD.
What About Games?
Games are usually the biggest space hogs on any PC. Modern titles regularly exceed 50GB, with some like Call of Duty topping 150GB. You have a few smart options here.
In Steam, go to Settings > Storage and add your D: drive as a second Steam Library folder. When installing a game, Steam will ask which library to use. Put competitive multiplayer games and titles with long load times on the SSD, and single-player or less demanding games on the HDD.
The EA App, GOG Galaxy, and Epic Games Store all offer similar options in their settings. Set the default game install location to your HDD, and manually override it for specific titles you want on the SSD.
Step 6: Use Windows Libraries for Unified Access
Windows Libraries are an underused feature that works perfectly with a dual-drive setup. Libraries let you group folders from multiple locations into a single virtual folder.
For example, you might keep your current photo projects on the SSD for faster editing, but store your complete photo archive on the HDD. By adding both folders to the Pictures Library, you can browse everything from one place without physically moving files around.
To set this up, open File Explorer, right-click on Libraries in the sidebar (if Libraries isn’t visible, right-click in the sidebar and enable it under “Show libraries”). Right-click any library, select Properties, and add or remove folders from both drives.
Tips for Keeping Your Dual-Drive System Running Smoothly
- Keep at least 10-20% of your SSD free. SSDs slow down significantly as they fill up due to how NAND flash writes data. On a 500GB drive, try to keep at least 50GB free.
- Use Storage Sense. Go to Settings > System > Storage and enable Storage Sense. It automatically cleans up temporary files, emptying the Recycle Bin and removing old Windows Update files.
- Don’t defragment your SSD. Windows 10 and 11 are smart enough to TRIM SSDs and only defragment HDDs. Just make sure “Optimize Drives” is enabled in Windows, and it’ll handle both drives correctly.
- Back up the HDD. HDDs are mechanical and will eventually fail. Your important files on the D: drive should be backed up to an external drive or cloud service.
- Consider your page file. Windows places the page file on the C: drive by default. Leave it there. The SSD’s speed benefits virtual memory performance significantly.
What Should Live on Each Drive?
Here’s my recommended breakdown:
SSD (C: Drive)
- Windows operating system
- Drivers and system utilities
- Your web browser and email client
- Productivity software (Office, Adobe apps, development tools)
- Competitive multiplayer games or titles with brutal load times
- Active project files you’re currently working on
HDD (D: Drive)
- Documents, Downloads, Pictures, Music, Videos folders
- Media libraries (movies, TV shows, music collections)
- Single-player games and older titles
- Backups and archives
- Large project files you aren’t actively editing
- Game installers and ISO files
Frequently Asked Questions
Can I use both an M.2 NVMe SSD and a SATA SSD alongside an HDD?
Absolutely. Most modern motherboards support multiple drive types simultaneously. You could use an NVMe SSD as your boot drive, a SATA SSD for frequently played games, and an HDD for mass storage. Just be aware that some motherboards disable one or two SATA ports when an M.2 slot is occupied. Check your motherboard’s manual to see which ports are affected.
Will running two drives at once use significantly more power?
Not really. A typical 3.5-inch HDD draws around 6-8 watts during operation, and a 2.5-inch SATA SSD uses about 2-3 watts. An NVMe drive uses even less in most scenarios. Your power supply can handle this easily, and the impact on your electricity bill is negligible.
Should I partition my SSD into multiple drives?
I’d recommend against it for most users. Partitioning a 500GB or 1TB SSD just adds complexity and can leave you short on space in one partition while another sits half-empty. Use the whole SSD as your C: drive and let the HDD handle the rest. The exception would be if you want a small separate partition for a Linux dual-boot setup.
My HDD is making clicking or grinding noises. Is that normal?
Some operational noise is normal for mechanical hard drives. You’ll hear soft clicking during read/write operations, and a slight spin-up sound when the drive wakes from sleep. Loud, repetitive clicking, grinding, or any unusual sounds are warning signs of impending drive failure. Back up your data immediately and consider replacing the drive. Tools like CrystalDiskInfo can check your HDD’s health status using S.M.A.R.T. data.
Final Thoughts
A dual-drive setup with an SSD and HDD is the most cost-effective way to get fast boot times and application performance without sacrificing storage capacity. The initial configuration takes maybe 20 minutes after Windows is installed, and once it’s done, everything just works in the background.
The key is moving your user folders to the HDD and being intentional about where you install software. Do those two things, and your SSD will stay fast and uncrowded for years. When SSD prices continue to drop and you eventually want to go all-solid-state, migrating off the HDD is simple since all your data is already organized on a separate drive.
James Kennedy is a writer and product researcher at Drives Hero with a background in IT administration and consulting. He has hands-on experience with storage, networking, and system performance, and regularly improves and optimizes his home networking setup.