Clone Mac Hard Drive to External Ssd
Backing up your Mac is important, and one way to do it is to clone your Mac hard drive to an external SSD. This process will create an exact copy of your hard drive, including all of your files and settings. It’s a good idea to do this periodically, in case something happens to your original hard drive.
If you’re running out of space on your Mac’s internal hard drive, one option is to clone it to an external SSD. This can be a great way to give yourself some extra room without having to delete any files or programs. Here’s how to do it:
1. Connect your external SSD to your Mac using a USB cable.
2. Launch Disk Utility (you can find this in the Utilities folder in your Applications folder).
3. Select your external SSD from the list of drives on the left side of the window.
4. Click the “Erase” button at the top of the window.
5. Choose “Mac OS Extended (Journaled)” from the format drop-down menu and click “Erase.”
6. Now that your SSD is formatted, select your Mac’s internal hard drive from the list on the left side of Disk Utility.
How Do I Clone My Mac Hard Drive to an External Hard Drive?
There are a few different ways that you can clone your Mac hard drive to an external hard drive. The most common way is to use a disk cloning software program like Carbon Copy Cloner or SuperDuper!.
These programs will make an exact copy of your hard drive, including the operating system, all of your files, and any settings or preferences that you have set.
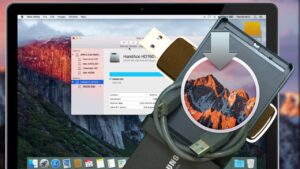
Another way to clone your hard drive is to use Apple’s built-in Disk Utility program. To do this, you will need to connect your external hard drive to your Mac and launch the Disk Utility program.
Once Disk Utility is open, select your internal hard drive from the list of drives on the left side of the window. Then, click on the “Restore” tab at the top of the window. From here, you will see two drop-down menus where you can select the source and destination for the clone operation.
Select your internal hard drive as the source and your external hard drive as the destination, then click on the “Restore” button. This will start cloning your internal hard drive to your external one.
Finally, another option for cloning your Mac hard drive is to use Time Machine.
Time Machine is a backup utility that comes pre-installed on all Macs running OS X 10.5 Leopard or later (including Yosemite). To use Time Machine with an external hard drive, simply connect thedrivetoyourMacandlaunchtheTimeMachinepreferencespaneinthesystempreferencesapp(youcanalsouseSpotlighttoquicklyfindit).Fromhere,select”BackupDisk”asthedestinationdiskforTimeMachinebackupsandclickon”Use for Backup.”
Time Machine will now automatically back up everything on your internal hard disk to your external one every hour (assuming it’s connected). If you ever need to restore from a backup, simply connectyour externaldrivetoyourMacandlaunchTimeMachinefromthesystempreferencesappagain;you’llbepromptedtopickarestorepointandeverythingwillbeclonedbacktoyourinternalharddrive!
How Do I Copy My Hard Drive to an External Ssd Mac?
You’ve probably been hearing a lot about SSDs (Solid State Drives) lately, and for good reason. These drives are much faster than traditional hard drives, and can really speed up your computer’s performance. If you’re looking to upgrade your Mac with an SSD, you may be wondering how to go about copying your hard drive to the new drive.
Here’s a step-by-step guide on how to do just that:
3. Select your hard drive from the list of devices on the left side of the window. 4. Click on the “Erase” tab at the top of the window. 5. Choose “Mac OS Extended (Journaled)” from the Format drop-down menu.
6. Enter a name for your hard drive in the Name field and click Erase. 7. quit Disk Utility when finished erasing your drive . now we will copy everything over
8 open terminal which is also located in Application>Utilities 9 type in cd /Volumes/ then drag and drop you Hard Drive into terminal 10 type ls and hit enter , this location should now be populated by all information stored on Macintosh HD
11 now we need to create an image file of what is currently on our Hard Drive so again in terminal type sudo tar -cvpzf /Volumes/USBHDD/ImageBackupofMacintoshHD01132017+dateandtimeofbackup+.tar adjacent spaces are important here as well as including date and time for backup purposes note if getting an error here try typing sudo -i first then run previous command line Now wait for process bar to fill completely this could take some time depending on size ofHard Drive being copied over once complete move onto next step 12 We need verify image file was created correctly by listing contents of USBHDD volume again but using different command line string this time , enter sudo tar -tvpzf /Volumes/USBHDD/ImageBackupofMacintoshHD01132017+dateandtimeofbackup+.
Can I Clone My Hdd to an External Ssd?
You can clone your HDD to an external SSD. This can be done with a few simple steps. First, you need to connect your HDD and SSD to your computer.
Then, you need to open up the Disk Management tool in Windows. Once the Disk Management tool is open, you will need to find your HDD and SSD in the list of drives. Right-click on your HDD and select the “Clone Disk” option.
In theclone window, select your SSD as the destination disk. Make sure that you check the “Optimize for performance” option. Finally, click on the “Start Clone” button to start cloning your HDD to your external SSD.
How Do I Clone My Mac With Disk Utility?
Disk Utility is a powerful tool that comes with every Mac. It can be used to create backups of your entire system, clone your hard drive, and more. In this article, we’ll show you how to use Disk Utility to clone your Mac.
Before we begin, it’s important to note that cloning your hard drive should only be done if you have a backup of your data. This is because when you clone your hard drive, the entire contents of the drive are copied over to the new drive. If something goes wrong during the process, you could lose all of your data.
With that said, let’s get started!
If you’re not sure which one is which, you can click on the Info button in the toolbar and it will show you each disk’s capacity and name. Once you’ve selected the source disk, click on the “Edit” button in the toolbar and then select “Duplicate.” A window will pop up asking you where you want to save the duplicate disk image.
Choose a location and then click “Save.” Disk Utility will now create an exact copy of your selected hard drive on your chosen destination. This process may take some time depending on how large your source disk is.
When it’s finished, you’ll have an exact replica of your original hard drive!
How to Clone Mac Hard Drive to External Drive
When you back up your Mac using Time Machine, your backups are stored on an external hard drive. But what if you want to clone your Mac hard drive to an external drive? Cloning gives you an exact copy of your entire system, including your operating system, applications, settings, and all of your data.
This can be useful if you want to create a bootable backup or if you want to migrate your entire system to a new computer.
Here’s how to clone your Mac hard drive to an external drive:
1. Connect the external hard drive to your Mac.
2. Open Disk Utility (located in /Applications/Utilities).
3. Select the internal hard drive from the sidebar and click the “Erase” button.
4. Choose “Mac OS Extended (Journaled)” from the format drop-down menu and click “Erase.” This will erase everything on the external hard drive, so make sure you have backups of any important data!
5. Once the erase process is complete, select the internal hard drive again and click the “Restore” button.
6. Drag the internal hard drive from the source field into the destination field and click “Restore.” This will clone your entire Mac hard drive onto the external disk.
Clone Mac Hard Drive to Ssd Carbon Copy
Cloning your Mac’s hard drive is a great way to create an exact replica of your current system. This can be useful for backup purposes, or if you want to upgrade to a new hard drive without losing any data. Carbon Copy Cloner is one of the best tools for this job, and it’s very easy to use.
Here’s how to clone your Mac hard drive using Carbon Copy Cloner.
First, download and install Carbon Copy Cloner on your Mac. Once it’s installed, launch the app and select the source (your current hard drive) and destination (the new SSD) in the sidebar.
Make sure that you select “Copy everything” in the options, as this will ensure that all of your data is cloned over.
Click Clone in the bottom-right corner, and wait for the process to complete. This may take a while depending on the size of your hard drive, but once it’s done you’ll have an exact replica of your current system on the new SSD!
Clone Mac Hard Drive to Ssd Free
There are a few different ways that you can clone your Mac hard drive to an SSD. The first is to use the built-in Disk Utility program that comes with your Mac. To do this, you’ll need to connect both the hard drive and the SSD to your computer.
Once they’re connected, open Disk Utility and select your hard drive from the list of devices on the left side of the window. Then, click on the “Erase” tab at the top of the window. In the “Format” drop-down menu, select “Mac OS Extended (Journaled)”.
Finally, click on the “Erase” button and wait for Disk Utility to finish erasing your hard drive.
Once your hard drive has been erased, you can now clone it to your SSD. To do this, select your SSD from the list of devices on the left side of Disk Utility’s window.
Then, click on the “Restore” tab at the top of the window.
Clone Mac Hard Drive (Disk Utility)
Disk Utility is a powerful tool that comes with every Mac. It can be used to create backups of your entire system, or just your most important files. You can even use it to clone your hard drive, making an exact copy of everything on your Mac.
Here’s how:
1. Launch Disk Utility from the Applications > Utilities folder, or by searching for it in Spotlight.
2. Select your startup disk from the list of drives on the left side of the window.
If you don’t see your startup disk listed, click the “View” menu and select “Show All Devices”.
3. Click the “Erase” tab at the top of the window. Choose a format for the cloned drive – we recommend “Mac OS Extended (Journaled)”.
Give it a name, then click “Erase”. This will erase everything on the destination drive! Make sure you have a backup before proceeding.
4. Once the erase process is complete, click on the newly erased drive in Disk Utility’s sidebar and then click the “Restore” tab at the top of the window.
5. Drag your startup disk fromthe list of drives onthe left side into themain areaofDisk Utilitywindow (orclickon its iconandthenclickthe Restore button). This tells Disk Utility which drive you want to clone onto this new one 6 .
Click Erase againin ordertoformatthisdriveforuse asa bootabledrive (make sureyou choose MacOSExtended [Journaled]asbefore). 7 .Give it aclean nameand thenclick Eraseonce moreto confirm 8 .
Once thatprocessis complete ,exit outofDiskUtility whenprompted
9 . Nowthatyou havea bootablediskwithallofyourfilesintact ,restartyourcomputer whileholdingdownthe Optionkey 10 .You shouldseealistofavailabledrivespop up—selecttheone named afterthecloneofthe originalstartupdisktobootfromit 11 .Uponloggingin ,openDiskUtility oncemoreandonceagainselectyourstartupdisk 12 .
Conclusion
If you want to keep a backup of your Mac’s hard drive, cloning it to an external SSD is a great option. Here’s how to do it:
1. Connect the external SSD to your Mac using a USB cable.
2. Launch Disk Utility, which can be found in the Utilities folder in your Applications folder.
3. Select the internal hard drive you want to clone in the left sidebar, then click on the “Restore” tab in the main window.
4. Drag the internal hard drive icon from the sidebar into the “Source” field, then drag the external SSD icon into the “Destination” field.
5. Click on the “Clone” button and wait for the process to complete.
That’s all there is to it!


